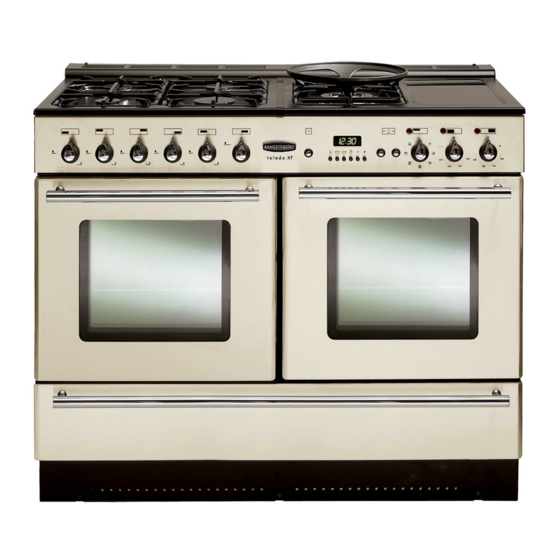
Rangemaster Toledo 110 Dual Fuel Users Manual & Installation
Installation & service instructions
Hide thumbs
Also See for Toledo 110 Dual Fuel:
- User's manual & installation instructions (40 pages) ,
- User manual (36 pages) ,
- Users manual & installation (36 pages)
Table of Contents
Advertisement
Advertisement
Table of Contents

Related Manuals for Rangemaster Toledo 110 Dual Fuel


Summary of Contents for Rangemaster Toledo 110 Dual Fuel
-
Page 1: Users Guide
110 Dual Fuel Users Guide & Installation & Service Instructions U107200 - 02... -
Page 2: Peculiar Smells
Be safe Warning Accessible parts will become hot in use. To avoid burns and scalds children should be kept away. You need clean fresh air - so does your cooker. Burner fl ames produce exhaust gases, heat and moisture. Make sure that the kitchen is well ventilated: keep natural ventilation holes open or install a powered cooker hood that vents outside. -
Page 3: Table Of Contents
Contents Users Guide Hotplate Burners The Ovens Storage Multi-function Oven cooking guide Cooking chart - Conventional and full Fan oven functions Cleaning your cooker Troubleshooting General Safety Instructions Installation Installation Conversion to LP gas Servicing Circuit Diagram Technical Data The Griddle The Wok cradle Warmer The Clock... -
Page 4: Hotplate Burners
Hotplate Burners The drawing by each knob indicates which burner that knob controls. Press the igniter button, and push in and turn a knob to the large fl ame symbol ( ). Alternatively light with a match. When igniter button is pressed in, sparks will be made at every burner - this is normal. -
Page 5: The Griddle
The Griddle The griddle fi ts a single pan support, front to back. It is designed for cooking food on directly. Don’t use pans of any kind on it. The griddle surface is non-stick and metal cooking utensils (e.g. spatulas) will damage the surface. Use heat resistant plastic or wooden utensils. -
Page 6: The Wok Cradle
The Wok cradle The Wok cradle is designed to fi t a Typhoon 35cm Wok (Part Code 13840S) This is available from leading retailers. If you use a diff erent Wok make sure that it fi ts the cradle. Woks vary very widely in size and shape. It’s important that the Wok sits down on the pan support - but if the Wok is too small the cradle will not support it properly. -
Page 7: The Ovens
The Ovens During use the appliance becomes hot. Care should be taken to avoid the touching heating elements inside the oven. Before using for the fi rst time, to dispel manufacturing odours turn the ovens to 230°C and run for an hour. To clear the smell make sure the room is well ventilated to the outside air, by opening windows or turning on a cooker hood for example. -
Page 8: To Start/Stop Oven Automatically
The Clock You can use the timer to turn the left hand Multifunction oven on and off . The clock must be set to the time of day before the left hand Multifunction oven will work. To set the time of day Press and hold as above. -
Page 9: Cooking Using The Timer
To activate the key lock Make sure that the clock is in manual mode and cancel any active programs. Hold the Minute Minder ( ) and Cooktime ( ) buttons for about 8 seconds. ‘On’ will appear on the display. Press the ‘+’... -
Page 10: Multi-Function Oven
opening the oven stand well back and allow any steam to disperse. When the oven is on, don’t leave the door open for longer than necessary, otherwise the knobs may get very hot. • Always leave a ‘fi ngers width’ between dishes on the same shelf. -
Page 11: Conventional Oven
Fan oven This function operates the fan and the heating element around it. An even heat is produced throughout the oven, allowing you to cook large amounts quickly. Fan oven cooking is particularly suitable for baking on several shelves at one time and is a good ‘all- round’... -
Page 12: The Handygrill
The Handygrill The maximum weight than can be held by the Handygrill is 5.5kg (12lb). It should only be used with the supplied tin, which is designed to fi t the rack. Any other vessel could be unstable. The Handygrill fi ts on the oven door. Food cooking on it is easy to attend to, because it’s accessible when the door is opened. -
Page 13: Oven Shelves
Oven shelves the shelf guard should be at the back pointing upwards As well as the fl at shelves some models are supplied with a drop shelf. The drop shelf increases the possibilities for oven shelf spacing. The oven shelves can be easily removed and refi tted. Pull the shelf forward until the back of the shelf is stopped by the shelf... -
Page 14: Multi-Function Oven Cooking Guide
Multi-function Oven cooking guide Remember - not all functions will be suitable for all food types. The oven control settings and cooking times given are intended to be used only as a guide. Individual tastes may require the temperature to be altered to provide a preferred result. -
Page 15: Cooking Chart - Conventional And Full Fan Oven Functions
Cooking chart - Conventional and full Fan oven functions Food Temperature FISH ROAST MEATS Beef with bone Beef without bone Lamb Pork Stuff ed and rolled - Add approx. 10 mins. per 500g to above cooking times or cook at 200°C for 20mins. then 160°C for remainder. -
Page 16: Cleaning Your Cooker
Cleaning your cooker Essential information Before thorough cleaning isolate the electricity supply. Remember to switch on the electricity supply and reset the clock before using the cooker. Never use paint solvents, washing soda, caustic cleaners, biological powders, bleach, chlorine based bleach cleaners, coarse abrasives or salt. Don’t mix diff... -
Page 17: Control Panel And Doors
To fi t the small inner burner, fi nd the larger electrode notch in the burner rim. Line this up with the white ignition electrode and place the inner burner on the large base ring. electrode notch Now fi t the two burner caps, making sure that they are sitting down properly. -
Page 18: Cleaning Table
Cleaning Table Hotplate Part Hotplate Top Pan Supports, Wok Cradle (some models only) Burner Caps Burner Trim Rings (some models only) and Burner Head Griddle Plate (some models only) Outside of cooker Part Door, Door surround and Storage Drawer exterior. Sides and Plinth Splashback/Rear Grille Control panel... -
Page 19: Troubleshooting
Troubleshooting Steam is coming from the oven When cooking foods with a high water content (e.g. oven chips) there may be some steam visible at the rear grille. Take care when opening the oven door, as there may be a momentary puff of steam when the oven door is opened. -
Page 20: General Safety Instructions
Oven temperature getting hotter as the cooker gets older If turning the knob down has not worked or only worked for a short time then you may need a new thermostat. This should be fi tted by a service person. The oven light is not working The bulb has probably blown. - Page 21 Use dry oven gloves when applicable - using damp gloves might result in steam burns when you touch a hot surface. Never operate the cooker with wet hands. Do not use a towel or other bulky cloth in place of a glove.
-
Page 22: Dear Installer
Check the ap pli ance is electrically safe and gas sound when you have fi nished. Installation Dear Installer Before you start your installation, please complete the details BELOW. If your customer has a problem relating to your installation they will be able to contact you easily. Installer’s Name Installer’s Company Installer’s Telephone number... -
Page 23: Positioning The Cooker
Check the ap pli ance is electrically safe and gas sound when you have fi nished. You will need the following equipment to complete the cooker installation satisfactorily STABILITY BRACKET If the cooker is to be supplied with gas through a fl exible hose, a stability bracket or chain must be fi... -
Page 24: Unpacking The Cooker
Check the ap pli ance is electrically safe and gas sound when you have fi nished. of 75mm should be left between each side of the cooker and any adjacent vertical surface. For non-combustible surfaces (such as unpainted metal or ceramic tiles) this can be reduced to 25mm. A minimum space of 650mm is required between the top of the hotplate and a horizontal combustible surface. -
Page 25: Fitting A Stability Bracket
Check the ap pli ance is electrically safe and gas sound when you have fi nished. A left rear roller, B right rear roller, C centre roller LOWER THE FRONT ROLLER by doing 14 complete (360°) turns clockwise. Now LOWER THE TWO REAR ROLLERS. First fi... -
Page 26: Pressure Testing
Check the ap pli ance is electrically safe and gas sound when you have fi nished. 3. Mark the centre line for the bracket by measuring 550mm from the left hand side of the cooker. 4. Lower the front roller and move the cooker forward. 5. -
Page 27: Electrical Connection
Check the ap pli ance is electrically safe and gas sound when you have fi nished. Pressures Natural Gas LP Gas cookers 20mbar. Butane Propane Turn off the burners. Reassemble burner top, making sure it is re as sem bled in the correct way on the burner body. -
Page 28: Conversion To Lp Gas
WARNING SERVICING TO BE CARRIED OUT ONLY BY AN AUTHORISED PERSON Disconnect from electricity and gas before servicing. Check appliance is safe when you have finished. Conversion to LP gas Check in the Technical Data section at the back of the book that the cooker is convertible to the gas you want to use. -
Page 29: Servicing
WARNING SERVICING TO BE CARRIED OUT ONLY BY AN AUTHORISED PERSON Disconnect from electricity and gas before servicing. Check appliance is safe when you have finished. Servicing BEFORE SERVICING ANY GAS CARRYING COMPONENTS. TURN OFF THE GAS SUPPLY Check the appliance is gas sound after completion of service. - Page 30 WARNING SERVICING TO BE CARRIED OUT ONLY BY AN AUTHORISED PERSON Disconnect from electricity and gas before servicing. Check appliance is safe when you have finished. 3. To Remove Side Panels Disconnect from electricity supply. Remove the Control Panel - see 1. Pull the cooker forward.
- Page 31 WARNING SERVICING TO BE CARRIED OUT ONLY BY AN AUTHORISED PERSON Disconnect from electricity and gas before servicing. Check appliance is safe when you have finished. 12. To Remove an Oven Door Open oven door. Support the door and remove the two screws securing the upper hinge and gasket to the cooker front.
- Page 32 WARNING SERVICING TO BE CARRIED OUT ONLY BY AN AUTHORISED PERSON Disconnect from electricity and gas before servicing. Check appliance is safe when you have finished. 19. To Remove Oven Inner Back Open the oven door. Remove oven furniture. For the LH oven unscrew the 2 thermostat phial fi...
-
Page 33: Circuit Diagram
Circuit Diagram Colour Code b Blue br Brown or Orange r Red v Violet w White y Yellow bl Black... -
Page 34: Technical Data
Technical Data This cooker is category II It is supplied set for group H natural gas. A conversion kit from NG to LP gas is packed with the cooker. INSTALLER: Please leave these instructions with the User. DATA BADGE LOCATION : Cooker back, serial number repeater badge below oven door opening. Country of Destination: GB Natural Gas Butane...
Need help?
Do you have a question about the Toledo 110 Dual Fuel and is the answer not in the manual?
Questions and answers