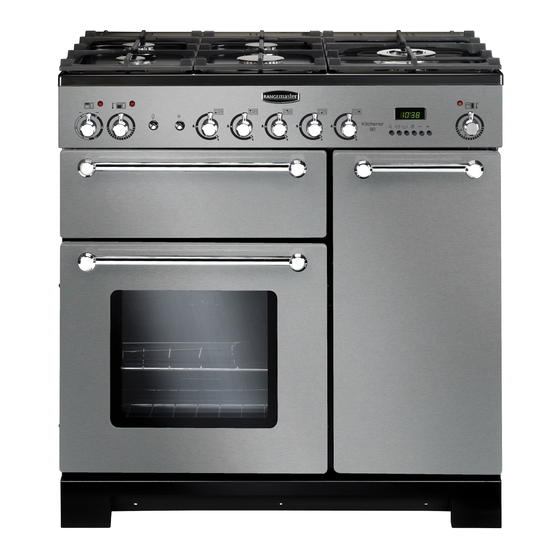
Rangemaster Kitchener 90 Dual Fuel Users Manual & Installation
Users guide & installation & service instructions
Hide thumbs
Also See for Kitchener 90 Dual Fuel:
- User manual ,
- User's manual & installation instructions (40 pages) ,
- Installation and user manual (44 pages)

Related Manuals for Rangemaster Kitchener 90 Dual Fuel


Summary of Contents for Rangemaster Kitchener 90 Dual Fuel
-
Page 1: Users Guide
Kitchener 90 Dual Fuel Users Guide & Installation & Service Instructions U109700 - 01... -
Page 2: Peculiar Smells
Be safe Warning Accessible parts will become hot in use. To avoid burns and scalds children should be kept away You need clean fresh air - so does your cooker. Burner fl ames produce exhaust gases, heat and moisture. Make sure that the kitchen is well ventilated: keep natural ventilation holes open or install a powered cooker hood that vents outside. -
Page 3: Table Of Contents
Contents User Guide Hotplate Burners The Grill The Ovens Cleaning your cooker Moving your cooker Troubleshooting General Safety Instructions Installation Conversion to LP gas Servicing Circuit Diagram Technical Data The Griddle (optional extra) The Wok cradle (optional extra) The Clock Cooking using the timer Main Oven shelves The Handyrack... -
Page 4: Hotplate Burners
Hotplate Burners The drawing by each knob indicates which burner that knob controls. Press the igniter button, and push in and turn a knob to the large fl ame symbol ( ). Alternatively light with a match. If a burner fl ame goes out, turn the control knob off and leave it for one minute before relighting it. -
Page 5: The Griddle (Optional Extra)
The Griddle (optional extra) The griddle fi ts a single pan support, front to back. It is designed for cooking food on directly. Don’t use pans of any kind on it. The griddle surface is non-stick and metal cooking utensils (e.g. spatulas) will damage the surface. -
Page 6: The Wok Cradle (Optional Extra)
The Wok cradle (optional extra) The Wok cradle is designed to fi t a Typhoon™ Professional 35cm Wok (Part Code 13840S) This is available from leading retailers. If you use a diff erent Wok make sure that it fi ts the cradle. Woks vary very widely in size and shape. -
Page 7: The Grill
The Grill Caution: Accessible parts may be hot when the grill is in use. Young children should be kept away. Remove the pan from the bottom of the grill compartment. After placing your food on the grill tray pan, slide the grill pan onto the side supports just below the elements. -
Page 8: The Ovens
The Ovens During use the appliance becomes hot. Care should be taken to avoid the touching heating elements inside the oven. Before using for the fi rst time, to dispel manufacturing odours, turn the ovens to 230°C and run for an hour. To clear the smell, make sure the room is well ventilated to the outside air, by opening windows or turning on a cooker hood for example. -
Page 9: The Clock
The Clock You can use the timer to turn the left hand Main Oven on and off . The clock must be set to the time of day before the right hand fan oven will work. To set the time of day Press and hold as above. -
Page 10: Using Both Ovens
Clock Special Features Key Lock When the key lock is activated, the clock can be operated as usual but the oven is locked and will not come on. This means that your child could select a cook program but the program will not be activated and oven will not be switched on. -
Page 11: Main Oven Shelves
For even browning, the maximum recommended size of a baking tray is 340mm by 340mm for the main oven and 230mm by 320mm for the Tall oven. Cooking high moisture content foods can create a ‘steam burst’ , when the oven door is opened. When opening the oven stand well back and allow any steam to disperse. -
Page 12: Oven Light
at two diff erent heights. One of the oven shelves must be removed and the other positioned to suit. When the Handyrack is used in its highest position, other dishes can be cooked on the bottom shelf position of the oven or standing on the base of the oven When the Handyrack is used in its lowest position, other dishes can be cooked on the second shelf... -
Page 13: Oven Cooking Guide
Oven cooking guide Food FISH ROAST MEATS Beef with bone Beef without bone Lamb Pork Stuff ed and rolled - Add approx. 10 mins. per 500g to above cooking times or cook at 200°C for 20mins. then 160°C for remainder. THOROUGHLY THAW FROZEN JOINTS AND POULTRY BEFORE COOKING. -
Page 14: Cleaning Your Cooker
Cleaning your cooker Essential information Before thorough cleaning, isolate the electricity supply. Remember to switch on the electricity supply and reset the clock before using the cooker. Never use paint solvents, washing soda, caustic cleaners, biological powders, bleach, chlorine based bleach cleaners, coarse abrasives or salt. Don’t mix diff... -
Page 15: Control Panel And Doors
To fi t the small inner burner, fi nd the larger electrode notch in the burner rim. Line this up with the white ignition electrode and place the inner burner on the large base ring. electrode notch Now fi t the two burner caps, making sure that they are sitting down properly. -
Page 16: Cleaning Table
Cleaning Table Hotplate Part Hotplate Top Pan Supports, Wok Cradle (some models only) Burner Caps Burner Trim Rings (some models only) and Burner Head Griddle Plate (some models only) Outside of cooker Part Door, Door surround. Sides and Plinth Splashback/Rear Grille Control panel Control Knobs/Handles Oven Door Glass/Glass Lid (some... -
Page 17: Moving Your Cooker
Moving your cooker Switch off the electricity supply. The cooker is heavy, two people may be required to move it. There are two levelling rollers at the back and also two screw down levelling feet at the front. Open the grill door and right hand oven door so that you can get a good grip on the bottom of the fascia panel as you move the oven. - Page 18 The oven is not cooking evenly Do not use a tin or baking tray larger than 340mm x 340mm in the Main oven or 232mm x 321mm in the Tall oven. If you are cooking a large item, be prepared to turn it round during cooking.
-
Page 19: General Safety Instructions
General Safety Instructions In the UK the cooker must be installed by a CORGI registered engineer. The installation must be in accordance with the in stal la tion instructions and comply with the relevant regulations and also the local gas and electricity supply companies’... - Page 20 Use a deep fat thermometer whenever possible to prevent overheating fat beyond the smok ing point. Never leave a chip pan unattended. Always heat fat slowly, and watch as it heats. Deep fry pans should be only one third full of fat. Filling the pan too full of fat can cause spill over when food is added.
-
Page 21: Installation
Check the ap pli ance is electrically safe and gas sound when you have fi nished. Installation Dear Installer Before you start your installation, please complete the details BELOW. If your customer has a problem relating to your installation they will be able to contact you easily. Installer’s Name Installer’s Company Installer’s Telephone number... -
Page 22: Positioning The Cooker
Check the ap pli ance is electrically safe and gas sound when you have fi nished. You will need the following equipment to complete the cooker installation satisfactorily STABILITY BRACKET If the cooker is to be supplied with gas through a fl exible hose, a stability bracket or chain must be fi... -
Page 23: Unpacking The Cooker
Check the ap pli ance is electrically safe and gas sound when you have fi nished. A minimum space of 650mm is required between the top of the hotplate and a horizontal combustible surface. *Any cooker hood should be installed in accordance with the hood man u fac tur er’s instructions. -
Page 24: Fitting A Stability Bracket
Check the ap pli ance is electrically safe and gas sound when you have fi nished. Unfold the rear edge of pack base tray. Open the grill door and the Tall oven door. Grip under the facia panel and lift the front of the cooker. Carefully push the cooker backwards off... -
Page 25: Electrical Connection
Check the ap pli ance is electrically safe and gas sound when you have fi nished. Gas Connection Must be in accordance with the relevant standards. A hose is not supplied by with the cooker. Hoses may be purchased at most builders’ merchants. The Gas sup ply needs to terminate with a down facing bayonet. -
Page 26: Fitting The Plinth
Check the ap pli ance is electrically safe and gas sound when you have fi nished. Hotplate Check each burner in turn. Push in tap and turn to the large fl ame symbol. Press ignition switch on facia panel.. Oven check The clock must be set to the time of day before the left hand Main oven will work. -
Page 27: Conversion To Lp Gas
WARNING SERVICING TO BE CARRIED OUT ONLY BY AN AUTHORISED PERSON Disconnect from electricity and gas before servicing. Check appliance is safe when you have finished. Conversion to LP gas Check in the Technical Data section at the back of the book that the cooker is convertible to the gas you want to use. -
Page 28: To Remove Control Panel/Hotplate
WARNING SERVICING TO BE CARRIED OUT ONLY BY AN AUTHORISED PERSON Disconnect from electricity and gas before servicing. Check appliance is safe when you have finished. Servicing BEFORE SERVICING ANY GAS CARRYING COMPONENTS. TURN OFF THE GAS SUPPLY Check the appliance is gas sound after completion of service. - Page 29 WARNING SERVICING TO BE CARRIED OUT ONLY BY AN AUTHORISED PERSON Disconnect from electricity and gas before servicing. Check appliance is safe when you have finished. 3. To Remove Side Panels Disconnect from electricity supply. Remove the Control Panel - see 1. Pull the cooker forward. Remove the 4 retaining screws for each panel (1 at the front base, 1 on the top and 2 at the rear).
-
Page 30: To Remove Hotplate Burner/Oven Door
WARNING SERVICING TO BE CARRIED OUT ONLY BY AN AUTHORISED PERSON Disconnect from electricity and gas before servicing. Check appliance is safe when you have finished. 11. To Remove or Change a Hotplate Burner. Remove the hotplate tray (see 2). The burners except the right hand wok burner are mounted on support struts. -
Page 31: To Change Tall Oven Door Magnetic Latch
WARNING SERVICING TO BE CARRIED OUT ONLY BY AN AUTHORISED PERSON Disconnect from electricity and gas before servicing. Check appliance is safe when you have finished. 18. To Change Tall Oven Door Magnetic Latch Remove the control panel (see 1). Remove the plinth (3 screws) and the central vertical cover (5 screws). - Page 32 WARNING SERVICING TO BE CARRIED OUT ONLY BY AN AUTHORISED PERSON Disconnect from electricity and gas before servicing. Check appliance is safe when you have finished.
-
Page 33: Circuit Diagram
Circuit Diagram Connection shown in circuit diagram is for single phase. Ratings are for 230V 50Hz Key to circuit diagram A1 Right hand oven thermostat A2 Right hand oven switch block A3 Right Fan oven element 2.5kW A4 Right hand oven fan B1 Left hand oven thermostat B2 Left hand oven switch block B3 Left Fan oven element 2.5kW... -
Page 34: Technical Data
Technical Data This cooker is category II2H3+ It is supplied set for group H natural gas. A conversion kit from NG to LP gas is packed with the cooker. INSTALLER: Please leave these instructions with the User. DATA BADGE LOCATION : Country of Destination: GB Natural Gas Butane... - Page 36 140806...
Need help?
Do you have a question about the Kitchener 90 Dual Fuel and is the answer not in the manual?
Questions and answers
Hi, is the lead a 6ml or 10ml electrical cable? Thanks
The electrical cable size for the Rangemaster Kitchener 90 Dual Fuel is 6 mm² or 10 mm², depending on the connection type. For single-phase, use 6 mm² max cable; for 3-phase (3N ac), use 10 mm² max cable.
This answer is automatically generated