
Related Manuals for EOS Herkules XL S120 HD


Summary of Contents for EOS Herkules XL S120 HD
- Page 1 EOS Herkules XL S120 HD EOS Herkules XL S120 Vapor HD Heater for Sauna Cabins Installation and Operating Instructions Made in Germany Druck-Nr.: 2902 5322 Stand: 15/23...
-
Page 2: Documentation
Less than or equal to, greater than or equal to Revision history Date Version Description 05.012023 02.00 Conversion to HD connections using a copper strip. 30 July 2020 01.00 First version EN-2 Installation and Operating Instructions - EOS Herkules XL S120 HD... -
Page 3: Table Of Contents
Filling with stones ................. EN-47 Starting the heater................EN-48 Switching the heater on remotely ..........EN-48 Water splash.................... EN-48 Commissioning the vaporiser (Herkules XL S120 Vapor only) ............EN-49 EOS Herkules XL S120 HD - Installation and Operating Instructions EN-3... - Page 4 (Herkules XL S120 Vapor HD only) ..........EN-55 Replacing the tubular heating element ........EN-58 Troubleshooting ..................EN-62 7 General terms and conditions of service ........... EN-63 8 Disposal ......................EN-66 EN-4 Installation and Operating Instructions - EOS Herkules XL S120 HD...
-
Page 5: General Safety Instructions
The sauna heater may not be placed on a floor made of easily flammable material (laminate or synthetic flooring, etc.). Ce- ramic tiles are recommended as a flooring option. EOS Herkules XL S120 HD - Installation and Operating Instructions EN-5... - Page 6 Electrical installations and equipment in the sauna cabin must comply with IEC 60364-7-703 (DIN VDE 0100-703). EN-6 Installation and Operating Instructions - EOS Herkules XL S120 HD...
- Page 7 Close the shut-off valve if the connection to potable water is not used for an extended period of time. EOS Herkules XL S120 HD - Installation and Operating Instructions EN-7...
-
Page 8: Operator Instruction
Never leave herbal sachets in the holder if the system has a con- trol unit with a post-heating time option; they could dry quickly and catch fire. EN-8 Installation and Operating Instructions - EOS Herkules XL S120 HD... - Page 9 The higher the lime content in the water used, the more often the vaporiser must be descaled. EOS Herkules XL S120 HD - Installation and Operating Instructions EN-9...
-
Page 10: Safety Levels
For an overview of the standards that were observed during design and construction of the sauna heater, please refer to the individual product’s technical data sheet that can be downloaded from www.eos-sauna.com. EN-10 Installation and Operating Instructions - EOS Herkules XL S120 HD... -
Page 11: Identification
Identification Identification Herkules XL S120 HD is an electrically heated sauna heater available in a variety of output capacities. The ‘Vapor’ version also has an installed vapor- iser that can be used to operate a steamy hot-air bath. Requirements for operation... -
Page 12: Scope Of Delivery
E Installation instructions Scope of delivery Herkules XL S120 Vapor HD comes with a pre-mounted mains water con- nection (FWA01) on the rear side. Herkules XL S120 HD does not have this pre-mounted mains water connection. Warning plate (D) Caution: observe the instructions. -
Page 13: Accessories
The EOSafe L heater monitor can be used to prevent the heater from being switched on if objects have been placed on the heater. EOS Herkules XL S120 HD - Installation and Operating Instructions EN-13... -
Page 14: Technical Data
1 x (4 x 2.5 mm²) Connection LSG – control unit 4 x 1.5 mm *LSG = power extension unit All line cross-section specifications are the minimum cross-sections of a copper line. EN-14 Installation and Operating Instructions - EOS Herkules XL S120 HD... -
Page 15: Intended Use
This sauna heater is intended solely for the purpose of heating sauna cab- ins, together with a suitable control unit and one relay box. Herkules XL S120 HD is a sauna heater that stands on the floor. It is suitable for cabins for commercial use. - Page 16 The first time the cabin is heated, you may notice a slight odour result- ing from the evaporation of consumables used in the manufacturing processes. Air out your cabin once it has been heated and before using the sauna. EN-16 Installation and Operating Instructions - EOS Herkules XL S120 HD...
-
Page 17: Installation
Installation Installation This chapter describes how to install the Herkules XL S120 HD/Vapor HD sauna heater. Prior to installing the heater, air inlets and outlets must be installed in the cabin. It may be necessary to mount additional fans in the inlets/outlets. -
Page 18: 3.1.1 Installation Site
~ 51 A Cabin ceiling D Sauna heater B Temperature sensor E Air inlet C Cabin wall F Heater guard rail Minimum distances in the cabin in cm EN-18 Installation and Operating Instructions - EOS Herkules XL S120 HD... -
Page 19: 3.1.2 Air Inlets And Outlets
If the heating process takes a long time, the underlying reason is that the sauna heater receives insufficient air. A minimum of 5 times the cabin volume of air per hour must be exchanged. EOS Herkules XL S120 HD - Installation and Operating Instructions EN-19... - Page 20 If there is still not enough fresh air to reach the sauna heater, a fan must be installed at the opening outside of the cabin. Installing the air inlet in the cabin wall EN-20 Installation and Operating Instructions - EOS Herkules XL S120 HD...
-
Page 21: 3.1.3 Connecting Cables
The cable and all other connecting cables (supply line to mains and cabin lighting) on the external side of the cabin must be protected from damage. To do this, use installation pipes or attach a suitable protective cover. EOS Herkules XL S120 HD - Installation and Operating Instructions EN-21... -
Page 22: Temperature Sensor In The Cabin
A Cabin ceiling D Cabin rear wall B Temperature sensor E Air inlet C Cabin side wall F Heater guard rail Minimum dimensions for mounting sensor in cm EN-22 Installation and Operating Instructions - EOS Herkules XL S120 HD... -
Page 23: Mounting The Sauna Heater
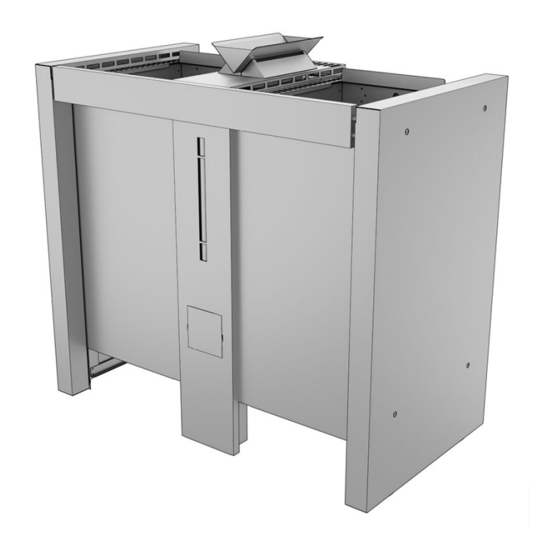
Remove the side panels before the sauna heater is lifted manu- ally. Necessary steps: Unpacking the heater, EN-24 Removing the side panels, EN-25 Lifting the heater from the pallet, EN-25 Tool: Screwdriver EOS Herkules XL S120 HD - Installation and Operating Instructions EN-23... - Page 24 Remove the heater from the packaging and leave the heater on the pal- let. The heater is already assembled with the exception of the holder (A). EN-24 Installation and Operating Instructions - EOS Herkules XL S120 HD...
- Page 25 Remove all transport locks and the protective film. Perform the following tasks next: 4.5 Establishing an electrical connection, EN-36 4.7 Connecting the water supply (EOS Herkules XL S120 Vapor HD only), EN-40 Then the heater can be positioned and mounting can be completed: ...
-
Page 26: Electrical Installation
Electrical installation This chapter describes how the sauna heater is connected to the relay boxes and how the water supply is connected (EOS Herkules XL S120 Vapor HD only). It then describes how the heater is positioned and the water level (EOS Herkules XL S120 Vapor HD only) is set. -
Page 27: Inner Wiring Diagrams
The control unit and the sauna heater are designed for connection to 400 V 3N ~. Use suitable fuses and cable lines. NOTICE Damage to device from surges Make sure to always connect neutral conductor N. EOS Herkules XL S120 HD - Installation and Operating Instructions EN-27... - Page 28 C Heater B Temperature sensor with safety temperature limiter D Power extension unit (LSG) E Mains connection EOS Herkules XL S120 HD 18 kW terminal diagram L1 L2 L3 N W V U N S1 N N U V W...
- Page 29 C Heater B Temperature sensor with safety temperature limiter D Power extension unit (LSG) E Mains connection EOS Herkules XL S120 HD 24 kW/30 kW terminal diagram S1 N L1 L2 L3 N W V U N N U V W...
- Page 30 E Heater C Humidity sensor (optional) F Power extension unit (LSG) G Mains connection EOS Herkules XL S120 HD Vapor 18 kW terminal diagram S1 N L1 L2 L3 N W V U N N U V W N U V W...
- Page 31 E Heater C Humidity sensor (optional) F Power extension unit (LSG) G Mains connection EOS Herkules XL S120 Vapor HD 24 kW terminal diagram S1 N L1 L2 L3 N W V U N N U V W N U V W...
-
Page 32: Internal Wiring
18 kW heater output 5 x 6 2 5 x 6 2 A To control unit B To power extension unit LSG 10 Circuit diagram for 18 kW heater output EN-32 Installation and Operating Instructions - EOS Herkules XL S120 HD... - Page 33 Circuit diagram for 24 kW heater output 30 kW heater output 5 x 6 2 5 x 6 2 A To power extension unit LSG 36 Circuit diagram for 30 kW heater output EOS Herkules XL S120 HD - Installation and Operating Instructions EN-33...
-
Page 34: Vaporiser Circuit Diagrams (Eos Herkules Xl S120 Vapor Hd Only
3 kW vaporiser output max. 1,5 kW 3 kW max. 1,5 kW A Signal C Thermostat B Heating element D Sauna control unit Circuit diagram for 3 kW vaporiser EN-34 Installation and Operating Instructions - EOS Herkules XL S120 HD... - Page 35 2 kW A Signal D Connection for power extension B Heating element unit C Thermostat E Connection for sauna control unit Circuit diagram for 4 kW vaporiser EOS Herkules XL S120 HD - Installation and Operating Instructions EN-35...
-
Page 36: Establishing An Electrical Connection
EOS Herkules XL S120 Vapor HD requires that the vaporiser must also be connected electrically. The electrical connection for the vaporiser is also located at the rear of the heater. - Page 37 30 kW heater output, EN-33 Closing the terminal box for the heating coil Put the cover of the terminal box in place. Screw in the 4 retaining screws and tighten them. EOS Herkules XL S120 HD - Installation and Operating Instructions EN-37...
- Page 38 Electrical installation EOS Herkules XL S120 Vapor HD: opening the terminal box for the vaporiser Unscrew the 2 retaining screws on the cover of the terminal box. Remove the cover. EN-38 Installation and Operating Instructions - EOS Herkules XL S120 HD...
- Page 39 Circuit diagram for 3 kW vaporiser, EN-34 Circuit diagram for 4 kW vaporiser, EN-35 EOS Herkules XL S120 Vapor HD: closing the terminal box for the vaporiser Put the cover of the terminal box in place.
-
Page 40: Heating Period Limitation
Water with an elevated lime content, i.e. more than 1.3 millimole of calcium oxide per litre (hardness class I or hardness levels 1–7 in Germany), can lead to unit malfunctions. Install a decalcification system. EN-40 Installation and Operating Instructions - EOS Herkules XL S120 HD... - Page 41 Ensure that the operating pressure for the connected water supply is between 2 and 6 bar. Necessary steps Connecting the water supply, EN-42 Tools and hardware: Spanner Water tap adapter, if needed EOS Herkules XL S120 HD - Installation and Operating Instructions EN-41...
- Page 42 3/4” connection, attach a suitable water tap adapter to the connection with screws. Connect the water supply. Use pipe insulation tape to ensure it is sealed. EN-42 Installation and Operating Instructions - EOS Herkules XL S120 HD...
-
Page 43: Positioning The Heater
EOS Herkules XL S120 Vapor HD: checking the water installation for leaks, EN-45 EOS Herkules XL S120 Vapor HD: setting the water level, EN-45 Attaching the warning plate, EN-45 EOS Herkules XL S120 HD - Installation and Operating Instructions... - Page 44 Lift the heater and place it in the pre-designated location. Ensure that the connecting lines are not pinched. Attach the side panels. Screw 4 screws into each of the two side panels. Insert the holder. EN-44 Installation and Operating Instructions - EOS Herkules XL S120 HD...
- Page 45 Electrical installation EOS Herkules XL S120 Vapor HD: checking the water installation for leaks Open the shut-off valve for the water supply. Inspect all sections of the water installation. The connections must be free of water leaks. EOS Herkules XL S120 Vapor HD: setting the water level Set the water level by raising or lowering the float gauge.
-
Page 46: Commissioning
Inspect the cabin prior to each use and ensure that no objects are placed on the sauna heater. Start the sauna only after all air inlets and outlets have been opened. EN-46 Installation and Operating Instructions - EOS Herkules XL S120 HD... -
Page 47: Filling With Stones
There must be enough space between the stones so that convection air can circulate sufficiently between them. Fill the store with stones only to the upper edge. EOS Herkules XL S120 HD - Installation and Operating Instructions EN-47... -
Page 48: Starting The Heater
10 cL of water per m³ cabin volume should be vaporised. After each water splash, wait approx. 10 minutes before starting the next one. This time is needed for the sauna stones to reheat. EN-48 Installation and Operating Instructions - EOS Herkules XL S120 HD... -
Page 49: Commissioning The Vaporiser (Herkules Xl S120 Vapor Only
The water in the vaporiser can build foam and boil over if additives are added to it. Never add essences, essential oils or herbs to the water in the vaporiser; add them to the holder only. EOS Herkules XL S120 HD - Installation and Operating Instructions EN-49... -
Page 50: Service And Maintenance
Openings can easily become blocked with lint and dust as fresh air is drawn in. This limits the air convection ability of the heater and could lead to impermissible temperatures. EN-50 Installation and Operating Instructions - EOS Herkules XL S120 HD... -
Page 51: Sauna Stones
Rinse all stones with cold water. Place the stones loosely so that there is enough space between them for air to circulate sufficiently. Filling the rock store, EN-47 EOS Herkules XL S120 HD - Installation and Operating Instructions EN-51... -
Page 52: Descaling The Vaporiser (Herkules Xl S120 Vapor Hd Only
Switch off the heater from the control unit. Wait until the heater has cooled completely. Connect the shut-off valve to the potable water connection. Remove the holder and base mount. EN-52 Installation and Operating Instructions - EOS Herkules XL S120 HD... - Page 53 Place a small piece of hose on the drainage nozzle, if needed. c) Open the ball valve and allow the mixture of approx. 8.5 litres to drain into the container completely. d) Close the ball valve. EOS Herkules XL S120 HD - Installation and Operating Instructions EN-53...
- Page 54 Repeat steps 9 to 11. Attach the small cover panel on the front of the heater. Reposition the holder. Open the shut-off valve to the potable water connection. Restart the heater. EN-54 Installation and Operating Instructions - EOS Herkules XL S120 HD...
-
Page 55: Cleaning The Vaporiser (Herkules Xl S120 Vapor Hd Only
Loosen the 2 screws in the middle panel on the rear side. b) Remove the middle panel. c) Loosen the 4 screws in the base mount bracket. d) Remove the base mount bracket. EOS Herkules XL S120 HD - Installation and Operating Instructions EN-55... - Page 56 Place a small piece of hose on the drainage nozzle, if needed. c) Open the ball valve and allow the water to drain into the container completely. d) Close the ball valve. Moisten a cloth with alcohol or methylated spirit. EN-56 Installation and Operating Instructions - EOS Herkules XL S120 HD...
- Page 57 Place the base mount and holder in position. Open the shut-off valve to the potable water connection. Switch on the fuses for the heater to establish a connection between them and the mains supply. EOS Herkules XL S120 HD - Installation and Operating Instructions EN-57...
-
Page 58: Replacing The Tubular Heating Element
Ensure that the heater has been disconnected from all power supply lines. a) Switch off the heater. b) Switch off the fuses to disconnect the heater from the mains supply. EN-58 Installation and Operating Instructions - EOS Herkules XL S120 HD... - Page 59 Insert the new heating coil. See Inserting the heating coil, EN-61 Replace the tubular heating element. See Replacing a tubular heating element, EN-60 EOS Herkules XL S120 HD - Installation and Operating Instructions EN-59...
- Page 60 Remove the tubular heating element. Insert the new tubular heating element and tighten the screws. Screw the new tubular heating element back onto the copper strip (M4). EN-60 Installation and Operating Instructions - EOS Herkules XL S120 HD...
- Page 61 Closing the terminal box for the heating coil, EN-37 b) Assembling the heater, EN-44 Switch on the fuses for the heater to establish a connection between them and the mains supply. EOS Herkules XL S120 HD - Installation and Operating Instructions EN-61...
-
Page 62: Troubleshooting
Water with foam is boiling over from There are additives, e.g. essence or Clean the vaporiser. See Cleaning the vaporiser, EN-55 the vaporiser. essential oils, in the container for the water. EN-62 Installation and Operating Instructions - EOS Herkules XL S120 HD... -
Page 63: General Terms And Conditions Of Service
The customer shall provide assistance free of charge to the manufacturer in rendering services. In the case of a warranty claim, the manufacturer shall provide spare parts necessary for servicing free of charge. EOS Herkules XL S120 HD - Installation and Operating Instructions EN-63... - Page 64 Only original spare parts may be used within the warranty period. Service visits made by third parties shall require a written order issued by our service department. EN-64 Installation and Operating Instructions - EOS Herkules XL S120 HD...
- Page 65 The manufacturer’s General Terms and Conditions of Business, in the ver- sion available at www.eos-sauna.com/agb, shall apply in addition to the foregoing terms and conditions of service. EOS Herkules XL S120 HD - Installation and Operating Instructions EN-65...
-
Page 66: Disposal
Do not dispose of the unit with household waste. Packaging The packaging of the EOS Herkules can be completely separated for dis- posal and recycled. The following materials are used in the packaging: Used paper/cardboard ... - Page 67 EOS Herkules XL S120 HD - Installation and Operating Instructions EN-67...
- Page 68 Store this address with the installation and operating instructions in a safe place. Please always provide us with nameplate data, such as model, item num- ber and serial number so we can provide fast and efficient support. Date of sale Stamp/retailer signature: © EOS Saunatechnik GmbH - All rights reserved.
Need help?
Do you have a question about the Herkules XL S120 HD and is the answer not in the manual?
Questions and answers