Advertisement
Quick Links
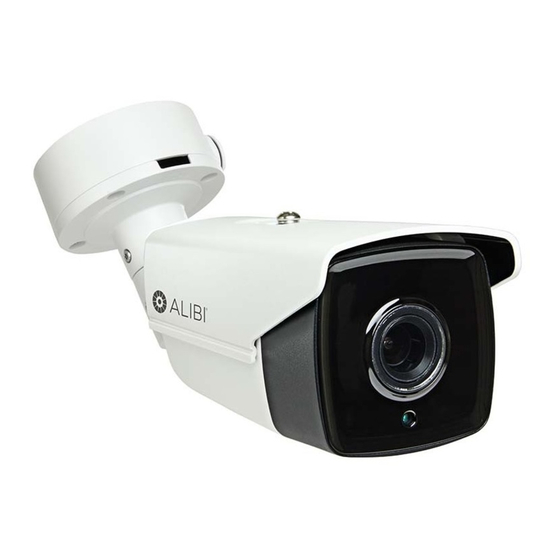
ALI-NP3012RH 2.0 MP
Smart IP Bullet Camera
Quick Installation Guide
This document guides you through the basic steps to install and configure the ALI-NP3012RH camera. The
camera features:
2.0 MP high resolution sensor
•
4.7 - 94 mm motorized vari-focal lens
•
HD real-time video up to 1920 x 1080 with tri-streaming and H.264 compression
•
Smart detection including Intrusion, Line Crossing, Object left/removal, Face, Audio Surge, etc.
•
Smart IR LED array with illumination up to 390 feet
•
Supports distortion correction
•
3D-DNR noise reduction, 120dB Wide Dynamic Range (WDR)
•
Dual power capable - Power over Ethernet (PoE) or 12 Vdc
•
Internal heater for environments as cold as -40˚ F
•
Weatherproof - IP67 rated
•
Internal microSD card storage up to 128GB (card not provided)
•
2-way Audio I/O, Alarm I/O
•
For more information about the software features of this camera, please refer to the ALIBI IP Camera V3
Software User Manual, available from your retailer.
Articulated
mounting
bracket
Camera body
12 Vdc,power
and ground
terminations
www.observint.com
1
Junction box assembly
(see detail below)
Camera mounting base
Sun Shield
Safety cable
Alarm In/Out
terminals
LAN (RJ-45)
connector
Audio In/Out
connectors
CVBS Out
Camera base
locator pins
Top (up)
Bottom (down)
Conduit port (2)
What's in the box
Your camera includes the following items:
CD-ROM with manuals and ALIBI Power Tools
•
utilities
Drill template
•
Waterproof RJ-45 LAN coupling
•
Junction Box
•
Gang box adapter plate (not shown)
•
Security wrench
•
Mounting hardware
•
Lens
Step 1.
Install the camera
The camera includes hardware to install it directly to the Junction box provided, to a mounting surface
(without the junction box), or to a double-gang electrical box using the adapter plate provided. When
using the junction box, camera LAN and power drop cables can attach to extension cables inside the box.
The camera with or without the junction box can be installed on a ceiling (horizontal surface) or wall
(vertical surface). To install the camera, do one of the following:
To mount the camera using the Junction box
1.
Remove the cover on the underside of the camera, and then install a microSD card. The card can
have a capacity up to 128 GB. Reinstall the cover.
2.
Determine the best fasteners for securing the Junction box to mounting surface. The mounting
hardware provided is suitable for most surfaces.
3.
Remove the junction box from the camera assembly by loosing the four captive screws.
4.
Attach the drill template to the surface. Mark the location of the Junction box mounting screw
holes. If routing extension cables for the LAN, power, alarm devices, etc. through the mounting
surface, mark the location for that hole too. NOTE: When installing the box onto a wall, observe the
orientation for TOP and BOTTOM orientation markings inside the box and on the camera mounting
base, and orient the drill template properly.
microSD card slot, reset button, CVBS video port inside.
Hook for safety
cable
Mounting screw
hole (4)
Hole for camera
mounting screw (4)
Cable access
through mounting
surface
Junction box detail
Waterproof LAN coupling
ALI-NP3012RH_CQ
161129
Advertisement

Subscribe to Our Youtube Channel
Related Manuals for ALIBI ALI-NP3012RH


Summary of Contents for ALIBI ALI-NP3012RH
- Page 1 • through mounting Conduit port (2) surface For more information about the software features of this camera, please refer to the ALIBI IP Camera V3 Software User Manual, available from your retailer. Junction box detail What’s in the box Your camera includes the following items:...
- Page 2 For this mounting option, the drop cables can be routed through the mounting surface, or through the cable channel in the mounting base. Alibi Discovery Tool is a software utility used to “discover” Alibi cameras and NVRs/DVRs installed on the physical Ethernet network (LAN) and change their network settings. Discovery Tool is provided on the CD with your camera and is contained in Alibi Power Tools.
-
Page 3: Remote Login
» camera is new (un-configured) or was reset to its factory default state, the camera did not Close the Alibi Tools Utility by clicking the Close icon ( ) in the upper-right corner of the screen. find a DHCP server on the network. Modify the parameters in the right pane to values you prefer and are compatible with the network. - Page 4 If this login is the first login to an Alibi camera from your computer and browser, continue with the following sub-steps to install a plugin: After a successful login to the camera, a message will appear in the middle of the Live View Allow the plug-in installation to complete.
- Page 5 Live View image Capture Record Zoom Configurable parameters include parameters for Day - Night Scheduled-Switch and Auto-Switch. For Scheduled-Switch, configure the following: NOTE: You can also observe video from the camera by plugging the Video Test Monitor cable into the CVBS monitor connector in the camera, then attaching it to a spot monitor.
-
Page 6: Specifications
Exposure Time: Value ranges from 1/3 to 1/100,000 s. The nominal value is 1/150. Adjust it Camera Reset — according to the lightening condition. To Reset the camera to its factory default configuration, press and hold the Reset button, located beneath Gain: Set the gain to show the optimal brightness level. - Page 7 Network Network Storage NAS (Support NFS,SMB/CIFS), ANR Motion detection, Tampering alarm, Network disconnect, IP address conflict, Storage Alarm Trigger exception TCP/IP, ICMP, HTTP, HTTPS, FTP, DHCP, DNS, DDNS, RTP, RTSP, RTCP, PPPoE, NTP, UPnP, SMTP, Protocols SNMP, IGMP, 802.1X, QoS, IPv6, Bonjour Security User Authentication, Watermark, IP address filtering, Anonymous access Standard...
Need help?
Do you have a question about the ALI-NP3012RH and is the answer not in the manual?
Questions and answers