Table of Contents
Advertisement
Quick Links
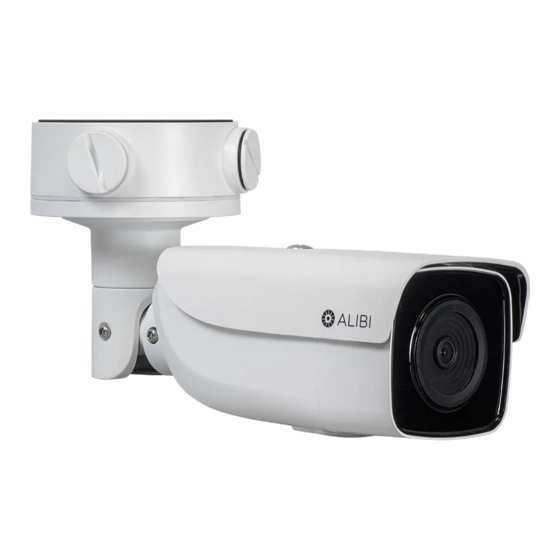
ALI-NS4036RE 6MP 270 ft IR IP Bullet
Camera Quick Installation Guide
This document guides you through the basic steps to install and configure the ALI-NS4036RE IP bullet
camera. This camera features:
6 MP 3072 × 2048 pixel maximum resolution at 20 fps
•
STARLIGHT Color: 0.008 Lux @ (F1.2, AGC ON), 0.014 Lux @ (F1.6, AGC ON) minimum illumination
•
4 mm lens with 80˚ horizontal field of view
•
Supports H.265+ / H.265 / H.264OVC / H.264 / MJPEG compression
•
120 dB Wide Dynamic Range
•
Supports microSD/SDHC/SDXC card onboard storage up to 128GB max (card not included)
•
IP67 rated, −22 °F ~ 140 °F temperature range
•
ONVIF Profile S & Profile G, ISAPI
•
For more information, refer to these documents - available from your equipment vendor:
ALIBI™ Witness App for Android Quick Start Guide
•
ALIBI™ IP Camera Firmware Version 5.4 User Manual (or later) provided at:
•
AlibiSecurity.com/resources
Articulated
mounting
bracket
Camera body
* Reset: To restore the camera with its default configuration (including user name, password, IP address, etc.) press and hold
the Reset button for 10 s when the camera is power on or rebooting.
Maintenance panel
Ground
terminal
Tab for j-box
safety cable
J-box locator
pin holes (2)
Camera mounting base
1
www.observint.com
Junction box assembly
(see detail below)
Camera mounting base
Sun Shield
Maintenance panel
Mounting
screw holds (4)
Drop cable
Safety cable
Camera base
locator pin (2)
Mounting
screw hole (4)
Hole for camera
mounting screw (4)
Conduit port (2)
What's in the box
Your camera includes the items shown below.
This document
•
Alilbi IP camera networking instructions
•
ALI-NS4036RE camera with and junction box (j-box)
•
Adapter plate and screws
•
Security L-wrench
•
Drill template
•
Waterproof Ethernet fitting
•
Lens
Mounting hardware with wall inserts
•
Drill template
Reset*
Button
Step 1.
Install the camera
microSD
card slot
The camera includes hardware to install it directly to the Junction box provided, to a mounting surface
(without the junction box), or to a double-gang electrical box using the adapter plate provided. When
using the junction box, camera LAN and power drop cables can attach to extension cables inside the
box. The camera with or without the junction box can be installed on a ceiling (horizontal surface) or
wall (vertical surface). To install the camera:
1.
(Optional) Remove the cover on the underside of the camera, and then install a microSD card.
See the Specifications section at the back of this document for card type and capacity. Reinstall
the cover.
The microSD card may need to be initialized before it can be used to record data. Refer to the ALIBI™
IP Camera Firmware Version .. User Manual provided at AlibiSecurity.com/resources for
NOTE
instructions to initialize the card.
2.
Mount the camera in one of the following ways:
To mount the camera using the Junction box
1.
Determine the best fasteners for securing the Junction box to mounting surface. The mounting
hardware provided is suitable for most surfaces.
2.
Attach the drill template to the surface. Mark the location of the Junction box mounting screw
holes. If routing extension cables for the LAN, power, alarm devices, etc. through the mounting
surface, mark the location for that hole, too. NOTE: If installing the box onto a wall, observe
the orientation for TOP and BOTTOM orientation markings inside the box and on the camera
mounting base, and orient the drill template properly.
Top (up)
Cable access
through
mounting
surface
Junction box detail
12 Vdc Power connector with plug
Ethernet connector -
PoE capable
Camera drop cables
Adapter plate
Mounting hardware
Waterproof Ethernet fitting
ALI-NS4036RE_CQ
Security
L-wrench
190603
Advertisement
Table of Contents

Subscribe to Our Youtube Channel
Related Manuals for ALIBI ALI-NS4036RE


Summary of Contents for ALIBI ALI-NS4036RE
- Page 1 Reset button for 10 s when the camera is power on or rebooting. The microSD card may need to be initialized before it can be used to record data. Refer to the ALIBI™ Maintenance panel IP Camera Firmware Version .. User Manual provided at AlibiSecurity.com/resources for NOTE instructions to initialize the card.
- Page 2 Step 3. Install the Alibi Config Tool software The Alibi Config Tool is a PC-based network utility for discovery of Alibi compatible devices. It provides an easy way to activate devices, configure camera and recorder network configuration settings, and set device passwords.
- Page 3 Activate Inactive Alibi device Modify Network Parameters When an Alibi device is first installed, or reset to its factory configuration, it must be “Activated” before it can be used. In the Alibi Configuration Tool, “Inactive” devices have a Security status of Inactive, and an IPv4 address of 192.168.1.64.
- Page 4 Click on the message to install the plugin. Run as administrator MS Internet Explorer icon Click Run as administrator in the pop-up menu. Window 10: To run IE as an Administrator: Find MS IE in the start menu. Usually this is found in the Windows Accessories group. In the message bar at the bottom of the screen, click Run.
- Page 5 3 levels: Administrator, Operator and User using Automatic White Balance (AWB1), and lock the white balance setting (Locked WB). Client Alibi Central Management Software (ACMS) ver. 3.1 or later Image Enhancement: Options in this submenu include Digital Noise Reduction (DNR) —...
- Page 6 Camera ALI-NS4036RE General Operating conditions: -22 °F ~ 140 °F (-30 °C ~ 60 °C), Humidity 95% or less (non-condensing) 12 Vdc ± 25%, 5.5 mm coaxial power plug Power supply PoE (802.3af, class 3) 12 Vdc, 1.0 A, max: 11 W Power consumption: PoE: (802.3af, 36 Vdc ~ 57 Vdc), 0.4 A ~ 0.1 A, max: 12.9 W...
Need help?
Do you have a question about the ALI-NS4036RE and is the answer not in the manual?
Questions and answers