
Related Manuals for ALIBI ALI-NP7012RT


Summary of Contents for ALIBI ALI-NP7012RT
-
Page 1: Installation Guide
ALI-NP7012RT 2.1 MP 23x IP PTZ Camera Installation Guide PLEASE READ THIS MANUAL BEFORE USING YOUR CAMERAS, and always follow the instructions for safety and proper use. Save this manual for future reference. ALI-NP7012RT_CM 10/13/15... - Page 2 ALIBI and the ALIBI logo are trademarks of Observint. Microsoft, Windows, and Internet Explorer are either registered trademarks or trademarks of Microsoft Corporation in the United States and/or other countries.
-
Page 3: Regulatory Information
Do not connect several devices to one power adapter as adapter overload may cause over-heat or fire hazard. • Please make sure that the power has been disconnected before you wire, install or dismantle the camera. • ALI-NP7012RT IP PTZ Camera Installation Guide... - Page 4 If smoke, odors or noise rise from the device, turn off the power at once and unplug the power cable, and then please contact • the service center. If the product does not work properly, please contact your dealer or the nearest service center. Never attempt to disassemble •...
-
Page 5: Table Of Contents
24 Vac Wire Gauge and Transmission Distance ......... . 31 ALI-NP7012RT IP PTZ Camera Installation Guide... - Page 6 NOTES...
-
Page 7: Overview
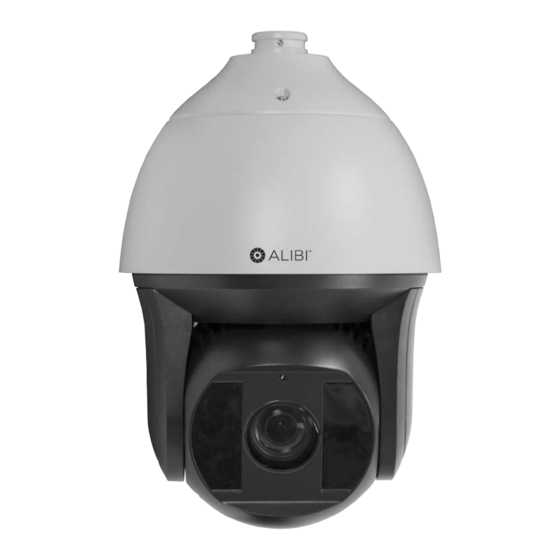
The ALI-NP7012RT IP PTZ Camera can capture high quality images in low light environment with its black anti-reflective glass. The black anti-reflective glass increase the luminousness for an IR reach of up to nearly 500 feet. Embedded with a 1/1.9’’ progressive scan CMOS chip makes DWDR 2MP real-time resolution possible. -
Page 8: Camera Function
SECTION 1: OVERVIEW ONVIF (Open Network Video Interface Forum), CGI (Common Gateway Interface), PSIA (Physical Security Interoperability • Alliance), to ensure greater interoperability between different platforms and compatibility 3D intelligent positioning function • Power-off memory function: restore PTZ & lens status after reboot •... -
Page 9: What's In The Box
Pendant adapter Software and documentation CD • Quick installation guide (this document) • 1.3 Accessories The following accessories are available for the ALIBI ALI-NP7012RT camera. Mounting bracket detail is shown below. Model Type ALI-PTZCL Ceiling Mount Bracket ALI-PTZWB Wall Mount Bracket... - Page 10 SECTION 1: OVERVIEW ALI-PTZCL: Ceiling Mount Bracket The Ceiling Mount Bracket is suitable for outdoor ceiling mounting. 2.24" 0.39" dia. (4) 4.57" dia. 3.52" dia.
- Page 11 SECTION 1: OVERVIEW ALI-PTZWB: Wall Mount Bracket The Wall Mount Bracket is suitable for indoor and outdoor wall mounting. 3.82" 12.2" 2.95" G 1.5" 0.33" dia. (4) ALI-NP7012RT IP PTZ Camera Installation Guide...
- Page 12 SECTION 1: OVERVIEW ALI-PTZPM: Pole Mount PTZ Bracket The Pole Mount Bracket is suitable for outdoor pole mounting. The straps can attach to a 2.64” ~ 5.00” diameter pole. 3.94" dia. 5.63" 12.2" 4.61" G 1.5"...
- Page 13 SECTION 1: OVERVIEW ALI-PTZCM: Corner Mount PTZ Bracket The Corner Mount Bracket is suitable for outdoor pole mounting to a 90˚ corner. 16.52" 6.96" G 1.5" ALI-NP7012RT IP PTZ Camera Installation Guide...
-
Page 14: Installation
SECTION 2: INSTALLATION SECTION 2 Installation Before you start Check the package contents and make sure that the device in the package is in good condition and all the assembly parts are • included: PTZ camera assembly — Pendant adapter —... -
Page 15: Install An Micro-Sd Card In The Camera
Bracket are very similar. For these brackets, use the instructions below as a guide. . 1. Determine the best mounting screws and hardware to anchor the mounting bracket with the camera to the mounting surface. Use the following guidelines: ALI-NP7012RT IP PTZ Camera Installation Guide... - Page 16 SECTION 2: INSTALLATION For cement wall mounting, use the expansion screw to anchor the bracket. — For wooden wall mounting, use self-tapping screw to anchor the bracket. — Make sure that the wall is strong enough to withstand more than 8 times the weight of the camera and the bracket. —...
-
Page 17: Connecting The Cables
9. Fit the mounting bracket coupling into the mounting bracket, and then tighten the lock screw. 2.3.1 Connecting the cables Drop cables connectors for the ALI-NP7012RT are shown below. Each wire is labeled with its purpose. RS-485 cable CVBS (BNC) - Page 18 SECTION 2: INSTALLATION Connect the camera alarm output drop cables to an alarm reporting device. See the Specifications section for interface requirements and the diagram below. These connection use the ALARM_OUT1 and ALARM_COM1 wires. JQ0-3FG GND OUT Relay DC Load (10 A 250 Vac) 12 Vdc ~ 220 Vac...
- Page 19 4. Plug the power cable provided (not shown) for the PoE injector into the jack on the injector, then into a standard 120 Vac electrical outlet. After power is applied to the camera, the camera will perform initial motion checks. Allow these motion checks to complete before continuing (~ 1 minute). ALI-NP7012RT IP PTZ Camera Installation Guide...
-
Page 20: Ceiling Mounting
SECTION 2: INSTALLATION 2.4 Ceiling mounting Following the instructions below to install the camera using the ALI-PTCL Ceiling Mount Bracket. 1. Determine the best mounting screws and hardware to anchor the mounting bracket with the camera to the mounting surface. Use the following guidelines. - Page 21 10. Fit the camera mounting bracket coupling into the mounting bracket, and then turn the camera to connect to the pendant adapter. Camera extension Ceiling cables Lock screw Coupling Safety cable 11. Tighten the lock screw to secure the camera in place. ALI-NP7012RT IP PTZ Camera Installation Guide...
-
Page 22: Configure Network Access
LAN and change their network parameters. Use Discovery Tool to setup your camera on a network. See below. Alibi Tools Utility is provided on the CD with your camera and is available on the Supercircuits product page (as Alibi Power Tools) for all Alibi IP cameras and recorders. - Page 23 SECTION 3: CONFIGURE NETWORK ACCESS 2. Double click the Discovery Tool icon to open the program. When the program opens it will automatically list the Alibi cameras and recorders installed on the network. 3. To change the network settings of the camera to be compatible with the subnet where it is installed, do the following: a.
- Page 24 SECTION 3: CONFIGURE NETWORK ACCESS b. Modify the network parameters to values compatible with the subnet where it is installed. c. Enter the admin password for the device in the password field. The default admin user password for Alibi cameras is 1111.
-
Page 25: Remote Login
2. In the login window, enter your User Name and Password in the appropriate fields, then click Login. The default User Name and Password for Alibi cameras is admin and 1111. 3. If the password you enter for your camera is a weak password, the following pop-up window will appear. Follow the instructions to create a “strong”... - Page 26 4. If this is the first time you are logging into a camera and are you are using Internet Explorer 10 or newer, a message may appear at the bottom of the window to use ActiveX Controls. Click Allow. 5. If this login is the first login to an Alibi camera from your computer and browser, continue with the following sub-steps to install WebComponents: a.
- Page 27 Some computer security software may attempt to block you from running WebComponents.exe. If necessary, open the Internet Explorer downloads list, right click on the WebComponents.exe file name, then click Run Anyway. NOTE b. In the Setup - WebComponents window opens, click Next to continue. ALI-NP7012RT IP PTZ Camera Installation Guide...
- Page 28 SECTION 4: REMOTE LOGIN Installing the WebComponents plugin may require that you close the browser. Follow the on-screen instructions, then restart your browser and log in after the installation is finished. c. Allow the plug-in installation to complete. When the following window appears, click Finish. 6.
- Page 29 Logout button Capture, Record, Zoom icons 7. In the Live View window shown below, click the Open PTZ controls icon to open/close the PTZ control panel. PTZ button PTZ manual controls PTZ control panel ALI-NP7012RT IP PTZ Camera Installation Guide...
-
Page 30: Additional Configuration Steps
8. In the PTZ control panel, click the manual control arrows to exercise the pan-tilt-zoom features of the camera. 4.1 Additional configuration steps Refer to the document ALIBI™ IP Camera Software User Manual provided on the software and documentation CD with your camera to customize the configuration of your camera. -
Page 31: Appendix A Specifications
F1.5 ~ F3.4 Video Video Compression Format H.264 (Baseline/Main/High Profile), MPEG-4, MJPEG Codec Streaming Capability Tri Streaming Maximum Frame Rate 30 fps @ 1080p Bit Rate 32 kbps ~ 16 Mbps Bit Rate Mode CBR, VBR ALI-NP7012RT IP PTZ Camera Installation Guide... - Page 32 APPENDIX A: SPECIFICATIONS Audio Audio Streaming Two-way Audio Compression Format G.711ulaw/G.711alaw/G.726/MP2L2/G.722 Pan and Tilt Smart Tracking Manual/ Panorama/ Intrusion trigger/ Line crossing trigger/ Region entrance trigger/Region exiting trigger/Smart tracking when patrol between multiple scenarios Number of Presets Patrol 8 Patrols, Up to 32 presets per patrol Pattern 4 Patterns PTZ Position Display...
- Page 33 1024 x 768 resolution or higher Web Browser Internet Explorer® 6.0 or above, Apple® Safari® 5.02 or above, Mozilla® Firefox® 3.5 or above Supplied Accessories CD ROM (User’s Guide, Installation Tools) Installation Guide High PoE Midspan Injector Installation Hardware ALI-NP7012RT IP PTZ Camera Installation Guide...
-
Page 34: Appendix B Definitions
APPENDIX B: DEFINITIONS APPENDIX B Definitions Comparing with the general 2D digital noise reduction, the 3D digital noise reduction function processes the noise 3D Digital Noise Reduction between two frames besides processing the noise in one frame resulting in clearer video. In the client software, use the click left mouse button on the desired position in the video image, and then drag a rectangle area in the lower right direction. - Page 35 The WDR function helps the camera provide clear images even with back lit environments. When there are both very Wide Dynamic Range (WDR) bright and very dark areas in the field of view, WDR balances the brightness level of the whole image and provide clearer images and details. ALI-NP7012RT IP PTZ Camera Installation Guide...
-
Page 36: Appendix C Lightning And Surge Protection
APPENDIX C: LIGHTNING AND SURGE PROTECTION APPENDIX C Lightning and Surge Protection This product includes TVS plate lightning protection technology to prevent damage caused by a pulse signal that is below 3000 watts from sources such as lighting, surging, etc. Protection measures must be taken to ensure electrical safety. The distance between signal transmission line and high-voltage equipment or high-voltage cable is at least 50 m. -
Page 37: Appendix D 24 Vac Wire Gauge And Transmission Distance
113 (34) 16 (4) 26 (7) 42 (12) 106 (32) 15 (4) 25 (7) 39 (11) 100 (30) 14 (4) 23 (7) 37 (11) 95 (28) 14 (4) 22 (6) 35 (10) 90 (27) ALI-NP7012RT IP PTZ Camera Installation Guide... - Page 38 APPENDIX D: 24 VAC WIRE GAUGE AND TRANSMISSION DISTANCE Table 2. Wire Gauge Standards American Wire Gauge Cross-sectional Area of Bare Wire Gauge (mm) Bare Wire (mm 0.750 0.4417 0.800 0.5027 0.900 0.6362 1.000 0.7854 1.250 1.2266 1.500 1.7663 2.000 3.1420 2.500 4.9080...
Need help?
Do you have a question about the ALI-NP7012RT and is the answer not in the manual?
Questions and answers