NEC XN120 Manual
Hide thumbs
Also See for XN120:
- Feature manual (222 pages) ,
- Getting started manual (83 pages) ,
- User manual (40 pages)
Table of Contents
Advertisement
Quick Links
This guide explains the installation, configuration and operation of the XN120 VoIP Card.
Further information will be supplied with any optional equipment that you have purchased.
Please keep all information supplied for future reference.
Regulatory Notice.
Refer to the Getting Started Guide (991409-5) supplied with the XN120 Main Unit for the Declaration
of Conformity related to the product.
Warning: This is a class A product. In a domestic environment this product may cause radio
interference in which case the user may be required to take adequate measures.
XN120
Voice Over IP Guide
Rev 1.0 April 2005
991450-5
Advertisement
Table of Contents

Related Manuals for NEC XN120


Summary of Contents for NEC XN120
- Page 1 Please keep all information supplied for future reference. Regulatory Notice. Refer to the Getting Started Guide (991409-5) supplied with the XN120 Main Unit for the Declaration of Conformity related to the product. Warning: This is a class A product. In a domestic environment this product may cause radio interference in which case the user may be required to take adequate measures.
-
Page 2: Table Of Contents
7- Connect the VOIPU Circuits to the Data Network ..................8 Ethernet Port Specification..........................8 Ethernet Cable ..............................8 Maximum Cable Length .............................8 8- Power on the XN120 ............................9 9- Configure the IP Addresses..........................10 10- Test IP Connectivity .............................12 11- Configure SIP Trunks...........................14 12- Configure Incoming Calls ..........................17... -
Page 3: What Is Voice Over Ip (Voip)
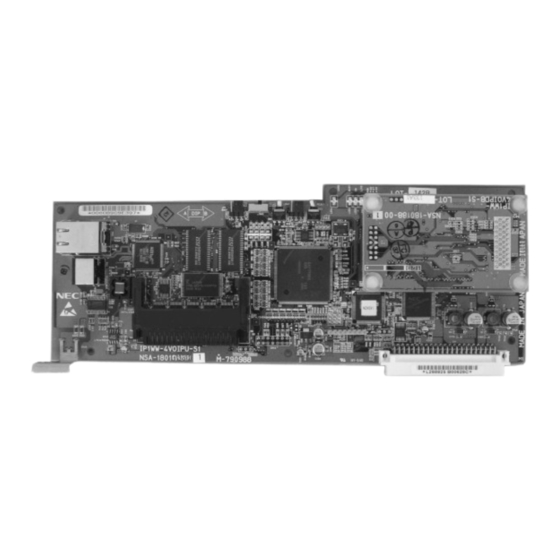
Compact Flash Socket Note: An EXIFU-A1 is also required for VoIP on the XN120. Please refer to the EXIFU Guide (991423-5) for further information about this card The VOIPU cards are installed in the 2OPBOX unit, refer to the guide supplied with the 2OPBOX for installation instructions. -
Page 4: System Connection Diagram
IP packets for all calls active on the card. Each VOIPU card, and the Ethernet port on the EXIFU-A1 connects to an Ethernet hub (or Switched Hub) provided by the customer. From each VOIPU From EXIFU To Data Network XN120 Voice Over IP Card Guide... -
Page 5: Installation Procedure
Connect the VOIPU cards and EXIFU-A to the data network Power on the XN120 Configure the IP Addresses Test the IP network connectivity Configure SIP Trunks Configure the Incoming Calls Configure the Outgoing Calls Configure the Caller ID XN120 Voice Over IP Card Guide... -
Page 6: 1- Unpack The Card
Apply firm, even pressure to the four plastic areas on the daughterboard until the legs click into place on the VoIPU. 3- Power Off the System. You must power off the XN120 system before you install the VOIPU card into a slot in the 2OPBOX. 4- Fit the EXIFU-A1. Refer to the installation instructions supplied with the EXIFU-A1. -
Page 7: 6- Install The Voipu Card
Each VOIPU card will use a slot in a 2OPBOX. Each 2OPBOX has two slots. · The XN120 can have up to three 2OPBOXs; one box can be connected to each XN120 Unit (1 main unit plus 2 expansion units). -
Page 8: 7- Connect The Voipu Circuits To The Data Network
RJ45 Ethernet RJ45 colour Ethernet Ethernet socket on the code Straight Cable Cross Cable VOIPU White/Orange Orange/White White/Green Green/White Maximum Cable Length The maximum cable length is 100 metres for straight and cross cables. XN120 Voice Over IP Card Guide... -
Page 9: 8- Power On The Xn120
Power on the XN120. ! System Start Up – Retain Customer Configuration This is the normal operation for powering the XN120 on. Before you power on the system check that the NORMAL switch is set to ON. This will ensure that the system memory retains your configuration. -
Page 10: 9- Configure The Ip Addresses
This guide shows the configuration required to connect the XN120 to the customers Ethernet LAN. ! You will need a fixed IP address and the appropriate Subnet Mask for the XN120, this must be specified by the Network Administrator responsible for the customers LAN. - Page 11 Default Gateway = VOIPU IP (Slot 5) = VOIPU IP (Slot 6) = VOIPU IP (Slot 11) = Program 84-05-01 VOIPU IP (Slot 12) = VOIPU IP (Slot 17) = VOIPU IP (Slot 18) = XN120 Voice Over IP Card Guide...
-
Page 12: 10- Test Ip Connectivity
Type cmd in the Open dialogue box and click OK. A command prompt window will open. · Type ping 172.16.0.10 (replace 172.16.0.10 with the actual IP address that you want to test) and then press Enter. XN120 Voice Over IP Card Guide... - Page 13 Test IP Connectivity The output will resemble one of the following outputs: a) Successful – The PC receives a reply back from the XN120 and the reply is received in approx. 1milli- second Microsoft Windows XP [Version 5.1.2600] (C) Copyright 1985-2001 Microsoft Corp.
-
Page 14: 11- Configure Sip Trunks
The 2OPBOX connected to the Second XN120 expansion unit is assigned slots 17 and 18. Setting Global SIP Parameters The XN120 has several system-wide settings that have to be programmed to enable SIP to work. These items are located in Program 10-28. - Page 15 Configure SIP Trunks Enter XN120 Configuration Mode. (Refer to XN120 Configuration Mode at the end of this guide if you are not familiar with the XN120 system). Program 10-03-01 Default Setting: All VOIPU circuits are set to mode 0 (not used).
- Page 16 (Press SPK to save changes and exit if you are finished). Configuration Sheet : SIP Trunks Program 10-28-01 Domain Name = Program 10-28-02 Host Name = Program 10-28-04 UserID = Program 84-13-28 SIP Trunk CODEC = XN120 Voice Over IP Card Guide...
-
Page 17: 12- Configure Incoming Calls
12- Configure Incoming Calls The XN120 supports two methods of handling incoming SIP calls; normal (non-DDI) or DDI. This guide explains the general operation only, for an explanation of every option refer to the XN120 Features Manual 991434-5. Non-DDI Operation. - Page 18 Configuration Sheet: Normal (Non-DDI) Operation Line Line Mode Incoming Ring Group Target 22-05-01 Members of the IRG Number 22-02-01 default = all trunks point to IRG 1 Default = telephone 200 default = 0 normal XN120 Voice Over IP Card Guide...
-
Page 19: Ddi Operation
This is the most common method of handling incoming SIP calls. With DDI operation the network will pass the last digits of the dialed number to the XN120. The XN120 then compares these digits to a look up table, if the number matches any entry in the look up table it will follow the routing specified. -
Page 20: Set The Voipu Lines As Ddi Mode
Ø Press HOLD to confirm the entry and step to the next Trunk. Ø Press DC several times when you are done to return to the Program Mode. (Press SPK to save changes and exit if you are finished). XN120 Voice Over IP Card Guide... -
Page 21: Point The Trunk Group To An Area Of The Ddi Table
Ø When you have changed all 8 night modes the next trunk group number will be displayed. Ø Press DC several times when you are done to return to the Program Mode. (Press SPK to save changes and exit if you are finished). XN120 Voice Over IP Card Guide... -
Page 22: Enter The Ddi Numbers In The Ddi Table
You do not need to enter the full quantity of received digits, for example, if the network is sending four DDI digits in the range from 3100 to 3199 you can just enter receive DDI digits of 00 to 99 in the XN120 and it will match them correctly. - Page 23 DDI entry. Ø Press DC several times when you are done to return to the Program Mode. (Press SPK to save changes and exit if you are finished). XN120 Voice Over IP Card Guide...
- Page 24 Line Mode Trunk Point to DDI table area for each night mode Number Group 22-02-01 22-13-01 Number (DDI=mode 3) default = all trunk groups point to area 1 14-05-01 default = 0 default=1 normal XN120 Voice Over IP Card Guide...
- Page 25 22-11-07 to entry 22-11-01 22-11-02 22-11-03 Operation Target 1 Target 2 22-11-11 not number default=entries default=entries default=blank Mode 22-11-05 22-11-06 covered in 1-99 have 00-99 1-99 have 200-299 22-11-04 default=none default=none this guide default=none XN120 Voice Over IP Card Guide...
-
Page 26: 13- Configure Outgoing Calls
When calls are made via Analogue or BRI trunks, the network provider routes the call to the required destination. The XN120 just has to send the digits to the provider and their network is configured with the routing information to set up the call. This is essential as there are millions of possible telephone numbers that you could dial. - Page 27 IP addresses – these cannot be automatically determined as in the previous example. The XN120 has a dialing table that is referred to whenever a call is attempted via a VOIPU trunk. The dialing table allows up to 1000 telephone number/IP address entries. The flowchart below shows how the routing decisions are made in a typical XN120 installation.
- Page 28 Configure Outgoing Calls To configure the XN120 routing table: Program 10-23-01 Press Vol p q There are 1000 DDI entries. 10-03-01 No.1 to select the SysInterconnect0 One entry is required for each entry number remote destination. Ø Select the correct table entry number 1-1000 with the Vol.
- Page 29 This sheet shows 50 entries, make a copy if more entries are required (up to 1000 entries can be used) System System Interconnection Destination IP Address Call Control Dial Number Number PRG10-23-01 (Yes/No) PRG10-23-02 PRG10-23-03 PRG10-23-02 Cannot changed XN120 Voice Over IP Card Guide...
-
Page 30: 14- Configure Caller Id
The VOIPU lines will receiver Caller ID at default, the Caller ID will be displayed at the LCD display of the XN120 telephones or normal telephones with caller ID enabled (Caller ID is enabled by Program 15-03-09 for each normal telephone). -
Page 31: Example Configuration - Sip Trunks
Example Configuration – SIP Trunks This example shows two XN120 systems, connected via an Ethernet network. The extension numbers are different on both systems and the users on each system should be able to dial each other by using their extension numbers alone. -
Page 32: Xn120 Configuration Mode
Press HOLD You will see - Program Mode Selecting the Program Number · Each configuration setting within the XN120 is identified by a Program Number (eg 22-05-01). Ensure the LCD display shows: Program Mode If it is not displayed press the DC key several times. - Page 33 · With the Program Number entered and the curser positioned at the first entry you can change the value by entering the new one with the numeric keys of the XN120 phone. · When you have entered the new value press HOLD to confirm it and move to the next entry.
-
Page 34: Glossary
The collection of interconnected systems operated by the various telephone companies and administrations (telcos and PTTs) around the world. Session Initiation Protocol. An IETF standard that defines the delivery of Voice over IP and Multimedia services. VoIP Voice over Internet Protocol XN120 Voice Over IP Card Guide...
Need help?
Do you have a question about the XN120 and is the answer not in the manual?
Questions and answers