Table of Contents
Advertisement
Quick Links
Advertisement
Table of Contents

Subscribe to Our Youtube Channel
Related Manuals for CAS CT100 Series


Summary of Contents for CAS CT100 Series
- Page 1 CT100 User’s Manual...
-
Page 2: Table Of Contents
CONTENTS PRECAUTIONS ....................5 PREFACE ....................... 7 CHANGING THE PRINTER ROLL ..........8 NAME AND FUNCTIONS .................11 I. SAELS MODE ....................23 Chapter 1 Basic Operation .................. 24 Chapter 2 Sales for Weighed item............... 30 Chapter 3 Sales for non-weighed item .............. 32 Chapter 4 Clerk Operation ...................35 Chapter 5 Discount &... - Page 3 CASH DRAWER INTERFACE ............146 RS-232C & RS-485 INTERFACE ............146 USB INTERFACE ..................147 RJ-45 INTERFACE ..................147 PROGRAM MENU MAP ...............148...
-
Page 4: Precautions
PRECAUTIONS... -
Page 6: Preface
PREFACE Thank you for purchasing your CT100. CAS scales are designed and produced under rigid quality control to deliver outstanding performance, reliability and long life. This manual will help you with the proper operation and care of your new CT100. -
Page 7: Changing The Printer Roll
CHANGING THE PRINTER ROLL ■ Recommended size for thermal paper; 58mm (Width) / 65 m(Thickness) / 60mm (Maximum Diameter) - Page 8 ■ The procedures to Install label are follows Set the direction of the Label paper. 1 : None Peel Off mode 2 : Peel Off mode.
- Page 9 ■ It is recommended to tear off the ticket left to right.
-
Page 10: Name And Functions
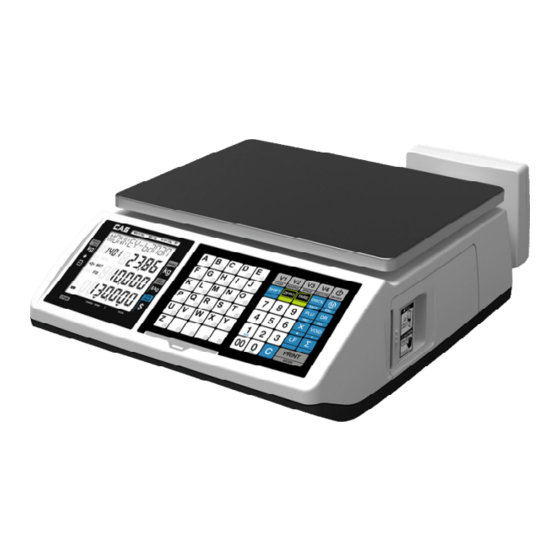
NAME AND FUNCTIONS OVERALL VIEW ■ B TYPE... - Page 11 ■ P TYPE...
- Page 12 ■ R TYPE ■ POLE TYPE INSTALLATIONS - Insert the post pipe into a post bracket. - Insert and fasten the display assembly screws.
- Page 13 DISPLAY Front (Clerk-side display) ex) 15kg Version ■ Pole Display ex) 15kg Version...
- Page 14 KEYBOARD...
- Page 15 Table 1 : Symbols on Display SYMBOLS DESCRIPTION Master mode MASTER (▼) Slave mode SLAVE (▼) AC power mode AC (▼) When blinks, there is some problem with paper roll in the printer. PAPER (▼) Prepack mode PREPACK (▼) Program mode MODE (▼) SHIFT key pressed To adjust the weight to zero.
- Page 16 Table 2 : Key Functions FUNCTIONS KEYS SALES MODE PROGRAM MODE Input all numerical data Input double zero Clear all of numbers input on the display Select clerk 1~8 Select alternate key functions *Double click: Set zero Set or clear tare value Go to program mode *Press the button for a while to enter the program mode.
- Page 17 FUNCTIONS KEYS SALES MODE PROGRAM MODE Open cash drawer *The cash drawer is opened no matter how the "opening time" is set. Feed the paper Make discount After pressing vendor key After pressing Put the ASCII code PAY: Choose the payment (Cash or Credit) Make discount for subtotal Go to the previous menu...
- Page 18 able 3 : PROGRAMMING Program Mode Menu Tree CODE Menu CODE Sub Menu 1110 PRICE UNIT PRICE CODE PLU CODE 1120 GROUP GROUP 1130 1140 NAME PLU NAME 1150 NO W NO W EIGHT ITEM (=COUNT ITEM) 1160 FIX PR FIXED PRICE 1170 PR BAR...
- Page 19 1420 TIME TIME 1430 PASS PASSWORD 1440 ER ALL ERASE PLU, CLERK and etc 1450 DEFAULT DEFAULT SET 1460 LICENSE MENU 1510 DUPLICATE RECEIPT 1520 IMAGE IMAGE LOGO PRINT 1530 BAR S SINGLE BARCODE PRINT 1540 BAR T TOTAL BARCODE PRINT 1550 OB PAY OBLIGATORY PAYMENT...
- Page 20 1718 FLINE2 FOOTER MESSAGE LINE 2 1721 HFORM1 FORMAT HEADER LINE 1 1722 HFORM2 FORMAT HEADER LINE 2 1723 HFORM3 FORMAT HEADER LINE 3 1700 LOGO 1724 HFORM4 FORMAT HEADER LINE 4 1725 HFORM5 FORMAT HEADER LINE 5 1726 HFORM6 FORMAT HEADER LINE 6 1727 FFORM1...
- Page 21 1C00 1C10 LOG SV SAVE LOG DATA 1D11 IP ADDRESS 1 1D12 IP ADDRESS 2 1D13 IP ADDRESS 3 1D14 IP ADDRESS 4 1D21 GATEWAY 1 1D22 GATEWAY 2 1D00 1D23 GATEWAY 3 1D24 GATEWAY 4 1D31 SUBNET MASK 1 1D32 SUBNET MASK 2 1D33...
-
Page 22: Saels Mode
I. Sales Mode Chapter 1. Basic Operation a. Turning the scale or backlight on / off b. Feeding the paper c. Opening cash drawer d. Self-test on printing e. Zero function f. Tare function Chapter 2. Sales for weighed item a. -
Page 23: Chapter 1 Basic Operation
Chapter 1. Basic Operation This chapter explains how to turn the scale or backlight on/off, feed the paper, open cash drawer, and do self-test on printer. a. Turning the scale or backlight on/off ① Press when the scale is turned off, then it starts counting 0~9. - Page 24 b. Feeding the paper ■ Feeding the paper is to make sure that printer paper is properly set and operated. ① Press when user needs to feed the paper. c. Opening cash drawer ■ This operation is to use the scale with cash drawer. The cash drawer is opened when the scale is connected both AC power and 12 V battery ■...
- Page 25 d. Self-test on printing ① Press while counting 0~9 after turning on the scale by pressing . Then, it automatically prints out the test report. ■ Printing self-test function may be also executed on test mode in "II. Programming mode". e.
- Page 26 f. Tare function ■ One Time Tare This function is to subtract the weight of actual tare. ① Place a tare on the platter. For example, 10g. Press the key. ② Subtract the tare weight. After setting the tare user may place item on the platter, and the scale reads only the weight of item.
- Page 27 ■ Successive Tare This function is to subtract two successive tares. The successive tare can be set in the calibration mode. Please contact your dealer if you want to use "Successive Tare". ① Place a tare on the platter. For example, 10g. Press the key.
- Page 28 Next two chapters, chapter 2 & 3, explain how to make sales transactions for weighed item and for non-weighed item respectively. User may use or not use PLU (Price Look-Up), which can be pre-programmed into the scales. Let’s look at how to operate the sales function of CAS CT100.
-
Page 29: Chapter 2 Sales For Weighed Item
PLU. CAS CT100 can store up to 1,000 PLUs in its memory. Look at how to make a sales transaction using a PLU down below. - Page 30 * If current PLU1 has fixed price attribute, which is set in the program mode user cannot change the unit price for PLU called up. However, if current PLU has non-fixed price attribute user may change (override) the unit price as his/her sales transaction requires. ①...
-
Page 31: Chapter 3 Sales For Non-Weighed Item
Chapter 3. Sales for non-weighed item a. Sales with free price(hand pricing) ① Simply input item's unit price and press key. Pressing displays initial "1". ② For sales of only 1 item just press because zero the quantity is already set to initial "1". Then, press to select the clerk 1. - Page 32 ④ Press to clear previous transaction and go back to initial weighing mode. b. PLU Sales ■ Please make sure current PLU is set with non-fixed price in the PLU program mode. Otherwise, user cannot change unit price for the PLU called up. ■...
- Page 33 ③ Input new price, 3.00. Then, press the number of non-weighed item unit. For example, 5 units. ④ Press to clear previous transaction and go back to initial weighing mode.
-
Page 34: Chapter 4 Clerk Operation
Chapter 4. Clerk Operation There are three different types of clerk modes. Maximum number of sales per CLERK : 99 Table 3: Clerk Mode (refer to clerk mode setting on page 88) Modes DESCRIPTION Receipt Printing All clerks can use the scale for a It prints ticket (receipt) including series of sales activity. - Page 35 ① Call up PLU of Beef Sirloin, #14 for clerk V1. ② Call up PLU of Beef Sirloin, #14 for clerk V1 ③ Select the clerk 1. ④ Remove Beef Sirloin from the platter. ⑤ Call up PLU of Turkey, #15 for clerk V2.
- Page 36 ⑥ Select the clerk V2. ⑦ Remove Turkey from the platter. ⑧ Call up PLU of Rib Eye, #17 for clerk V3. ⑨ Select the clerk V3.
- Page 37 ⑩ Remove Rib Eye from the platter. ⑪ Call up PLU of Potato(No weight Item), #1 for clerk V1. Customer purchase 3 packs of Potato. ⑫ Select the clerk V1. ⑬ Subtotal Mode. Get subtotal amount.
- Page 38 ⑭ Select appropriate clerk (V1, V2, V3, V4, V5 V6, V7, V8) Selecting V1 in the SUBTOTAL mode and pressing key prints out a ticket (receipt) for Clerk1 transaction(s). ※User may print out individual clerk's receipt by pressing individual clerk key (using key will show all the clerk’s receipt.
- Page 39 b. CLERK MODE 1 (Only one clerk operation) ① For example, put 2kg of item whose unit price is 3.99 and clerk V1 is making current transaction. ② Press to select the clerk 1. It automatically prints out ticket (receipt) for current transaction. ③...
- Page 40 ⑤ Sales List User may check through previous ① ~ ④ transactions (lists) before printing receipt, using • Pressing key will delete current transaction made in the sales list mode. (If user press again, the user can cancel the delete order) ⑥...
- Page 41 c. CLERK MODE 2 (Supermarket mode) • Only one transaction per clerk at a moment. • It prints ticket (receipt) only for one transaction per clerk. Assumption : a) Please go to clerk mode and set clerk mode as "2 (supermarket mode)". b) 2kg of Beef Sirloin (PLU setting # 14, €3.99/kg, No weight;...
- Page 42 d. CLERK MODE 3 (Label-1 mode) • Only one transaction per clerk at a moment. • It prints Label format receipt only for one transaction per clerk. Assumption : a) Please go to clerk mode and set clerk mode as "3 (Label-1 mode)". b) 2kg of Beef Sirloin (PLU setting # 14, €3.99/kg, No weight;...
- Page 43 e. CLERK MODE 4 (Label-2 mode) • Only one transaction per clerk at a moment. • It prints Label format receipt only for one transaction per clerk. Assumption : a) Please go to clerk mode and set clerk mode as "4 (Label-2 mode)". b) 2kg of Beef Sirloin (PLU setting # 14, €3.99/kg, No weight;...
- Page 44 f. CLERK MODE 5 (CT100 PLUS) • Only one transaction per clerk at a moment. • You can use to Label Print Mode.
-
Page 45: Chapter 5 Discount & Payment
Chapter 5. Discount & Payment a. Discount for a single of transaction ■ Instant Assumption : • Instant discount rate: 10% • Unit price of a commodity: €20 ① A customer purchased €20.00 for a commodity. ② Press to make €20.00 valued sales transaction for clerk V1. - Page 46 ④ Press to have the amount of Subtotal after instant 10% of discount for a single transaction. ※ CLERK"1"MODE : User doesn't need to select a "Clerk", . ■ Pressing is to finalize the discount for a single transaction and print out the receipt.
- Page 47 ② Press to make €20.00 sales transaction for clerk V1. ③ Press to provide 5% programmed discount for current single transaction. ④ Press to have the amount of subtotal after instant 5% of discount for a single transaction. ■ Pressing is to finalize the discount for a single transaction and print out the receipt.
- Page 48 b. Discount for subtotal Once the vendor gets the PLU information by pressing , the vendor may give some discount. Let's assume we apply a 6% discount (refer to II. program mode, SET 1) on a purchase of €170 valued commodity, for example. ①...
- Page 49 ④ Press to show the subtotal after programmed 6% discount. ※ You may apply "Instant discount" function to subtotal amount. ■ Pressing will to finalize the discount transaction and print out the receipt.
- Page 50 c. Payment ■ Payment function works only in the subtotal mode. Assumption : After clerk 1 has made three sales transactions the subtotal amount of € 46.48 comes up. Customer wants to pay € 20 in credit and rest in cash. ①...
- Page 51 ④ Press appropriate numeric keys to input the amount of payment in credit. ⑤ Press appropriate numeric keys to make rest of payment, €40.00 in cash. . Then, press the key.
- Page 52 ⑥ Then, the scale automatically prints out receipt. If user is using the scale with cash drawer connected the cash drawer is also automatically opened as the pulse length of cash drawer set when printing the receipt. Default for pulse length of cash drawer is 50m/sec (50/1,000 second). Please refer to page 74 for further detail of "pulse length setting"...
- Page 53 d. Duplicate receipt ■ If user sets duplicate receipt ("dbL") as "YES" in the OPTION setting of program mode the scale asks "DUP?" whenever printing receipt by using or PAY key. If user presses it prints the additional copy of receipt, and if press "C" key it does not print copy of receipt. ①...
-
Page 54: Chapter 6 Cash In /Out
Chapter 6. Cash In/Out Cash In/Out mode works only Sale mode. This function may use to put or get the cash from cash drawer. Assumption : • Put the cash € 1000.00 in the cash drawer. After put cash get the € 50.00 . ①... - Page 55 ④ Press key to enter the clerk select Mode. ⑤ Press to have the Cash in for clerk 1 as an example. Then the cash drawer opens and applicable Clerk will be set. ⑥ Press to have the Cash out for clerk 1 as an example.
-
Page 56: Chapter 7 Sales Transactions Simulation
Chapter 7. Sales Transactions Simulation Assumption : • Clerk sales mode: "0"- All clerks sales mode (Clerk mode on page 88) • Programmed discount: 5% (Discount percentage mode on page 66) • Obligatory payment function: "0"-disabled (Obligatory payment setting on page 84) •... - Page 57 ④ PLU 3 commodity (Tomato: €1.99/kg), Weight=0.500 kg, clerk 1 sales. ⑤ Programmed discount (5%) for PLU 3 commodity (Tomato), Weight=0.500kg, clerk 1 sales. ⑥ €5.00 of Non-weighed Free Price commodity (Garlic bread) x3, clerk 1 sales. ⑦ Subtotal, for example, €16.45. Total 4 transactions, and clerk 1 sales activities are shown on the display.
- Page 58 ⑧ Discount 10% for subtotal, €16.45. ⑨ To review sales list press ⑩ To review sales list, press . "dEL" means VOID function has deleted the second transaction. ⑪ To review sales list press . "p 3" means PLU 3 transaction has been completed. If user wants to exit from sales list press...
- Page 59 ⑫ If user presses to go back to sales mode the display is shown as right. ⑬ Two sales transactions for PLU 14 (€3.99/kg) and PLU 15 (€4.99/kg) with weight=0.500kg, clerk 1 sales activities. ⑭ Subtotal mode. Subtotal is €19.30, for example. Deleting sales transaction in subtotal ■...
- Page 60 ⑮ Go to the 6 sales transaction by using key to delete it. Press key to delete it. User may exit from this mode by pressing key. Payment of €10.00 in credit and rest in cash for total €17.30 for example. Input €10.00 of payment in credit.
- Page 61 ■ The receipt will be automatically printed and the scale is ready to exit to sales mode.
-
Page 62: Chapter 8 X Print (Label Only)
Chapter 8. X Print (CT100 PLUS) a. X print with free price(hand pricing) ① Simply input item's unit price and press key. Pressing displays initial "1". ② For sales of only 1 item just press because zero the quantity is already set to initial "1". Then, press to select the clerk 1. - Page 63 ⑤For more than single item sales, Simply input item's unit price and press and quantity. Then display will show total price. * User may make sales up to 1,999 items per transaction. ⑥ Press to clear previous transaction and go back to initial weighing mode. b.
-
Page 64: Chapter 9 Prepack Mode(Label Only)
Chapter 9. Prepack MODE (CT100 PLUS) ■ Prepack mode works only Clerk mode “5” (Label mode). ■ This function is only available for by-weight PLU. a. Prepack mode, it prints labels automatically. Prepack mode works like AUTO and Save mode. Prepack mode is very useful in backyard applications. -
Page 65: Ii. Program Mode
II. Program Mode Chapter 10. PLU Programming(Menu code 1100) a. Tare Validity Price Code Group Name b. Tax, Non Weighed, fixed PLU price, barcode printing, Demanded tare &Negative PLU c. Discount option d. One touch PLU data Erasing Chapter 11. Report(Menu code 1200) a. - Page 66 Chapter 14. OPTIONS (Menu code 1500) a. Duplicate receipt (Menu code 1510) b. Image (graphic logo) (Menu code 1520) c. Printing barcode for a single transaction (Menu code 1530) d. Printing barcode for total transaction (Menu code 1540) e. Obligatory payment (Menu code 1550) f.
- Page 67 Table 4 : Most commonly used keys in program mode FUNCTIONS KEYS PROGRAM MODE Get into program mode User can not get into program mode when ∑ (▼) is on, that is, previous transaction(s) is not completed. NOTE: Press the menu for a while to enter the program mode. ◀...
-
Page 68: Chapter 10 Plu Programming
Chapter 10. PLU Programming This chapter explains how to input all PLU-related data into the scale. User can store such information as price, code, group, name, tax rate group, weighed or non-weighed, fixed or not-fixed unit price, barcode printing etc. Look how to input price information on the scale. - Page 69 a. Tare, Price, Code, Group, Name, and Validity, ① To input PLU's preset tare press numeric keys you wish. For example, if you input 120g for PLU 1, 2 and 0 key. NOTE : It automatically saved ② Press to go to input unit price. To input PLU's unit price press numeric keys you wish.
- Page 70 ⑤ Press to save the name input. If user wants to continue to input other PLU name, exit PLU mode by pressing and press , or to move the other PLU number. ⑥ Press key to go to input validity. To input PLU's validity, press numeric keys.
- Page 71 ③ Press to go to fixed PLU price setting mode. This setting is to select either fixed or non-fixed PLU price. If user select fixed PLU price he/she can not change unit price when called up the PLU. User can select YES or no by pressing "1"...
- Page 72 c. Discount function of Target value - PLU can have maximum two Unit prices and it contains the weights and count information. The function is explained to enter the unit price about weight and count information ① To input PLU's target 1 numeric keys you wish. For example, if you input 500g for PLU 1, 5 and 00 key.
-
Page 73: Chapter 11 Report
Chapter 11. Report(Menu code 1200) This chapter explains how to print out all kind of reports in CT100. CT100 provides such reports as PLU data list, PLU, clerk, department, tax, hourly, sales reports. All of report always includes two special PLUs, PLU 0 and 1,001 on top of report. a. - Page 74 Table 6 : "C" key operation while printing Does "C"(cancel) key work while printing report? Report PLU data list Clerk Group Hourly sales Daily sales Weekly sales Monthly sales Total Closing b. PLU report (Menu code 1212) ■ PLU report always includes two special PLUs, PLU 0 and PLU 1,001. ■...
- Page 75 ⑤ Automatically print out the PLU report ranging from 1 to 20, and two special PLUs.
- Page 76 c. Clerk report (Menu code 1213) ■ This reports all sales-related activities for 8 clerks. ■ This report includes such information as the number of clients (customers), clerks total sales amount, the amount and number of canceled and negative transaction proportional percent of total sales amount, the amount and number of discount, transactions and the amount of sales in cash and credit respectively.
- Page 77 d. Group report(Menu code 1214) ⑦ Go to the group report mode.
- Page 78 e. Tax report (Menu code 1215) This report include 8 tax groups. Total tax amount and sales amount for each tax groups. ■ Tax report: total tax amount and sales amount for each 8 tax groups. f. Hourly, Daily, Weekly and Monthly sales, report The same process as group report ■...
- Page 79 g. Log report (Menu code 121A) CT100 can memory 1,000 transaction sales data. Each transaction data includes such a information as the sale data/time, PLU name, weight, unit price, total price. ⑧ Press key to go to Log report mode. ⑨...
- Page 80 i. Cash Flow report (Menu code 121C) CT100 can memory Cash In/Out data data. You can print Cash In/Out data. ① Press key to go to Cash report mode. ② Press key to print out the Cash flow report. j. Closing report (Menu code 1220) This will set all of accumulated sums to zero and close all of daily sales activities by printing report.
-
Page 81: Chapter 12 Set 1 (Discount, Barcode & Hw Setting)
Chapter 12. SET 1 (Discount, Barcode formatting & HW setting) This chapter explains how to set BAUD 1 rate, BAUD 2 rate, discount rate, barcode format for a single or total, and pulse length for operation cash drawer. In addition to these, it also describes how to printing darkness, input currency symbol or name, scale number, font type selection, and receipt number Table 7 : SET 1... - Page 82 ② Press to go to BAUD1 rate setting mode. User may input any one of options 9600~115200 To meet best usage environment. Please refer to "Table 7: SET 1" on page 66 for speed options. For example, select 57600. b. BAUD 2 rate (bps) (Menu code 1320) The same process as baud 1.
- Page 83 d. Barcode format setting for a single transactions (Menu code 1340) ① Press to go to Barcode format setting for a single transaction mode. ② Then, press again to get into input barcode String, using code table on page 114. Now you can input appropriate barcode string.
- Page 84 M : number of sales in receipt ▶ N : number of digit(s) ▶ M : constant digit(s) The parameter X specifies what will be printed. You can choose between several parameters and can set how many digits will be printed. The parameter N after parameter X is a obligatory! It give the number of digits which will be printed from value specified with parameter X.
- Page 85 ☞ Case 2 (EAN13 type) : Assumption: Weight -1.550 Department – 15 Clerk - 1 String- (total is 12 digits input)Then, Barcode -> 4 01550 62 15 1 9 (total is 12 digits input) ☞ Case 3 (UPCA type) : Assumption: Weight -1.025 Unit price - 2.28...
- Page 86 ☞ Case 4 (EAN8 type) : Assumption: Number of receipt - 000579 String- (total is 7 digits input) Then, Barcode -> 2 000038 (total is 7 digits input) ☞ Case 5 (CODE128 type) : Assumption: CODE of PLU - 551256 Weigh - 1.545 Unit price - 20.00 Total price - 30.90...
- Page 87 Lets try to set barcode for above case 1. User should input codes- 49, 87,53, 86, 85, 53- for barcode string, 1W5VU5. ③ Press the following keys to input barcode string. e. Barcode format setting for total (Menu code 1350) ①...
- Page 88 f. Setting pulse length to open cash drawer (Menu code 1360) ■ CT100 may be used with cash drawer 12 volts DC. ■ Default for pulse length of cash drawer is 50 msec (50/1000 second). However, user can select any of 1~99 ms, which is best fit for user's own cash drawer. ①...
- Page 89 g. Printing darkness setting(Menu code 1370) ① Printing darkness setting mode. User may set the darkness 1 and 3. NOTE: The default setting is 3. ② Press appropriate numeric key to set printing darkness of 1 and 3 key to save it. For example, set 2.
- Page 90 ③ Press to save it. i. Scale number (Menu code 1390) Scale number is for scale's characteristic. User can select 1~99. j. Font number (Menu code 13A0) Currently CT100 support 2 type fonts. Arial and New Times Roman. k. Speed PLU key (Menu code 13B0) Enter the direct PLU key Enter the PLU number on the applicable direct PLU key as the user want to save.
- Page 91 TYPE 0: Only one PLU will be saved in the direct PLU key. 1: Call the two PLUs by turns by double clicking 2: Call the two PLUs by turns by toggle Doblue click time Set the speed of double click in 0.x seconds l.
-
Page 92: Chapter 13 Set 2 (Date, Time & Default Setting)
Chapter 13. SET 2 (Date, Time, Password, erase PLU data & Default setting) This chapter explains how to set date and time, erase all of PLU data. In addition to these functions it also shows how to do one-touch default setting. a. - Page 93 ④ Press to go to Time Setting mode. ⑤ Press any numeric keys you wish to input. For example, lets input "09:53:00" as time, and press to save time. b. Password setting (Menu code 1430) ① Press to go to Password Setting mode. ②...
- Page 94 c. One touch PLU data erasing & default setting (Menu code 1430&1440) ① Press to go to erase PLU, header and footer message. ② Press to erase all PLU data. ③ Press to go to default setting mode. Then, press to set default.
- Page 95 d.License - If the user need special function, the user need to enter the License. ① Press to go to LICENSE. ② The display shows the information to print the Scale id or not. If the user do not want to print the Scale id, press ‘0’...
- Page 96 Default <SET1> ■ COM1 Baud Rate (bps) = 115200 ■ COM2 Baud Rate (bps) = 115200 ■ Discount Rate = 0% ■ Cash Drawer-Opening Pulse = 50ms ■ Printing Darkness = 3 ■ Currency = € ■ Font = 1 ■...
-
Page 97: Chapter 14 Options (Receipt Formatting)
Chapter 14. OPTIONS (Receipt Formatting) This chapter explains how to enable/disable back light and save PLU after transaction. duplicate receipt, printing barcode for a single transaction or total. It also explains how to enable/disable printing graphic logo on receipt, code of PLU and all of reports in the closing report. - Page 98 b. Image (graphic logo) (Menu code 1520) ① (Using key and go to option setting mode from main menu. And then press to get into image setting mode. ② User may select YES or NO by pressing "1" or "0" respectively. You can simply change the Setting by pressing “1”...
- Page 99 c. Printing barcode for a single of transaction(Menu code 1530) ① (Using key and go to option setting mode from main menu. And then press to get into barcode printing for a single of transaction setting mode. ② User may select YES or NO by pressing "1" or "0"...
- Page 101 e. Obligatory payment (Menu code 1550) ① (Using key and go to option setting mode from main menu. And then press to get into obligatory payment option mode. ② User may select YES or NO by pressing "1" or "0" respectively. You can simply change the Setting by pressing “1”...
- Page 102 g. Printing PLU code (Menu code 1570) ① (Using key and go to option setting mode from main menu. And then press to get into PLU code printing mode. ② User may select YES or NO by pressing "1" or "0"...
- Page 103 i. Printing tax (Menu code 1590) ① (Using key and go to option setting mode from main menu. And then press o get into tax printing mode. ② User may select YES or NO by pressing "1" or "0" respectively. You can simply change the Setting by pressing “1”...
- Page 104 k. Saving PLU (Menu code 15B0) ① (Using key and go to option setting mode from main menu. And then press to get into PLU saving mode. ② User may select YES or NO by pressing "1" or "0" respectively. You can simply change the Setting by pressing “1”...
-
Page 105: Chapter 15 Clerk
Chapter 15. CLERK (Menu code 1600) This chapter explains what kind of clerk modes there are and how different they are. In addition, it shows how to input name of clerk 1~8. a. Clerk mode (Menu code 1610) There are three different type of clerk modes. max number of sales per CLERK : 99 Table 3 : Clerk Mode Modes Description... - Page 106 b. Clerk name input: 1~8 (Menu code 1621~1628) ① Using key and go to clerk name setting mode from main menu. ② Press to get into clerk name 1 setting mode. User may input up to 16 characters in accordance to "code table" on page 114. For example, lets input "JOHN KIM"...
- Page 107 ⑤ Input clerk' name using appropriate numeric keys in accordance to "code table" on page 114. NOTE: will make a space. ⑥ Input clerk' name using appropriate numeric keys in accordance to "code table" on page 114. ⑦After finishing clerk name input save it by pressing * Whenever user wants to go back to main menu, press key.
-
Page 108: Chapter 16 Logo
Logo setting mode form main menu. ② Press to get into Headline 1 setting mode. ③ Press and input appropriate numeric keys to input codes in the headline 1. For example, lets input "CAS" at 16 space in the first headline. - Page 109 ④ Press appropriate numeric keys. ⑤ Press appropriate numeric keys. ⑥ Press appropriate numeric keys. ⑦ Press to save the first headline. User may press to go to input next headline (storable up to 6 header & 2 footer lines), and exit using...
- Page 110 ⑧ Enter Headline 1 font format setting value. For example, We can match 12 3’s meaning. Below as XY Z (123 = XYZ) 1 = Standard, 2 = Bold X(font type) 1 = Standard, 2= Double width, 3 = Double Height, 4 = Double Y(font size) 1 = Left, 2 = Center,...
-
Page 111: Chapter 17 Tax Rate Group
Chapter 17. TAX RATE GROUP (Menu code 1800) This chapter explains how to set tax rate group. User may set up to 8 different tax rate groups; 1~8, and then store a specific tax group when he/she inputs PLU data. NOTE: CT100 save tax rate automatically, so simply press to input the other tax rate. - Page 112 ④ User may press to go to input next tax rate group 2~8. And exit using ※Free Price, Free Count Tax number set ① Move to the FREE PRICE TAX number setting mode by pressing the arrow keys. Set the Tax number the user want, then press the ‘Enter’...
-
Page 113: Chapter 18 Test
Chapter 18. TEST (Menu code 1900) This chapter explains how to test hardware in the following aspects. ■ ADC (Analog Digital Converter): the digital value converted from analog value. ■ SPAN ■ Display : self-test ■ Keyboard ■ Memory ■ Printer : self-test ■... - Page 114 ③After making sure the ADC value press ) to get back to ADC test mode. Then press again to go to next test mode, SPAN test mode. ④ After making sure the SPAN value press ) to get back to SPAN test mode and press again to go to next Display test mode.
- Page 115 ⑦ Press to go to Printer self-test mode. Then, press to test the printer and show current voltage on the display.
- Page 116 ⑧ Press to go to Battery voltage mode. Then, press to see remained voltage percentage. For example, Pb battery currently remains 75%. ⑨ Press to go to Menu print mode. Then, press to test the printer and show All menu and menu code.
-
Page 117: Chapter 19 Group
Chapter 19. GROUP(Menu code 1A00) This chapter explains how to input group name. Users may input up to 1~99, which each group name may have up to 32 characters, using "code table" on 114 page. ① Press to enter main menu, and enter PASSWORD. - Page 118 ⑤ Press appropriate numeric keys. ⑥ Press appropriate numeric keys. ⑦ Press appropriate numeric keys. ⑧ Press to save. User may press to go to input next Group name (storable up to 99),and exit using...
-
Page 119: Chapter 20 Network (Ethernet Only)
Chapter 20. Network(Menu code 1D00) This chapter explains how to set IP, Gateway and Subnet mask (Ethernet option) Table 8 : Network setting example Example Remark Local IP 192.168.0.100 Gate way 192.168.0.1 Subnet mask 255.255.0.0 ① Press to enter main menu, and enter PASSWORD. - Page 120 ④ Press to save the first headline. And user may press to go to input next IP. Gateway and Subnet mark setting, and exit using * User should turn off and on the scale after network setting.
-
Page 121: Chapter 21 Wireless Lan (Ethernet Only)
Chapter 21. Wireless LAN (Menu code 1E00) This chapter explains how to set Wireless LAN setting. User may input SSID and Password using “code table” on 114 pages. (Ethernet option) Table 9 : WLAN WLAN Minimum Maximum Remark SSID Password 0 : No 1 : WEP64 2 : WEP128... - Page 122 ③ Press and input appropriate numeric keys to input codes in the SSID (refer to page 114). For example, lets input "CAS". ④ Press appropriate numeric keys. ⑤ Press appropriate numeric keys. ⑥ Press appropriate numeric keys.
- Page 123 ⑦ Press to save SSID. And user may press to go to next setting and exit using b. Password(Menu code 1E20) ① Press to get into WLAN Password setting mode. ② Press and input appropriate numeric keys to input codes in the Password (refer to page 114).
- Page 124 ④ Press appropriate numeric keys. ⑤ Press appropriate numeric keys. ⑥ Press appropriate numeric keys. ⑦ Press appropriate numeric keys.
- Page 125 ⑧ Press appropriate numeric keys. ⑨ Press appropriate numeric keys. ⑩ Press appropriate numeric keys. ⑪ Press appropriate numeric keys.
- Page 126 ⑫ Press to save the PASS. And user may press to go to next setting, and exit using c. Security type (Menu code 1E30) ① User may set the security type. Please refer to “ Table 9 : WLAN” on the page 103.
-
Page 127: Chapter 22 Floating Clerk (Rs-485 Only)
Chapter 22. FLOAT(Menu code 1B00) This chapter explains how to set RS-485 mode (RS-485 option) Table 10 : FLOAT FLOAT Minimum Maximum Remark Scale ID 0: Don’t use Type 1:Wired 2:Wireless User should turn off and on the scale BAUD Rate (bps; bit per sec.) 9600, 19200, 38400, 57600, 115200 after setting new “Baud Rate”. - Page 128 b. Scale ID ① Scale ID setting mode. User may set the scale ID 1~6 by pressing numeric keys. If you want to change the scale ID, exit main menu and enter this menu again. For example, set 1. “1” is master scale “2”...
-
Page 129: Chapter 23 Usb (Usb Only)
Chapter 23. USB (Menu code 1C00) This chapter explains how to save transaction data. Users may get the sales result up to 1,000. Which each data may have data such as date, time, PLU name, weight, unit price, total price and etc. -
Page 130: Chapter 24 Label Print(Label Only)
Chapter 24. LABEL (Menu code 1H00) This chapter explains how to set Label Print.(CT100 PLUS) ① Press key to enter main menu, and enter PASSWORD. And then press go to LABEL setting mode from main menu. a. LABEL SIZE ① Press to get into LABEL Size setting mode. - Page 131 ② Enter appropriate value for “Gap”. If you press “Tare”key, Gap value is adjusted automatically. c. Gap Sensor Test ① Press to get into Sensor Test mode. ② You can check Gap Sensor value.
- Page 132 d. Label Format Select ① Press Numeric key 1 ~ 5, you can select a Label Format. ※ Please see the table for Label Format. e. Label Paper Setting Set the direction of the Label paper. 1 : None Peel Off mode 2 : Peel Off mode.
- Page 133 LABEL FORMAT Label Number #1 (54mmⅹ40mm) Label Number #2 (54mmⅹ40mm) Label Number #3 (54mmⅹ40mm) Label Number #4 (54mmⅹ40mm) Label Number #5 (54mmⅹ25mm)
- Page 134 CODE [MS 1250 Windows Central Europe] Table 11 : Code [MS 1250 Windows Central Europe] “ & ‘ < > 100 101 102 103 104 105 106 107 108 109 110 111 112 113 114 115 116 117 118 119 120 121 122 123 124 125 126 127 128 €...
- Page 135 Code [MS 1251 Windows Cyrillic(Slavic)] Table 12: Code [MS 1251 Windows Cyrillic(Slavic)] “ & ‘ < > 100 101 102 103 104 105 106 107 108 109 110 111 112 113 114 115 116 117 118 119 120 121 122 123 124 125 126 127 128 Ђ...
- Page 136 Code [MS 1252 Windows Latin-1] Table 13 : Code [MS 1252 Windows Latin-1] “ & ‘ < > 100 101 102 103 104 105 106 107 108 109 110 111 112 113 114 115 116 117 118 119 120 121 122 123 124 125 126 127 128 €...
- Page 137 Code [MS 1253 Windows Greek] Table 14 : Code [MS 1253 Windows Greek] “ & ‘ < > 100 101 102 103 104 105 106 107 108 109 110 111 112 113 114 115 116 117 118 119 120 121 122 123 124 125 126 127 128 €...
- Page 138 Code [MS 1254 Windows Turkish] Table 15 : Code [MS 1254 Windows Turkish] “ & ‘ < > 100 101 102 103 104 105 106 107 108 109 110 111 112 113 114 115 116 117 118 119 120 121 122 123 124 125 126 127 128 €...
- Page 139 Code [MS 1257 Windows Baltic] Table 16 : Code [MS 1257 Windows Baltic] “ & ‘ < > 100 101 102 103 104 105 106 107 108 109 110 111 112 113 114 115 116 117 118 119 120 121 122 123 124 125 126 127 128 €...
- Page 140 CODE [FARSI FONT (IRAN)] Table 17 : Windows Codepage 1256 Code [FARSI FONT (IRAN)] NUL SOH STX ETX EOT ENQ ACK BEL BS HT LF VT FF DLE DC1 DC2 DC3 DC4 NAK SYN ETB CAN EM SUBESC FS RS US "...
-
Page 141: Error Messages
Please check the weight on the Weight Minus displayed with beep tray. When turning on the scale this message may be displayed Please call your CAS dealer. ERROR with continuous beep and it is automatically turned off. Please remove the item from INIT... -
Page 142: Specification
SPECIFICATION Table 19 : SPECIFICATION Model CT100 CAPACITY 6 kg 15 kg 30 kg Division, e= 1 / 2 g 2 / 5 g 5 / 10 g Minimum weight ※ 20 g 40 g 100 g Alpha-numeric LCD DISPLAY 5/5/6/7 (Tare / Weight / Unit Price / Total price) Thermal printer - 32 Characters per line Printing Speed : Max 75 mm/sec... - Page 143 Table List page Table 1: Symbols on display........................13 Table 2: Key Functions..........................14 Table 3: Clerk Mode........................32 & 99 Table 4: Most commonly used keys program mode.................61 Table 5: PLU Programming........................62 Table 6: "C" key operation while printing....................68 Table 7: SET1............................75 Table 8: Network setting example.......................113 Table 9: WLAN............................115 Table 10: RS-485............................121...
-
Page 144: I/O Interface
I/O INTERFACE ■ Ethernet Version I/O ■ RS485 Version I/O... -
Page 145: Cash Drawer Interface
CASH DRAWER INTERFACE ■ Using Voltage : 12V RJ-11 connector Not connected : 1 x (+12V) : 2 Ground : 3 Ground : 4 (+ 12V) : 5 Not connected : 6 x RS-232 & RS-485 INTERFACE RS-232 (cross connect) RS-485 (direct connect) 1,4,6,7,8,9 : Not connected 2 : RX DATA... -
Page 146: Usb Interface
USB INTERFACE ■ USB host ■ USB device RJ45 INTERFACE... -
Page 147: Program Menu Map
PROGRAM MENU MAP Table 20 : PROGRAM MENU MAP Mode Sub-Mode Menu On Display Page Mode Tare tArE Price PriCE Code CodE Group GroUP Validity vALid (CHAPTER 7) Name nAME Tax rate group 1~8 Weighed or non-weighed? no W Fixed or non-fixed unit price? FIX Pr Barcode printing? Pr bAr... - Page 148 Speed PLU key setting SP KEY Mode Quick PLU setting q-PLU Date dAtE Time tiME SET 2 Password to enter main menu PASS (CHAPTER 10) One touch PLU data Erasing Er ALL Default setting dEFAUL Duplicate receipt Image(Graphic Logo) iMAGE Printing barcode for a single transaction on bAr S receipt...
- Page 149 Header line 1 Format HForm1 Header line 2 Format HForm2 Header line 3 Format HForm3 Header line 4 Format HForm4 Header line 5 Format HForm5 Header line 6 Format HForm6 Footer line 1 Format FForm1 Footer line 2 Format FForm2 Group 1 tAX 1 Group 2...
- Page 150 SSID SSid WLAN Password PASS (CHAPTER 18) Security type tYPE Floating clerk mode TYPE BAUD rate bAUd Scale ID Is MASTER scale ? mAStEr Connect SLAVE 1 ? SLAvE1 Connect SLAVE 2 ? SLAvE2 RS-485 Connect SLAVE 3 ? SLAvE3 (CHAPTER 19) Connect SLAVE 4 ? SLAvE4...
- Page 151 MEMO...
- Page 152 MEMO...
- Page 153 MEMO...
- Page 154 뒷표지...
Need help?
Do you have a question about the CT100 Series and is the answer not in the manual?
Questions and answers