CAS CL7200 Series Enhanced Features Manual
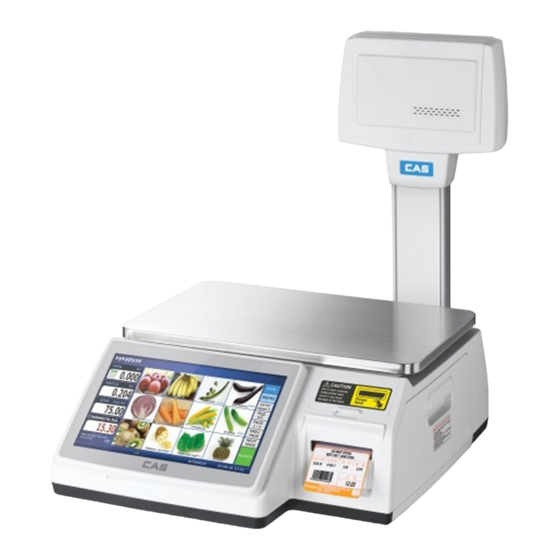
Touch screen label printing scale
Hide thumbs
Also See for CL7200 Series:
- User manual (248 pages) ,
- Service manual (47 pages) ,
- Owner's manual (228 pages)
Table of Contents
Advertisement
Quick Links
Advertisement
Table of Contents

Related Manuals for CAS CL7200 Series


Summary of Contents for CAS CL7200 Series
- Page 1 CL7200 Series (English) V3.02.5 (D)
-
Page 4: Table Of Contents
Table of Contents Features ......................2 Firmware Update Procedure ................1 USB Update ......................1 PC Update ......................3 Initialize Scale ....................6 Scale Data Backup to USB ................7 Restoring Scale Data from USB ................. 9 Edit Key Function ................... 11 PLU Speed Key .................... -
Page 5: Table Of Contents
Other Tips ....................75 Operations ......................75 Date Time Key ..................... 75 Programming ..................... 76 List Key ....................... 76 Menu 1150 PLU List ..................81 Tare Key ...................... 83 Menu 1873 Additional Item ................86 CAS Label Formats ..................87... -
Page 6: Features
Enhanced Speed Key programming and design. Increased Speed Key capacity. All CAS Standard Label Formats Built In including CAS 8030 and CAS 8040. PLU Ingredients changed from Indirect (linked) to Direct (part of PLU data). Maximum number of Ingredient characters increased to 2100. -
Page 8: Firmware Update Procedure
Firmware Update Procedure USB Update Firmware Update Procedure The firmware can be updated using a USB Flash Drive or a PC. Both methods are explained below. USB Update Note: USB flash drive format is FAT32. New firmware files will be located in a folder named “patch”. 1. - Page 9 Firmware Update Procedure USB Update 7. Press the Start button. The firmware will begin updating and the progress will be shown. When the firmware has finished updating you will see a pop up message stating "Update Completed". 8. Remove the USB Flash Drive 9.
-
Page 10: Pc Update
Ex.) If the scale’s IP Address is 192.168.0.82 you would type in ftp://192.168.0.82. 4. When ask for User ID and password type in the User ID as “cas” and the password as “cascl7200” and press the Log On button. (don’t use the quotation marks) 5. - Page 11 Firmware Update Procedure PC Update 6. Press the Power Switch to turn the scale off completely. 7. Press the Power Switch to turn the scale on. 8. The Update screen will be displayed. 9. Make sure there is an “X” beside the firmware version that is to be loaded. If not, simply touch the box with the firmware version number in it.
- Page 12 Firmware Update Procedure PC Update When the firmware has finished updating you will see a pop up message stating "Update Completed". 11. Press the OK button. The scale will power off after a few seconds. 12. Press the Power Switch to turn the scale on. Go to Menu 1867 to verify the updated firmware version.
-
Page 13: Initialize Scale
Initalize Scale Initialize Scale (Menu 1876) Using Menu 1876 is the same as loading the DATAROM in the CL5000 series. There will be occasions when the firmware update will require that the scale be initialized. This initialization is normally not required unless there are major changes to the firmware. -
Page 14: Scale Data Backup To Usb
Scale Data Backup to USB Menu 1877 Scale Data Backup to USB (Menu 1877) Almost all of the scale’s programmed information can be saved or backed up to a USB flash drive using Menu 1877. 1. Insert the USB flash drive in one of the two USB slots on the communications panel located in the scale base. - Page 15 Scale Data Backup to USB Menu 1877 4. Select the items for backup by entering a “Y” for the item or items. Note: Move cursor to Folder Name and press the "TEST" key to select all “Y”. 5. Press the SAVE button to start the backup. 6.
-
Page 16: Restoring Scale Data From Usb
Restoring Scale Date from USB Menu 1878 Restoring Scale Data from USB (Menu 1878) Data that has been backed up to a USB flash drive using the scale can be restored using Menu 1878. Caution: When restoring a backup folder that was made on a different scale please remember that the backup may contain information such as the Network Settings, Scale Number, Sales Reports, etc. - Page 17 Restoring Scale Data from USB Menu 1878 4. Select the items to be restored by placing a “Y” beside the item. Note:1.) Move cursor to PLU,Store Table, Settings and press the "TEST" key to select all “Y”. 2.) The restore function will only display the items that were selected during the backup process.
-
Page 18: Edit Key Function
Edit Key Function PLU Speed Key Edit Key Function The Edit Key can be used to directly edit the speed keys on the scale without entering the programming menu (M1161). This function can be used to add/edit PLU speed keys, function keys and category keys. Note: The Edit Key can be password protected using Menu 1855. - Page 19 Edit Key Function PLU Speed Key 3. Press the key to be edited. The edit window will open. Note: The speed key number will be automatically entered based on the key that was pressed in this step. 4. The default setting is for a PLU type key (1) already so all we need to do is enter the PLU number you want to assign to the key.
- Page 20 Edit Key Function PLU Speed Key 6. Enter the number for the Background Color for the key. 7. Press the Enter key. 8. Enter the number for the Font Color for the key. 9. Press the Enter key. 10. Enter the Cell Size for the key. 11.
- Page 21 Edit Key Function PLU Speed Key Note: If you are editing an existing keyboard there may be keys located adjacent to the key you are programming that already contain information. Use caution when changing the cell size or the change in cell size may result in those keys being overwritten.
-
Page 22: Function Key
Edit Key Function Function Key 16. Press the Escape Key or the Sales Mode key to see the results. 17. Press the Edit Key button to exit the Edit Key function and return to normal key operations. Function Key 1. Navigate to the screen that contains the key to be edited. 2. - Page 23 Edit Key Function Function Key 3. Press the key to be edited. The edit window will open. Note: The speed key number for the Function key will be automatically entered based on the key that was pressed in this step. 4.
- Page 24 Edit Key Function Function Key 6. Enter the Function Key code. Ex.) Key code 13 MISC WEIGHT 7. Press the Enter key. 8. Enter the number for the Background Color for the key. 9. Press the Enter key. 10. Enter the number for the Font Color for the key.
- Page 25 Edit Key Function Function Key 11. Press the Enter key. 12. Enter the Cell Size for the key. 13. Press the Enter key. Note: If you are editing an existing keyboard there may be keys located adjacent to the key you are programming that already contain information.
- Page 26 Edit Key Function Function Key 16. Enter the Function Key Name. 17. Press the Enter Key. 18. Press the Escape Key or the Sales Mode key to see the results. 19. Press the Edit Key button to exit the Edit Key function and return to normal key operations.
-
Page 27: Category Key
Edit Key Function Category Key Category Key 1. Navigate to the screen that contains the key to be edited. 2. Press the Edit Key on the right side of the screen. 3. Press the key to be edited. The edit window will open. Note: The speed key number for the Category key will be automatically entered based on the key that was pressed in this step. - Page 28 Edit Key Function Function Key 4. The cursor is already at the Category No. field so enter the Category Number you wish to use and press the Enter key. Note: Categories must already be programmed using Menu 1165. Ex.) Category 2 Produce 5.
- Page 29 Edit Key Function Category Key 7. Enter the Cell Size for the key and press the Enter key. Note: If you are editing an existing keyboard there may be keys located adjacent to the key you are programming that already contain information.
- Page 30 Edit Key Function Function Key 10. Program the next Category key (as required). 11. Press the Escape Key or the Sales Mode key to see the results. 12. Press the Edit Key button to exit the Edit Key function and return to normal key operations.
-
Page 31: Touch Screen Calibration
Touch Screen Calibration Category Key Touch Screen Calibration The touch screen calibration can be enabled using two different methods. First method is to use Menu 1871. The second method is done using the Power Switch. Method 1 1. Power the scale Off using the main power switch. 2. -
Page 32: Network Setting
Network Setting Wired LAN Network Setting (Menu 1910) Wired LAN Menu 1912 DHCP Menu 1912 is used to automatically configure the scale’s IP address. 1. Connect the scale to the network. 2. Access Menu 1912. 3. Enter a “Y” and press the Enter key. - Page 33 Network Setting Wired LAN 4. Scale will return to Menu 1910. 5. Press Sales Mode key. 6. In the information bar you should see “CONN” while the scale is obtaining an IP address. 7. When the scale is connected to the network you will see a pop up window with the scale’s IP address and “CONN”...
-
Page 34: Menu 1913 Ip
Network Setting Menu 1913 IP Menu 1913 IP Menu 1913 is used to manually configure the scale IP address. 1. Connect the scale to the network. 2. Access Menu 1913. 3. Enter the scale IP address and press the Enter key. 4. - Page 35 Network Setting Menu 1913 IP 9. Scale will return to Menu 1910. 10. Press Sales Mode key. 11. In the information bar you will see “LAN” when the scale is connected to the network. Notes: 1.) You cannot access Menu 1913 if the DHCP setting in Menu 1912 is set to Yes.
-
Page 36: Menu 1918 Ping Test
Network Setting Menu 1918 Ping Test Menu 1918 Ping Test You can verify the network connection using the Ping Test. The Ping Test can be performed from any scale that is connected in the network. A scale cannot ping itself but it can ping other scales on the network. 1. - Page 37 Network Setting Menu 1918 Ping Test 3. Press the Enter Key. 4. Press the Stop button to end the Ping Test. The scale will return to Menu 1910. 5. Press the Sales Mode key to return to normal operations.
-
Page 38: Wireless Lan
Network Setting Menu 1917 Wireless LAN Use Wireless LAN Menu 1917 WLAN Use Before you can use Wireless Networking you must enable the Wireless LAN module in the scale. To do this we can use Menu 1917. Note: If the Wireless LAN module is not installed in the scale you will not be able to access Menu 1916 or Menu 1917. -
Page 39: Menu 1916 Wlan Setting
Network Setting Menu 1916 WLAN Setting (DHCP Enabled) Menu 1916 WLAN Setting DHCP Enabled (Automatic IP Configuration) Menu 1916 is used to program the Wireless LAN module information. Note: You cannot access Menu 1916 WLAN Setting if Menu 1917 WLAN Use is set to “N”. - Page 40 Network Setting Menu 1916 WLAN Setting (DHCP Enabled) 3. Enter the Security Key for this SSID then press the Enter key. 4. In the Operation Mode field enter a “1” for Infrastructure and press the Enter key.
- Page 41 Network Setting Menu 1916 WLAN Setting (DHCP Enabled) 5. The scale will return to Menu 1910. Press the Sales Mode key. 6. You should see the main operator screen with “CONN” in the information bar. 7. If Menu 1912 DHCP is set to a “Y” and the Wireless AP has DHCP enabled the scale will automatically obtain an IP address and you will see a pop up window with the scale’s IP address in it and “CONN”...
- Page 42 Network Setting Menu 1916 WLAN Setting (DHCP Disabled) DHCP Disabled (Manual IP Configuration) 1. Access Menu 1916. 2. With the cursor in the SSID field press the Tare Key. You should see a list of near by SSID’s with their Security Types (if any) and a Signal Strength. Locate the SSID that you want to connect to and press the SSID name.
- Page 43 Network Setting Menu 1916 WLAN Setting (DHCP Disabled) 3. Enter the Security Key for this SSID then press the Enter key. 4. In the Operation Mode field enter a “1” for Infrastructure and press the Enter key.
- Page 44 Network Setting Menu 1916 WLAN Setting (DHCP Disabled) 5. The scale will return to Menu 1910. Press the Sales Mode key. 6. You should see the main operator screen with “WLAN” in the information bar. 7. Since Menu 1912 DHCP is set to a “N” you will need to program the scale’s IP configuration manually using Menu 1913 IP.
- Page 45 Network Setting Menu 1916 WLAN Setting (DHCP Disabled) 12. Enter DNS Server 1 IP address and press the Enter key. (optional) 13. Enter DNS Server 2 IP address and press the Enter key. (optional) 14. Enter TCP Port address and press the Enter key. (optional) 15.
- Page 46 Network Setting Menu 1916 WLAN Setting (DHCP Disabled) 17. In the information bar you will see “WLAN” and the scale should be connected to the network.
-
Page 47: Plu Image Display
PLU Image Display Adding PLU Images to the Scale (USB Method) PLU Image Display The CL7200 can store and display image files. These image files can be attached to PLU’s for display in the customer display when the PLU is recalled. The images can also be displayed on the operator’s keyboard. - Page 48 PLU Image Display Adding PLU Images to the Scale (USB Method) 2. Copy the image files to the image folder. 3. Power the scale Off. 4. Insert the USB flash drive in one of the two USB connectors on the scale. 5.
- Page 49 PLU Image Display Adding PLU Images to the Scale (USB Method) 7. Press the Start button. The images will transfer to the scale and the progress will be shown. 8. When the transfer is complete you will see a pop up message “Update Completed!”...
-
Page 50: Adding Images To A Plu
PLU Image Display Adding PLU Images to a New PLU Adding Images to a PLU After images have been loaded into the scale they can be attached to PLU’s using Menu 1120 New/Edit. Images can be added while programming new PLU’s or they may be added to existing PLU’s. - Page 51 PLU Image Display Adding PLU Images to a New PLU 4. Enter the remaining PLU information until you get to the Image File prompt. 5. If you know the name of the image file you want to use enter it now. If you don’t know the name of the image file press the Test key and you will see a list of the image files that are stored in the scale.
- Page 52 PLU Image Display Adding PLU Images to a New PLU 7. Press the Save key. 8. Press the Sales Mode key. (PLU was already assigned to speed key.) 9. Recall the PLU that was just programmed and you should see the image you added in the customer display.
-
Page 53: Existing Plu
PLU Image Display Adding PLU Images to an Existing PLU Existing PLU To add an image to an existing PLU you could use this procedure. 1. Access Menu 1120 New/Edit PLU 2. Enter the Department Number and press the Enter key. 3. - Page 54 PLU Image Display Adding PLU Images to an Existing PLU 5. Press the Down Arrow key at the bottom right one time. 6. Press the Image File text and you will go to the Image File prompt. 7. If you know the name of the image file you want to use enter it now. If you don’t know the name of the image file press the Test key and you will see a list of the image files that are stored in the scale.
- Page 55 PLU Image Display Adding PLU Images to an Existing PLU 8. Use the Up and Down Arrow buttons at the bottom right side of the screen to find the image file that you want to use and then press the image file name.
- Page 56 PLU Image Display Adding PLU Images to an Existing PLU 11. Recall the PLU that was just programmed and you should see the image you added in the customer display.
-
Page 57: Advertisements
Advertisements Adding Files to the Scale (USB Method) Advertisements The CL7200 can store and display movie files that can be programmed to run in the customer display during scale idle time. Image files stored in the movie folder of the scale can be linked together to create slide shows that can also run in the customer display. - Page 58 Advertisements Adding Files to the Scale (USB Method) 2. Copy the movie files and slide show image files to the movie folder. 3. Power the scale Off. 4. Insert the USB flash drive in one of the two USB connectors on the scale. 5.
- Page 59 Advertisements Adding Files to the Scale (USB Method) 7. Press the Start button. The images will transfer to the scale and the progress will be shown. 8. When the transfer is complete you will see a pop up message “Update Completed!”...
-
Page 60: Creating An Advertisement
Advertisements Video Configuration Creating an Advertisement Video Configuration (Menu 1431) The Video Configuration menu is used to program the time that the advertisements will wait after the scale reaches an idle condition before they begin to display. The range is input in seconds and has a range of 0 to 6000. Notes: 1.) If a “0”... - Page 61 Advertisements Creating an Advertisement 3. Scale will return to Menu 1430. Creating an Advertisement (Menu 1432) There are two types of advertisements that can be created using Menu 1432. You can create an ad using movie file(s) or you can create a slide show using image files.
-
Page 62: Create Ad Playlist
Advertisements Create an Ad (Single File) Using a Single File 1. Access Menu 1432 Create Ad Playlist 2. Enter the Message No. (1-5) and press the Enter key. 3. With the cursor in the File Name field press the Test key. You will see a list of the files that are available for use in advertisements. - Page 63 Advertisements Create an Ad (Single File) 4. Use the up and down arrow keys at the bottom right of the screen to navigate to the file name you wish to use and press the file name. You will see a “V” and a number in parenthesis “(1)” beside the file name that you select.
- Page 64 Advertisements Create an Ad (Single File) 7. We want to make this ad active, so in the Use Message field press the “1 Yes” key and press Enter. 8. The Image Show Time field is used when more than one file is used in an ad.
- Page 65 Advertisements Create an Ad (Single File) 10. The ad can be scheduled to display on a selected date and time or it can be displayed all of the time. (during scale idle only) To use the schedule enter a “Y” or press the “1 Yes” key and then press Enter. 11.
- Page 66 Advertisements Create an Ad (Single File) 12. For example, to make the ad be active on Wednesday through Saturday enter “0001111” and press the Enter key. 13. Enter the Start Date (MMDDYY) of the ad and press Enter. 14. Enter the End Date (MMDDYY) of the ad and press Enter.
- Page 67 Advertisements Create an Ad (Single File) 15. Enter the Time of Day (HHMMSS) that the ad will start displaying and then press the Enter key. 16. Enter the Time of Day (HHMMSS) that the ad will end displaying and then press the Enter key. 17.
-
Page 68: Using A Playlist
Advertisements Create an Ad (Using Playlist) Using a Playlist 1. Access Menu 1432 Create Ad Playlist 2. Enter the Message No. (1-5) 3. Press the Enter key. - Page 69 Advertisements Create an Ad (Using Playlist) 4. With the cursor in the File Name field press the Test key. You will see a list of the files that are available for use in advertisements. 5. Use the up and down arrow keys at the bottom right of the screen to navigate to the file names you wish to use in the playlist and press the file names in the order you would like them to display.
- Page 70 Advertisements Create an Ad (Using Playlist) 7. You should see the string of file names you selected in the File Name field. Press the Enter key. 8. We want to make this ad active, so in the Use Message field press the “1 Yes”...
- Page 71 Advertisements Create an Ad (Using Playlist) 10. In this example we want each of the images to display for 25 seconds. Enter “000025” (HHMMSS) and then press the Enter key. 11. The ad can be scheduled to display on a selected date and time or it can be displayed all of the time.
- Page 72 Advertisements Create an Ad (Using Playlist) 13. Enter the days of the week that the ad will be active on by entering a “1” for active days and a “0” for inactive days. 14. For example, to make the ad be active on Monday through Friday enter “0111110”.
- Page 73 Advertisements Create an Ad (Using Playlist) 16. Enter the Start Date (MMDDYY) of the ad and press Enter. 17. Enter the End Date (MMDDYY) of the ad and press Enter. 18. Enter the Time of Day (HHMMSS) that the ad will start displaying and then press the Enter key.
- Page 74 Advertisements Create an Ad (Using Playlist) 19. Enter the Time of Day (HHMMSS) that the ad will end displaying and then press the Enter key. 20. Scale will return to Menu 1430. 21. Press the Sales Mode key to return to normal operations.
-
Page 75: Remote Control Function
Remote Control Function Install Viewer Remote Control Function The CL7200 can be controlled remotely from a PC. Using the remote control function you can operate, program or troubleshoot the scale. To use the remote control function a third party viewer is required. For example, you could use a viewer such as the TightVNC viewer.(download from www.tightvnc.com). - Page 76 Remote Control Function Install Viewer 4. Click on the Custom button. 5. Click on the drop down arrow beside “TightVNC Server”. You will see a drop down menu. 6. Select “Entire feature will be unavailable” for the “TightVNC Server”.
- Page 77 Remote Control Function Install Viewer 7. You will see an “X” beside the “TightVNC Server” now. Click the Next button. 8. Select the Additional Tasks and the press the Next button. Note: The selections shown are the default settings. 9. Press the Installation button and when the pop up appears press Yes.
- Page 78 Remote Control Function Install Viewer 10. Installation is complete. 11. Click the Finish button to exit the installation process.
-
Page 79: Enable Remote Control (Cl7200)
Remote Control Function Enable Remote Control on Scale Enable Remote Control (CL7200) 1. To turn on the "Remote Control" function access Menu 1920 Application. 2. Press the Page Down key two times. 3. Press the Down Arrow Cursor to move the cursor to Use Remote Control field. - Page 80 Remote Control Function Enable Remote Control on Scale 4. Press the “1 Yes” key. 5. Press the Save key. 6. Scale will return to Menu 1900. 7. Press the “Sales Mode” key. You should see a bright red “R” in the information bar at the bottom of the operator display beside the date.
-
Page 81: Connecting To The Cl7200
Remote Control Function Connecting to the Scale Connecting to the CL7200 1. Open the VNC viewer. 2. In the Remote Host window, type in the CL7200’s IP address followed by two colons (:) and the port number 5902. 3. Press the Connect button. You should see both of the CL7200’s displays. You can now control the scale using the mouse connected to your PC. -
Page 82: Other Tips
Other Tips Operations - Using the Date/Time Key Other Tips Operations Date Time Key Using the Date Time key on the Function Keyboard you can display different scale status information on the information bar. -
Page 83: Programming
Other Tips Programming - Using the List Key Programming List Key In the programming mode the List key can be used for a couple of different special functions. In most menu’s pressing the List key will give you a list of the available programming prompts in that menu. - Page 84 Other Tips Programming - Using the List Key 4. With the cursor in the PLU Type field, press the List Key. 5. You will see page 1 of the list of prompts available for programming PLU’s. Press the Price prompt text. 6.
- Page 85 Other Tips Deleting Information Using the List Key Deleting Information from a List You can also use the List key when deleting information. For example, you might need to delete a Group from the scale but when you are prompted to enter the Group No.
- Page 86 Other Tips Deleting Information Using the List Key 4. You will see the list of all the Groups in the scale. Navigate to the Group you want to delete. In this example we want to delete “Lamb Flank” so touch the Lamb Flank text and it will be deleted. 5.
- Page 87 Other Tips Deleting Information Using the List Key 7. You will see the Group list and Group 7 Lamb Flank has been deleted. 8. Press the Sales Mode key to return to normal operations. Note: You can not use the Menu List Function to delete information. For example, you could not use Menu 1222 List Group to delete a Group.
-
Page 88: Menu 1150 Plu List
Other Tips Using Menu 1150 PLU List Menu 1150 PLU List Once the PLU list is displayed you can press any PLU in the list and all of the PLU’ programmed information will be displayed in a list format. 1. Access Menu 1150. 2. - Page 89 Other Tips Using Menu 1150 PLU List 4. Navigate to the PLU that you wish to see information on and press the PLU Name. 5. Press the Down Arrow on the bottom right of the screen to see the rest of the programmed information.
-
Page 90: Tare Key
Other Tips Using Tare Key in Menu 1120 Tare Key In Menu 1120 New Edit PLU information you can use the Tare key to provide a list of the PLU’s in the scale. This allows you to view the list of PLU’s to edit. For example you may have forgotten the exact PLU number you wanted to edit or there may be more than one PLU with the same first name and you want to make sure you edit the correct one. - Page 91 Other Tips Using Tare Key in Menu 1120 4. Press the Save key to display all of the available PLU’s in the Department selected. 5. Navigate to the PLU that you want to edit and press the PLU Name. (Ex.Select PLU #4 Beef for Fajitas)
- Page 92 Other Tips Using Tare Key in Menu 1120 6. Press the Enter key to begin programming the PLU information. 7. When finished programming PLU information press the Sales Mode key to return to normal operations.
-
Page 93: Menu 1873 Additional Item
Other Tips Menu 1873 Additional Item Menu 1873 Additional Item An item has been added to Menu 1873 Sale Setup. On page 5/5 of Menu 1873 you will find a setting for “Show Number Key On Sale”. When this setting is set to a “Y” the Function Keyboard will be recalled with the PLU. -
Page 94: Cas Label Formats
Embedded Formats CAS Label Formats All of the standard CAS Label formats are included as part of the 50 label formats that are embedded in the CL7200. The chart below shows the Label Format numbers in the top gray area and the Label Name in the bottom gray area. - Page 95 CAS Label Formats Embedded Formats CAS 8010 C.O.O. (60x40) CAS 8020 C.O.O. (60x60) CAS 8030 C.O.O. (60x50) CAS 8040 C.O.O. (60x60) CAS 8020-1 (60x60) CAS 8020-2 (60x60)
- Page 96 CAS Label Formats Adding Custom Label Formats (USB Method 1) Loading Custom Labels The CL7200 can store up to 20 custom label formats. The label formats can be created using the CL-Works Pro software. The created formats can be downloaded and stored in the scale using a USB flash drive or the CL-Works Pro software.
- Page 97 CAS Label Formats Adding Custom Label Formats (USB Method 1) 5. Copy the Label Format files (*.lfm) to the label folder. Note: Maximum number of custom label formats is 20. 6. Remove the USB flash drive. 7. Turn the CL7200 Off.
- Page 98 CAS Label Formats Adding Custom Label Formats (USB Method 1) 11. Press the “Start” button. The Label Format files will transfer to the scale and the progress will be shown. 12. When the transfer is complete you will see a pop up message “Update Completed!”...
- Page 99 CAS Label Formats Adding Custom Label Formats (USB Method 1) 15. Access Menu 1876 Initialize Settings. 16. Press the “Page Down” key twice. 17. Press the “Down Arrow” key once. The cursor should be at the Custom Label Form prompt.
- Page 100 CAS Label Formats Adding Custom Label Formats (USB Method 1) 18. Press the “Y” or “1 Yes” key to select the Custom Label Form. 19. Press the “Save” key. 20. The scale will reboot and the Label Format files will be available for...
- Page 101 CAS Label Formats USB Method 2 Saving Custom Label Formats USB Method 2 The second USB method allows you to save existing custom label formats already in the scale and then restore them. This method uses Menu 1877 Backup to USB Memory and Menu 1878 Restore From USB Memory.
- Page 102 CAS Label Formats USB Method 2 Saving Custom Label Formats 4. To backup or save the custom label formats make sure the cursor is located in the PLU, Store Table, Settings item and press the “Y” or “1 Yes” key.
- Page 103 CAS Label Formats USB Method 2 Restoring Custom Label Formats Restoring Custom Label Formats (Menu 1878) The custom label formats that have been backed up to a USB flash drive using Menu 1877 can be restored using Menu 1878. 7. Insert the USB flash drive with the custom label formats in one of the two USB slots on the communications panel located in the scale base.
- Page 104 CAS Label Formats USB Method 2 Restoring Custom Label Formats 10. Select the items to be restored by pressing the “Y” or “1 Yes key. 11. Press the “Save” button to start the Restore process. After the Restore is completed the scale will automatically reboot and all...
- Page 105 CAS Label Formats Adding Custom Label Formats Using CL-Works Pro CL-Works Pro Method Custom label formats can be created and downloaded using the CL-Works Pro software. This procedure explains the process of downloading the labels to the CL7200. It does not explain the creation of labels using the software.
- Page 106 CAS Label Formats Adding Custom Label Formats Using CL-Works Pro 3. Verify that the scale that you want to send the label format to is connected to the PC by using the Connect Test function. 4. Click on the “Label” icon to open the Label Editor.
- Page 107 CAS Label Formats Adding Custom Label Formats Using CL-Works Pro 6. Click on the file and then click on the “Open” button. You should see the label file in the label editor window. 7. Click on the “Transfer” icon. If only have one scale the label format will automatically begin downloading.
- Page 108 CAS Label Formats Verifying Custom Label Formats Using CL-Works Pro Verifying Label Formats Using the CL-Works Pro software we can verify which label formats are stored in the scale. This may become necessary if there are multiple custom formats used.
- Page 109 CAS Label Formats Verifying Custom Label Formats Using CL-Works Pro 3. Verify that the scale that you want to verify label formats in is connected to the PC by using the Connect Test function. 4. Click on the “Label” icon to open the Label Editor.
- Page 110 CAS Label Formats Verifying Custom Label Formats Using CL-Works Pro 6. The upload will begin and the progress will be shown. 7. When the upload has completed press the “Close” button. 8. You should see a file explorer window with the Upload folder in it.
- Page 111 CAS Label Formats Verifying Custom Label Formats Using CL-Works Pro 9. Double click on the Upload folder to open it. You will see a list of the label formats that are stored in the scale listed by their label numbers.
- Page 112 CAS Label Formats Deleting Custom Label Formats Using CL-Works Pro Deleting Label Formats There may be a need to remove an existing label format from the scale to make room for a different one. This can be accomplished by using the CL-Works Pro Label Editor software.
- Page 113 CAS Label Formats Deleting Custom Label Formats Using CL-Works Pro 3. Verify that the scale that you want to delete label formats in is connected to the PC by using the Connect Test function. 4. Click on the “Label” icon to open the Label Editor.
- Page 114 CAS Label Formats Deleting Custom Label Formats Using CL-Works Pro 6. You will see a pop up asking you to select the label formats that you want to delete in the scale. 7. If you want to delete a single label format, enter the number in the box.
- Page 115 CAS Label Formats Deleting Custom Label Formats Using CL-Works Pro 8. Press the “OK” button. The communication window will appear and the label format will be deleted from the scale. 9. You can use the verification procedures explained in the previous section...
- Page 116 LSM-805 Original 6308...
Need help?
Do you have a question about the CL7200 Series and is the answer not in the manual?
Questions and answers