
Related Manuals for Fujitsu PRIMERGY PG-FC202


Summary of Contents for Fujitsu PRIMERGY PG-FC202
- Page 1 B7FY-1721-02 ファイバーチャネルカード取扱説明書 Fibre Channel Controller User’s Guide (PG-FC202)...
- Page 2 はじめに 2007 安全にお使いいただくために 注意 VCCI 本製品のハイセイフティ用途での使用について...
- Page 3 本書の表記 ■ 警告表示 警告 注意 ■ 本文中の記号 記号 意味 ■ キーの表記と操作方法 Ctrl Enter Ctrl + F3 Shift + ...
- Page 4 ■ コマンド入力(キー入力) CD-ROM CD-ROM [CD-ROMドライブ]:\setup.exe ■ 製品の呼び方 製品名称 本文中の表記 ® ® Microsoft Windows Server 2003 R2, Standard Edition ® ® Microsoft Windows Server 2003 R2, Enterprise Edition Windows Server 2003 ® ® Microsoft Windows Server 2003, Standard Edition ® ® Microsoft Windows Server 2003, Enterprise Edition...
- Page 5 安全上のご注意 ■ 本製品の取り扱いについて 警告 注意 ...
- Page 6 梱包物の確認 ・ ファイバーチャネルカード本体(本製品) ・ ドライバディスク 1 枚(CD-ROM) - FC Controller (PG-FC202) Drivers CD ・ 取扱説明書(本書) ・ LowProfile 用ブラケット Microsoft、Windows、Windows Server は、米国 Microsoft Corporation の米国およびその他の国におけ る登録商標または商標です。 その他の各製品は、各社の商標、または登録商標です。 その他の各製品は、各社の著作物です。 All Rights Reserved, Copyright© FUJITSU LIMITED 2006-2007...
-
Page 7: Table Of Contents
目次 1 概要 ..........1.1 カードについて... -
Page 9: カードについて
概要 この章では、ファイバーチャネルカードについて説明しています。 カードについて PRIMERGY 4Gbps 項目 機能・仕様 PG-FC202 Fabric FC-AL Arbitrated Loop PCI-Express 1.0a 1/2/4Gbps LC connector/non-OFC/multimode 167.64mm 64.42mm Green Yellow 状態 ブラケットの背面 Yellow Yellow Green 1Gbps 2Gbps 4Gbps 1 概要 ... -
Page 10: ドライババージョンの確認方法
確認するドライバ(Emulex LightPulse ***** S***port Miniport Driver)をダブルクリックします。 [ドライバ]タブをクリックします。 Windows Server 2003 *.1.30.9 Windows 2000 Server 5.5.31.0 [ドライバの詳細]をクリックします。 「ドライバファイル」にある「***lpxnds.sys」のファイルバージョンを 確認します。 Windows Server 2003 *-1.30.9 ***** Windows 2000 Server 5-5.31.0 ***** 確認するドライバ(Emulex PLUS 内の ElxPlus または Emulex PLUS) をダブルクリックします。 [ドライバ]タブをクリックします。 *.1.0.* [ドライバの詳細]をクリックします。 「ドライバファイル」にある「***\elxplus.sys」のファイルバージョン を確認します。 *-1.00A* ***** http://primeserver.fujitsu.com/primergy/... -
Page 11: Eternus との接続について
ETERNUS との接続について ETERNUS ■ FC-AL 接続(直接接続) ETERNUS PRIMERGY ETERNUS3000/ ETERNUS6000 ファイバーチャネルカード ETERNUS3000 モデル 50 のポート拡張機構を使用した場合も FC-AL 接続です。 ■ Fabric 接続 ETERNUS ETERNUS PRIMERGY ETERNUS3000/ SN200 series ETERNUS6000 (ファイバーチャネルスイッチ) ファイバーチャネルカード カードを交換した場合の注意事項 本ドライバ使用時の注意事項 ■ イベントログについて elxplus ID (1) ( elxplus /AUXSOURCE= : , ********** 1 概要 ... -
Page 12: サーバ本体への搭載
サーバ本体への搭載 この章では、サーバ本体への搭載方法について説明しています。 警告 LowProfile LowProfile... -
Page 13: ケーブルの接続
ケーブルの接続 この章では、ケーブルの接続時の留意事項について説明しています。 ケーブル側のコネクタには、挿入方向を決めるための突起があります。ケーブルを 接続するときはこの突起の向きを確認し、コネクタを奥までしっかりと差し込んで ください。 注意 3 ケーブルの接続 ... -
Page 14: ドライバとユーティリティのインストール
ドライバとユーティリティのインス トール この章では、ドライバとユーティリティのインストール方法について説明しま す。 ドライバインストール(カードの追加を含む)を行う場合は、ケーブルをファイ バーチャネルカードから外し、すべて管理者権限でログオンして行ってください。 ファイバーチャネルカードを追加で搭載する場合は、すでに搭載済みのファイバー チャネルカードも同時に更新する必要があります。型名に関係なくすべてのファイ バーチャネルカードに対してドライバの更新を行ってください。 HBAnyware P.14 HBAnyware P.15 自動インストール HBAnyware AutoPilot Installer CD-ROM CD-ROM Windows Server 2003 Storportminiportkit_1-30a9-1e.exe Windows 2000 Server ScsiPortMiniportKit_5-31a0-1e.exe Next Install Windows Server 2003 Storport Miniport Driver kit 1.30a9-1e Windows 2000 Server SCSIport Miniport Driver kit 5.31a0-1e... -
Page 15: 手動インストール
Start AutoPilot Installer Finish AutoPilot Installer Autopilot Installer Warning Monitoring the Installation 1. 「次へ」をクリックします。 2. 「デバイスに最適なドライバを検索する」を選択し、 [次へ]をクリックしま す。 3. 「CD-ROM ドライブ」にチェックし、 [次へ]をクリックします。 4. [次へ]をクリックします。 5. [完了]をクリックします。 System Settings Change P.10 4.3 Firmware BootBIOS P.21 4.4 HBAnyware P.24 4.5 AutoPilot Installer P.25 手動インストール... - Page 16 ■ Emulex PLUS のインストール CD-ROM CD-ROM CD-ROM 32Bit [CD-ROMドライブ]:\Drivers\W2K3\Storport\x86 64Bit [CD-ROMドライブ]:\Drivers\W2K3\Storport\x64 Emulex PLUS ■ Storport Miniport Driver のインストール SCSI RAID Emulex **********...
- Page 17 Emulex LightPulse ***** Storport Miniport Driver *.1.30.9 Windows Update SCSI RAID CD-ROM CD-ROM CD-ROM 32Bit [CD-ROMドライブ]:\Drivers\W2K3\Storport\x86 64Bit [CD-ROMドライブ]:\Drivers\W2K3\Storport\x64 Emulex LightPulse HBA - Storport Miniport Driver *.1.30.9 Storport Miniport Driver P.16 4.2.3 HBAnyware P.20 4 ドライバとユーティリティのインストール ...
- Page 18 Windows 2000 Server にインストールする場合 4.2.2 CD-ROM CD-ROM ■ Emulex PLUS のインストール CD-ROM CD-ROM CD-ROM [CD-ROMドライブ]:\Drivers\W2K\Scsiport\x86 Emulex PLUS...
- Page 19 ■ SCSIport Miniport Driver のインストール SCSI RAID Emulex ***** Emulex LightPulse ***** SCSIport Miniport Driver 5.5.31.0 SCSI RAID CD-ROM CD-ROM CD-ROM [CD-ROMドライブ]:\Drivers\W2K\Scsiport\x86 Emulex LightPulse HBA - SCSIport Miniport Driver 1. [次へ]をクリックします。 2. 「デバイスに最適なドライバを検索する」を選択し、 [次へ]をクリックしま す。 3. 「CD-ROM ドライブ」にチェックし、 [次へ]をクリックします。 4. [次へ]をクリックします。 5.
- Page 20 5.5.31.0 SCSIport Miniport Driver P.19 4.2.3 HBAnyware P.20 HBAnyware のインストール 4.2.3 HBAnyware Windows Server 2003 Windows 2000 Server CD-ROM CD-ROM setupapps.exe [CD-ROMドライブ]:\Utilities\setupapps.exe Next Full Management Allow users to change management mode from utility. Finish 4.3 Firmware BootBIOS P.21 4.4 HBAnyware P.24...
-
Page 21: Firmware / Bootbios の確認と更新
Firmware / BootBIOS の確認と更新 Firmware BootBIOS 4.3.1 LightPulse Utility P.21 4.3.2 HBAnyware Utility P.23 Windows Server 2003 Windows 2000 Server LightPulse Utility / NT で行う場合 4.3.1 LightPulse Utility Adapter * -LPe1150-* Port * Emulex lpUtilNT Category Firmware Maintenance Firmware Functional Firmware Revision 2.70a5 2.70a5... - Page 22 BootBIOS Boot Bios Firmware Revision 1.70a3 1.70a3 Download CD-ROM CD-ROM BootBIOS [CD-ROMドライブ]:\FirmBIOS\WB170A3.PRG BootBIOS Boot Bios Firmware Revision 1.70a3 P.26 本製品の交換を行った場合には、 必要に応じて、 再度 「4.3 Firmware / BootBIOS の 確認と更新」 (→ P.21)を行ってください。...
- Page 23 HBAnyware Utility で行う場合 4.3.2 HBAnyware Utility LPe1150-* - 10:00:**:**:**:**:**:** **:**:**:**:**:** IEEE Address IEEE Address IEEE Address Emulex HBAnyware Firmware Firmware Firmware Current Firmware Version: 2.70A5 2.70A5 Firmware Update Firmware CD-ROM CD-ROM Firmware Start Download [CD-ROMドライブ]:\FirmBIOS\wf270a5.all Firmware Close Firmware Current Firmware Version: 2.70A5 4 ドライバとユーティリティのインストール ...
-
Page 24: Hbanyware のアンインストール
BootBIOS BootBIOS BootBIOS 1.70a3 1.70a3 Firmware Update Firmware CD-ROM CD-ROM BootBIOS Start Download [CD-ROMドライブ]:\FirmBIOS\WB170A3.PRG Firmware Close BootBIOS BootBIOS 1.70a3 P.26 本製品の交換を行った場合には、 必要に応じて、 再度 「4.3 Firmware / BootBIOS の 確認と更新」 (→ P.21)を行ってください。 HBAnyware のアンインストール HBAnyware Windows Server 2003 Windows 2000 Server Windows 2000 Server Emulex Fibre Channel HBAnyware Version 3.*A*... -
Page 25: Autopilot Installer のアンインストール
AutoPilot Installer のアンインストール Windows 2000 Server Windows Server 2003 Emulex Storport Miniport Driver Package 1.30a9-1e Windows 2000 Server Emulex SCSIport Miniport Driver Package 5.31a0-1e 4 ドライバとユーティリティのインストール ... -
Page 26: カードの詳細設定
カードの詳細設定 この章では、カードの詳細設定について説明しています。 カードの詳細設定を行う場合は、ケーブルをファイバーチャネルカードから外し、 すべて管理者権限でログオンしてください。 接続装置が ETERNUS SX300 の場合は、 ETERNUS SX300 の説明書など を参照して ください。 LightPulse Utility / NT 設定において、ラジオボタンで「Registry」を選択し「Key」の 「Device」をダブルクリックして設定した場合と、本書の全カード共通設定( 「Global」に チェックを付ける)で設定した場合は同じです。 カードの設定方法 5.1.1 LightPulse Utility P.26 5.1.2 HBAnyware Utility P.32 Windows Server 2003 Windows 2000 Server 5.1.1 LightPulse Utility / NT で行う場合 LightPulse Utility Adapter * -LPe1150-* Port * LightPulse Utility... - Page 27 Parameters Parameters Topology P.38 New Value Permanent Change Global 接続形態 New Value の値 FC-AL Fabric FC-AL 5 カードの詳細設定 ...
- Page 28 Fabric Perameters QueueDepth New Value Permanent Change Global ■ETERNUS3000 モデル 50/GR710/GR720/GR730/GR740/GR820/GR840 の場合 MSCS/SafeCLUSTER MSCS/SafeCLUSTER FC-CA FC FC-CA FC ■ETERNUS2000、ETERNUS3000 モデル 80/100/200/300/400/500/600/700、 ETERNUS4000 モデル 80/100 の場合 ■ETERNUS6000 モデル 400/500/600/700/800/900/1000/1100 の場合 ■ETERNUS4000 モデル 300/500、ETERNUS8000 の場合 Storport Miniport Driver SCSIport Miniport Driver...
- Page 29 Perameters QueueTarget New Value Permanent Change Parameter LinkSpeed 5 カードの詳細設定 ...
- Page 30 New Value Permanent Change Global ETERNUS Current 0x28 Parameter 「G」は、 「GL」と表示される場合があります。 Topology 0 QueueDepth 8 QueueTarget 1...
- Page 31 Topology 1 QueueDepth 40 QueueTarget 1 File Exit LightPulse Utility/NT P.35 5 カードの詳細設定 ...
- Page 32 5.1.2 HBAnyware Utility で行う場合 HBAnyware Utility LPe1150-* - 10:00:**:**:**:**:**:** **:**:**:**:**:** IEEE Address IEEE Address IEEE Address Emulex HBAnyware 本製品を追加した場合、すでに搭載されている本製品の設定値が変更される場合 があります。したがって、本製品またはドライバの追加後は、詳細設定値を再確 認して、値を正しい値に設定してください。 Driver Parameters Driver Parameters Driver Parameters...
- Page 33 Driver Parameters RX300S3 LPe1150-F4 - 10:00:00:00:C9:48:FE:0C Adapter Parameter Topology Modify Adapter Parameter Value Apply 接続形態 Value の値 FC-AL Fabric Adapter Parameters QueueDepth Modify Adapter Parameter Value Apply ■ETERNUS3000 モデル 50/GR710/GR720/GR730/GR740/GR820/GR840 の場合 MSCS/SafeCLUSTER MSCS/SafeCLUSTER FC-CA FC FC-CA FC ■ETERNUS3000 モデル 80/100/200/300/400/500/600/700、ETERNUS4000 モデ ル...
- Page 34 ■ETERNUS6000 モデル 400/500/600/700/800/900/1000/1100 の場合 ■ETERNUS4000 モデル 300/500、ETERNUS8000 の場合 Adapter Parameters QueueTarget Modify Adapter Parameter Value Apply Adapter Parameters LinkSpeed Modify Adapter Parameter Value Apply ETERNUS Value Apply Topology 0 QueueDepth 8 QueueTarget 1 File Exit HBAnyware Utility P.35...
-
Page 35: レジストリ設定
レジストリ設定 regedit ¥HKEY_LOCAL_MACHINE ¥SYSTEM ¥CurrentControlSet ¥Services ¥Disk TimeOutValue TimeOutValue ・データ型 REG_DWORD DWORD ・値の名前 TimeOutValue ・値のデータ ・ベース ■表: 「TimeOutValue」の値 接続構成 製品名称 単体接続 クラスタ構成 Windows Server 2003 3c 16 3c 16 Windows 2000 Server 3c 16 3c 16 クラスタ構築後、本設定を再度確認してください。設定値が違う場合は、再度設定 してください。 5 カードの詳細設定 ... -
Page 36: トラブルシューティング
トラブルシューティング この章では、本製品が正常に動作しない場合やエラーメッセージが表示される場 合の対処方法について説明しています。 リンク状態の確認 Light Pulse BIOS Utility ■ Light Pulse BIOS Utility 起動方法 !!! LP**** BIOS, Copyright (c) 2005 Emulex !!! Version 1.70A3 Press <ALT E> to go to Emulex BIOS Utility Press <s> to skip Emulex BIOS Light Pulse BIOS Utility ... -
Page 37: 本製品が正しく動作しない場合
本製品が正しく動作しない場合 現象 確認項目 対処方法 LP**** BIOS, *** (*) P.12 Emulex ***** P.14 LightPulse Utility/NT HBAnyware Utility P.26 * PRIMERGY RX300 S3 BIOS ROM Option ROM SCAN Disabled !!! LP**** BIOS, *** 6 トラブルシューティング ... -
Page 38: 付録 A カードの特定の仕方
付録 A カードの特定の仕方 IEEE Address IEEE Address IEEE Address********** IEEE Address IEEE Address 0000C94BFE0C IEEE ADDRESS 00-00-C9-4B-FE-0C LightPulse Utility/NT IEEE Address Emulex lpUtilNT IEEE Address Category Adapter Revision Levels Component IEEE Address Revision IEEE Address IEEE Address 00-00-C9-4B-FE-0C カードに貼ってある IEEE Address が「00-00-C9-4B-FE-0C」の場合、上図の LightPulse Utility/NT 上で表示されるカードの名称は、... -
Page 39: 付録 B 本製品のエラー情報を確認する方法
付録 B 本製品のエラー情報を確認す る方法 ETERNUS マルチパスドライバのエラー情報から、エラーが発生している本製品 のポート番号と WWN 情報を確認する方法は、次のとおりです。 \Device\ScsiPort3 1. 「HBAnyware Utility」画面で、カード名を選択します。 2. 「Adapter Details」タブをクリックし、 「OS Device Name」の末尾が「3」であ ることを確認します。 10:00:00:00:C9:51:A7 6 トラブルシューティング ... - Page 41 Before Reading This Manual Thank you for purchasing the Fibre Channel Controller (hereinafter referred to as this product). Please review the information outlined in this manual before using the card. September, 2007 For Your Safety This manual contains important information, required to operate this product safely. Thoroughly review the information in this manual before using this product.
- Page 42 Remarks Warning Descriptions Various symbols are used throughout this manual. These are provided to emphasize important points for your safety and that of others. The symbols and their meanings are as follows. Be sure to fully understand these before reading this manual. Ignoring this symbol could be potentially lethal.
- Page 43 Abbreviations The following expressions and abbreviations are used to describe the product names used in this manual. Product names Expressions and abbreviations ® ® Microsoft Windows Server 2003 R2, Standard Edition ® ® Microsoft Windows Server 2003 R2, Enterprise Edition Windows Server 2003 ®...
- Page 44 Microsoft, Windows, Windows Server are registered trademarks or trademarks of the Microsoft Corporation in the USA and other countries. Other product names used are trademarks or registered trademarks of their respective manufacturers. Other products are copyrights of their respective manufacturers. All Rights Reserved, Copyright© FUJITSU LIMITED 2006-2007...
- Page 45 Contents 1 Overview ......... . Card .
-
Page 47: Overview
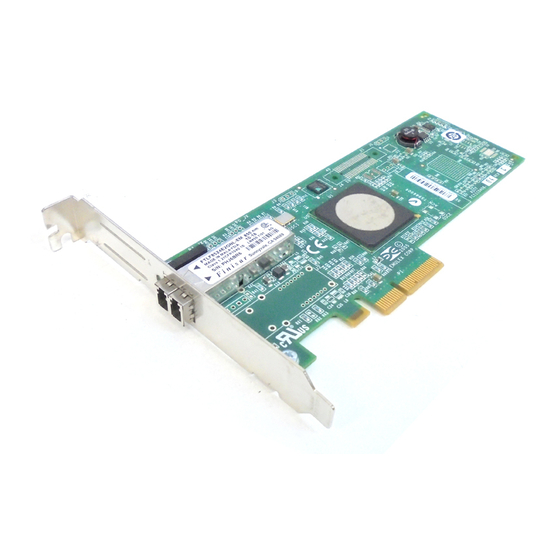
Overview This chapter explains the Fibre Channel Controller. Card This product is designed to provide a Fibre Channel interface for PRIMERGY (hereafter referred to as "the server"). This product has the following features: • Capable of high-speed data transfer at a maximum rate of 4Gbps. •... -
Page 48: How To Check The Driver Version
The driver version "*.1.0.*" appears. Click the [Driver Details]. Check the file version of "***\elxplus.sys" in [Driver files]. • File version: *-1.00A* ***** For details about the drivers for the other operating systems, refer to the website for Fujitsu PRIMERGY (http://primergy.fujitsu.com). -
Page 49: Fibre Channel Controller To Eternus Connections
Fibre Channel Controller to ETERNUS Connections There are 2 types of Fibre Channel Controller to ETERNUS connections. FC-AL connection (direct connection) Connects a Fibre Channel Controller and ETERNUS directly. PRIMERGY ETERNUS3000/ ETERNUS6000 Fibre Channel Controller When using the ETERNUS3000 model 50 port expansion mechanism, the connection type is FC-AL connection. -
Page 50: Points To Note When Using This Driver
Points to Note When Using This Driver Event log When the system is started using this driver, the following logs are stored in the event viewer system log. They can be ignored. -
Page 51: Installing Cards To The Server
Installing Cards to the Server This chapter explains the procedure for installing cards to the server. WARNING • Before installing or removing cards, turn off all devices (the server, peripherals, etc.) and unplug all power cables from the outlets. Failure to do so may cause electric shock. Follow the procedure below to install this product to the server. -
Page 52: Connecting Cables
Connecting Cables This chapter explains points to note when connecting cables. Each cable connector has a protrusion which determines the inserting direction of the connector. When connecting the cable, check this protrusion to make sure of the inserting direction of the connector, and then push the connector as far as it will go. CAUTION •... -
Page 53: Installing Drivers And Utility
Installing Drivers and Utility This chapter explains the procedure for installing drivers and utility. Before installing drivers (including adding a card), disconnect the cable from the Fibre Channel Controller, and then logon using administrator privileges. When the Fibre Channel Controller is additionally installed, it is necessary to update the installed Fibre Channel Controller at the same time. - Page 54 Click [Next]. When the [AutoPilot Installer Warning] window appears, click [Yes] or [OK] (This window may appear multiple times). Installation process starts. When the [Monitoring the Installation] window appears, click [Next]. When the [Welcome to the Found New Hardware Wizard] window appears, install as follows (this window may appear after restart).
-
Page 55: Manual Installation
Manual Installation Drivers and utilities can be manually installed using the following procedures. 4.2.1 For Installation on Windows Server 2003 When [ Welcome to the Found New Hardware Wizard ] appears during startup, click [Cancel]. Installing Emulex PLUS → → Click the [Start] button [Control Panel] [Add Hardware] in... - Page 56 Installing Storport Miniport Driver → → Click the [Start] button [Administrative Tools] [Computer Management] in this order. Click [Device Manager]. Select [Fibre Channel controller] or [Emulex **********] in the "SCSI and RAID controllers" or "Other devices" list and double- click it. Close the property window if the displayed name is "Emulex LightPulse *****, Storport Miniport Driver", and the driver version is "*.1.30.9"...
- Page 57 Close the card property window. If multiple cards are installed in the server, perform " Installing Storport Miniport Driver" ( pg.56) for each card. When installation finishes, perform "4.2.3 Installing HBAnyware" ( pg.59). 4.2.2 For Installation on Windows 2000 Server If the following window appears during startup, follow the instruction below.
- Page 58 Installing SCSIport Miniport Driver → → → Click the [Start] button [Programs] [Administrative Tools] [Computer Management] in this order. Click [Device Manager]. Double-click [Fibre Channel controller] or [Emulex *****] in the "SCSI and RAID controllers" or "Other devices" list. Close the property window if the displayed name is "Emulex LightPulse *****, SCSIport Miniport Driver", and the driver version is "5.5.31.0"...
- Page 59 Close the card property window. If multiple cards are installed in the server, perform " Installing SCSIport Miniport Driver" ( pg.58) for each card. When installation finishes, perform "4.2.3 Installing HBAnyware" ( pg.59). 4.2.3 Installing HBAnyware The HBAnyware installation procedures are the same for both Windows Server 2003 and Windows 2000 Server.
-
Page 60: Checking And Updating Firmware / Bootbios
Checking and Updating Firmware / BootBIOS There are two methods to check and update Firmware/BootBIOS. The results will bring no difference. "4.3.1 Using LightPulse Utility / NT"(pg.60) "4.3.2 Using HBAnyware Utility"(pg.62) The checking procedures are same for Windows Server 2003 and Windows 2000 Server. 4.3.1 Using LightPulse Utility / NT The card name displayed in LightPulse Utility/NT is "Adapter * - LPe1150 - * Port *". - Page 61 For the BootBIOS version, check the [Revision] value in [Boot Bios Firmware]. • When the version is "1.70a3", proceed to Step 11. • When the version is other than "1.70a3", proceed to Step 8. Click the [Download] button. Although the warning window appears, click [OK]. Insert the driver disk (CD-ROM) into the CD-ROM drive, select the BootBIOS file in the CD-ROM drive, and click [Open].
- Page 62 4.3.2 Using HBAnyware Utility The card name displayed in HBAnyware Utility is "LPe1150 - * - 10:00:**:**:**:**:**:**". The "**:**:**:**:**:**" after the card name shows the IEEE address of the Fibre Channel controller. Each Fibre Channel controller has a unique IEEE address, which is written on the sticker on each controller.
-
Page 63: Uninstalling Hbanyware
Click the [Update Firmware...] in [Firmware]. When the confirmation dialog appears, click [Yes]. Insert the driver disk (CD-ROM) into the CD-ROM drive, select the BootBIOS file in the CD-ROM drive, and click [Start Download]. [CD-ROM drive]:\FirmBIOS\WB170A3.PRG When the Firmware update is completed, click [Close]. Check that the [BootBIOS] value in [BootBIOS] is "1.70a3". -
Page 64: Uninstalling Autopilot Installer
Uninstalling AutoPilot Installer → Click the [Start] menu [Settings] (only for Windows 2000 → → Server) [Control Panel] [Add or Remove Programs] or [Add/ Remove Programs] in this order. Select the next program and click [change/remove] or [Remove]. • For Windows Server 2003 Emulex Storport Miniport Driver Package 1.30a9-1e •... -
Page 65: Card Detailed Setting
Card Detailed Setting This chapter explains the card detailed settings. Before setting the card details, disconnect the cable from the Fibre Channel Controller, and then logon using administrator privileges. When the connected device to the card is ETERNUS SX3000, refer to the User’s Guide, etc. - Page 66 Select [Parameters]. The following parameter data are displayed. Select the card for which settings are changed from the card list on the left of the window, and double-click [Topology] in [Parameters]. When there are 2 or more cards, refer to "Appendix A How to Identify the Card" ( pg.77). Set a value for [New Value] depending on the connection type, check [Permanent], and click [Change].
- Page 67 • When only the card under setting is Fabric connection: Double-click [QueueDepth] in [Parameters]. Set a value in [New Value], check [Permanent], and click [Change]. When the settings vary for each card, remove the check on the [Global]. The setting value is calculated as follows: For ETERNUS3000 model 50/GR710/GR720/GR730/GR740/GR820/GR840 •...
- Page 68 • When the setting value for all the installed cards is "8": • When the setting value for only the card under setting is "40": Double-click [QueueTarget] in [Parameters]. Set "1" (fixed value) in [New Value], check [Permanent], and click [Change].
- Page 69 Set a value in [New Value], check [Permanent], and click [Change]. When the setting value for each card differs, uncheck [Global]. For the setting values, refer to the ETERNUS Server Connection Guide, etc. When there are two or more cards, and the value for each card will be changed separately, perform the procedures from Step 4 to 11 for each card separately.
- Page 70 • When Topology is 1, QueueDepth is 40, and QueueTarget is 1 for the cards specified sepa- rately: When the settings for all the card finishes, select [Exit] from [File] menu, and exit LightPulse Utility/NT. After exiting LightPulse Utility/NT perform "5.2 Registry Setting" ( pg.74).
- Page 71 5.1.2 Using HBAnyware Utility The card name displayed in HBAnyware Utility/NT is "LPe1150 - * - 10:00:**:**:**:**:**:**". The "**:**:**:**:**:**" after the card name shows the IEEE address of the Fibre Channel controller. Each Fibre Channel controller has a unique IEEE address, which is written on the sticker on each controller.
- Page 72 • When selected the card to be set and [Driver Parameters] (Individual setting for each card) In the above diagram, "RX300S3" represents a local server, and "LPe1150-F4 - 10:00:00:00:C9:48:EF:0C" represents an installed Fibre Channel controller. Click [Topology] in [Adapter Parameter]. Select a value representing the connection type from the list box to [Value] in [Modify Adapter Parameter], and click [Apply].
- Page 73 Double-click [QueueTarget] in [Adapter Parameters]. Set "1" (fixed value) in [Value] in [Modify Adapter Parameter], and click [Apply]. Click [LinkSpeed] in [Adapter Parameters]. Select the value from the list box to [Value] in [Modify Adapter Parameter], and click [Apply]. For the setting values, refer to the ETERNUS Server Connection Guide, etc. When there are two or more cards, and the setting for each card will be changed separately, perform the procedures from Step 2 to 10 for each card.
-
Page 74: Registry Setting
Registry Setting → Click the [Start] button [Run...] in this order. Enter a name in [Name] as follows, and click [OK]. regedit The registry editor starts. Follow the paths below. \HKEY_LOCAL_MACHINE \SYSTEM \CurrentControlSet \Services \Disk Check that the key name [TimeOutValue] values have the relations described in the table below. -
Page 75: Troubleshooting
Troubleshooting This chapter explains the troubleshooting methods when this product is not running properly or when error messages are displayed. Checking the Link Status The link status can be checked on the LEDs of this product ( "1.1 Card"(pg.47)). The link status with the connection device can be checked if the Light Pulse BIOS Utility is started at the system startup. -
Page 76: Troubleshooting
Troubleshooting Check the applicable items listed below if this product does not operate correctly. If the problem is not resolved even after taking the following measures, contact an office listed in "Appendix C Contact Information" ( pg.79). Symptoms Items to be checked Remedies This product is not Is the [!!! LP**** BIOS,... -
Page 77: Appendix A How To Identify The Card
How to Identify the Appendix A Card Each card has an IEEE Address. The IEEE Address is printed on a seal attached on either side of the card surface. The value of "IEEE Address**********" detailed on the card represents the IEEE Address. In the following example, the IEEE Address is [0000C94BFE0C]. -
Page 78: Appendix B How To Confirm Error Information Of The Device
How to confirm Appendix B error information of the device This appendix describes how to confirm the port number and WWN information of this device where the error occurs using the error information of the ETERNUS multipath driver. Confirm the event log information. The port number corresponding to the card that detects the error is recorded in the event log of the multipath driver. -
Page 79: Appendix C Contact Information
Fax: +852-2827-4724 Address: 10/F., Lincoln House, 979 King's Road Taikoo Place, Island East, Hong Kong • Indonesia: PT. Fujitsu Systems Indonesia Offices Headquarters Tel: +62-21-570-9330 (Hunting) Fax: +62-21-573-5150 Address: Wisma Kyoei Prince 10th Floor Jl. Jend. Sudirman Kav 3-4 Jakarta, Indonesia 10220 •... - Page 80 Address: Unit 802-8th floor, Fortuna Tower Hanoi 6B Lang ha Street, Ba dinh District, Hanoi Socialist Republic of Vietnam • United States: Fujitsu Computer Systems Corporation Tel: +1-800-831-3183 Fax: +1-408-496-0575 Address: 1250 East Arques Avenue, Sunnyvale, CA USA 94088-3470 For the latest information, refer to the Fujitsu PRIMERGY website (http://primergy.fujitsu.com).
- Page 81 ● 落丁、乱丁本は、お取り替えいたします。 • The contents of this manual may be revised without prior notice. • Fujitsu assumes no liability for damages to third party copyrights or other rights arising from the use of any information in this manual. • No part of this manual may be reproduced in any form without the prior written permission of Fujitsu.
- Page 82 こ のマ ニ ュ アルは再生紙を使用 し 、 リ サイ ク ルに配慮 し て製本 さ れています。 不要にな っ た際は、 回収 ・ リ サイ ク ルに出 し て く だ さ い。...
Need help?
Do you have a question about the PRIMERGY PG-FC202 and is the answer not in the manual?
Questions and answers