Table of Contents
Advertisement
Quick Links
Advertisement
Table of Contents

Subscribe to Our Youtube Channel
Related Manuals for Insportline 14332


Summary of Contents for Insportline 14332
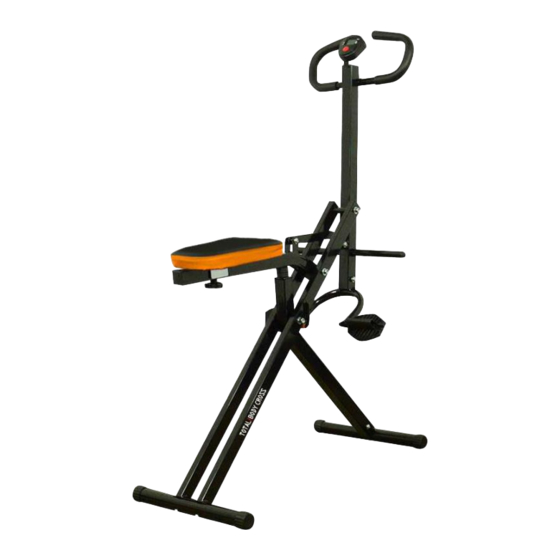
- Page 1 USER MANUAL – EN IN 14332 Whole Body Trainer inSPORTline AB Rider...
-
Page 2: Table Of Contents
CONTENTS IMPORTANT SAFETY INFORMATION ....................3 EXPLODED DRAWING (FOR ASSEMBLY) ................... 4 PARTS LIST ............................4 SCREW LIST ............................5 ASSEMBLY STEPS ..........................6 PRINCIPLE OF EXERCISING ......................10 EXERCISE INSTRUCTIONS ........................ 10 WARM UP PHASE ..........................10 EXERCISE PHASE ..........................11 COOL DOWN PHASE ........................ -
Page 3: Important Safety Information
IMPORTANT SAFETY INFORMATION 1. Read this manual carefully before using and keep it for future reference. 2. Read this manual before first using. Assemble and use it only according to this manual. Inform other users of all warnings and precautions. 3. -
Page 4: Exploded Drawing (For Assembly)
EXPLODED DRAWING (FOR ASSEMBLY) PARTS LIST NUMBER DESCRIPTION Front upright Handlebars Tube Foot tube Main frame Front stabilizer... -
Page 5: Screw List
Rear stabilizer Saddle support Saddle bracket (U-shaped) Curved piece Saddle Knob End cap Pedal 2 (sets) Screw M8*50 Washer ø8 Nut M8 Screw M8*16 Screw M10*110 Washer ø10 Nut M10 Screw M8*40 Screw M10*120 Screw M8*20 Wrench S13-14-15 Wrench EN L S5 Computer Main frame tube SCREW LIST... -
Page 6: Assembly Steps
Screw M8*16 Screw M10*110 Washer ø10 Nut M10 Screw M8*40 Screw M10*120 Screw M8*20 Wrench S13-14-15 Wrench EN L S5 ASSEMBLY STEPS Step 1 • Put the main frame tube (28) and the saddle support (8) into the middle position of the main frame (5). - Page 7 Step 2 • Attach the rear stabilizer (7) to the end of the main frame (5) using two washers ø8 (16) and two screws M8*50 (15). • Attach the front stabilizer (6) to the end of the main frame tube (28) and secure it with three washers ø8 (16) and three screws M8*16 (18).
- Page 8 Step 4 Attach the foot tube (4) to the front upright (1). Use three washers ø8 (16) and three screws M8*16 (18). Step 5 • Attach pedals (14) to the foot tube (4) and secure them with two screws M10*120 (23) and two nuts M10 (21).
- Page 9 Step 6 • Attach the tube (3) to the front upright (1) and ensure with one screw M8*20 (24) and one washer ø8 (16). Tighten them well using included tools. • Attach handlebars (2) to the to the top of the front upright (1) and secure it with two washers ø8 (16) and two screws M8*16 (18).
-
Page 10: Principle Of Exercising
Step 8 • Attach the saddle (11) to the saddle support (8) and fit with knob (12). You can adjust the saddle position. • Slide end caps (13) onto ends of both stabilizers. PRINCIPLE OF EXERCISING Using this device, you can exercise the complete body with help of your own weight. Just sit on the saddle, put your feet on the pedals and grip the handlebars. -
Page 11: Exercise Phase
Side bends Forward bends Outer thigh Inner thigh Calves/Achilles tendon EXERCISE PHASE At this phase you put the effort in. After regular use, the muscles in your body should get more flexible. Exercise properly and keep steady tempo. The rate of work should be sufficient to raise your heartbeat into the target zone (as on the graph below). -
Page 12: Cool Down Phase
This stage should last for a minimum of 12 minutes though most people start at about 15 – 20 mins. COOL DOWN PHASE This phase has to calm your muscles and cardiovascular system. It is repeating of the warm-up exercising, but with reduced tempo. Take it for approx. 5 minutes. You can repeat the stretching exercises, but don’t jerk or overstretch your muscles. -
Page 13: Functions
FUNCTIONS 1. TIME – Press the “MODE” key until the pointer shows “TIME”. The total time of the workout will be shown when you will start your exercising. 2. SPEED – Press the “MODE” key until the pointer shows “STRIDES/MIN”. It will display the current speed during your workout. - Page 14 These Conditions of Warranty and Warranty Claims are an integral part of every Purchase Agreement made between the Seller and the Buyer. All Warranty Conditions are valid and binding, unless otherwise specified in the Purchase Agreement, in the Amendment to this Contract or in another written agreement.
- Page 15 VAT ID: CZ26847264 Phone: +420 556 300 970 E-mail: eshop@insportline.cz reklamace@insportline.cz servis@insportline.cz Web: www.insportline.cz INSPORTLINE s.r.o. Headquarters, Warranty & Service centre: Elektricna 6471, 911 01 Trencin, Slovakia CRN: 36311723 VAT ID: SK2020177082 Phone: +421(0)326 526 701 E-mail: objednavky@insportline.sk reklamacie@insportline.sk servis@insportline.sk Web: www.insportline.sk...
Need help?
Do you have a question about the 14332 and is the answer not in the manual?
Questions and answers