Table of Contents
Advertisement
Quick Links
related literature | Search www.corning.com/opcomm. Click on "Resources."
LAN-538-EN
Table of Contents
1.
General . . . . . . . . . . . . . . . . . . . . . . . . . . . . . . . . . . . . . . . . . . . . . . . . . . . . . . . . . . . . . . . . . . . . 2
2.
Carton Contents . . . . . . . . . . . . . . . . . . . . . . . . . . . . . . . . . . . . . . . . . . . . . . . . . . . . . . . . . . . . . . 2
3.
Tools and Materials Required . . . . . . . . . . . . . . . . . . . . . . . . . . . . . . . . . . . . . . . . . . . . . . . . . . . 3
4.
Installation . . . . . . . . . . . . . . . . . . . . . . . . . . . . . . . . . . . . . . . . . . . . . . . . . . . . . . . . . . . . . . . . . . 3
4.1
Opening the Housing . . . . . . . . . . . . . . . . . . . . . . . . . . . . . . . . . . . . . . . . . . . . . . . . . . . . . 3
4.2
Mounting the Housing into a Rack . . . . . . . . . . . . . . . . . . . . . . . . . . . . . . . . . . . . . . . . . . . 3
4.3
Installing Cable Entry Plate . . . . . . . . . . . . . . . . . . . . . . . . . . . . . . . . . . . . . . . . . . . . . . . . . 3
4.4
Securing the Cable . . . . . . . . . . . . . . . . . . . . . . . . . . . . . . . . . . . . . . . . . . . . . . . . . . . . . . . 4
4.4.1 Using the Universal Cable Clamp (UCC) . . . . . . . . . . . . . . . . . . . . . . . . . . . . . . . . 4
4.4.2 Using Cable Ties . . . . . . . . . . . . . . . . . . . . . . . . . . . . . . . . . . . . . . . . . . . . . . . . . . . 4
4.4.3 Strain-relieving the Cable Central Member . . . . . . . . . . . . . . . . . . . . . . . . . . . . . . . 5
4.4.4 Grounding Armored Cable . . . . . . . . . . . . . . . . . . . . . . . . . . . . . . . . . . . . . . . . . . . 5
4.5
Managing Cable . . . . . . . . . . . . . . . . . . . . . . . . . . . . . . . . . . . . . . . . . . . . . . . . . . . . . . . . . 5
4.5.1 Installing Preconnectorized Cable. . . . . . . . . . . . . . . . . . . . . . . . . . . . . . . . . . . . . . 5
4.5.2 Installing Cable Using Buffer Tube Fanout (BTF) Kits . . . . . . . . . . . . . . . . . . . . . . 6
4.6
Documentation . . . . . . . . . . . . . . . . . . . . . . . . . . . . . . . . . . . . . . . . . . . . . . . . . . . . . . . . . . 7
4.7
Closing the Housing . . . . . . . . . . . . . . . . . . . . . . . . . . . . . . . . . . . . . . . . . . . . . . . . . . . . . . 7
4.8
Install Jumpers . . . . . . . . . . . . . . . . . . . . . . . . . . . . . . . . . . . . . . . . . . . . . . . . . . . . . . . . . . 8
5.
Connector Care and Cleaning . . . . . . . . . . . . . . . . . . . . . . . . . . . . . . . . . . . . . . . . . . . . . . . . . . . 8
6.
Testing . . . . . . . . . . . . . . . . . . . . . . . . . . . . . . . . . . . . . . . . . . . . . . . . . . . . . . . . . . . . . . . . . . . . . 9
6.1
Provisioning Tests . . . . . . . . . . . . . . . . . . . . . . . . . . . . . . . . . . . . . . . . . . . . . . . . . . . . . . . . 9
6.2
Troubleshooting Tests . . . . . . . . . . . . . . . . . . . . . . . . . . . . . . . . . . . . . . . . . . . . . . . . . . . . . 9
STANDARD RECOMMENDED PROCEDURE 003-723 | ISSUE 2 | OCTObER 2015 | PAGE 1 OF 9
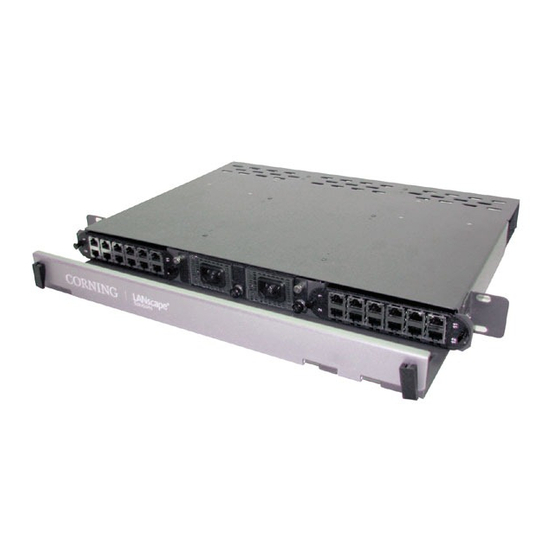
Product Specifications for Connector Housings
Rack-mountable 1U 96-fiber
Housing
003-723, Issue 2
Advertisement
Table of Contents

Related Manuals for CORNING PCH-96F-01U


Summary of Contents for CORNING PCH-96F-01U
-
Page 1: Table Of Contents
Rack-mountable 1U 96-fiber Housing 003-723, Issue 2 related literature | Search www.corning.com/opcomm. Click on “Resources.” LAN-538-EN Product Specifications for Connector Housings Table of Contents General ..............2 Carton Contents . -
Page 2: General
KPA-0158 Dimensions Part Number Weight (H x W x D) 1.75 x 17 x 12 in. 5 lb (2.3 kg) PCH-96F-01U (4.5 x 43 x 28.5 cm) KPA-1004 Carton Contents Cable Tie Locations Radius Control Guide Rear Tray Stop Radius Control Guide... -
Page 3: Tools And Materials Required
• (4) Cable ties • (2 ft) Spiral wrap • (1 ft) Double-sided hook-and-loop strap • (1) Internal strain-relief bracket (cable plate) • (1) Universal Cable Clamp (UCC) kit • (1) Bracket, right UCC Tools and Materials Required • Phillips-head screwdriver •... -
Page 4: Securing The Cable
Securing the Cable CAUTION: Fiber optic cable is sensitive to excessive pulling, bending, and crushing forces. Consult the cable specification sheet for the cable you are installing. Do not bend the cable more sharply than the minimum recommended bend radius. Do not apply more pulling force to the cable than specified. -
Page 5: Strain-Relieving The Cable Central Member
Cable ties Yarn (if present) Central member Flat washer U-shaped washer KPA-0167 Figure 6 4.4.3 Strain-relieving the Cable Central Member Step 1: Install the U-shaped washer and the flat washer on the strain-relief bracket in the orientation shown in Figure 6 using the supplied Phillips-head screw. Step 2: Place the central member and yarn, if present, between the U-shaped washer and the flat washer. -
Page 6: Installing Cable Using Buffer Tube Fanout (Btf) Kits
Figure 7 4.5.2 Installing Cable Using Buffer Tube Fanout (BTF) Kits CAUTION: Corning recommends the use of safety glasses (spectacles) conforming to ANSI Z87 for eye protection from accidental injury when handling chemicals, cables, or working with fiber. Pieces of glass fiber are very sharp and have the potential to damage the eye. -
Page 7: Documentation
Step 4: Route the connectorized fibers under the plastic tabs on the radius control guides. Step 5: Remove dust caps from the connectors and adapters into which they will be mated. Refer to Section 5 for recommended cleaning procedures or clean the connector end-faces and the adapter per standard company practices. -
Page 8: Install Jumpers
Install Jumpers Step 1: Remove dust caps from the connectors and adapters into which they will be mated. Refer to Section 5 for cleaning instructions or clean connector end-faces and adapters per standard company practices and insert connectors into adapters. Step 2: Install jumpers as specified on planning diagrams. -
Page 9: Testing
A complete listing of the trademarks of Corning Optical Communications is available at www.corning.com/opcomm/trademarks. All other trademarks are the properties of their respective owners. Corning Optical Communications is ISO 9001 certified. © 2007, 2015 Corning Optical Communications.
Need help?
Do you have a question about the PCH-96F-01U and is the answer not in the manual?
Questions and answers