
Related Manuals for Pro Spot PR-3 AUTO


Summary of Contents for Pro Spot PR-3 AUTO
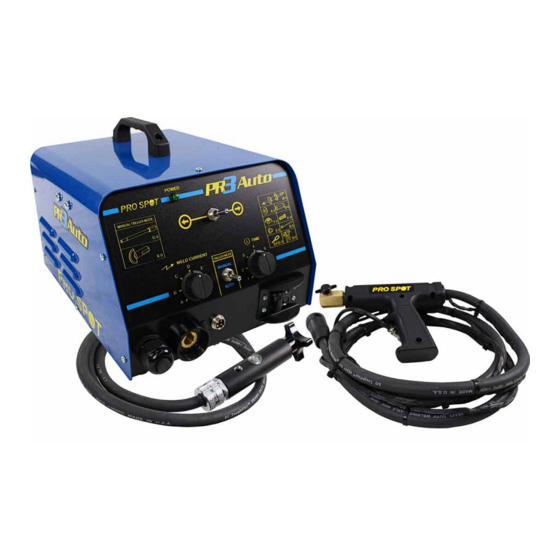
- Page 1 PR-3 AUTO Instruction Manual Version 2.0 All Info Copyright © Pro Spot International Inc.
- Page 2 & development department, a fabrication facility and production lines for the various welders Pro Spot International exports its products worldwide, export sales are managed through our headquarter office. The company owns numerous patents for our ingenious application tools, machines, and procedures.
-
Page 3: Table Of Contents
NOTES . . . . . . . . . . . . . . . . . . . . . . . . . . . . . . . . . . . . . . . . . . 13 For Instructional Videos: https://www.youtube.com/c/Prospotwelding All Info Copyright © Pro Spot International Inc. 2023... -
Page 4: Installation Requirements
All Info Copyright © Pro Spot International Inc. -
Page 5: Pr-3 Assembly Instructions
PR-3 Assembly Instructions PR-3 Parts List WELDING-ON GROUND Auto Or Manual SA-0157 MANUAL TRIGGER MODE Need Description/Step by Step Need Description. All Info Copyright © Pro Spot International Inc. -
Page 6: Manual Mode | Auto Mode
1 second delay.) • Typically used for small or quick pulling applications. 1. Push in and twist main weld cable. 2. Move the Trigger Mode switch to Auto, located on the front panel. All Info Copyright © Pro Spot International Inc. -
Page 7: Spot Hammer Welding | Washer Welding | Shrinking
5. Compressed air can be applied to the work area to cool the metal, and to enhance to enhance the shrinking performance. shrinking performace. All Info Copyright © Pro Spot International Inc. -
Page 8: Stretching | Moulding Clip Rivets | Stitch Welding
The welder will send an intermittent current output. timer knob. (For best results use 24 guage stainless sheet metal.) Excellent for patching holes, rust repair, etc. NOT RECOMMENDED FOR STRUCTURAL REPAIR All Info Copyright © Pro Spot International Inc. -
Page 9: Welding Of Threaded Studs And Nuts
4. Insert a desired stud into the adapter electrode, place it against the sheet metal and studs and nuts to hold interior panels, tail lights, door mouldings, push the trigger. etc., although they are not attached to the replacement parts. All Info Copyright © Pro Spot International Inc. -
Page 10: Weld-On Pull Assembly
SA-0151 : 9” Weld-on Shaft Use the 9” Weld-on shaft with the Pro Pull for small repairs. The three different sized plates are easily changed to isolate the size of the dent being pulled. All Info Copyright © Pro Spot International Inc. -
Page 11: Pull Key Welding
3. Use the pulling claws from the Pull Bar to grab the pulling rod. 4. Use the black knob to increase tension on the pulling claws. 5. Use a hammer/dolly to work the metal while under pressure. All Info Copyright © Pro Spot International Inc. -
Page 12: Troubleshooting Guide
All Info Copyright © Pro Spot International Inc. -
Page 13: Notes
NOTES All Info Copyright © Pro Spot International Inc. - Page 14 NOTES All Info Copyright © Pro Spot International Inc.
- Page 15 NOTES All Info Copyright © Pro Spot International Inc.
- Page 16 Pro Spot International, Inc. 5932 Sea Otter Place Carlsbad, CA 92010 Toll Free: (877) PRO SPOT Phone: (760) 407-1414 Fax: (760) 407-1421 E-mail: info@prospot.com Web: www.prospot.com Copyright © Pro Spot International, Inc. 2017...
Need help?
Do you have a question about the PR-3 AUTO and is the answer not in the manual?
Questions and answers