Table of Contents
Advertisement
Quick Links
Advertisement
Table of Contents

Related Manuals for Vertiv Liebert EXM2


Summary of Contents for Vertiv Liebert EXM2
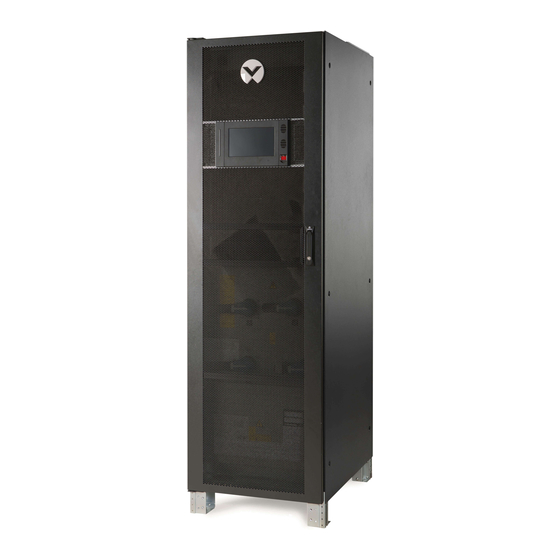
- Page 1 Vertiv™ Liebert® EXM2 User Manual 100kVA to 250kVA UPS...
- Page 2 The products covered by this instruction manual are manufactured and/or sold by Vertiv. This document is the property of Vertiv and contains confidential and proprietary information owned by Vertiv. Any copying, use or disclosure of it without the written permission of Vertiv is strictly prohibited.
-
Page 3: Table Of Contents
Vertiv™ Liebert® EXM2 UPS User Manual TABLE OF CONTENTS 1 Im portant Safety Instructions 2 O verview 2.1 Features 2.2 Design Concept 2.2.1 System Design 2.2.2 Bypass 2.2.3 System Control Principle 2.2.4 UPS Power Supply Switch Configuration 2.2.5 Battery Circuit Breaker (BCB) 2.3 Parallel System... - Page 4 5.2 Navigating Through the Vertiv Liebert EXM2 Touchscreen Control Panel 5.2.1 Access Level Log-In 5.2.2 Vertiv Liebert EXM2 Touchscreen Control Panel Components 5.3 Operation 5.3.1 Log In to the Vertiv Liebert EXM2 Touchscreen Control Panel 5.3.2 Customizing the Display 5.3.3 Operator Controls 5.4 Viewing UPS Status 5.4.1 Viewing UPS Data with the Status Gauge...
- Page 5 Vertiv™ Liebert® EXM2 UPS User Manual 6.2.2 Startup Procedures in ECO Mode 6.2.3 Startup Procedures in Battery Mode (Battery Cold Start) 6.3 Procedures for Transfer between Operation Modes 6.3.1 Transfer from Normal Mode to Battery Mode 6.3.2 Transfer from Normal Mode to Bypass Mode 6.3.3 Transfer from Bypass Mode to Normal Mode...
- Page 6 Vertiv™ Liebert® EXM2 UPS User Manual 8.2.3 External Protective Device 8.2.4 Power Cable 8.2.5 Parallel Cable 8.2.6 Remote EPO 8.3 Operation Procedures for Parallel System 8.3.1 Startup Procedures in Normal Mode 8.3.2 Maintenance Bypass Procedures 8.3.3 Procedures for Isolating One UPS Module from Parallel System 8.3.4 Procedures for Inserting One Isolated UPS Module in Parallel System...
- Page 7 Vertiv™ Liebert® EXM2 UPS User Manual 10 C om m unication 10.1 SNMP Protocol Communication 10.2 Modbus Protocol Communication 10.3 Dry Contact Communication 10.3.1 Communication Through IS-Relay Card 10.3.2 Communication Through Dry Contact Port 11 Service and M aintenance 11.1 Safety 11.2 Service Procedures of Power Module and Bypass Module...
- Page 8 Vertiv™ Liebert® EXM2 UPS User Manual This page intentionally left blank...
-
Page 9: Important Safety Instructions
Where conductive dusts, corrosive gases, salts, or flammable gases are present • Near heat sources or strong electromagnetic interferences. Disclaimer Vertiv disclaims any and all responsibility or liability for the defects or malfunction caused by: • Application range or operating environment outside the specifications •... - Page 10 • IEC/EN/BS 62040-2:2018 Additional information regarding adherence to these directives and regulations is included in the appendices NSR and EMC to the Declarations of Conformity. If needed, the Declarations of Conformity can be requested to Vertiv. 2011/65/EU Directive of the council for adapting the legal regulations of member states on the restriction of the use of certain hazardous substances that can be used in the manufacture of electrical and electronic equipment.
- Page 11 Vertiv™ Liebert® EXM2 UPS User Manual W A RN IN G ! The selection of the upstream distribution protection equipm ent of the U PS shall be selected in accordance w ith the details and shall com ply w ith the local electrical regulations.
- Page 12 Vertiv™ Liebert® EXM2 UPS User Manual W A RN IN G ! W hen the internal fuse of the U PS is dam aged, it m ust be replaced w ith fuse of the sam e electric param eters by qualified personnel.
- Page 13 Vertiv™ Liebert® EXM2 UPS User Manual The M anual D escribes the Follow ing Equipm ent Product M odel 100kVA EXM 0100kTG16FN02000 120kVA EXM 0120kTG16FN02000 150kVA EXM 0150kTG16FN02000 160kVA EXM 0160kTG16FN02000 200kVA EXM 0200kTG16FN02000 250kVA EXM 0250kTG16FN02000 1 Important Safety Instructions...
- Page 14 Vertiv™ Liebert® EXM2 UPS User Manual Revision Inform ation V1.0 (November 11, 2020) Initial release. V1.1 (October 20, 2022) Updated the manual for GHMI images in Chapter 5 Operator Control and Display Panel. Added 28-block battery in Table 7.4 BCB rated current and battery m ax. discharge current at full load (recommended). Added 9.2.13 LBS Adapter. Updated Table 12.1 European and international standards, Table 12-2 Environmental characteristics, Table 12.3 Mechanical Characteristics,...
-
Page 15: Verview
2 Overview This chapter briefly introduces the features, design concept, parallel system, operation mode, battery management and battery protection of the Vertiv™ Liebert® EXM2 UPS 100kVA~250kVA (UPS for short). 2.1 Features The UPS is connected between a critical load (e.g. a computer) and mains power to provide high quality power for the loads. -
Page 16: Design Concept
Vertiv™ Liebert® EXM2 UPS User Manual 2.2 Design Concept 2.2.1 System Design This section introduces the working principle of the UPS single module. The UPS adopts AC-DC-AC converter (as shown in Figure 2.1 below). The first stage conversion (AC-DC) adopts three-phase high frequency rectifier to convert the three-phase input voltage into stable DC bus voltage. -
Page 17: Bypass
Vertiv™ Liebert® EXM2 UPS User Manual The UPS has its own battery charger and adopts advanced temperature compensation technology to effectively prolong the battery service life. The inverter adopts three level T-type IGBT topology and uses advanced SVPWM control technology to derive the stable AC voltage from the DC bus voltage. -
Page 18: System Control Principle
In case of inverter failure and output fuse blowout, the load will automatically transfer to the bypass, and the output power supply will not be interrupted. In this situation, please contact the local customer service center of Vertiv for technical support. -
Page 19: Ups Power Supply Switch Configuration
Vertiv™ Liebert® EXM2 UPS User Manual Parallel SystemThe control logic system constantly monitors load requirements and controls the power supplied by each UPS module. In the event that an overload condition is sustained for greater than a preset time, the load will transfer to the bypass, when the number of active modules is unable to satisfy load requirements. - Page 20 Vertiv™ Liebert® EXM2 UPS User Manual Figure 2.2 U PS pow er supply sw itch configuration N O . D escription Bypass input Maintenance bypass switch Q3 Static switch Shorting copper bar of common input configuration Bypass input switch Q2...
-
Page 21: Battery Circuit Breaker (Bcb)
Vertiv™ Liebert® EXM2 UPS User Manual N O TE: Q 1, Q 2 and Q 5 are optional w hile Q 3 is standard. N O TE: The m ains input and bypass input share the sam e neutral line. -
Page 22: Operation Modes
Vertiv™ Liebert® EXM2 UPS User Manual 2.4 Operation Modes The UPS has the following operation modes: • Normal mode • Battery mode • Automatic restart mode • Bypass mode • Maintenance mode • ECO mode • Parallel redundancy mode (system expansion) •... - Page 23 Vertiv™ Liebert® EXM2 UPS User Manual N O . D escription UPS output Rectifier input switch Battery Battery charger Battery m ode As shown in Figure 2.4 below , the operation mode in which the battery provides backup power supply to the loads through the rectifier and inverter is called battery mode.
- Page 24 EOD voltage, if the mains is recovered, the UPS will restart automatically after a certain time of delay. This function restart delay time can be set by the service engineer authorized by Vertiv. During the process of automatic restart time of delay, the UPS will charge the battery to protect against the power-off risk to the load device caused by mains power failure.
- Page 25 Vertiv™ Liebert® EXM2 UPS User Manual M aintenance m ode As shown in Figure 2.6 below, if the UPS maintenance or service is required, you may use the manual maintenance bypass switch to transfer the load to maintenance bypass, with no interruption in power to the load. This maintenance bypass switch is fitted in all UPS modules and rated for full load of a single module.
- Page 26 Vertiv™ Liebert® EXM2 UPS User Manual N O . D escription N O . D escription Bypass input Inverter switch Static switch UPS output Bypass input switch Rectifier input switch Mains input Output switch Rectifier Battery Inverter Battery charger If ECO mode is required, adjust corresponding parameters through the operator control and display panel.
- Page 27 Vertiv™ Liebert® EXM2 UPS User Manual Figure 2.8 Bypass dynam ic regulation m ode N O . D escription N O . D escription Bypass input Inverter switch Static switch UPS output Bypass input switch Rectifier input switch Mains input...
-
Page 28: Battery Management
5. Float charge temperature compensation (optional) This function must be used together with the battery temperature detection device. The Vertiv battery temperature sensor is a standard option for your selection. -
Page 29: Advanced Function
(which charges the battery) will be reduced correspondingly to provide optimal charging voltage for the battery, thus prolonging the battery service life time. This function must be used together with the Vertiv battery temperature detection device (a standard option). 2 Overview... -
Page 30: Battery Protection
It is recom m ended to adopt V ertiv BC B to provide a better solution. The following battery protection functions are set by the service engineer through the Vertiv setting software. Battery low pre-w arning The battery low pre-warning occurs before the EOD. -
Page 31: Echanical Installation
Vertiv™ Liebert® EXM2 UPS User Manual 3 Mechanical Installation This chapter briefly introduces the mechanical installation of the UPS, including the precautions, initial inspection before installation, environmental requirement, mechanical requirement and installation diagram. 3.1 Precautions This chapter describes the environmental and mechanical requirements and mechanical considerations that must be taken into account when planning the positioning and cabling of the UPS equipment. -
Page 32: Transportation
Vertiv™ Liebert® EXM2 UPS User Manual 3.2 Transportation Railroad transportation and shipping are the recommended means of transportation. If truck transportation is unavoidable, choose roads that are less bumpy in order to protect the equipment. The UPS cabinet is heavy (see Table 12.3 on page 184 for its weight). We recommend using mechanical equipment such as an electric forklift to unload and move the equipment to the place closest to the installation site. -
Page 33: Tools
Vertiv™ Liebert® EXM2 UPS User Manual 3.3 Tools W A RN IN G ! For the sake of safety, the installation tools under live operation m ust be insulated. W A RN IN G ! Tools in Table 3.1 below are for reference only;... - Page 34 Vertiv™ Liebert® EXM2 UPS User Manual Table 3.1 Tools (continued) N am e Part N am e Icon Q uantity Insulating tape Insulating gloves Crimping plier Heat shrinkable tube Insulated torque wrench Torque screwdriver Multimeter Clip-on ammeter 3 Mechanical Installation...
-
Page 35: Unpacking
Vertiv™ Liebert® EXM2 UPS User Manual 3.4 Unpacking Unpack the UPS and battery packages under the guidance of authorized service engineer. Steps: 1. Remove the packing belt. Use a cutting plier to cut off the packing belt, as shown in Figure 3.2 below Figure 3.2 Packing belt... - Page 36 Vertiv™ Liebert® EXM2 UPS User Manual 2. As shown in Figure 3.4 below, remove the honeycomb plate. Figure 3.4 Rem oving honeycom b plate 3. Open the front door of the UPS, loosen the fixing screws and remove the bottom fixed part at front of the cabinet. Then loosen the fixing screws and remove the bottom fixed part at back of the cabinet.
-
Page 37: Initial Inspection
2. Unpack the UPS and battery under the guidance of authorized service engineer. Visually inspect whether the UPS and battery have any transportation damage. If there is any damage, report to the Carrier / Vertiv representative immediately. 3. Verify the UPS label and confirm the correctness of the UPS. The UPS label is attached on the back of the door. -
Page 38: Battery Location Selection
Vertiv™ Liebert® EXM2 UPS User Manual The UPS uses forced cooling by internal fans. Cooling air enters the UPS through the ventilation grills at the front of the cabinet and exhausted through the ventilation grills at the back of the cabinet. Do not obstruct the ventilation holes (ventilation grills). -
Page 39: Clearance
Vertiv™ Liebert® EXM2 UPS User Manual 3. Vertical hanging of cabinet is not allowed. Ensure that the weight of the UPS does not exceed the capacity of the lifting equipment. For the UPS weight, refer to Table 12.3 on page 184. -
Page 40: Installation Drawings
Vertiv™ Liebert® EXM2 UPS User Manual 3.8 Installation Drawings Figure 3.7 Top/front/side/bottom view of the 100kV A ~250kV A U PS (unit: m m ) 100kV A ~160kV A 3 Mechanical Installation... - Page 41 Vertiv™ Liebert® EXM2 UPS User Manual 200kV A ~250kV A 3 Mechanical Installation...
- Page 42 Vertiv™ Liebert® EXM2 UPS User Manual This page intentionally left blank 3 Mechanical Installation...
-
Page 43: Electrical Installation
Vertiv™ Liebert® EXM2 UPS User Manual 4 Electrical Installation This chapter mainly introduces the electrical installation of the UPS, including the power cable and signal cable connecting procedures and methods. After completing the mechanical installation of the UPS, it is required to connect the power cable and signal cable of the UPS. -
Page 44: Maximum Steady State Ac And Dc Currents
Vertiv™ Liebert® EXM2 UPS User Manual 4.1.2 Maximum Steady State AC and DC Currents The power cable must be selected according to the current and voltage values in Table 4.1 below as well as the local wiring regulations, and take environmental conditions (temperature and physical media) into consideration, then refer to Table 3B in IEC 60950-1. -
Page 45: Selection Of Ups I/O And Battery Switch
Vertiv™ Liebert® EXM2 UPS User Manual 4.1.4 Selection of UPS I/O and Battery Switch The user can select the switch according to actual needs. Table 4.3 below shows inbuilt switch assembly capacitiesTable 4.3 below Table 4.3 In built U PS I/O sw itch capacity... -
Page 46: Protection Ground
Vertiv™ Liebert® EXM2 UPS User Manual 4.1.8 Protection Ground The protective earth cable is reliably connected to the PE input terminal (see Figure 4.2 on page 40) via the fixing bolt. All the cabinets and cable troughs shall be grounded according to the local regulations. The grounding wires shall be tied up reliably to prevent the loosening of the grounding wire tightening screws when the grounding wires are pulled. - Page 47 Vertiv™ Liebert® EXM2 UPS User Manual The RCCB shall meet the following requirements: • Be sensitive to the DC unidirectional pulse (class A) of the whole distribution network • Be insensitive to transient state current pulse • Have an average sensitivity which is 0.3A ~ 3A adjustable The RCCB symbols are shown in Figure 4.1 below.
-
Page 48: Power Cable Connection Steps
Vertiv™ Liebert® EXM2 UPS User Manual 4.1.10 Power Cable Connection Steps C onnection term inal Figure 4.2 belowshows the connection terminals of the UPS power cable. Figure 4.2 below show the power cable entry and routing methods. N O TE: The pow er cables should be routed through tunnels or cable troughs to prevent cable dam age due to m echanical stress. - Page 49 Vertiv™ Liebert® EXM2 UPS User Manual N O . D escription Shorting copper bar of common input configuration BAT+ BAT- 4 Electrical Installation...
- Page 50 Vertiv™ Liebert® EXM2 UPS User Manual Pow er cable connection term inals of 200kV A ~ 250kV A U PS N O . D escription BAT- BAT+ 4 Electrical Installation...
- Page 51 Vertiv™ Liebert® EXM2 UPS User Manual N O . D escription Shorting copper bar of common input configuration Pow er cable routing m ethod The standard cabinet supports bottom cable access only, see Figure 4.3 on the next page. If the user needs top cable access, please choose the side cabinet option, refer to Options .
- Page 52 Vertiv™ Liebert® EXM2 UPS User Manual Figure 4.3 Pow er cables w iring route of 200kV A ~ 250kV A (standard cabinet) N O . D escription Remove the bottom plate, connect cables to corresponding terminals W A RN IN G ! Before cables connection, m ake sure that all external and internal pow er sw itches of the U PS are off, and post necessary w arning signs to prevent inadvertent operation of the sw itches.
- Page 53 Vertiv™ Liebert® EXM2 UPS User Manual W A RN IN G ! 1. The earth cables and neutral line m ust be connected in accordance w ith local and national codes of practice. 2. Failure to observe could result in electric shock or fire risk .
-
Page 54: Wiring Of Signal Cable
Vertiv™ Liebert® EXM2 UPS User Manual 4.2 Wiring of Signal Cable 4.2.1 Overview For on-site specific needs, the UPS needs auxiliary connection to realize battery system (including the external battery switch) management, communicate with PC, provide alarm signal to external devices, realize remote EPO or provide bypass back feed circuit breaker signal and parallel communication. -
Page 55: Dry Contact Port J6
Vertiv™ Liebert® EXM2 UPS User Manual 4.2.2 Dry Contact Port J6 The dry contact port J6 is shown in Figure 4.5 below and described in Table 4.5 below. Figure 4.5 D ry contact port J6 Table 4.5 D escription of dry contact port J6... -
Page 56: Dry Contact Port J7
Vertiv™ Liebert® EXM2 UPS User Manual 4.2.3 Dry Contact Port J7 The dry contact port J7 is shown in Figure 4.6 below and described in Table 4.6 below. Figure 4.6 D ry contact port J7 Table 4.6 D escription of dry contact port J7... - Page 57 Vertiv™ Liebert® EXM2 UPS User Manual Table 4.6 D escription of dry contact port J7 (continued) Term inal D esignation M axim um M axim um M axim um Signal N am e W ire Range Rem arks V oltage...
- Page 58 Vertiv™ Liebert® EXM2 UPS User Manual Table 4.6 D escription of dry contact port J7 (continued) Term inal D esignation M axim um M axim um M axim um Signal N am e W ire Range Rem arks V oltage...
- Page 59 Vertiv™ Liebert® EXM2 UPS User Manual Table 4.6 D escription of dry contact port J7 (continued) Term inal D esignation M axim um M axim um M axim um Signal N am e W ire Range Rem arks V oltage...
-
Page 60: Programmable Dry Contact Port J8
Vertiv™ Liebert® EXM2 UPS User Manual N O TE: Param set is required to configure the program m able dry contact port. N O TE: To prevent signal interference above 30 and up to 150 m eters, additional surge protection is required using shielded cables or separate grounded conduit. -
Page 61: Repo Port
Vertiv™ Liebert® EXM2 UPS User Manual 4.2.5 REPO Port The UPS has an EPO function that operates by an EPO button on the operator control and display panel of the UPS or by a remote contact provided by the user. The EPO button has a protective cover. -
Page 62: Host Communication Port
Vertiv™ Liebert® EXM2 UPS User Manual 4.2.6 Host Communication Port This port monitors and sets parameters through connecting with computer. The communication port provides serial data and is intended for use by authorized commissioning and service personnel in UPS commissioning and service. Refer to Options for details. - Page 63 Vertiv™ Liebert® EXM2 UPS User Manual Figure 4.9 Signal cables w iring route of 200kV A ~ 250kV A (top cable access) 1. Lead cables into the cabinet through the holes 2. Then connect them to correspond term inals 4 Electrical Installation...
- Page 64 Vertiv™ Liebert® EXM2 UPS User Manual Figure 4.10 Signal cables w iring route of 200kV A ~ 250kV A (bottom cable access) 1. Lead cables into the cabinet through the holes 2. Then connect them to correspond term inals 4 Electrical Installation...
-
Page 65: Perator C Ontrol And D Isplay Panel
This simple, dynamic display speeds operator response to changing power input and demand. Many of the settings will depend on the UPS type and features. Many other settings will be made during the UPS setup by Vertiv Tech service personnel. - Page 66 Vertiv™ Liebert® EXM2 UPS User Manual Figure 5.1 V ertiv Liebert EXM 2 Touchscreen C ontrol Panel com ponents N O . D escription UPS status LED Touchscreen LCD Speakers (not used) EPO Switch UPS Status LED 5 Operator Control and Display Panel...
-
Page 67: Navigating Through The Vertiv Liebert Exm2 Touchscreen Control Panel
Service-- All functions of Administrator plus permission to alter system configuration, choose serial communication protocol, enable equalize battery charging and change Service PIN; PIN required. Vertiv Tech Liebert Services sets PINs when setting up the UPS. These default PINs may be changed by those with Administrator or Service access (see above). -
Page 68: Vertiv Liebert Exm2 Touchscreen Control Panel Components
5.2.2 Vertiv Liebert EXM2 Touchscreen Control Panel Components The main areas of the Vertiv™ Liebert® EXM2 Touchscreen Control Panel are shown in Figure 5.2 below. The display arrangement and the information displayed can be changed. At log-in for all access levels, the Vertiv Liebert EXM2 Touchscreen Control Panel opens to the STATUS screen in graphic display. - Page 69 The menus under Display Options on STATUS, for example, differ for each access level. Some information available through the Context Menu, such as alarms and run hours, are available through other areas of the Vertiv™ Liebert® EXM2 Touchscreen Control Panel.
- Page 70 Vertiv™ Liebert® EXM2 UPS User Manual • Screen Saver: Display Sleep Mode notification (immediate entry into screen saver); screen goes dark and user is logged off; interface reactivated by touching the screen; same options for all access levels • Total Run Hours: Component and hours it has operated; touching a component displays details in the right panel;...
- Page 71 Vertiv™ Liebert® EXM2 UPS User Manual Figure 5.5 M im ic display, norm al operation U N IT STA TU S Pane C om ponents The UNIT STATUS pane is identical for all PIN access levels (see Figure 5.6 on the next page) Observers will not have the pencil edit icon.
- Page 72 Vertiv™ Liebert® EXM2 UPS User Manual Figure 5.6 U N IT STA TU S pane com ponents; graphic display Figure 5.7 U N IT STA TU S pane— Input details; graphic display 5 Operator Control and Display Panel...
- Page 73 Vertiv™ Liebert® EXM2 UPS User Manual Figure 5.8 U N IT STA TU S pane— Bypass details; graphic display Figure 5.9 U N IT STA TU S pane— Battery and cabinet details; graphic display 5 Operator Control and Display Panel...
-
Page 74: Operation
5.3.1 Log In to the Vertiv Liebert EXM2 Touchscreen Control Panel The Vertiv™ Liebert® EXM2 Touchscreen Control Panel is On whenever the UPS has control power. It may be inactive and appear dark, depending on its settings. If it is inactive, touch the TOUCHSCREEN to wake it up. -
Page 75: Customizing The Display
(see U sing the Edit Icon to C ustom ize Layout). To customize the display’s appearance: Log in to the Vertiv Liebert EXM2 Touchscreen Control Panel as Administrator or Service detailed in Log In to the Vertiv Liebert EXM2 Touchscreen Control Panel . - Page 76 Vertiv™ Liebert® EXM2 UPS User Manual 6. Either accept the generated name (New View) or touch the view’s name to rename it using the on-screen keyboard (maximum length is 14 characters). Touch the Enter key on the on-screen keyboard after entering the new name.
- Page 77 Vertiv™ Liebert® EXM2 UPS User Manual Figure 5.12 Set num ber of panes and choose data 10. Touch the Save button. 11. When the window returns to two screens—PANEL CONTENT and PANEL OPTIONS—touch the radio button beside the new view to activate it (this puts a dot inside the circle).
- Page 78 Use the Edit Icon to Customize Layout The Vertiv™ Liebert ®EXM2 Touchscreen Control Panel layout can also be changed with the Edit icons on the screen for a user logged-in as Operator, Administrator or Service. The Edit icon can be used to add or remove panels, resize panels, rearrange panels and change monitored parameters.
- Page 79 Vertiv™ Liebert® EXM2 UPS User Manual Exit Edit Mode 9. Edit Mode will deactivate after some changes. If all changes have been made and Edit Mode is active, touch the panel’s header area. Figure 5.13 C hange panel content or resize/rem ove a panel...
- Page 80 Vertiv™ Liebert® EXM2 UPS User Manual Figure 5.14 Resize or rem ove a panel Edit U N IT STA TU S Panel w ith the Edit Icon The UNIT STATUS panel may be changed to add or remove data. The panel has four default parameters. Any or all can be deleted or replaced with the Editing icon.
- Page 81 Vertiv™ Liebert® EXM2 UPS User Manual To edit the UNIT STATUS panel: Activate the editing mode by touching and holding the Edit icon on the UNIT STATUS panel. 2. Touch the large X by a parameter icon to delete it or touch the + icon at the bottom right of the panel to add a parameter icon.
-
Page 82: Operator Controls
Vertiv™ Liebert® EXM2 UPS User Manual 5.3.3 Operator Controls The Operator login confers control of UPS functions: • Silence (Alarm) • Inverter On • Inverter Off • Reset Fault • Energy Saving Mode Activation • Battery Operations Each command is available under the OPERATE menu. The OPERATE menu may be used by logging in with Operator, Administrator and Service access. - Page 83 The Inverter On menu item is available whenever the UPS has input power and the inverter is Off. Before executing the command, verify that the UPS is prepared for the inverter to start.. The Vertiv™ Liebert® EXM2 Touchscreen Control Panel will display a message asking for confirmation and noting that it may take a moment to start (see Figure 5.17 below).
- Page 84 Vertiv™ Liebert® EXM2 UPS User Manual Inverter O ff The Inverter Off menu item is available whenever the UPS has input power and the inverter is On. Before executing the command, verify that the UPS and connected load are prepared for the inverter to be shut down.
- Page 85 Vertiv™ Liebert® EXM2 UPS User Manual Faults may be reset with the Reset radio button. Figure 5.19 Reset fault com m and Suspended Time Remaining The Suspended Time Remaining box is not configurable. It is the time remaining when energy savings mode is suspended. It is activated when energy saving mode has been active and inactive too much times and the system will suspend its activation for a period.
- Page 86 Vertiv™ Liebert® EXM2 UPS User Manual Figure 5.20 Enable m odule redundancy 5 Operator Control and Display Panel...
- Page 87 Vertiv™ Liebert® EXM2 UPS User Manual Energy Saving M ode A ctivation N O TE: Refer to the U PS m anual before activating Energy Saving M ode. A n O perator can only enable or disable Energy Saving M ode. The m odes available vary according to the U PS type and system configuration.
-
Page 88: Viewing Ups Status
Vertiv™ Liebert® EXM2 UPS User Manual 5.4 Viewing UPS Status The Vertiv™ Liebert® EXM2 Touchscreen Control Panel interface reports UPS status in multiple ways. The graphic views and text views will show the same readings. Alarms and certain events will trigger audible alarms and the LED on the bezel, the light bar and the status header will change color. - Page 89 Vertiv™ Liebert® EXM2 UPS User Manual Figure 5.22 D efault Status G auge view To change the values shown on the Status Gauge: Log in with either Administrator or Service access. 2. Touch the SETUP menu icon. 3. Touch the Context menu icon.
- Page 90 Vertiv™ Liebert® EXM2 UPS User Manual Figure 5.23 A ccess Status G auge settings Figure 5.24 Status G auge setting options 5 Operator Control and Display Panel...
- Page 91 Vertiv™ Liebert® EXM2 UPS User Manual 5 Operator Control and Display Panel...
-
Page 92: Viewing Ups Data With The Status Panel
Vertiv™ Liebert® EXM2 UPS User Manual 5.4.2 Viewing UPS Data with the Status Panel More-detailed information about the UPS’s status is readily available through the Status panel. Touching a component in the animated mimic display brings up data about the component on another pane. Touching a parameter icon on the UNIT STATUS pane brings up further details about that parameter. - Page 93 Vertiv™ Liebert® EXM2 UPS User Manual Figure 5.26 U nit status— Bypass details 5 Operator Control and Display Panel...
- Page 94 Vertiv™ Liebert® EXM2 UPS User Manual Figure 5.27 U nit status— Battery details 5 Operator Control and Display Panel...
- Page 95 Vertiv™ Liebert® EXM2 UPS User Manual Figure 5.28 U nit status— Load details 5 Operator Control and Display Panel...
- Page 96 Vertiv™ Liebert® EXM2 UPS User Manual Figure 5.29 U nit status— Environm ental details 5 Operator Control and Display Panel...
- Page 97 Vertiv™ Liebert® EXM2 UPS User Manual 5 Operator Control and Display Panel...
-
Page 98: Logs-Alarms And Events
Vertiv™ Liebert® EXM2 UPS User Manual 5.4.3 Logs—Alarms and Events The Context Menu, when opened from the STATUS pane, permits viewing logs of alarms and events that have occurred on the UPS. Both logs include the date and time of occurrence, type, an ID, component affected and a description of the alarm or event. - Page 99 Vertiv™ Liebert® EXM2 UPS User Manual 5 Operator Control and Display Panel...
-
Page 100: Viewing Ups Component Status
Vertiv™ Liebert® EXM2 UPS User Manual 5.5 Viewing UPS Component Status The animated mimic screen permits viewing details about the main components installed and configured in the UPS. The data list opens on the opposite side of the screen and, for most parameters, expands to show all details for the component touched. - Page 101 Vertiv™ Liebert® EXM2 UPS User Manual Figure 5.32 U nit status— O utput details Figure 5.33 U nit status— Bypass details 5 Operator Control and Display Panel...
- Page 102 Vertiv™ Liebert® EXM2 UPS User Manual Figure 5.34 U nit status— Pow er m odule details Figure 5.35 U nit status— Battery details 5 Operator Control and Display Panel...
-
Page 103: Status Bar Component
Vertiv™ Liebert® EXM2 UPS User Manual 5.6 Status Bar Component The status bar indicates UPS status by: • scrolling messages to inform viewers; see Table 5.1 below through Table 5.3 on page 97 • changing color; green for normal, yellow for warning and red for alarm. - Page 104 Vertiv™ Liebert® EXM2 UPS User Manual Table 5.2 W arning status m essages M essage 1 M essage 2 M essage 3 D efinition This system is in warning normal operating mode, supplied by LOAD ON INVERTER OUTPUT OVERLOAD —...
- Page 105 Vertiv™ Liebert® EXM2 UPS User Manual Table 5.3 C ritical status m essages M essage 1 M essage 2 M essage 3 D efinition This system is in critical operating mode, supplied by the TRANSFER TO BYPASS LOAD ON INVERTER...
- Page 106 Vertiv™ Liebert® EXM2 UPS User Manual Table 5.3 C ritical status m essages (continued) M essage 1 M essage 2 M essage 3 D efinition This system is in critical operating mode, supplied by the inverter via the battery, running in a system test mode, and has...
-
Page 107: Alarm List
Vertiv™ Liebert® EXM2 UPS User Manual 5.7 Alarm List Table 5.4 belowprovides the complete list of UPS alarm messages for display either on the 'Event' menu or on the 'Records' menu. Table 5.4 N orm al status m essages A larm... - Page 108 Vertiv™ Liebert® EXM2 UPS User Manual Table 5.4 N orm al status m essages (continued) A larm Explanation Bypass overcurrent The bypass current is outside the rated current Bypass backfeed The bypass backfeed is faulty Bypass Overtemperature The bypass has overtemperature The bypass detects an inverter signal when the system runs normally.
- Page 109 Vertiv™ Liebert® EXM2 UPS User Manual Table 5.4 N orm al status m essages (continued) A larm Explanation Input Switch Open Input switch is open Maint. Switch Open Maintenance bypass switch is open Maint. Switch Closed Maintenance bypass switch is closed...
- Page 110 Vertiv™ Liebert® EXM2 UPS User Manual Table 5.4 N orm al status m essages (continued) A larm Explanation BCB1 Status Abnormal Logic conflict between BCB1 drive signal and backfeed signal BCB1 Closed BCB1 state (closed) BCB1 Open BCB1 state (open) Phase A Out.
-
Page 111: Single Ups Operation Introduction
Vertiv™ Liebert® EXM2 UPS User Manual 6 Single UPS Operation Introduction This chapter introduces the operating precautions and routine operating methods of UPS single module in detail. For the operating precautions and routine operating methods of UPS parallel system, refer to Parallel System and LBS System . -
Page 112: Power Switch
Vertiv™ Liebert® EXM2 UPS User Manual 6.1.2 Power Switch Opening the front door of the UPS cabinet reveals the power switches, as shown in Figure 6.1 below including: Q1: Rectifier input switch, which connects UPS to the main circuit power. - Page 113 Vertiv™ Liebert® EXM2 UPS User Manual 200kV A ~ 250kV A N O TE: If the U PS contains only standard Q 3 bypass sw itch, all other breakers, including an external m aintenance bypass sw itch, m ust be installed for full m aintenance of the U PS and its cleaning operations.
-
Page 114: Ups Startup Procedures
Vertiv™ Liebert® EXM2 UPS User Manual 6.2 UPS Startup Procedures The UPS must be completely installed and tested by authorized engineer, and ensure that the external power supply switch is closedd, then you can start the UPS. 6.2.1 Startup Procedures in Normal Mode W A RN IN G ! 1. - Page 115 Vertiv™ Liebert® EXM2 UPS User Manual Figure 6.2 Inputting passw ord 4. When the rectifier start process is finished, close the battery circuit breaker, and the system will run in Bypass mode (Power flow shown in Figure 6.3 on the next page). Click the On key (Refer to Operator Controls...
- Page 116 Vertiv™ Liebert® EXM2 UPS User Manual Figure 6.3 C licking O n Status key 5. The inverter starts self-test and sync. Figure 6.4 Inverter self-test and sync 6 Single UPS Operation Introduction...
-
Page 117: Startup Procedures In Eco Mode
At the moment, the system is powered on, and the startup screen pops up. 3. If ECO mode is required, contact Vertiv service engineer to set it through the setting software. If you wish to set it by yourself, you can enable it through the sub-menu under 'SETUP' on the TOUCHSCREEN screen. For details, refer to Operator Controls . -
Page 118: Startup Procedures In Battery Mode (Battery Cold Start)
Vertiv™ Liebert® EXM2 UPS User Manual Figure 6.6 Setting EC O m ode 4. When the rectifier start process is finished, start the system according to Startup Procedures in Normal Mode . After the inverter runs normally, if the bypass voltage is within the range of ECO power supply, then the system works in ECO mode;... -
Page 119: Procedures For Transfer Between Operation Modes
Vertiv™ Liebert® EXM2 UPS User Manual N O . D escription Battery cold start button 6.3 Procedures for Transfer between Operation Modes 6.3.1 Transfer from Normal Mode to Battery Mode Open the external power switch to isolate the mains power and initiate the UPS on battery mode. To transfer the UPS back to normal mode, close the external power switch to reconnect the mains power to the UPS. -
Page 120: Transfer From Normal Mode To Maintenance Mode
Vertiv™ Liebert® EXM2 UPS User Manual Figure 6.9 Transfer U PS to N orm al m ode 6.3.4 Transfer from Normal Mode to Maintenance Mode The following procedures will transfer the UPS from inverter output mode to the maintenance bypass mode. -
Page 121: Transfer From Maintenance Mode To Normal Mode
Vertiv™ Liebert® EXM2 UPS User Manual N O TE: U nder m aintenance m ode, the load is directly fed by the m ains pow er instead of the pure A C pow er from the inverter. 6. Disconnect the rectifier input switch Q1, bypass input switch Q2, and output switch Q5. -
Page 122: Battery Test Procedures
Periodical self-test is to test the battery activity. The periodical self-test is regular, and the self-test period can be configured via the Vertiv setting software. During the periodical self-test, if the battery maintenance requirement is met, the system will generate audible/visual alarm and corresponding records. The periodical self-test does not update the battery curve table. - Page 123 Vertiv™ Liebert® EXM2 UPS User Manual N O TE: A fter the self-test is successful, the system w ill fully clear the self-test interval counter. If the self-test fails this tim e, then exit the system ; w hen self-test conditions are satisfied again, enters self-test once m ore.
-
Page 124: Ups Shutdown Procedures
Vertiv™ Liebert® EXM2 UPS User Manual 6.5 UPS Shutdown Procedures 6.5.1 Procedures for Completely Powering Down UPS Complete UPS shutdown and load power-off should follow this procedure. All power switches, isolating switches and breakers are disconnected, and then UPS no longer supplies power to load. -
Page 125: Ups Reset Procedures After Epo
Vertiv™ Liebert® EXM2 UPS User Manual 6.7 UPS Reset Procedures after EPO After shutting down the UPS through EPO or reasons of inverter overtemperature, overload, battery overvoltage and DC bus voltage, clear the fault according to the alarm message displaying on TOUCHSCREEN screen. Then carry out the following reset procedures to make UPS resume normal operation. -
Page 126: Selecting Language
Vertiv™ Liebert® EXM2 UPS User Manual 6.9 Selecting Language Use the following procedures to select the language: Click the icon 2. Click the icon 3. Click the item of Display. 4. Click 'Display Properties'. 5. As shown in Figure 6.11 below, click 'Language' to set the language you need. -
Page 127: Changing Current Date And Time
Vertiv™ Liebert® EXM2 UPS User Manual 6.10 Changing Current Date and Time Use the following procedures to change the system date and time: Click the icon 2. Click the icon 3. Click the item of Display. 4. Click 'Date&Time'. 5. Refer to Figure 6.12 below, set the actual date and time. -
Page 128: Control Password
Vertiv™ Liebert® EXM2 UPS User Manual 6.11 Control Password To change password, carry out the following procedures: Enter SETUP level. 2. Click the icon 3. Refer to Figure 6.13 below, set password changing. Figure 6.13 Setting passw ord 6 Single UPS Operation Introduction... -
Page 129: Battery
Vertiv™ Liebert® EXM2 UPS User Manual 7 Battery This chapter introduces the battery, including the battery safety, installation and maintenance information, battery protection function, as well as the connection of BCB box (option), battery temperature sensor (option), and battery ground fault detector (option). - Page 130 Vertiv™ Liebert® EXM2 UPS User Manual H azardous battery voltage present behind covers Observe the following safety precautions when working on the batteries: The battery shall be firmly and reliably connected. After the connection is completed, the screw connections between all the terminals and the batteries shall be calibrated.
-
Page 131: Ups Battery
Vertiv™ Liebert® EXM2 UPS User Manual 7.3 UPS Battery The UPS generally adopts valve-regulated battery. At present, 'valve-regulated' means the 'sealed type' or 'maintenance free' mentioned in the past. The valve-regulated battery is not completely sealed, especially when it is over-charged, there will be gas escape. The volume of the gas escape is less than the water injection battery. - Page 132 Vertiv™ Liebert® EXM2 UPS User Manual W A RN IN G ! In addition to safety requirem ents it is im portant to follow grounding best practices for EM C requirem ents. For exam ple, daisy chain grounding connection betw een U PS m odules located in different electrical room s or floors is not recom m ended.
-
Page 133: Battery Installation Environment And Number Of Batteries
Vertiv™ Liebert® EXM2 UPS User Manual 7.5 Battery Installation Environment and Number of Batteries 7.5.1 Installation Environment Fresh air volum e (EN 50272-2001) The operating environment of the battery must be ventilated. During the operation of the battery, the following requirement for the fresh air ventilation shall be satisfied: –3... -
Page 134: Number Of Batteries
Vertiv™ Liebert® EXM2 UPS User Manual 7.5.2 Number of Batteries The system battery cell number is 30 by default, and the cell float voltage is 2.27V. The number of batteries, EOD voltage, and float charging voltage under the 380V/400V/415V voltage system are consistent, as shown in Table 7.2 below. -
Page 135: Battery Installation
Vertiv™ Liebert® EXM2 UPS User Manual N O TE: V ertiv w ill not accept liability or pay costs, fees, or dam ages resulting from m issing or incorrect sizing of the battery protection device(s). Please contact V ertiv Technical Support for m ore inform ation. -
Page 136: Design Of Battery Room
Vertiv™ Liebert® EXM2 UPS User Manual 7.8 Design of Battery Room No matter which type of installation system is adopted, the following items shall be paid special attention to (refer to Figure 7.1 below): Layout of cells No matter which battery installation system is used, the battery shall be located in a matter that it will not contact two naked live parts with the potential difference over 150V at the same time. -
Page 137: Common Battery String
Vertiv™ Liebert® EXM2 UPS User Manual 7.9 Common Battery String The UPS supports common battery string function, which indicates that each unit in the parallel system shares the same battery string to achieve the purpose of energy saving, space saving and efficiency improving. The cables connection for common battery string is shown in Figure 7.2 below. -
Page 138: Connections Between Battery Compartments And Ups
Vertiv™ Liebert® EXM2 UPS User Manual 7.10 Connections between battery compartments and UPS The cables for connecting the UPS to the battery cabinets are not supplied. They can be provided by the manufacturer upon special request. A battery area temperature sensor is optional and includes a connecting cable. Place the sensor in the battery cabinet to monitor the battery temperature. - Page 139 Vertiv™ Liebert® EXM2 UPS User Manual Table 7.3 Param eters of BC B box D im ensions (H x W x D ), m m W eight (kg) 650 × 1000 × 285 The BCB box should be installed as close as possible to the battery. It can be installed on a wall or a horizontal surface through the installation holes shown in Figure 7.3 below.
- Page 140 Vertiv™ Liebert® EXM2 UPS User Manual Figure 7.4 Internal structure of BC B box (400A ) N O . D escription Top cable entry hole Top plate Current transformer of battery ground fault detector Battery terminal (-) Battery terminal (+)
- Page 141 Vertiv™ Liebert® EXM2 UPS User Manual Figure 7.5 C onnection diagram of BC B box (400A ) 7 Battery...
-
Page 142: Battery Ground Fault Detector (Optional)
7.12 Battery Ground Fault Detector (Optional) Vertiv provides an optional battery ground fault detector. It includes a current transducer and a PCB, which should be installed in the BCB box. The installation position of the PCB is shown in . If the BCB box uses top cable entry, the current transducer should be installed on the inside of the top plate of the BCB box, as shown in ;... -
Page 143: Bcb Reference Current And Connection
Vertiv™ Liebert® EXM2 UPS User Manual 7.13 BCB Reference Current and Connection Table 7.4 below provides recommended BCB rated current and battery maximum discharge current at full load. Refer to Table 3B in IEC60950-1, and select appropriate cable CSA according to local electrical codes and standards. -
Page 144: Battery Maintenance
Vertiv™ Liebert® EXM2 UPS User Manual Table 7.4 BC B rated current and battery m ax. discharge current at full load (recom m ended) (con- tinued) U PS rated pow er (kV A ) Item s U nit CSA of connection cable... -
Page 145: Disposal Of Used Battery
Vertiv™ Liebert® EXM2 UPS User Manual 7.15 Disposal of Used Battery If the battery has liquid leakage or is damaged, place the battery into the container that can withstand sulphuric acid and discard it according to the local regulations. Used lead acid storage battery belongs to dangerous waste, and it is a key item for used battery pollution control. The storage, transportation, use and disposal of the battery shall comply with the national and local laws and regulations on dangerous waste and used battery pollution prevention and other standards. - Page 146 Vertiv™ Liebert® EXM2 UPS User Manual This page intentionally left blank 7 Battery...
-
Page 147: Parallel System And Lbs System
Vertiv™ Liebert® EXM2 UPS User Manual 8 Parallel System and LBS System This chapter gives details on the installation of parallel system and LBS system. 8.1 General The parallel system can comprise of up to six UPS modules of the same power rating and connected in parallel without the need for a centralized mains static bypass. - Page 148 Vertiv™ Liebert® EXM2 UPS User Manual Figure 8.1 Schem atic of typical parallel system (w ith com m on input, separate batteries and output) N O . D escription N O . D escription Input power supply Inverter Mains input L1, L2, L3, N...
-
Page 149: External Protective Device
Vertiv™ Liebert® EXM2 UPS User Manual 8.2.3 External Protective Device W A RN IN G ! H igh earth leakage current: Earth connection is critical before connecting the input supply (including both m ains supply and battery). The equipm ent m ust be earthed in accordance w ith the local electrical code of practice. -
Page 150: Parallel Cable
Vertiv™ Liebert® EXM2 UPS User Manual 8.2.5 Parallel Cable Shielded and double-insulated parallel cables available in lengths 5m, 10m and 15m must be interconnected in a ring configuration between the UPS modules, as shown in Figure 8.2 below. Method: connect a module parallel cable from its PARA1 port to the PARA2 port of another module. -
Page 151: Remote Epo
Vertiv™ Liebert® EXM2 UPS User Manual 8.2.6 Remote EPO In addition to the EPO switch provided on the operator control and display panel of each UPS module for controlling the EPO of each module respectively, the parallel system also provides remote EPO function for controlling all UPS modules to shut down simultaneously from a remote terminal, as shown in Figure 8.4 below. -
Page 152: Operation Procedures For Parallel System
Vertiv™ Liebert® EXM2 UPS User Manual 8.3 Operation Procedures for Parallel System Only one step is carried on for once, and only after finishing this operation step of each UPS module, the next step can be carried on. 8.3.1 Startup Procedures in Normal Mode These procedures are applicable to start the UPS under total power-down state, which means the UPS or the maintenance bypass switch has not supplied the load before. -
Page 153: Maintenance Bypass Procedures
Vertiv™ Liebert® EXM2 UPS User Manual 8.3.2 Maintenance Bypass Procedures W A RN IN G ! If the U PS system is com posed of tw o or m ore parallel connected U PS m odules, and the load capacity exceeds the single U PS m odule capacity, do not use the internal m aintenance bypass sw itch (Q 3). -
Page 154: Procedures For Isolating One Ups Module From Parallel System
8.3.3 Procedures for Isolating One UPS Module from Parallel System These procedures shall only be carried out by service personnel of Vertiv or under their guidance. W A RN IN G ! Please check if the parallel U PS system is configured in redundancy m ode or not. -
Page 155: Procedures For Inserting One Isolated Ups Module In Parallel System
Vertiv™ Liebert® EXM2 UPS User Manual 8.3.4 Procedures for Inserting One Isolated UPS Module in Parallel System IM PO RTA N T! These procedures shall only be carried out by service personnel of V ertiv or under their guidance. The following procedures are used to reintegrate a UPS module that has been previously isolated from the parallel system: Confirm that the I/O cable, battery cable of the single module are correctly connected. -
Page 156: Lbs System
Vertiv™ Liebert® EXM2 UPS User Manual 8.4 LBS System 8.4.1 Cabinet Installation An LBS system consists of two independent UPS systems, each containing one or more parallel UPS modules, as shown in Figure 8.5 below and Figure 8.6 on the facing page The LBS system has high reliability and is applicable to the load with multiple inputs. -
Page 157: External Protective Device
Vertiv™ Liebert® EXM2 UPS User Manual Figure 8.6 LBS system (parallel system ) N O . D escription N O . D escription Bypass Rectifier UPS 1 UPS 4 Parallel cable N O TE: Q 1, Q 2 and Q 5 are optional w hile Q 3 is standard. -
Page 158: Lbs Cable
Vertiv™ Liebert® EXM2 UPS User Manual 8.4.4 LBS Cable For 100kVA~250kVA dual bus system, connect the optional LBS cables (10m, 15m, 20m) between the LBS ports (J4) or PARA2 and LBS port of the two UPS systems shown in Figure 8.7 below. The J4 port and PARA port are provided on the front panel of the bypass control module, as shown in Figure 8.8 on the facing page. - Page 159 Vertiv™ Liebert® EXM2 UPS User Manual N O . D escription LBS cable 2 Parallel cable Figure 8.8 LBS port (J4) and PA RA port (J3) on bypass control m odule 8 Parallel System and LBS System...
- Page 160 Vertiv™ Liebert® EXM2 UPS User Manual This page intentionally left blank 8 Parallel System and LBS System...
-
Page 161: Ptions
Vertiv™ Liebert® EXM2 UPS User Manual 9 Options This chapter provides the UPS option list, and introduces the functions, installation and configuration of each option. 9.1 Option List Table 9.1 O ption list N o. O ption nam e Rem ark... -
Page 162: Option Introduction
Vertiv™ Liebert® EXM2 UPS User Manual 9.2 Option Introduction 9.2.1 Optional Side Cabinet Figure 9.1 Top/front/side/bottom view of the 100kV A ~ 250kV A U PS (w ith optional side cabinet) (unit: m m ) 9 Options... - Page 163 Vertiv™ Liebert® EXM2 UPS User Manual Side C abinet m echanical connection The power cabinet and optional side cabinet need to be connected at installation site, see Figure 9.2 below. Figure 9.2 M echanical cabinet connection N O TE: W hen installing the tw o cabinets, rem ove the right-side panel of the m ain pow er cabinet first, and install the dism antled right-side panel on the right-side of the top cabling cabinet after the top cabling cabinet is installed.
- Page 164 Vertiv™ Liebert® EXM2 UPS User Manual Figure 9.3 M atching optional side cabinet electrical connection (200V A ~ 250kV A ) N O TE: Step 1: Rem ove the top plate. lead cables into the cabinet. Step 2: Rout cables along the cabinet inside, and use cable ties to bind them .
-
Page 165: Bypass Short-Circuit Withstand Option
Vertiv™ Liebert® EXM2 UPS User Manual 9.2.2 Bypass Short-circuit Withstand Option As shown in Figure 9.4 below, the bypass short-circuit withstand option contains three bypass fuses. Before installation, it is necessary to remove three bypass shorting copper bars and then install three bypass fuses at the corresponding shorting copper bars. -
Page 166: Battery Temperature Sensor
Vertiv™ Liebert® EXM2 UPS User Manual 9.2.3 Battery Temperature Sensor The battery temperature sensor is used to detect the battery temperature. With this function, we can adjust the float charging voltage of the battery to make it inversely proportional to the ambient temperature of the battery, so as to prevent the over- charge of the battery at high ambient temperature. -
Page 167: Seismic Anchor Kit
Vertiv™ Liebert® EXM2 UPS User Manual 9.2.5 Seismic Anchor Kit The UPS provides seismic anchor kits that can support earth quake intensity level 9 and below to avoid and reduce the damage to UPS caused by earthquake vibration See Table 9.2 below for dimensions of the seismic anchor kit. - Page 168 Vertiv™ Liebert® EXM2 UPS User Manual Figure 9.5 Installing seism ic anchor (rear installation) N O . D escription 4 - M8 x 25 tapping screw Installing M12 expansion bolt (3PCS) 2. Use M8 × 25 tapping screws (4 pcs) to install seismic anchor on the front bottom of the UPS cabinet, and use M12 expansion bolts (3 pcs) to fix seismic anchor on the ground, as shown in Figure 9.6 on the facing page...
- Page 169 Vertiv™ Liebert® EXM2 UPS User Manual Figure 9.6 Installing seism ic anchor (front installation) N O . D escription 4 - M8 x25 tapping screw Installing M12 expansion bolt (3PCS) 9 Options...
-
Page 170: Is-Unity-Dp Card
Vertiv™ Liebert® EXM2 UPS User Manual 9.2.6 IS-UNITY-DP Card IM PO RTA N T! It is recom m ended to use the shielded cables to enhance the EM C . The appearance of IS-UNITY-DP card is shown in Figure 9.7 below. -
Page 171: Sic Card (Available In Specific Regions Only)
Vertiv™ Liebert® EXM2 UPS User Manual 9.2.8 SIC Card (Available in Specific Regions only) The SIC card is a network management card. It brings the network communication capability for the Liebert UPS. It can also support IRM series sensor to monitor environment. When the intelligent equipment generates an alarm, the SIC card can notify the user by recording the log, sending trap information, and sending a mail. -
Page 172: Uf-Rs485 Card
Vertiv™ Liebert® EXM2 UPS User Manual 9.2.9 UF-RS485 Card The UF-RS485 card converts RS232 signal to RS485 signal to realize UPS networking and communication. It should be installed in an Intellislot port (see Figure 4.4 on page 46) of UPS. It is hot pluggable for easy installation. -
Page 173: Is-Relay Card
Vertiv™ Liebert® EXM2 UPS User Manual 9.2.10 IS-Relay Card The appearance of the IS-Relay card is shown in Figure 9.10 below. Figure 9.10 A ppearance of IS-Relay card The UPS provides IS-Relay card for the user to use the dry contact signal to monitor the UPS. -
Page 174: Bcb Box
Vertiv™ Liebert® EXM2 UPS User Manual For more information of the IS-Relay card, refer to the Liebert® IntelliSlot IS-Relay Card User Manual in accessory. The installation method of the IS-Relay card is the same as that of the SIC card described in SIC Card (Available in Specific Regions only) Refer to Signal Cable Connection Steps for the cabling and routing of the signal cables. -
Page 175: Top Fan Kit
Vertiv™ Liebert® EXM2 UPS User Manual 200kV A ~ 250kV A N O . D escription Main contactor Bypass contactor 9.2.15 Top Fan Kit As shown in Figure 9.12 below, the top fan kit consists of two fans which are installed on top of the cabinet. -
Page 176: Input/Output Switch Kit
Vertiv™ Liebert® EXM2 UPS User Manual 9.2.16 Input/output Switch Kit As shown in Figure 9.13 below, the I/O switch kit includes input switch, output switch and bypass switch. Please dismantle the shorting busbar before installation, then install the switches to corresponding shorting busbars. -
Page 177: Ip21 Option
Vertiv™ Liebert® EXM2 UPS User Manual 9.2.17 IP21 Option As shown in Figure 9.14 below, the IP21 option includes cabinet top cover, which makes the UPS protection level IEC (60529) be IP21. Figure 9.14 IP21 O ption D iagram D escription... -
Page 178: Ip31 Option
Vertiv™ Liebert® EXM2 UPS User Manual 9.2.18 IP31 Option As shown in Figure 9.15 below, the IP31 option includes cabinet top cover and air filter, which makes the UPS protection level IEC (60529) be IP31. Figure 9.15 IP31 O ption D iagram... -
Page 179: Transformer
Vertiv™ Liebert® EXM2 UPS User Manual 9.2.19 Transformer As shown in Figure 9.16 below, connect the UPS main cabinet and transformer cabinet in parallel using screws. Figure 9.16 Parallel cabinet w ith transform er Connect the power cable of the transformer cabinet to the output OA\OB\OC\ON\PE terminals shown in Figure 4.2 on page 40. -
Page 180: C2 Electromagnetic Shielding Option
Vertiv™ Liebert® EXM2 UPS User Manual Figure 9.17 Term inals connection N o. D escription Out A Out B Out C Out D 9.2.20 C2 Electromagnetic Shielding Option The C2 electromagnetic shielding option enables the UPS to meet the EMC requirements of Class C2 devices. If used in residential areas, installation restrictions or additional measures may be required to suppress RF harassment. -
Page 181: Lbs Adapter
Vertiv™ Liebert® EXM2 UPS User Manual 9.2.22 LBS Adapter The LBS adapter is designed to extend the LBS function up to 150m between the two UPS units or systems of a dual bus system, and it also enables an EXM2 UPS to synchronize with other UPS models. - Page 182 Vertiv™ Liebert® EXM2 UPS User Manual This page intentionally left blank 9 Options...
-
Page 183: Om M Unication
10.1 SNMP Protocol Communication If you need to monitor the UPS through network, you may select the UNITY card or SIC card provided by Vertiv. These two cards support SNMP protocol. -
Page 184: Communication Through Dry Contact Port
Vertiv™ Liebert® EXM2 UPS User Manual 10.3.2 Communication Through Dry Contact Port For on-site specific needs, the UPS may need auxiliary connection to achieve functions like acquiring external equipment status information, providing alarm signals to external devices, and remote EPO. The UPS has the following interfaces: •... -
Page 185: Service And Maintenance
Vertiv™ Liebert® EXM2 UPS User Manual 11 Service and Maintenance The UPS system (including battery) needs regular service and maintenance. This chapter elaborates on the advice on the service life, regular inspection, maintenance and replacement of the UPS key components. Effective maintenance of the UPS system can reduce the risk in UPS failure and prolong the UPS service life. -
Page 186: Service Procedures Of Bypass Module
Vertiv™ Liebert® EXM2 UPS User Manual N O TE: The m odule w ill be blocked by a spring piece on the right side of the m odule w hen the m odule is pulled out of the cabinet halfw ay. A t this point, you m ust press the spring piece before you continue to pull the m odule out. -
Page 187: Key Components And Service Life Of Ups
Vertiv™ Liebert® EXM2 UPS User Manual Figure 11.2 Installing pow er m odules of 200kV A ~ 250kV A N O TE: Install the pow er m odules from bottom to top to avoid cabinet toppling caused by the high center of gravity. -
Page 188: Life Parameters And The Proposed Replacement Time Of Key Components
Vertiv™ Liebert® EXM2 UPS User Manual 11.3.1 Life Parameters and the Proposed Replacement Time of Key Components Key components in Table 11.1 below are used in the UPS system. To prevent system failures due to some of the devices' failure by wear, it is proposed to carry out regular inspection and replacement during its estimated life. -
Page 189: Maintenance Of Ups And Options
Vertiv™ Liebert® EXM2 UPS User Manual Figure 11.3 Replacing air filter N O . D escription Replacing air filter 11.4 Maintenance of UPS and Options UPS and the options need common maintenance: Keep good history record. Keeping good history record facilitates failure treatment. - Page 190 Vertiv™ Liebert® EXM2 UPS User Manual This page intentionally left blank 11 Service and Maintenance...
-
Page 191: Specifications
Vertiv™ Liebert® EXM2 UPS User Manual 12 Specifications This chapter lists the UPS specifications. 12.1 Conformance and Standards The UPS has been designed to comply with the European and international standards listed in Table 12.1 below. Table 12.1 European and international standards... -
Page 192: Mechanical Characteristics
Vertiv™ Liebert® EXM2 UPS User Manual 12.3 Mechanical Characteristics Table 12.3 M echanical characteristics Rated pow er (kV A ) Item U nit 120/150/160 Packing 850x600x1600 850x600x2000 excluded Dimensions (D × W × H) Packing 1000x800x1800 1000x800x2180 included Net weight... -
Page 193: Electrical Characteristics (Intermediate Dc Circuit)
Vertiv™ Liebert® EXM2 UPS User Manual 12.5 Electrical Characteristics (Intermediate DC Circuit) Table 12.5 Battery Rated pow er (kV A ) Item U nit 120/150/160 Max. charging current Quantity of lead-acid cells (nominal) Block 28 ~ 44 (12Vdc) 2.25 (selectable from 2.2V/cell to 2.3V/cell) -
Page 194: Electrical Characteristics (Bypass Input)
Vertiv™ Liebert® EXM2 UPS User Manual Table 12.6 Inverter output (to critical load) (continued) Rated pow er (kV A ) Item U nit Transient voltage response ±5 Total voltage harmonic distortion < 1 (linear load), < 3 (non-linear load Upper limit: 0.5Hz, 1Hz, 2Hz, 3Hz, +10%; Default: +10%. -
Page 195: Efficiency And Loss
Vertiv™ Liebert® EXM2 UPS User Manual 12.8 Efficiency and Loss Table 12.8 Efficiency and loss Rated pow er (kV A ) Item U nit Rated normal mode (full load) Rated normal mode (No load) ECO mode (full load) 25% Load 96.69... - Page 196 Vertiv™ Liebert® EXM2 UPS User Manual This page intentionally left blank 12 Specifications...
-
Page 197: Appendices
Vertiv™ Liebert® EXM2 UPS User Manual Appendices Appendix A: Technical Support and Contacts Technical Support/Service in the United States Vertiv Group Corporation 24x7 dispatch of technicians for all products. 1-800-543-2378 Liebert® Thermal Management Products 1-800-543-2778 Liebert® Channel Products 1-800-222-5877 Liebert® AC and DC Power Products... -
Page 198: Appendix B: Glossary
Vertiv™ Liebert® EXM2 UPS User Manual Appendix B: Glossary Alternating current Battery circuit breaker Cross sectional area Direct current External interface board Electromagnetic compatibility Electromagnetic interference End-of-discharge Emergency power off Input/output IGBT Integrated gate bipolar transistor Load bus synchronizer TOUCHSCREEN... -
Page 199: Appendix C: Hazardous Substances And Content
Vertiv™ Liebert® EXM2 UPS User Manual Appendix C: Hazardous Substances and Content H azardous substances Parts Plum bum H ydrargyru C adm ium C hrom e PBD E ( Pb) ( H g) ( C d) ( C r (V I)) -
Page 200: Appendix D: Declaration Of Materials And Components
Components containing refractory ceramic fibres Components containing radioactive substances Electrolytic capacitors of height > 25 mm and diameter > 25 mm or proportionately similar volume This table is made following the standard of IEC 62040-4. Applicable scope: Vertiv™ Liebert® EXM2 100-250 kVA UPS. Appendices... -
Page 201: Appendix E: Disposal After End Of Product (Applicable For India)
Disposal of battery waste as per local regulations. In India, dispose to authorized recyclers as mentioned under current E- waste act/rules of the relevant state pollution control board. List of authorized recyclers are available on the relevant website of state pollution. Vertiv has list of collection centre for e-waste available at below mentioned site: https://www.vertiv.com/en-in/about/e-waste-management/ Packing w aste: Disposal of battery waste as per local regulations. - Page 202 Vertiv™ Liebert® EXM2 UPS User Manual This page intentionally left blank Appendices...
- Page 203 Vertiv™ Liebert® EXM2 UPS User Manual...
- Page 204 Vertiv.com | Vertiv Headquarters, 1050 Dearborn Drive, Columbus, OH, 43085, USA © 2022 Vertiv Group Corp. All rights reserved. Vertiv™ and the Vertiv logo are trademarks or registered trademarks of Vertiv Group Corp. All other names and logos referred to are trade names, trademarks or registered trademarks of their respective owners. While every precaution has been taken to ensure accuracy and completeness here, Vertiv Group Corp.
Need help?
Do you have a question about the Liebert EXM2 and is the answer not in the manual?
Questions and answers