Advertisement
EUROPEAN COOKING APPLIANCES
AUS
TOLL FREE:
LOCAL:
Technika Pty. Ltd.
A.B.N. 38 069 686 326
MODEL: GHEO9TD
MODEL: GHEO6TD
FREESTANDING DUAL FUEL COOKERS
DOMESTIC USE ONLY
Operating and Installation Instructions
CUSTOMER CARE
P.O. BOX 2254, FOUNTAIN GATE RETAIL POST OFFICE 3805
8 - 10 VESPER DRIVE, NARRE WARREN
Ph: 9705 4144 Fax: 9704 1796
Toll Free: 1800 333 244
1 800 333 244
(03) 9705 4144
Advertisement

Related Manuals for Technika GHEO9TD


Summary of Contents for Technika GHEO9TD
- Page 1 EUROPEAN COOKING APPLIANCES MODEL: GHEO9TD MODEL: GHEO6TD FREESTANDING DUAL FUEL COOKERS DOMESTIC USE ONLY Operating and Installation Instructions CUSTOMER CARE TOLL FREE: 1 800 333 244 LOCAL: (03) 9705 4144 8 - 10 VESPER DRIVE, NARRE WARREN P.O. BOX 2254, FOUNTAIN GATE RETAIL POST OFFICE 3805 Technika Pty.
-
Page 2: Table Of Contents
The appliance was designed and made in accordance with the European standards listed below: => EN 30-1-1, EN 30-2-1 and EN 437 plus subsequent amendments (gas) => EN 60 335-1 and EN 60 335-2-6 (electrical) plus relative amendments The appliance complies with the prescriptions of the European Directives as below: =>... -
Page 3: Assistance And Spare Part
ASSISTANCE AND SPARE PARTS Before this appliance left the factory it was tested and set by specialized, expert personnel in order to guarantee the best functioning results. Any subsequent repairs or adjustments that may be necessary must be done with the maximum of care and attention by authorised personnel. -
Page 4: Important Notes And Precautions For Use
IMPORTANT NOTES AND PRECAUTIONS FOR USE You have purchased one of our products for which we There are a few basic rules that must be observed thank you. We are confi dent that this new appliance, when using the appliance: modern, functional and practical, made with top =>... -
Page 5: Description Of The Appliance
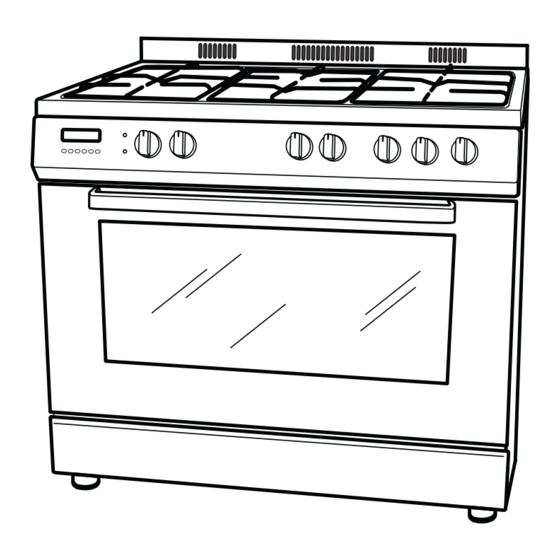
DESCRIPTION OF THE APPLIANCE PRESENTATION Our cooker is fi tted with a fully gas hotplate. This innovative burner hotplate offers you more scope and versatility in hotplate cooking than ever before. The round burners are graduated in their size and output to provide the exact heat required for every style of cooking. - Page 6 DESCRIPTION OF THE APPLIANCE CONTROL PANELS DESCRIPTION A. Gas burner knob B. Oven thermostat knob C. Function selector knob D. Red warning light E. Yellow warning light indicating oven thermostat activation Electronic programmable clock MODEL: GHEO9TD. MODEL: GHEO6TD...
- Page 7 DESCRIPTION OF THE APPLIANCE DESCRIPTION OF THE CONTROLS HOB GAS BURNER KNOB (ref. A) By rotating the knob in an anticlockwise direction, the following symbols appear: = Closed position = “Full on” position = “Reduced rate or Low” position OVEN THERMOSTAT KNOB (ref. B) By turning the oven knob clockwise we will fi...
- Page 8 DESCRIPTION OF THE APPLIANCE ELECTRONIC PROGRAMMER (ref. F) The programmer can select the following functions: - Clock (set by keys 2 and 3) - Minute counter (set by key 1) - Cooking time (set by key 2) - End of cooking (set by key 3) - Manual operation mode (set by key 4)
- Page 9 DESCRIPTION OF THE APPLIANCE ELECTRONIC PROGRAMMER (ref. F The programmer can select the following functions: - Clock (set by keys 2 and 3) - Minute counter (set by key 1) - Cooking time (set by key 2) - End of cooking (set by key 3) - Manual operation mode (set by keys 2 and 3)
-
Page 10: Instructions For The User
INSTRUCTIONS FOR THE USER HOB: GENERAL NOTES ON SAFETY • Use only a wok support supplied or recommended • When using the burners, do not leave the appliance by the manufacturer of the appliance (fi g. 8). unsupervised. Ensure that children and the infi rm do not play with the appliance. - Page 11 INSTRUCTIONS FOR THE USER...
- Page 12 INSTRUCTIONS FOR THE USER WHAT TO DO THE FIRST TIME YOU USE THE OVEN: GENERAL SAFETY INSTRUCTIONS OVEN • Do not leave the oven unsupervised during use. • Remove all protective wrapping materials from the Ensure that children and the infi rm do not play with appliance and labels from the oven door.
- Page 13 INSTRUCTIONS FOR THE USER HOW TO USE THE MULTIFUNCTION OVEN FAN FORCED COOKING Turn the selector knob (ref. C) to the symbol and DEFROSTING AT ROOM TEMPERATURE adjust the thermostat knob (ref. D) to the desired Turn the selector knob (ref. C) to the symbol and place temperature, then place your food inside the oven.
- Page 14 INSTRUCTIONS FOR THE USER Meat: USEFUL COOKING TIPS • If, when cooking meat, the time needed is more than 40 minutes, turn the oven off 10 minutes Cakes and bread: before the end of cooking time to exploit the • Heat the oven for at least 15 minutes before you residual heat (energy saving).
- Page 15 INSTRUCTIONS FOR THE USER COOKING / BAKING TIMETABLE Position of the COOKING BY COOKING BY oven shelf from Weight NATURAL CONVECTION FORCED CONVECTION (WITH FAN) the bottom FOODS with 5 with 3 Temperature Cooking Time Temperature Cooking Time in °C in minutes in °C in minutes...
- Page 16 INSTRUCTIONS FOR THE USER STRUCTURE CLEANING AND MAINTENANCE All the cooker parts (in enamelled or painted metal, Before cleaning or maintenance, isolate the steel, or glass) should be cleaned frequently with cooker from the electricity supply. warm soapy water and then rinsed and dried with a Never use a steam cleaner or caustic cleaner soft cloth.
- Page 17 INSTRUCTIONS FOR THE USER REPLACING THE OVEN LAMP (fi gs. 10a - 10b) OVEN CAVITY Ensure the appliance is switched off before Do not spray or wash the thermostat bulb with replacing the lamp to avoid the possibility of acid based products (check the product label electric shock..
-
Page 18: Troubleshooting
TROUBLESHOOTING Some problems can be caused either as the results of simple maintenance operations or by incorrect selection of settings. Prior to contacting a Service Centre please check the following chart. PROBLEM REMEDY The appliance is not working • Make sure the gas cock is open •... -
Page 19: Instructions For The Installer
6. INSTRUCTIONS FOR THE INSTALLER TECHNICAL INFORMATION The installations, conversions and maintenance operations listed in this part must only be carried out by authorised personnel. The manufacturer cannot be held responsible for any damage to persons or property resulting from an incorrect installation of the appliance. •... - Page 20 6. INSTRUCTIONS FOR THE INSTALLER POSITION (fi g. 11) LEVELLING THE COOKER The appliance should be positioned in good light and • Adjustable feet, to be fi tted to the appliance, which free from draughts. Any adjoining wall surface situated allow the height of the cooker to be aligned with within 200 mm from the edge of any hob burner must be other kitchen furniture This can be done by means...
- Page 21 6. INSTRUCTIONS FOR THE INSTALLER SECURING THE COOKER TO WALL (fi g. 15) Note:- The installation of the chain provided is for safety reasons, it must be installed as indicated below. To prevent the cooker tipping forwards in the event of children standing on the oven door or where users put extreme weight on the door when in open position, two lengths of chain are fi...
- Page 22 6. INSTRUCTIONS FOR THE INSTALLER GAS CONNECTION This appliance shall be installed only by authorised personnel and in accordance with the manufacturer’s installation instructions, local gas fi tting regulations, municipal building codes, water supply regulations, electrical wiring regulations, AS 5601/AG 601 - Gas Installations and any other statutory regulations. The appliance is adjusted to work at gas indicated on the label which is applied on the glass-window of the oven door and on the cooker packing.
- Page 23 6. INSTRUCTIONS FOR THE INSTALLER ELECTRICAL CONNECTION The electrical connection must be carried out in accordance with the current standards and laws in force and by an authorised electrician. • Warning this appliance must be earthed. • Connection to the electricity supply must be made by an authorised electrician to a suitable isolating switch in accordance with the requirements of SAA Wiring Rules, AS/NZS 3000.
- Page 24 6. INSTRUCTIONS FOR THE INSTALLER NOTE: GAS CONVERSIONS Hot Plate Ignition Failure When converting from Natural Gas to Propane ensure • Check alignment of burner holes to electrode. that the NG regulator is removed and replaced with the • Check aeration sleeve for adjustment for gas type, Test Point Assembly.
- Page 25 Servicing must only be carried out by authorised personnel. REPLACING THE TAPS (mod GHEO9TD) Proceed in the following way when replacing a tap: • Remove pan supports, burner heads.
- Page 26 REPLACING THE TAPS (mod GHEO6TD) REPLACING THE ELECTRICAL COMPONENTS To change a tap proceed as follows (fi g. 24): (mod GHEO9TD) • Remove pan supports, burner heads and knobs. • Unscrew the burners securing screws. • The rear protection will have to be removed in order •...
-
Page 27: Technical Features
Left front Natural 1.00 13.3 ELECTRICAL COMPONENTS DESCRIPTION NOMINAL DATA NOMINAL DATA MODEL: GHEO9TD MODEL: GHEO6TD Lower heating element of the oven 2100 W 1600 W Top heating element of the oven-grill 2000 + 2200 W 700+1800 W Rear heating element... - Page 28 TECHNICAL FEATURES ELECTRICAL WIRING DIAGRAM LABEL mod GHEO9TD...
- Page 29 TECHNICAL FEATURES ELECTRICAL WIRING DIAGRAM LABEL mod GHEO6TD...
-
Page 32: Warranty
This appliance is for domestic, private or household purposes only within Australia. Technika will replace, or at its option repair, the appliance if it is found to be defective due to faulty materials or workmanship within three years of its purchase.
Need help?
Do you have a question about the GHEO9TD and is the answer not in the manual?
Questions and answers