
Related Manuals for Technika TFS54RC-DRW


Summary of Contents for Technika TFS54RC-DRW
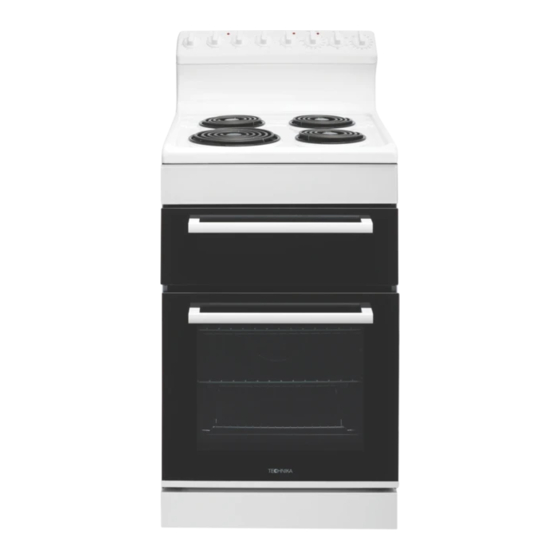
- Page 1 5 4 C M F R E E S T A N D I N G E L E C T R I C C O O K E R T F S 5 4 R C - D R W TECHNIKA.COM.AU...
-
Page 3: Table Of Contents
CONTENTS TABLE Conditions of use....................Pg 4 Safety precautions....................Pg 4 Other important safety information..............Pg 4 Warnings for use (of grill, oven, and appliance hob)......... Pg 5 Disposal of packaging ..................Pg 5 Installation, cleaning and servicing..............Pg 5 Product description..................... -
Page 4: Conditions Of Use
SAFETY USE • This appliance is not intended for use by persons (including children) with reduced physical, sensory or mental capabilities, or lack of experience and knowledge, unless they have been given supervision or instruction concerning use of the appliance by a person responsible for their safety. •... -
Page 5: Warnings For Use (Of Grill, Oven, And Appliance Hob)
WARNINGS FOR USE OF OVEN AND APPLIANCE HOB Grill warnings • DO NOT leave grill on unattended. • DO NOT cover the grill tray wire rack with foil. • Trying to grill food more than 25mm thick under grill can be a fire hazard. Trim excess fat from fatty meats, such as pork and lamb. -
Page 6: Product Description
PRODUCT DESCRIPTIONS Description of Electric Cooker Hob (solid, coil and ceramic) Heat shield (coil element models only) Grill door Oven shelf (2 supplied) Enamelled oven baking tray (1 supplied) Oven inner door glass Oven door Control panel Grill element (inside compartment) Grill tray wire rack insert (reversible to adjust height) Fan &... -
Page 7: First Time Use Of The Appliance
FIRST TIME USE OF THE APPLIANCE Fitting Oven Shelves • Ensure shelf orientation is correct (refer picture). • Slide into oven at an angle until raised back of shelf is past the stop on side runners. • Lower front of shelf and push in until stop is reached. NOTE: The top ledge is not a shelf position 120 Minute Timer... -
Page 8: Using The Oven
USING THE OVEN Set Oven Functions Description of oven functions Light The oven light is on. No heating elements are on. Grill The top central heating element comes on. Suitable for grilling food or browning food. Do not use lowest shelf position. Fan Assisted Grill The upper heating element and the fan come on. - Page 9 OVEN SHELF LOCATION (5 shelf positions side racks) OVEN COOKING GUIDE The following is intended as a guide only. It is often required to set oven 10-20 degrees above or below this guide to get the result you want. Also adjustments are needed for the cooking time to suit personal desired results. Also you should follow the recipe guide when setting temperature and times.
- Page 10 PG 10...
- Page 11 UNDERSTANDING COOKING PROBLEMS NOTE: Condensation on oven door is normal, especially when kitchen is cold. Also spacing and size of food on trays and the number of baking dishes in the oven can affect air circulation. PG 11...
-
Page 12: Using The Grill
Grill safety warnings • Always turn off the grill immediately after you have finished cooking and pull drawer out or remove grill tray otherwise fat left in the tray in the hot grill compartment will continue to smoke or could catch fire. •... -
Page 13: Using The Hotplates Of Your Cooker
USING THE HOTPLATES OF YOUR COOKER Hotplates safety warnings • Do not use pots and pans which are unsteady, as these could overbalance. • Do not use mats, heat diffusers or wok stands. These will cause a temperature build-up which can damage the cook top. -
Page 14: Fitting Oven Accessories And Cleaning
CLEANING THE COOKER Safety warnings about cleaning • Always make sure that the cooker is turned off before cleaning. • Always clean cooker immediately after use. • Do not use steam cleaners. These may cause moisture build-up. • Do not use caustic- based cleaners. These will damage aluminums parts, and remove enamel gloss. Cleaning the enamel •... - Page 15 Cleaning the grill compartment • Pull the grill tray out. • Clean the sides an bottom of compartment with hot soapy water. If stronger action is needed use a non abrasive cleaner applied with a nylon scourer. Cleaning the Oven •...
- Page 16 Cleaning the oven door / How to remove the oven door • For a more thorough clean, you can remove and disassemble the oven door. Proceed as follows: • Open the door to the full extent (fig. 1) • Open the lever A completely on the left and right hinges (fig. 2) •...
- Page 17 INFORMATION ABOUT THE COOLING FAN NOTE: Your cooker is fitted with a cooling fan that will run after the oven has been turned off. The reduce the time of the cooling fan running time it is suggested to open door ajar to assist in cooling down of oven.
-
Page 18: Solving Problems
SOLVING PROBLEMS Note: Only Euromaid Authorised service agents should carry out servicing otherwise warranty may be void. PG 18... -
Page 19: Installing Cooker - Power Connections
INSTALLING COOKER - POWER CONNECTIONS Fitting a power supply cable WARNING: Installation MUST ONLY be carried out by a qualified approved installer, ie. an Electrician. Connecting appropriate power supply ` terminal board/ connector block: NOTE: REFER to TECHNICAL tables at the rear of this manual for correct rating for your corresponding model purchased. -
Page 20: Installing Your New Cooker
INSTALLING YOUR NEW COOKER Safety warnings about installation • The cooker must be installed and serviced only by an authorised person. • A certificate of compliance must be supplied by Installer and is to be kept by the customer. • The packing materials must be removed before you install the cooker. - Page 21 (Refer to diagram relating to minimum clearances required for correct installation) • Determine position of cooker and ant-tilt plate. • Securely fix the anti-tilt plate to the floor with appropriate fasteners. • Slide the cooker into the anti-tilt plate to double check. And then slide out the cooker. •...
-
Page 22: Technical Specifications
TECHNICAL SPECIFICATIONS PG 22... -
Page 23: Warranty
Subject to the exclusions below, we warrant that the product will not have any electrical or mechanical breakdowns within: a) In the case of Technika Professional products used for personal, domestic or household purposes, a period of 2 years from the date the product is purchased as a brand-new product from a retailer located in Australia / New Zealand. - Page 24 MANUFACTURER GUARANTEE The product requires repairs due to damage resulting from accident, misuse, incorrect installation, insect or vermin infestation, improper liquid spillage, cleaning or maintenance, unauthorised modification, use on an incorrect voltage, power surges and dips, voltage supply problems, tampering or unauthorised repairs by any persons, use of defective or incompatible accessories or exposure to abnormally corrosive conditions, events independent of human control which occurred after the goods left the control of Glen Dimplex;...
- Page 25 MANUFACTURER GUARANTEE Warranty claims If you make a valid claim under this warranty and none of the exclusions set out in section 2 apply, we will, at our election, either repair the product or replace the product with a product of identical specification (or where the product is superseded or no longer in stock, with a product of as close a specification as possible).
- Page 26 NOTES PG 26...
- Page 27 MANUFACTURER GUARANTEE READ THE INSTRUCTION BOOKLET BEFORE INSTALLING AND USING THE APPLIANCE. The manufacturer will not be responsible for any damage to property or to persons caused by incorrect installation or improper use of the appliance. The manufacturer is not responsible for any inaccuracies, due to printing or transcription errors, contained in this manual.
Need help?
Do you have a question about the TFS54RC-DRW and is the answer not in the manual?
Questions and answers