
Related Manuals for Wacker Neuson DT10


Summary of Contents for Wacker Neuson DT10
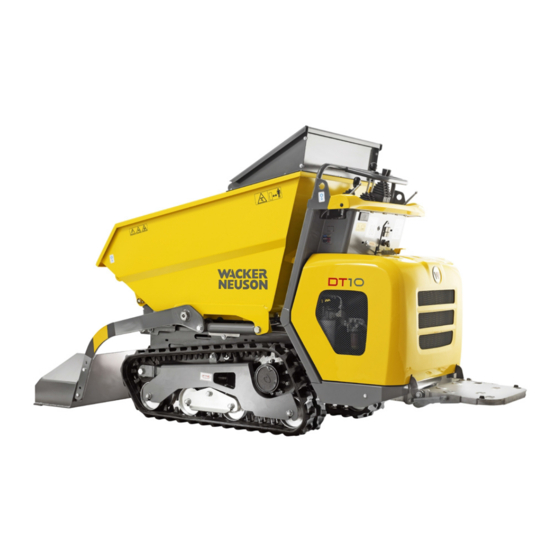
- Page 1 Operator’s manual Track dumper Vehicle model DT10 Edition Language Article number 1000312270...
- Page 2 07 / 2016 05 / 2017 11 / 2017 Copyright - 2017 Wacker Neuson Linz GmbH, Hörsching Printed in Austria All rights reserved This document may be used by the receiver only for the designated purpose. It may in no way be duplicated or translated into any other language, in whole or in part, without prior permission in writing from the manufacturer.
-
Page 3: Table Of Contents
Checking the coolant level ................5-23 Adding coolant ....................5-23 Tracks ........................5-28 Electrical system ....................5-30 General maintenance .................... 5-33 Cleaning with washing solvents ............... 5-33 Cleaning with compressed air ................. 5-33 BA DT10 en - Edition 1.5 * BaDT10en1_5IVZ.fm... - Page 4 Cleaning with volatile and easily flammable anticorrosion agents and sprays: 5-33 Fluids and lubricants ....................5-35 Maintenance plan DT10 ..................5-37 Lubrication schedule DT10 with front tip skip, front tip skip for lightweight material (op- tional) ........................5-39 Lubrication plan of DT10 with high tip skip (optional) ..........5-40 Lubrication plan DT10 with front skip (option) ............
- Page 5 Table of Contents BA DT10 en - Edition 1.5 * BaDT10en1_5IVZ.fm...
- Page 6 Putting into operation for the first time ..........3-6 Safety instructions ................3-6 Refueling ....................5-7 Replacing the filter cartridge ............... 5-10 Replacing the oil filter cartridge ............5-14 Running-in period .................. 3-6 BA DT10 en - Edition 1.5 * BaDT10en1_5SIX.fm...
- Page 7 Safety instructions .................2-1 Applications with lifting gear ............2-6 General conduct ................2-3 Identification ..................2-1 Maintenance ...................2-7 Operation ..................2-5 Special hazards ................2-9 Trailers and attachments ..............2-6 Transportation .................2-6 Signs and symbols .................1-8 Starting aid ...................3-12 Swivel skip (option) ................3-18 Technical data Coolant compound table ...............6-12 Electrical system ................6-12 Engine ...................6-12 Noise level ..................6-12...
- Page 8 Index BA DT10 en - Edition 1.5 * BaDT10en1_5SIX.fm...
-
Page 9: Important Information On This Operator's Manual
The abbreviation “Opt.” indicates control elements or other groups of the machine that can be installed as an option. This symbol shows the travel direction – for better orientation in figures and graphics. BA DT10 en - Edition 1.5 * dt10b110.fm... -
Page 10: Machine Overview
Introduction Machine overview Control stand/handle Tipping trailer Self-loading equipment (option) Engine Travel drive Lifting eye/tie-down point Chassis Tracks Foothold Engine cover Hydraulic PTO shaft (HPTO) (Option) Fig. 1: Vehicle outside views BA DT10 en - Edition 1.5 * * dt10b110.fm... - Page 11 Introduction Control stand/handle Tipping trailer Engine Travel drive Lifting eye/tie-down point Chassis Tracks Foothold Engine cover Fig. 2: Vehicle outside views BA DT10 en - Edition 1.5 * dt10b110.fm...
- Page 12 Introduction Control stand/handle Tipping trailer Engine Travel drive Lifting eye/tie-down point Chassis Tracks Foothold Engine cover Fig. 3: Vehicle outside views BA DT10 en - Edition 1.5 * * dt10b110.fm...
-
Page 13: Brief Description
• Control stand with integrated oil and fuel tanks • Internal combustion engine • Model DT10: two-cylinder diesel engine • Model DT10: two-cylinder diesel engine that corresponds to the EPA tier-4 regula- tions (optional) • Tipping trailer • High-tip skip (option) •... -
Page 14: Ec Declaration Of Conformity For Vehicles With A Ce Mark On The Type Label
(refer to the original declaration of conformity supplied with the vehicle). Applies to EU countries, and countries with legislation similar to that of the EU. Applies to all vehicles with CE marks that have not been modified without authorization since the product was placed on the market. BA DT10 en - Edition 1.5 * * dt10b110.fm... -
Page 15: Type Labels And Component Numbers
– see chapter 6 Technical data on page 6-1 Fig. 5: Position of the type label Engine number The type label (arrow) is located on the valve cover. Fig. 6: Engine number BA DT10 en - Edition 1.5 * dt10b110.fm... -
Page 16: Signs And Symbols
Introduction Signs and symbols BA DT10 en - Edition 1.5 * * dt10b110.fm... - Page 17 The machine meets all the health and safety requirements of the Machine Directive. Application On the type label Fig. 12: CE mark Meaning Add diesel fuel only! Application On the control panel Fig. 13: Diesel BA DT10 en - Edition 1.5 * dt10b110.fm...
- Page 18 – see chapter 3. 1 Overview of the operator's cab (front tip skip model, front tip skip for lightweight material) on page 3-1 Application On the control stand Fig. 21: Main label 1-10 BA DT10 en - Edition 1.5 * * dt10b110.fm...
- Page 19 The reservoir contains biodegradable hydraulic oil. – see chapter Dirty hydraulic oil, lack of oil or wrong hydraulic oil – on page 5-17 Application On the hydraulic oil reservoir Fig. 25: Biodegradable hydraulic oil 1-11 BA DT10 en - Edition 1.5 * dt10b110.fm...
- Page 20 Introduction 1-12 BA DT10 en - Edition 1.5 * * dt10b110.fm...
-
Page 21: Safety Instructions
All fluids, lubricants, material, etc., used on the machine are subject to specific regulations regarding collection and disposal. Dispose of different materials and consumables sepa- rately and in an environmentally friendly manner! Disposal may only be performed by a Wacker Neuson dealer. Also observe the national regulations regarding disposal! Environment! -
Page 22: Designated Use And Exemption From Liability
• The safety of the vehicle can be negatively affected by performing vehicle modifications without proper authority and by using spare parts, accessories and special equipment that have not been tested and released by Wacker Neuson. Wacker Neuson will not be liable for damage resulting from this. -
Page 23: General Conduct And Safety Instructions
(for example control stand, loading platform, etc.), as well as to the attach- ments, which might affect safety without the approval of Wacker Neuson! This also applies to the installation and the adjustment of safety devices and valves, as well as to welding work on load-bearing elements •... - Page 24 • this also includes the area affected by falling material, equipment or by debris that is thrown out. The danger zone must be extended by 0.5 m in the immediate vicinity of • buildings • scaffolds or • other elements of construction BA DT10 en - Edition 1.5 * * dt10b210.fm...
-
Page 25: Safety Instructions Regarding Operation
• If the skip is less than half full, drive backward uphill or forward downhill. • If the skip is more than half full, drive forward uphill or backward downhill. • On sloping terrain always adapt the travel speed to the prevailing ground conditions! BA DT10 en - Edition 1.5 * dt10b210.fm... - Page 26 Carry out all maintenance and inspection work before storing the machine for the winter. Then store the machine in a dry place at ambient temperature (about +15 °C). Observe these temperature ranges so as not to affect the machine’s service life. BA DT10 en - Edition 1.5 * * dt10b210.fm...
-
Page 27: Safety Instructions For Maintenance
Use only suitable lifting gear and suspension systems in a technically perfect state with appropriate load-bearing capacity! Stay clear of suspended loads! BA DT10 en - Edition 1.5 * dt10b210.fm... - Page 28 • Do not use starting aids (for example start pilot)! This especially applies to those cases in which a heater plug (intake-air preheating) is used at the same time – explosion hazard! • Apply special care when working on the fuel system – increased fire hazard! BA DT10 en - Edition 1.5 * * dt10b210.fm...
-
Page 29: Warning Of Special Hazards
• Hydraulic and compressed-air lines must be laid and fitted properly. Ensure that no connections are interchanged. The fittings, lengths and quality of the hoses must comply with the technical requirements BA DT10 en - Edition 1.5 * dt10b210.fm... - Page 30 Neuson service center only! • Malfunctioning tracks reduce the machine’s operational safety. Therefore perform regular checks of the tracks for • Cracks, cuts or other damage • Check track tension at regular intervals. 2-10 BA DT10 en - Edition 1.5 * * dt10b210.fm...
-
Page 31: Operation
Engine oil pressure indicator light ..............................3-5 Water temperature indicator light ........................3-5 Indicator light – diesel engine glow plug preheating Lock for cover 6-12 Fuse box......................................... optional 3-30 Actuation of the hydraulic PTO shaft (H.P.T.O.) ( ........................BA DT10 en - Edition 1.5 * dt10b320.fm... -
Page 32: Control Stand Overview (High-Tip Skip Model)
Operation 3. 2 Control stand overview (high-tip skip model) Item Description For more information see page ..................................3-18 Skip operation ....................................3-18 Raise skip option ..............................3-17 Loader unit operation ( BA DT10 en - Edition 1.5 * * dt10b320.fm... -
Page 33: Control Stand Overview (Model With Front Tip Skip)
Operation 3. 3 Control stand overview (model with front tip skip) Item Description For more information see page ..................................3-17 Skip operation BA DT10 en - Edition 1.5 * dt10b320.fm... -
Page 34: Control Stand Overview (Swivel Tip Skip Model)
Operation 3. 4 Control stand overview (swivel tip skip model) Item Description For more information see page ..................................3-18 Skip operation .................................3-18 Pivot front tip skip BA DT10 en - Edition 1.5 * * dt10b320.fm... -
Page 35: Alternator Charge Function Indicator Light
This indicator light indicates whether the glow plugs have the correct preheating tempera- ture for starting the diesel engine – see chapter Electric starter on page 3-10. The indicator light goes out as soon as the preheating temperature is reached (10 to 15 sec) BA DT10 en - Edition 1.5 * dt10b320.fm... -
Page 36: Putting Into Operation
• Do not allow the engine to run for a long period at maximum speed. • Increase the load gradually while varying the engine speed • Strictly observe the maintenance plans in the schedule. – see chapter 5.10 Maintenance plan DT10 on page 5-37 BA DT10 en - Edition 1.5 * * dt10b320.fm... - Page 37 Loader unit (option) lowered to the ground? ( 3-17) When parking on public roads: Machine appropriately secured? When parking on slopes: Machine also secured with chocks under the tracks to prevent it from rolling away? BA DT10 en - Edition 1.5 * dt10b320.fm...
- Page 38 Operation BA DT10 en - Edition 1.5 * * dt10b320.fm...
- Page 39 After you have completed the starting preparations: Turn fuel cock A clockwise to position O The fuel cock is open Fig. 26: Fuel cock Push throttle 5 fully to the front Fig. 27: Throttle BA DT10 en - Edition 1.5 * dt10b330.fm...
- Page 40 Check whether all indicator lights have gone out: Let the engine run warm At cold temperatures: Increase the engine speed slowly Do not run the engine at full load until it has reached its operating temperature 3-10 BA DT10 en - Edition 1.5 * * dt10b330.fm...
- Page 41 Fig. 30: Hydraulic PTO shaft (HPTO) Turn starter B to position E Fig. 31: Electric starter Turn fuel cock F anticlockwise to position S The fuel cock is closed Fig. 32: Fuel cock 3-11 BA DT10 en - Edition 1.5 * dt10b330.fm...
-
Page 42: Safety Instructions
Operation of electric consumers (for example the lighting equipment) is prohibited. This is why the vehicle has no socket. Also observe the applicable regulations for accident prevention of your country. 3-12 BA DT10 en - Edition 1.5 * * dt10b330.fm... - Page 43 Track dumper turns to the right Fig. 34: Drive levers 4 Pull backward • D Notice! Ensure that both tracks move as you change direction, otherwise the rubber tracks are subject to increased abrasion. 3-13 BA DT10 en - Edition 1.5 * dt10b330.fm...
- Page 44 If the engine stops as you drive across a slope, immediately put the control levers to neutral position and start the engine again. 3-14 BA DT10 en - Edition 1.5 * * dt10b330.fm...
- Page 45 15° Drive with extreme care on slopes in rain or if the ground is wet or slippery. Fig. 36: Machine travel with a load on slopes 3-15 BA DT10 en - Edition 1.5 * dt10b330.fm...
- Page 46 Driving with a raised and tilted skip is forbidden. Raise and dump out the skip only if the machine is at a standstill. Fig. 38: Driving with a high-tip skip 3-16 BA DT10 en - Edition 1.5 * * dt10b330.fm...
- Page 47 Loader unit is lowered • B 1 pulled backwards Loader unit is raised Notice! Always keep the loader unit 30 – 40 cm above the ground during machine opera- tion. Fig. 40: Loader unit 3-17 BA DT10 en - Edition 1.5 * dt10b330.fm...
- Page 48 Skip is tilted in • C 20 Pushed forward Skip swivels to the left Fig. 42: Swivel skip operation • D 20 Pulled to the rear Skip swivels to the right 3-18 BA DT10 en - Edition 1.5 * * dt10b330.fm...
- Page 49 Fold up foothold A with both hands to the upright position. Fig. 43: Folding up the foothold Folding down the foothold: Grab the foothold A with both hands. Fold it down to the horizontal position. Fig. 44: Folding down the foot- 3-19 BA DT10 en - Edition 1.5 * dt10b330.fm...
- Page 50 Turn key A of the battery master switch to position B and remove it Establishing power supply: Insert key A in the battery master switch. Turn the key downwards to the notched position C 3-20 BA DT10 en - Edition 1.5 * * dt10b330.fm...
- Page 51 Length L1 of the lifting gear on the skip must be at least 2.0 m long Length L2 of the lifting gear (two cables or chains) on the control stand must be at least 2.0 m long • Slowly raise the machine Fig. 46: Crane-lifting 3-21 BA DT10 en - Edition 1.5 * dt10b330.fm...
- Page 52 Lower the loader unit to the loading area Stop the engine Remove the starting key Notice! The manufacturer’s warranty shall not apply to accidents or damage caused by loading or transporting. 3-22 BA DT10 en - Edition 1.5 * * dt10b330.fm...
- Page 53 (including the dumper) as well as the applicable statu- tory provisions for this type of transport in the country in which the transport is occurring before driving! Tie down the machine. Fig. 48: Tying down the dumper 3-23 BA DT10 en - Edition 1.5 * dt10b330.fm...
- Page 54 The manufacturer’s warranty shall not apply to accidents or damage caused by towing. No towing away other machines with the eye hook. The machine can also be salvaged with a crane. Fig. 49: Tying down the dumper 3-24 BA DT10 en - Edition 1.5 * * dt10b330.fm...
-
Page 55: Machine Operation
Transporting with a full bucket Caution! No transport of material: the loader unit is designed for loading loose material only. Loading loose material is described below Only load material with the skip tilted in 3-25 BA DT10 en - Edition 1.5 * dt10b340.fm... - Page 56 Fig. 51: Driving into the material Ending loading Set the loader unit to position C Move the control lever 1 D to the rear Fig. 52: Tilt in the loader unit 3-26 BA DT10 en - Edition 1.5 * * dt10b340.fm...
- Page 57 Fully tilt in the skip A Lower the loader unit (option) to transport position B Always reverse up a slope at low speed with a full skip Fig. 54: Transporting with a full skip 3-27 BA DT10 en - Edition 1.5 * dt10b340.fm...
- Page 58 As you tilt out the skip, ensure that the loader unit does not touch the ground or the material transported in the skip, otherwise the loader unit can be damaged. Raise the loader unit completely Fig. 55: Tilt out the skip 3-28 BA DT10 en - Edition 1.5 * * dt10b340.fm...
- Page 59 2 A to the rear. The skip is lowered by its own weight once it is beyond the pivot point Fig. 57: Emergency lowering of the skip 3-29 BA DT10 en - Edition 1.5 * dt10b340.fm...
- Page 60 Switching on the PTO shaft with no work equipment connected can be the cause of starting failure or output loss of the dumper, or of oil overheating in the hydraulic system Fig. 58: Hydraulic PTO shaft (HPTO) 3-30 BA DT10 en - Edition 1.5 * * dt10b340.fm...
-
Page 61: Malfunctions
Insufficient or no engine oil pressure Excessive machine inclination (max. 15°) Wrong SAE grade of engine lubrication oil 5-35 Oil level too high 5-12 Engine has excessively high Excessive machine inclination (max. 15°) BA DT10 en - Edition 1.5 * dt10b410.fm... - Page 62 Engine starting temperature too low Fuel grade does not comply with specifications 5-35 White Engine smoke Wrong valve clearance Malfunctioning fuel injector Polluted air filter 5-15 Black Wrong valve clearance Malfunctioning fuel injector BA DT10 en - Edition 1.5 * * dt10b410.fm...
-
Page 63: Maintenance Introduction
Insert the maintenance prop A on the tipping cylinder B Secure the maintenance prop A with the locating pin C and the pin D During transport fit maintenance point A in the seat as shown in Fig. Fig. 59: Maintenance prop BA DT10 en - Edition 1.5 * dt10b510.fm... - Page 64 The skip is blocked in the raised position Remove the safety pin and the stud from opening B and insert them in opening C The skip is blocked in the raised position Fig. 60: Maintenance prop BA DT10 en - Edition 1.5 * * dt10b510.fm...
- Page 65 Remove safety pin E and pin F and insert into the opening G The skip is blocked in the raised position During transport fit maintenance point A in the seat as shown in Fig. Fig. 62: Maintenance prop BA DT10 en - Edition 1.5 * dt10b510.fm...
- Page 66 Secure the maintenance prop A with the locating pin C and the pin D During transport fit maintenance point A in the seat as shown in Fig. Fig. 64: Maintenance prop BA DT10 en - Edition 1.5 * * dt10b510.fm...
- Page 67 Insert the maintenance prop A on the tipping cylinder B Secure the maintenance prop A with the locating pin C and the pin D During transport fit maintenance point A in the seat as shown in Fig. Fig. 66: Maintenance prop BA DT10 en - Edition 1.5 * dt10b510.fm...
- Page 68 Remove the maintenance prop B from the transport bracket Insert the maintenance prop B in the corresponding bracket Secure the maintenance prop B with the screws A Fig. 69: Maintenance prop BA DT10 en - Edition 1.5 * * dt10b510.fm...
-
Page 69: Fuel System
Ensure that you refuel with the correct fuel. It is indicated on the label beside the filler inlet. Environment! Use a suitable container to collect the fuel as it drains and dispose of it in an environmentally friendly manner! BA DT10 en - Edition 1.5 * dt10b510.fm... - Page 70 Never perform work on the fuel system near open flames or sparks. Environment! Use a suitable container to collect the fuel as it drains and dispose of it in an environmentally friendly manner! BA DT10 en - Edition 1.5 * * dt10b510.fm...
-
Page 71: General
• No. 2-D according to DIN −15 °C to 45 °C 51601 Min. 45 • No. 1-D according to DIN For outside temperatures below 4 °C or for 51601 operation above 1500 m altitude BA DT10 en - Edition 1.5 * dt10b510.fm... - Page 72 Screw filter cup B back on again with a suitable tool by tightening ring C Set fuel cock A to O (ON) and check for leaks Environment! Dispose of the drained fuel in an environmentally friendly manner. Fig. 74: Filter cup 5-10 BA DT10 en - Edition 1.5 * * dt10b510.fm...
- Page 73 Loosen drain plug B above the fuel injection pump with a suitable tool Retighten drain plug B as soon as there is no more air Starts the engine Fig. 75: Bleeding the fuel system 5-11 BA DT10 en - Edition 1.5 * dt10b510.fm...
-
Page 74: Engine Lubrication System
Push it back in as far as possible Withdraw it and read off the oil level However, if need be add oil when the oil level has reached the MIN mark on the oil dip- stick A 5-12 BA DT10 en - Edition 1.5 * * dt10b510.fm... - Page 75 Close filler cap B Environment! Use a suitable container to collect the engine oil as it drains and dispose of it in an environmentally friendly manner! Fig. 78: Drain engine oil 5-13 BA DT10 en - Edition 1.5 * dt10b510.fm...
- Page 76 Check the engine oil level and add oil if necessary Environment! Use a suitable container to collect the engine oil as it drains and dispose of it in an environmentally friendly manner! Fig. 79: Engine oil filter cartridge 5-14 BA DT10 en - Edition 1.5 * * dt10b510.fm...
-
Page 77: Air Filter
• Check air filter attachments, air intake hoses and air filters for damage, and immedi- ately repair or replace if necessary • Check the screws at the induction manifold and the clamps for tightness. • Check the function of the dust valve, replace if necessary 5-15 BA DT10 en - Edition 1.5 * dt10b520.fm... - Page 78 Position cover B (ensure that it is properly seated) Notice! Ensure that dust valve C shows downward as you install it! Environment! Fig. 81: Replacing the filter Dispose of filter cartridge A in an environmentally friendly manner. 5-16 BA DT10 en - Edition 1.5 * * dt10b520.fm...
-
Page 79: Hydraulic System
Dispose of drained oil and used filters by an ecologically safe method. Always contact the relevant authorities or commercial establishments in charge of oil dis- posal before disposing of biodegradable oil. 5-17 BA DT10 en - Edition 1.5 * dt10b520.fm... - Page 80 With the filter insert in place: Adding hydraulic oil Check the hydraulic oil level with the dipstick integrated in filler cap B Add if necessary and check again Firmly tighten filler cap B by hand. 5-18 BA DT10 en - Edition 1.5 * * dt10b520.fm...
- Page 81 Collect the drained oil in a suitable container and dispose of it by an environmentally safe manner! Environment! Dispose of filter cartridge A in an environmentally friendly manner. Fig. 86: Replacing the oil filter cartridge 5-19 BA DT10 en - Edition 1.5 * dt10b520.fm...
- Page 82 Collect the drained oil in a suitable container and dispose of it by an environmentally safe manner! Environment! Dispose of filter cartridge A in an environmentally friendly manner. Fig. 87: Replace the oil intake filter cartridge 5-20 BA DT10 en - Edition 1.5 * * dt10b520.fm...
- Page 83 – otherwise this causes sludge to form that can damage the engine. Environment! Use a suitable container to collect the fuel as it drains and dispose of it in an environmen- tally friendly manner! 5-21 BA DT10 en - Edition 1.5 * dt10b520.fm...
- Page 84 Antifreeze is flammable and toxic. Accident hazard! Keep away from flames Avoid eye contact with antifreeze • If antifreeze comes into contact with the eyes: Immediately rinse with clean water and seek medical assistance 5-22 BA DT10 en - Edition 1.5 * * dt10b520.fm...
-
Page 85: Checking The Coolant Level
The coolant level must be in the lower corner of the filler inlet (radiator) If necessary, add coolant and repeat the procedure until the coolant level remains con- stant Notice! Check the antifreeze every year before the cold season sets in 5-23 BA DT10 en - Edition 1.5 * dt10b520.fm... - Page 86 • Close cock B Environment! Use a suitable container to collect the coolant as it drains and dispose of it in Fig. 90: Coolant drain cock an environmentally friendly manner! 5-24 BA DT10 en - Edition 1.5 * * dt10b520.fm...
- Page 87 • Use only the biodegradable hydraulic fluids which have been tested and approved by Wacker Neuson. Always contact Wacker Neuson for the use of other products that have not been recommended. In addition, ask the oil supplier for a written declaration of guarantee.
- Page 88 The date of manufacture (month or quarter and year) is indicated on the flexible line. 1 Q/07 Example: The indication “1 Q/07” means manufactured in the 1st quarter of 2007. 5-26 BA DT10 en - Edition 1.5 * * dt10b520.fm...
- Page 89 Maintenance 5-27 BA DT10 en - Edition 1.5 * dt10b520.fm...
-
Page 90: Tracks
Repeat the procedure if the tracks are not tight enough Notice! Check track tension once a day since excessive or insufficient track tension can damage the tracks and the components of the undercarriage. 5-28 BA DT10 en - Edition 1.5 * * dt10b530.fm... - Page 91 Unscrew adjusting screw D with a suitable tool Fig. 93: Loosen the chain Ram E is retracted The track is loosened Check track tension Repeat the procedure if the tracks are too tight 5-29 BA DT10 en - Edition 1.5 * dt10b530.fm...
-
Page 92: Electrical System
Every week Check once a week: • Electric fuses • Cable and grounding connections • Battery state of charge – see Battery on page 5-32 • Condition of battery terminals. 5-30 BA DT10 en - Edition 1.5 * * dt10b530.fm... - Page 93 Always observe the following instructions: • Malfunctioning components of the electrical system must always be replaced by a Wacker Neuson service center. Fuses may be changed by unqualified persons • When performing maintenance on the electrical system, pay particular attention to...
- Page 94 Notice! Do not disconnect the battery while the engine is running! Disconnecting the battery in an emergency • – see chapter Battery master switch on page 3-20 Fig. 94: Battery 5-32 BA DT10 en - Edition 1.5 * * dt10b530.fm...
-
Page 95: General Maintenance
• Air intake filters, etc. Cleaning with volatile and easily flammable anticorrosion agents and sprays: • Ensure sufficient room ventilation • Do not use unprotected lights or open flames • Do not smoke! 5-33 BA DT10 en - Edition 1.5 * dt10b530.fm... - Page 96 Immediately tighten loosened connections; Contact an authorized workshop if necessary. Pivots and hinges Lubricate all mechanical pivots on the vehicle (such as joints) and fittings at regular inter- vals even if they are not listed in the lubrication plan. 5-34 BA DT10 en - Edition 1.5 * * dt10b530.fm...
-
Page 97: Fluids And Lubricants
Biodegradable hydraulic oils based on saturated synthetic esters with an iodine value of < 10 according to DIN 51524, section 3, HVLP, HEES KF2K-25 according to DIN 51502 multipurpose lithium grease with MoS² additive 5-35 BA DT10 en - Edition 1.5 * dt10b530.fm... - Page 98 Maintenance 5-36 BA DT10 en - Edition 1.5 * * dt10b530.fm...
- Page 99 Every 3 years and/or after 1000 o/h Every 12 months or after 500 o/h Every 6 months or after 250 o/h Once a month or after 50 o/h Service work (daily) 5-37 BA DT10 en - Edition 1.5 * * dt10b550.fm...
- Page 100 Every 3 years and/or after 1000 o/h Every 12 months or after 500 o/h Every 6 months or after 250 o/h Once a month or after 50 o/h Service work (daily) 5-38 BA DT10 en<> - Edition 1.5 * * dt10b550.fm<>...
-
Page 101: Lubrication Schedule Dt10 With Front Tip Skip, Front Tip Skip For Lightweight Material (Optional)
5.11 Lubrication schedule DT10 with front tip skip, front tip skip for lightweight material (optional) Explanation Symbol Grease zerks 5-39 BA DT10 en - Edition 1.5 * dt10b560.fm... -
Page 102: Lubrication Plan Of Dt10 With High Tip Skip (Optional)
5.12 Lubrication plan of DT10 with high tip skip (optional) Explanation Symbol Grease zerks 5-40 BA DT10 en - Edition 1.5 * * dt10b560.fm... -
Page 103: Lubrication Plan Dt10 With Front Skip (Option)
5.13 Lubrication plan DT10 with front skip (option) Explanation Symbol Grease zerks 5-41 BA DT10 en - Edition 1.5 * dt10b560.fm... -
Page 104: Lubrication Schedule Dt10 With Rotary Tip Skip (Optional)
5.14 Lubrication schedule DT10 with rotary tip skip (optional) Explanation Symbol Grease zerks 5-42 BA DT10 en - Edition 1.5 * * dt10b560.fm... - Page 105 Maintenance opening Maintenance opening for cleaning the chassis. Unscrew 4 screws to remove housing A. Fig. 95: Maintenance opening 5-43 BA DT10 en - Edition 1.5 * dt10b560.fm...
- Page 106 5-44 BA DT10 en - Edition 1.5 * * dt10b560.fm...
-
Page 107: Technical Data
Starter (with spark plug) Starting aid 12 V/55 Ah Battery Max. inclined position (engine no 20° continuously longer supplied with oil): 97/68 EC, EPA Tier 4 Comply with the emission level BA DT10 en - Edition 1.5 * dt10b610.fm... -
Page 108: Hydraulic System
Tipping trailer 334 liters Struck 427 liters Heaped 166 l Liquid capacity 1320 mm Skip length 700 mm Skip width 390 mm Skip height Weight of work equipment with 165 kg bucket BA DT10 en - Edition 1.5 * * dt10b610.fm... -
Page 109: Front Tip Skip For Lightweight Load (Optional)
Liquid capacity 1294 mm Skip length 800 mm Skip width 836 mm Skip height 6.10 Loader unit (option) Model DT10 Self-loading equipment (option) 830 mm Width 15 mm Scraping depth 65 liters Capacity BA DT10 en - Edition 1.5 * dt10b610.fm... -
Page 110: Front Skip (Option)
Model DT10 Tipping trailer 430 liters Struck 460 liters Heaped 240 liters Liquid capacity 1427 mm Skip length 730 mm Skip width 570 mm Skip height 240 kg Weight of work equipment BA DT10 en - Edition 1.5 * * dt10b610.fm... -
Page 111: Noise Levels
Therefore, the value of the vibrations transmitted to the human body (indicated by the vehicle manufacturer in accordance with European standards) must not be used as a reference for specifying vehicle op- erator exposure to vibrations BA DT10 en - Edition 1.5 * dt10b610.fm... -
Page 112: Dimensions Model Dt10 With Skip
875 mm Chain length 384 mm Front skip projection 804 mm Skip load height (front edge) 1320 mm Skip length 700 mm Skip width 387 mm Skip depth 14 mm Scraping depth BA DT10 en - Edition 1.5 * * dt10b610.fm... -
Page 113: Dimensions Of Model Dt10 With Front Tip Skip For Lightweight Material (Optional)
Technical data 6.16 Dimensions of model DT10 with front tip skip for lightweight material (optional) 1357 1823 2670 Fig. 97: Vehicle dimensions (model DT10 with front tip skip for lightweight material) Model DT10 Main data 1000 kg Payload 705 kg Dead weight incl. -
Page 114: Dimensions Model Dt10 With High-Tip Skip (Option)
Technical data 6.17 Dimensions model DT10 with high-tip skip (option) 1134 1684 Fig. 98: Vehicle dimensions (model DT10 with high tip skip) Model DT10 Main data 550 kg Payload 825 kg Dead weight incl. skip and loader unit 1684 mm... - Page 115 Technical data 6.18 Dimensions model DT10 with high-tip skip (option) 1294 1735 Fig. 99: Vehicle dimensions (model DT10 with high tip skip) Model DT10 Main data 550 kg Payload 845 kg Dead weight incl. skip and loader unit 1735 mm...
-
Page 116: Dimensions Model Dt10 With Front Skip (Option)
Technical data 6.19 Dimensions model DT10 with front skip (option) 1200 1882 Fig. 100: Vehicle dimensions (model DT10 with front skip) Model DT10 Main data 1000 kg Payload 590 kg Dead weight incl. skip 1882 mm Length 806 mm Width... -
Page 117: Dimensions For Model Dt10 With Swivel -Tip Skip (Option)
Technical data 6.20 Dimensions for model DT10 with swivel -tip skip (option) 1427 1960 Fig. 101: Vehicle dimensions (model DT10 with swivel tip skip) Model DT10 Main data 1000 kg Payload 775 kg Dead weight incl. swivel tip skip 1960 mm... -
Page 118: Electrical System
Description Fuse rent (A) Starter fuse Engine stop fuse 15 A Fuse excitation Alternator 10 A Hour meter fuse Preheating fuse 10 A Not used Fig. 102: Diesel engine fuses 6-12 BA DT10 en - Edition 1.5 * * dt10b610.fm... - Page 119 Wacker Neuson Linz GmbH keep abreast of the latest technical developments and con- stantly improve their products. For this reason, we may from time to time need to make changes to figures and descriptions in this documentation that do not reflect products that have already been delivered and that will not be implemented on these vehicles.
- Page 120 Wacker Neuson Linz GmbH Flughafenstr. 7 A-4063 Hörsching Austria Tel. +43 (0) 7221 63000-0 Fax: +43 (0) 7221 63000-4000 E-mail office.linz@wackerneuson.com www.wackerneuson.com Order no. 1000312270 Language en...
Need help?
Do you have a question about the DT10 and is the answer not in the manual?
Questions and answers