Table of Contents
Advertisement
Quick Links
Advertisement
Table of Contents

Related Manuals for GigRig G3


Summary of Contents for GigRig G3
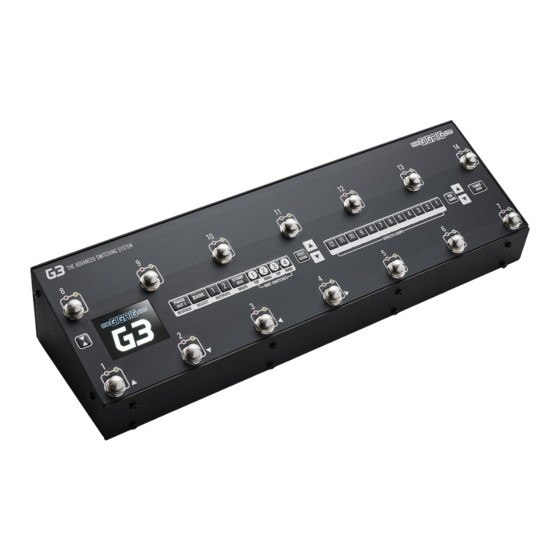
- Page 1 THE ADVANCED SWITCHING SYSTEM V1.1 USER MANUAL SOFTWARE VERSION 560 April 2023...
-
Page 2: Table Of Contents
5.2 NAVIGATING DEEP EDIT --------------------------------------------------------------------------- 15 5.2.1 NAME -------------------------------------------------------------------------------------- 16 5.2.2 MIDI ---------------------------------------------------------------------------------------- 16 EXPRESSION PEDAL MIDI -------------------------------------------------------- 18 MIDI CLOCK ------------------------------------------------------------------------- 19 5.2.3 EXPRESSION ------------------------------------------------------------------------------ 20 5.2.4 LOOP ORDER ------------------------------------------------------------------------------ 20 5.2.5 STOMPBOX-------------------------------------------------------------------------------- 21 5.2.6 TRAILS ------------------------------------------------------------------------------------- 21 THE GIGRIG G3 USER MANUAL... - Page 3 BACKLIGHT ----------------------------------------------------------------------------------------------- 27 STATUS BAR --------------------------------------------------------------------------------------------- 27 BANK RESET --------------------------------------------------------------------------------------------- 28 FACTORY RESET ----------------------------------------------------------------------------------------- 28 VERSION -------------------------------------------------------------------------------------------------- 28 THE G3 iOS APP AND BLUETOOTH----------------------------------------------------------------------- 29 7.1 SOFTWARE UPDATE -------------------------------------------------------------------------------- 29 7.2 SONG LIST -------------------------------------------------------------------------------------------- 30 7.3 BACKUP----------------------------------------------------------------------------------------------- 30 7.4 RESTORE ---------------------------------------------------------------------------------------------- 30...
-
Page 4: Introduction
THE ADVANCED SWITCHING SYSTEM 1. INTRODUCTION On behalf of myself and my team, thank you for buying G3. After years of work by myself, TheGigRig tech team and our extraordinary electronic engineers, we are delighted to introduce our new generation of pedalboard switching systems –... -
Page 5: Quick Start Guide
7. Connect your Remote Switch controllable devices (i.e., Amp channel, Remote Loopy 2, Tap Tempo) using G3’s REMOTE SWITCH sockets. 8. Connect your power to G3. We strongly recommend using TheGigRig Generator which is supplied with your G3. THE GIGRIG G3 USER MANUAL... -
Page 6: Programming
2. Select the EFFECTS LOOPS and CONTROL FUNCTIONS you want to use with that preset. 3. Repeat for the other presets you wish to programme. 4. There is no store button, G3 remembers every time you press a button and automatically saves after each step. -
Page 7: Navigating The Deep Edit Menu
SOFTWARE UPDATES & BACKUPS, STOMPBOX MODES, PRESET BANK COPY & PASTE, SCREEN BRIGHTNESS, etc. The Editing menu in G3 has been designed to be as intuitive as possible, but for additional guidance please refer to the full manual. THE GIGRIG G3 USER MANUAL... -
Page 8: Connections
(9V DC) - G3 uses a standard centre 9V DC input connection. G3 operates around 850 mA, so it is important that your power supply can provide sufficient current. The GigRig Generator Power Supply is included with your G3 so you can add elements of our Modular Power Supply to enable you to power G3 and your entire board. -
Page 9: Connection Examples
Connect G3 FX Loop SEND to FX Pedal Input. Connect FX Pedal OUTPUT to G3 Loop Return b. CONNECTING STEREO EFFECTS If you want to use stereo effects with G3, you can pair two mono loops together into a single stereo loop. G3’s loops are paired as follows: Loop 1/2, Loop 3/4 etc. - Page 10 FX LOOP sits, between the preamp and power amp. a. First select a G3 loop to connect with your amps FX loop. In the diagram above, loops 1-4 are placed before the preamp, loop 5 contains the preamp and loops 6-12 are placed inside the FX loop (note - any loop can be selected).
-
Page 11: Basic Programming
Everything is laid out in a simple, logical order to keep the experience as intuitive as possible. 4.1 PRESET PROGRAMMING Presets are at the heart of G3’s functionality. Whether you are controlling MIDI or adding Stompbox Mode, it all happens within a preset. - Page 12 It’s also incredibly useful with MIDI presets. For example, if you use a Strymon Timeline and you want to be able to engage the looper from G3, you can assign each footswitch to the TimeLine Looper CC number and use G3’s footswitches to instantly engage the looper functions.
- Page 13 Press the Stompbox enabled footswitch, then press Stompbox mode (yellow LED next to the footswitch will turn off). Then press the footswitch a second time so it is the only footswitch selected. Then you can programme the preset as normal. THE GIGRIG G3 USER MANUAL...
-
Page 14: Changing Banks
2. Back Panel Bank Remote - connect the GigRig Bank Manager or any momentary switch to the back-panel bank socket to access G3 banks (this needs to be activated in the Deep Edit Menu under Global Settings). Again, press the Bank switch once to go up, press and hold to go down. -
Page 15: Deep Edit
COPY/RESET – Copy/ paste/ reset, presets, entire banks or MIDI HIDDEN PRESET - Each preset in G3 has a separate, fully programmable hidden preset. This is accessed by pressing this footswitch a second time. SUB STOMP – Turn this on to enable STOMP BOX to add and subtract any function from a preset. -
Page 16: Midi
(3) to get back to the main menu or press to exit deep edit. * You can also name the presets using the G3 APP. Once you’ve done a backup, you’ll see the option the EDIT that backup. Simply enter the names of your presets then restore back up. - Page 17 For example, if you want to programme channel 7 and would like Preset Number 1 on G3 to send MIDI programme 7 on MIDI channel 3, you will need to: a. Select a MIDI command (1-20).
-
Page 18: Expression Pedal Midi
THE ADVANCED SWITCHING SYSTEM EXPRESSION PEDAL MIDI There are two EXP inputs in G3. Each expression can control up to two CC messages, so you have the choice of which expression pedal you want to use to send your EXP commands. -
Page 19: Midi Clock
THE ADVANCED SWITCHING SYSTEM MIDI CLOCK G3’s MIDI CLOCK enables you to send a MIDI clock message that can sync all your clock input enabled, time-based effects. You can send the MIDI clock out on all MIDI channels. There are two states to the MIDI clock:... -
Page 20: Expression
CC 32 = Preset, Number = Preset number (0~28) *Please note – every time you send a bank message to G3 it will load all the presets for that bank. We suggest that if you are loading songs remotely you only need to have a single preset that sends the bank/song CC message. -
Page 21: Stompbox
THE ADVANCED SWITCHING SYSTEM With G3, you can reorder your effects loops in any order you like. To do so: a. Go to LOOP ORDER on the Deep Edit menu. b. Scroll right (4) and you will see Loops 1-12 which correspond to your effects loops. - Page 22 THE ADVANCED SWITCHING SYSTEM G3’s PARALLEL FUNCTION enables you to split your signal path in two, meaning you can set up effects in Pparallel, Wet Dry, and even send different effects to different amplifiers. G3 allows you to flip the phase of the parallel signal chain. This is important for resolving phase cancellation between the two signal paths.
- Page 23 Modulation, Delay and Reverb effects (forming the wet signal chain) to a second amplifier. To set up this Wet Dry signal path: a. Scroll down to Parallel and select Parallel Enable. b. Select Parallel Start and select before loop 4. THE GIGRIG G3 USER MANUAL...
-
Page 24: Tap Tempo
LEFT and RIGHT inputs. EXAMPLE 4 - STEREO INPUT This new feature enables you to send a stereo signal into G3 (via a TRS cable) and maintain the stereo signal throughout the G3. To do this, simply choose SPLIT BEFORE INPUT within the parallel start sub menu and within the parallel end sub menu NO JOIN. - Page 25 FIRST PRESS ONLY. 5.2.9 COPY/RESET The Copy/Reset function in G3/Atom enables you to copy a preset, then paste the preset, or different parts of it to a new preset. You can also copy and paste entire banks.
-
Page 26: Hidden Preset
5.3 HIDDEN PRESET How it works: G3 enables you to have a secondary preset for any standard preset. To programme this: a. Enter the Deep Edit Menu and scroll down to Global setup, then scroll down to hidden preset then press (4). -
Page 27: Song / Bank
This feature must be turned on to use hidden presets. STEREO PAIRS - G3 has 12 x mono loops which you can pair to use with your stereo effects giving you up to 6 stereo loops. For example, if you have 1 x stereo reverb at the end of your chain, pairing loops 12 and 11 will give you 1 stereo loop, leaving you with 10 x mono loops. -
Page 28: Bank Reset
THEME – Use theme to change the colourway of the screen. VERSION - Here you can see your software version number and your G3 serial number. This makes it easy to check that you have the latest version of software installed in G3. -
Page 29: The G3 Ios App And Bluetooth
G3 app. i. Make sure you have the correct software update selected. j. Press TRANSMIT. The file will start to download. You will see the packet number rise on the G3 screen as the file is transferred. k. Once finished, the G3 screen will display – The Check Sum , DOWNLOADED and your total of packets downloaded. -
Page 30: Song List
Dismiss. e. Press Update on the app. It is then ready to receive the backup. f. Press 4 on G3 and you’ll see the packets being received by the app as well as the progress on the G3 screen. g. Once its finished, press the Deep Edit menu button to exit on G3. -
Page 31: Tech Specs
Power Requirements: G3/Atom 9V DC (2.1mm centre neg) @ 850mA We recommend the use of The GigRig GenX14 or Generator power supply supplied with G3/S/Atom Input impedance 1M Ohm Out 1 - Signal path with input and output amps OFF – True Bypass Out 1 is earthed and must always be connected to ground. -
Page 32: Warranty
In no event will The GigRig be liable for more than the amount of the purchase price, not to exceed the current retail price of the product. The GigRig disclaims any other warranties, express or implied. By using the product, the user accepts all terms herein.
Need help?
Do you have a question about the G3 and is the answer not in the manual?
Questions and answers