Advertisement
Available languages
Available languages
Quick Links
IMPORTANT: FOR YOUR PROTECTION, YOU MUST CAREFULLY READ ALL WARNINGS AND INSTRUCTIONS IN THEIR
ENTIRETY PRIOR TO INSTALLATION, OPERATION, SERVICE OR MAINTENANCE. FAILURE TO DO SO CAN RESULT IN DEATH,
PERSONAL INJURY AND PROPERTY DAMAGE. If you do not understand these warnings and instructions, or if additional
information is desired, please contact Signify, Lumec. TSC@signify.com phone 1-833-744-6439.
•
Installation, service and maintenance of luminaires must be performed by a qualified professional and in accordance with all federal, state and local
laws, regulations and electrical codes. This professional should be familiar with the construction and operation of this product and any hazards
involved. If not qualified, do not attempt installation, service or maintenance.
•
To reduce the risk of death, personal injury or property damage from fire, electric shock, falling parts, cuts, abrasions and other hazards, please read
all warnings and instructions included with the luminaire, on the luminaire's packaging and affixed to the luminaire itself.
•
Maintenance of the luminaires should be performed by person(s) familiar with the luminaire's construction and operation and any hazards involved.
WARNING
RISK OF FIRE, ELECTRIC SHOCK OR PERSONAL INJURY
•
Disconnect or turn off power before attempting any installation, service or
maintenance.
•
Verify that supply voltage is correct by referencing the luminaire label
information.
•
Make all electrical and ground connections in accordance with the National
Electrical Code (NEC) and any other applicable laws, regulations or codes.
•
All wiring connections should be capped with UL-approved wire connectors.
WARNING
RISK OF FIRE OR PERSONAL INJURY
•
Keep combustible materials away from LED/lamp & lens
•
▪ Do not operate in close proximity to persons, combustible materials
or substances affected by heat or drying.
CAUTION
RISK OF PRODUCT DAMAGE
• Never connect luminaires and/or components under load with supply voltage turned on.
• Do not mount or support these luminaires in a manner that can cut the outer jacket or damage wire insulation.
• Do not restrict fixture ventilation. Allow for some volume of airspace around luminaire. Avoid covering luminaire with insulation, foam or other material that will
prevent convection or conduction cooling.
• Do not exceed luminaire maximum ambient temperature.
• Do not modify the luminaire.
• Only use luminaire in its intended application and location.
• Led products are polarity sensitive. Ensure proper polarity before installation.
• Electrostatic Discharge (ESD) can damage LED. Personal grounding equipment must be worn during all installation and servicing of the luminaire.
• Do not touch individual electrical components as this can cause ESD, shorten LED life, or impact LED performance.
• Some components inside the luminaire may not be serviceable. In the unlikely event your luminaire may require service, stop using it immediately and contact
Signify.
• Always read the luminaires complete installation instructions prior to installation for any additional luminaire specific warnings.
• In the case of HID or Fluorescent luminaires, regular re-lamping is required to keep luminaire operating within safe limits
• Do not install damaged product. Handling and installing damaged products can potentially increase the risks mentioned In case of damage and/or missing parts
upon arrival of the luminaire.
• These instructions do not purport to cover all details or variations in equipment nor to provide every possible contingency to meet in connection with installation,
operation or maintenance.
• Please see luminaire specific Installation and Maintenance Instruction for additional warnings or any applicable FCC or regulatory statements. Failure to follow
any of these Instructions could void luminaires warranties.
Luminaire Maintenance
• Regular luminaire maintenance programs are recommended.
• It is recommended to clean the outside of the luminaire and the refractor/lens.
• Frequency of cleaning will depend on ambient dirt level and minimum light output which is acceptable to user.
• If clean water is not sufficient for cleaning, use a neutral, synthetic, not-scratching and not-abrasive cleaning substance.
• Never use alkaline and/or acetous cleaning substances.
• Make sure that the cleaning substance is carefully removed by rinsing with lots of clean water.
• Signify recommends using a cleaning solution that has a PH between 5 and 8.
• Recycle: For information on how to recycle electronic products and components, please visit www.epa.gov.
3/21/2023
page
1
www.gardcolighting.com
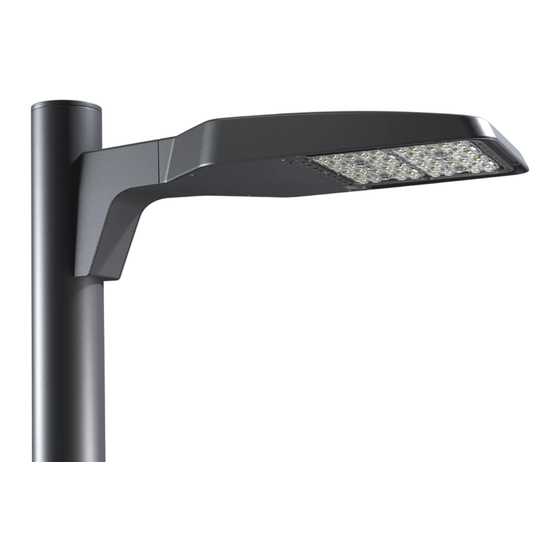
OPF-S/OPF-M/OPS-L
OptiForm
Installation Instruction
WARNING
RISK OF FIRE, ELECTRIC SHOCK OR PERSONAL INJURY
•
Wear gloves and safety glasses at all times when removing luminaire
from carton, installing, servicing or performing maintenance.
•
▪ Avoid direct eye exposure to the light source while it is on.
WARNING
RISK OF FIRE, ELECTRIC SHOCK OR PERSONAL INJURY
•
Allow Led/lamp & lens to cool before handling.
•
▪ Do not touch enclosure or light source
•
▪ Do not exceed maximum wattage marked on luminaire label.
•
▪ Follow all manufacturer's warnings, recommendations, instructions
and restrictions for driver type, burning position, mounting locations
and replacement.
442296100981 rev:c
Advertisement

Related Manuals for SIGNIFY GARDCO OptiForm OPF-S


Summary of Contents for SIGNIFY GARDCO OptiForm OPF-S
- Page 1 • Make sure that the cleaning substance is carefully removed by rinsing with lots of clean water. • Signify recommends using a cleaning solution that has a PH between 5 and 8. • Recycle: For information on how to recycle electronic products and components, please visit www.epa.gov.
- Page 2 OPF-S/OPF-M/OPS-L Installation Instructions 442296100981 rev:c Installation with Standard arm: AR1 The Standard arm (AR1) is designed for a square or round pole 4” or 5”. For round pole use pliers to remove break away tabs (top and bottom). For new installation refer to diagram 1 for drilling pattern. Note: The standard arm can be mounted on up to 4-7/8’’...
- Page 3 OPF-S/OPF-M/OPS-L Installation Instructions 442296100981 rev:c Installation with Standard arm: AR1 To avoid pinching or crushing fold fixture wires towards the front. Slide the fixture on the mounting arm. Tighten the mounting bolt (2x)1/4’’-20 UNC x 3/4’’, split washer and flat washer. Torque: 130in-lbs Note: Once the torque is applied on both screws repeat the torque operation until the torque is constant.
- Page 4 OPF-S/OPF-M/OPS-L Installation Instructions 442296100981 rev:c Installation with Mast Arm: MAR Slip the Mast Arm (MAR) over the 2-3/8’’ tenon. Make sure to not pinch any wires. Secure the Mast Arm over the tenon using the 2-3/8’’ tenon (5x) 3/8-16 x 3/4” set screws. Torque: 30ft-lbs Note: Ensure that the tenon contact the Mast Arm inner wall.
- Page 5 OPF-S/OPF-M/OPS-L Installation Instructions 442296100981 rev:c Installation with Wall Arm: WAL Use these Foam gasket On the outlet box install the gasket foam. Install the wall plate over mounting holes for the foam gasket using the outlet mounting screws (not included). OPF-M and OPF-L Route the wires through the center of both foam gasket and wall plate.
-
Page 6: Wiring Diagrams
OPF-S/OPF-M/OPS-L Installation Instructions 442296100981 rev:c Wiring Diagrams 0-10V/DLEA (Receptacle: 7 pins) (Receptacle: 3 pins) (Receptacle: 5 pins) (Photo control button) Emergency (Only available with OPF-S-P01, P02, P03) FCC Part 15 Class A Products FCC Markings NOTE: This equipment has been tested and found to comply with the limits for a Class A digital device, pursuant to part 15 of the FCC Rules. -
Page 7: Instruction D'installation
Si des renseignements additionnels sont requis, ou si des problèmes particuliers surviennent qui ne sont pas couverts suffisamment aux fins prévues par l’acheteur ou le propriétaire, veuillez soumettre la question ou le problème à avec Signify TSC@signify.com composez le 1-833-744-6439. - Page 8 OPF-S/OPF-M/OPS-L Instructions d’installation 442296100981 rev:c Installation avec le bras Standard: AR1 Le bras standard (AR1) est conçu pour les fûts ronds de 4” ou 5” ou carrés. Pour les fûts ronds enlever les languettes à l’aide de pince, sur le haut et le bas du bras standard. Pour une installation nouvelle référer au diagramme 1 pour les trous de montages.
- Page 9 OPF-S/OPF-M/OPS-L Instructions d’installation 442296100981 rev:c Installation avec le bras Standard: AR1 Replier les fils du luminaire vers l’avant. Glisser le luminaire sur le bras de montage. Serrer les boulons (2x) 1/4’’-20 x 3/4’’, rondelle fendue et rondelle plate. Couple de serrage: 130lbs-po Note: Lorsque le couple de serrage est appliquer sur les 2 boulons répété...
- Page 10 OPF-S/OPF-M/OPS-L Installation Instructions 442296100981 rev:c Installation avec le bras de montage latéral: MAR Insérer le bras de montage lateral (MAR) sur le tenon 2-3/8’’. S’assurer que les fils ne soient pas coincés. Tenon 2-3/8’’ Fixer le bras de montage latéral (MAR) en utilisant les vis de serrage allen (5x) 3/8-16 x 3/4”.
- Page 11 OPF-S/OPF-M/OPS-L Installation Instructions 442296100981 rev:c Installation avec le bras mural: WAL Joint d’étanchiété en mousse Installer le joint d’étanchiété en mousse sur la boite de connection. Utiliser ces Installer la plaque murale sur le joint d’étanchiété en mousse en trous de utilisant les vis de montages (non-incluses).
- Page 12 OPF-S/OPF-M/OPS-L Installation Instructions 442296100981 rev:c Schéma de cablâge 0-10V/DLEA (Réceptacle: 7 pins) (Réceptacle: 3 pins) (Réceptacle: 5 pins) (Photo Control Button) Éclairage d’urgence (seulement disponible avec OPF-S-P01, P02, P03) CAN ICES-005 (A) / NMB-005 (A 2020 page www.gardcolighting.com...
Need help?
Do you have a question about the GARDCO OptiForm OPF-S and is the answer not in the manual?
Questions and answers