Atos Unify OpenScape CP410 User Manual
Hide thumbs
Also See for Unify OpenScape CP410:
- User manual (191 pages) ,
- Quick reference manual (2 pages) ,
- Quick reference manual (2 pages)

Related Manuals for Atos Unify OpenScape CP410


Summary of Contents for Atos Unify OpenScape CP410
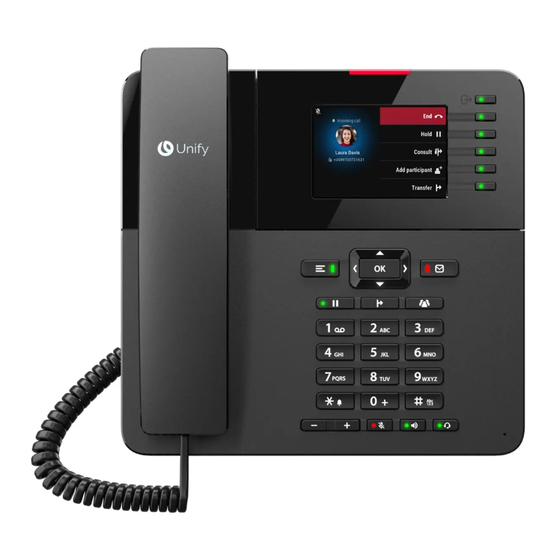
- Page 1 Unify OpenScape Desk Phone CP Atos Unify OpenScape Desk Phone CP410 User Guide HFA A31003-C1000-U148-01-7619...
-
Page 2: Important Information
Important information Important information For safety reasons, the telephone should only be supplied with power: using the original power supply unit. over a LAN with PoE (Power over Ethernet), which complies with the IEEE 802.3af standard. Never open the telephone. Should you encounter any problems, consult your administrator. -
Page 3: Care And Cleaning Instructions
Important information Care and cleaning instructions Never spray the phone with liquids as the penetrating fluids can lead to malfunctions or may damage the device. Do not use substances such as alcohol, chemicals, solvents or scouring agents, as these substances can lead to surface damage. Clean the phone with a soft and slightly damp cloth. -
Page 4: License Information
Important information Energy Star ENERGY STAR is a US Environmental Protection Agency voluntary program that helps businesses and individuals Save money and protect our climate through superior energy efficiency. Products that earn the ENERGY STAR prevent greenhouse gas emissions by meeting strict energy efficiency criteria or requirements set by the US Envir- onmental Protection Agency. -
Page 5: Table Of Contents
Contents Contents Important information Trademarks Software update Care and cleaning instructions Online documentation Location of the telephone Product-oriented environmental protection License information General information About this manual Displays for describing operation Service Intended use Telephone type Speakerphone quality and display legibility Single-line telephone / multi-line telephone Remote configuration for cloud service providers Connect the telephone... - Page 6 Contents Display contrast Home screen Displays on the status line for adjusting the volume Voicemail Adjusting the display angle Different display interfaces Context-dependent displays Actions with function keys Action via dialpad Actions with navigation keys Ports on the underside of the phone Threading the connection cables How to use network connections Using the USB port...
- Page 7 Contents Cancelling inline notification Settings menu User settings Administrator settings Configuring the phone default settings Adjusting the display brightness Screen saver Activating the screen saver Uploading images for the screen saver Setting the screen saver activation interval Setting the “Landing screen” Audio settings Switching to a ringer beep Pattern melody...
- Page 8 Contents Labelling function keys Setting up a selected dialling key Resetting all assigned functions to keys How to program a function key with “Send URL” Deleting an assigned function from a key Making calls Incoming calls Answering a call via the handset Answering a call via the loudspeaker (speakerphone mode) Answering a call via the headset Direct station selection keys...
- Page 9 Contents Activating or deactivating the microphone Changing the volume Switching from handset to speakerphone mode Switching from speakerphone mode to the handset Switching from headset to speakerphone mode Open listening to the room Parking a call Placing a call on hold Being on hold Call second participant (consultation) Transferring a call...
- Page 10 Contents Retrieving messages Identifying the line used Ending connection on a line key Entering a call on a line (three-way) Allowing or preventing entry Witness or tape connection Accepting calls for the manager in the secretarial office Accepting calls for the manager during a call Switching calls directly to the manager Accepting calls on the manager’s phone Accepting a call for another management or secretarial team...
- Page 11 Contents Identify yourself on another phone Switch off identification on another phone CTI calls Beep on auto-answer Beep on auto-reconnect Paging call Set your own connection to another phone (Mobility) Mobility variants Connect to “guest phone” Connect back to “home phone” Transfer connection to next phone OpenScape Desk Phone as house call system (intercom system) System-wide voice calling...
- Page 12 Contents Enabling or disabling the speaker call protection Caller ID suppression Setting the user password Deactivating the password prompt Locking the phone Activating the phone lock Unlocking the phone Dialling emergency numbers Secure calls Query status in idle mode Querying the status when connected Information about secure calls Identifying anonymous callers ("tracing") Local phone settings...
- Page 13 Contents Fixing problems Caring for your phone Troubleshooting Messages during remote configuration Index...
-
Page 14: General Information
General information About this manual This User Guide is intended to help you familiarize yourself with the OpenScape Desk Phone and all of its functions. It contains important information on the safe and proper operation of the OpenScape Desk Phone. These instructions should be strictly complied with to avoid operating errors and ensure optimum use of your telephone. - Page 15 Selecting and confirming actions Original illustration on display Step-by-step illustration in the user guide The action area on the right of the display changes colour according to the action required or the status. When an action is selected, it will be shown right-aligned in blue. Settings The action is executed by selecting the corresponding function key.
- Page 16 Action not selected Display illustrations Step-by-step illustration in the user guide When an action is not selected, it will be shown right-aligned in a dark grey colour. Favourites The corresponding key is also shown. The action can be executed by pressing the key even if it has not been selected. Conversation display When the phone is idle, the first entry in the conversation list is highlighted and selected.
-
Page 17: Service
Information displayed for a selected conversation Melanie Miller If a conversation contact is selected in the list, it will be highlighted in blue. Accept and select the conversation by pressing the adjacent function key or press to establish the connection. To open the context menu, press the navigation key. -
Page 18: Intended Use
Intended use The OpenScape Desk Phone CP410 is a desktop unit designed for voice trans- mission and for connection to the LAN. It can also be used as a workstation device. The OpenScape Desk Phone CP410 can also be connected to Wi-Fi with the additional Wi-Fi dongle CP10. -
Page 19: Remote Configuration For Cloud Service Providers
Remote configuration for cloud service providers Remote configuration for cloud service providers Connect the telephone Connect the telephone to the LAN. If the power is not supplied by the LAN cable, connect a power supply if appropriate (the power supply is not needed with PoE). The telephone should now boot. -
Page 20: Starting The Remote Configuration
Remote configuration for cloud service providers Enter the PIN you received from the administrator. Only numeric characters are accepted. Confirm the entry. Starting the remote configuration Once you have entered a valid PIN, the remote configuration of the telephone starts automatically. Once the configuration is concluded, the telephone is operational with the required settings. -
Page 21: Getting To Know The Openscape Desk Phone Cp410
Getting to know the OpenScape Desk Phone CP410 Getting to know the OpenScape Desk Phone CP410 The following sections describe the most frequently used controls and displays. The user interface of the phone You can make and receive calls as normal using the handset. The status LED displays the phone connection status. -
Page 22: Function Keys
Getting to know the OpenScape Desk Phone CP410 The fixed function keys on the right of the display correspond to the fixed functions on the display. The function keys (non-programmable) are assigned to the following functions: : Provides access to the user menu for locally controlling the phone settings. -
Page 23: Fixed Function Keys
Getting to know the OpenScape Desk Phone CP410 Function when key is pressed Function key next to the display: Activates the function shown next to the key on the display or opens an additional menu. If there is no description on the display next to the key, the key is not active. -
Page 24: Navigation Keys
Getting to know the OpenScape Desk Phone CP410 The status of a function is shown by the LED display for the corresponding func- tion key. Depending on how they are programmed, you can use the keys as fol- lows: "Programming the function keys" à page 81 Function keys, see Line and direct station selection (DSS) keys can only be programmed by the administrator via the program or service menu. -
Page 25: Audio Controls
Getting to know the OpenScape Desk Phone CP410 The pictograms for the navigation keys in this manual do not look identical to the navigation keys on the hardware. Key / pictogram Functions when key is pressed In lists and menus: One level up Entry selected: Cancel action In input fields: Delete character to the left of the cursor In lists and menus: One level down... -
Page 26: Dialpad
Getting to know the OpenScape Desk Phone CP410 Dialpad You can only use the digits 1 to 9 and 0 as well as the * and # characters when dial- ling a number. To delete digits press In situations where text input is possible, for example when entering the user pass- word, you can also use the dial keys to enter text in addition to the digits and spe- cial characters mentioned. - Page 27 Getting to know the OpenScape Desk Phone CP410 ’ “ Special characters (not in 123 mode) Space Extended character Toggle between uppercase and lowercase and number entry Multi-function keys Function during text input Function when held down Types special characters 2 seconds: Ringer off 3 seconds: Beep rather than ringer...
- Page 28 Getting to know the OpenScape Desk Phone CP410 Mode (# can also be used here to switch): 123: Digits only ABC: Uppercase letters only Abc: First letter in uppercase, subsequent letters in lowercase abc: Lowercase letters only Move cursor left: Moves the cursor to the left Move cursor right: Moves the cursor to the right Copy: Copies the entire content to the clipboard Paste: Inserts the entire content from the clipboard at the cursor position...
-
Page 29: Display
Getting to know the OpenScape Desk Phone CP410 Complete your input by pressing the corresponding function key. Display The various screens displayed in the following sections depend on the configuration by the administrator. Some items may not be dis- played if not configured. Display brightness You can adjust the display brightness to suit your ambient lighting. -
Page 30: Home Screen
Getting to know the OpenScape Desk Phone CP410 Home screen If no calls are taking place or settings being made, the phone is in idle mode. Time screen Status icons Date and time Presence status Menu options (e.g. for other screens) The selected menu option is highlighted Phone number Press this key to return to the home screen from a voicemail menu (see... - Page 31 Getting to know the OpenScape Desk Phone CP410 Status bar The status bar at the top of the screen displays the current time, phone status, presence status, and the phone number or name. Different icons represent dif- ferent situations and status. When the phone is idle, the status bar displays also the current date.
- Page 32 Getting to know the OpenScape Desk Phone CP410 Presence status Various icons are displayed indicating the presence status. Icon Meaning Available Away Break, Be right back Call me Home Meeting Lunch Office Offline Out of office Sick Vacation Call status Various icons are displayed indicating the call status.
- Page 33 Getting to know the OpenScape Desk Phone CP410 Icon Meaning Active (connected) video call Call that has encountered a “Busy” condition. Answered call (old) Missed call Dialled call Call on hold New voice mail Call you forwarded Call you forwarded unconditionally A call that has encountered “Unobtainable”.
- Page 34 Getting to know the OpenScape Desk Phone CP410 Navigation Various icons are displayed indicating the navigation options. Icon Meaning Expandable list Expanded list Options Scroll up or down in lists Cancel Information Back to previous entry or list Blacklist Call log Search Filter in lists Settings...
- Page 35 Getting to know the OpenScape Desk Phone CP410 Communication Various icons are displayed indicating the communication options, i.e. how to handle an incoming call. Icon Meaning Accept call Deflect call Call on hold Redial Repertory call Conference call Add caller to conference Transfer Select line Number of events (1…99, additional events are marked with a...
- Page 36 Getting to know the OpenScape Desk Phone CP410 Icon Meaning Line active Line on hold Line alert Unregistered line Availability status Various icons are displayed indicating the availability status. Icon Meaning Busy Available Away Taking a break In group call or meeting Out for lunch In office Out of office...
-
Page 37: Displays On The Status Line For Adjusting The Volume
Getting to know the OpenScape Desk Phone CP410 Connectivity status Various icons are displayed indicating the connectivity status. Icon Meaning Mailbox USB available Unsecure Wi-Fi connection. The strength of the signal is indic- ated by the “filling”. Secure Wi-Fi connection. The strength of the signal is indicated by the “filling”. -
Page 38: Voicemail
Getting to know the OpenScape Desk Phone CP410 Display Meaning Ringer volume in 10 levels when the ringer is switched off Handset or speaker volume in 10 levels after picking up the handset or switching to speakerphone mode. Voicemail Press the key shown. If your telephone is connected to a voicemail system (such as Smart Voicemail), key will light up in addition to the Notification LED to alert you to any messages that have arrived. - Page 39 Getting to know the OpenScape Desk Phone CP410 Landing screen The landing screen displays the contents of the screen that is displayed by default. For changing the landing screen, see "Setting the “Landing screen”" à page Conversations When set, the conversation list is displayed on the landing screen and is a col- lection of contact details and data from the call log.
- Page 40 Getting to know the OpenScape Desk Phone CP410 Start First level Second level Administrator settings Presence To access the menu "Presence", press the key above the function keys to the right of the display. “Presence”can be used for the following functions: Controlling call forwarding Controlling “Do Not Disturb”...
-
Page 41: Context-Dependent Displays
Getting to know the OpenScape Desk Phone CP410 Be Right Back In Meeting Offline Away UC preferred device shows the current device and when selected displays a screen to select a device that has been defined in the UC application. The OpenScape UC Presence state can be also changed from the OpenS- cape UC web client. -
Page 42: Actions With Navigation Keys
Getting to know the OpenScape Desk Phone CP410 If the conversation is already shown in the list before your input is complete, you can dial the number immediately using the associated function key or start a call with a new number (see "Opening details of a conversation or conducting a call"... -
Page 43: Ports On The Underside Of The Phone
Getting to know the OpenScape Desk Phone CP410 Ports on the underside of the phone Network LAN port PC LAN port USB-A port Optional power supply Headset port Handset port Key module port Note The key module is not “hot-swappable”: Always switch off the phone before removing or connecting a key module. -
Page 44: Threading The Connection Cables
Getting to know the OpenScape Desk Phone CP410 Threading the connection cables The picture shows an example of the OpenScape Desk Phone series. Your actual phone may look different. Thread the connection cables on the back of the phone through the holes in the stand. -
Page 45: Using The Usb Port
Getting to know the OpenScape Desk Phone CP410 The picture shows an example of the OpenScape Desk Phone series. Your actual phone may look different. USB port PC LAN port Network LAN port Using the USB port The USB type A port above the display can be used for connecting the following items: A USB headset, not included A mobile ION handset (DECT), not included... -
Page 46: Key Module Km410
Getting to know the OpenScape Desk Phone CP410 Key module KM710 A function or selected dialling can be programmed on two levels (“normal” and “shifted”) that can be invoked by pressing the key below the function keys, thereby doubling the functions that can be assigned to the key module (see "Programming the function keys"... -
Page 47: Key Module Km710
Getting to know the OpenScape Desk Phone CP410 Key module KM710 The KM710 is an optional key module attached and connected to the right side of the phone that provides an additional 12 illuminated and programmable function keys at two levels, i.e. additional 24 functions (see "Programmable function keys"... -
Page 48: Updating The Phone
Getting to know the OpenScape Desk Phone CP410 Key module bright- Select “Key module brightness”. The current setting is displayed. ness Select “Edit”. Use the function key to increase the value. Use the function key to decrease the value. Optionally, use the keys on the dialpad. Save the setting. -
Page 49: Operating The Openscape Desk Phone Cp410
Operating the OpenScape Desk Phone CP410 Operating the OpenScape Desk Phone CP410 The following descriptions provide an overview of how to operate the phone. Before operating, you should set up the user password to protect the phone against unauthorized use (see "Privacy and security"... -
Page 50: Opening Details Of A Conversation Or Conducting A Call
Operating the OpenScape Desk Phone CP410 The status of a conversation is displayed with an icon and text. The list is ordered chronologically based on the last event. The latest entry appears at the top of the list. Active calls are displayed before the historical con- versations. -
Page 51: Creating Or Editing Conversations
Operating the OpenScape Desk Phone CP410 Select “Contact details”. This displays the contact details for a conversation. Contact details Creating or editing conversations Conversations are created based on dialled or received calls. New contacts are synchronized with the phone when connected to the Microsoft® Exchange server. When the LDAP has found a contact and you call that contact, this contact is trans- ferred to conversations. - Page 52 Operating the OpenScape Desk Phone CP410 Open the details of the conversation using the navigation key. Select “Contact details”. Contact details Select the corresponding icon to open the edit mode. You can complete the fol- lowing fields for a contact: Last name: Last name of the contact First name: First name of the contact Work x: Work phone number.
-
Page 53: Searching For Conversations
Operating the OpenScape Desk Phone CP410 You can add missing fields values also at a later time. The information is shown on the display the next time you call this contact. Create a new contact from the conversation list You can create a new contact from the conversation list with no previous history. Scroll to the header row of the list “Conversations”... - Page 54 Operating the OpenScape Desk Phone CP410 Enter the first digits of the phone number to see all phone numbers starting with the digits in the search box. Use the key to switch from numeric to alphanumeric input. Press the function key next to a search result to call the contact. Search for names (alphanumeric search string) Searching for text strings (alphanumeric search) depends on the configuration of the LDAP.
- Page 55 Operating the OpenScape Desk Phone CP410 Search input Functionality Matches any entries where the last name is AMBER, exactly “amber” Matches any entries where the last name starts AMBER,, with “amber,” Matches any entries where the last name is AMBER, P exactly "amber"...
-
Page 56: Filtering Conversations
Operating the OpenScape Desk Phone CP410 "Alphabetical order" means A-Z ordering based on the first character in the name / names / topic of the conversation or contact. In the case of persons’ names, the order is based on the first character of the first name or last name as displayed in the conversation list. -
Page 57: Displaying The History Of A Conversation
Operating the OpenScape Desk Phone CP410 Displaying the history of a conversation The latest call of a conversation is shown directly in the conversation list. The his- tory of other calls can be viewed during a call in the details or also directly within the history option. -
Page 58: Marking All Conversations As Read
Operating the OpenScape Desk Phone CP410 Marking all conversations as read You are able to mark all new missed calls in the conversation list as read in a single action. By this, all conversations with new missed call events will change to show normal missed call events and the missed call counter is reset to zero. -
Page 59: Telephony Interface
Operating the OpenScape Desk Phone CP410 Telephony interface Telephony view Incoming call Your phone rings and the notification LED flashes. In addition to the common phone functions such as “Accept”, additional information and functions may be displayed. Incoming call in multi-call scenarios It is possible to have many incoming calls at the same time. -
Page 60: Programmable Function Keys
Operating the OpenScape Desk Phone CP410 Call handling is very limited when the phone is locked. The menu “Conversations” is not accessible and there is no alert. Only incom- ing calls with high priority are displayed. When another call is signalled, and the priority indicator changes, the incoming call switches to the current high priority call. -
Page 61: Answering Machine ("Voicemail")
Operating the OpenScape Desk Phone CP410 On the KM710, use the key on the key module to switch between the first and second level for the respective function. When you have pressed the corresponding function key on the key module, the status LED colour on the key changes, and possibly also the information shown on the display (KM710). -
Page 62: Display Of The Inline Notification
Operating the OpenScape Desk Phone CP410 DSS calls: Shown for an alerting DSS call (i.e. alerting the DSS monitored phone), even if a key module is plugged in or if the event is for the hidden favourite menu. MultiLine calls: Conditions for calls as stated above. Also for lines marked as no ring (the phone does not need to be busy). -
Page 63: Cancelling Inline Notification
Operating the OpenScape Desk Phone CP410 option. Cancelling inline notification The inline notification can be cancelled by pressing the function key adjacent to the notification. This will have one of the following consequences: Display the screen “Favourites”: If you visit the screen when an inline noti- fication is displayed, the notification is cancelled, i.e. - Page 64 Operating the OpenScape Desk Phone CP410 Alternatively, use the navigation keys to select the option and confirm with Save the setting. Parameters You can set values in some submenus. Press the function key to open the parameter setting. Press the function key for the desired parameter value. The setting is changed and you return to the previous menu.
-
Page 65: Administrator Settings
Operating the OpenScape Desk Phone CP410 Administrator settings Refer to the administration manual for your phone for more information on this topic. DLS security PIN If the administrator has configured a DLS security PIN, the following pop up screen appears on your device. Enter the PIN. -
Page 66: Configuring The Phone Default Settings
Configuring the phone default settings Configuring the phone default settings Adjusting the display brightness You can adjust the brightness of the display to suit the ambient lighting. You can also configure this setting via the web interface (see "Web inter- face (WBM)"... -
Page 67: Activating The Screen Saver
Configuring the phone default settings Activating the screen saver Prerequisite: The administrator has uploaded images to the phone or you have uploaded your own images. Press the key to open the main menu. Open “Service/Settings”. Service/Settings Open “User settings”. User settings Enter and confirm the user password, if required. - Page 68 Configuring the phone default settings Press the key to open the main menu. Open “Service/Settings”. Service/Settings Open “User settings”. User settings Enter and confirm the user password, if required. Select “Phone”. Phone Select “Inactivity”. Inactivity Setting the idle time Select “Idle time (mins)”. The current idle time is displayed. Idle time (mins) Select an idle time interval.
-
Page 69: Setting The "Landing Screen
Configuring the phone default settings Setting the “Landing screen” You can see the “Landing screen” in the following situations: When start-up is finished (e.g. after a restart or upgrade). Returning to the default screen via repeated use of the "back" key "Waking"... -
Page 70: Audio Settings
Configuring the phone default settings Audio settings Switching to a ringer beep You can turn the ringer off and select a short alert tone instead. Hold down the key for three seconds until the notification and icon for "Ringer beep" is displayed. Pattern melody You can also configure this setting via the web interface (see "Web inter-... -
Page 71: Room Character
Configuring the phone default settings Settings Select “Settings”. Select “Pattern sequence”. The current pattern sequence is displayed. Pattern sequence Select a pattern sequence. You will immediately hear the associated melody and sequence. Save the setting. Room character To ensure that the other party can hear you properly in speakerphone mode, you can adjust the phone to the room acoustics. -
Page 72: Setting The Headset Port Use
Configuring the phone default settings Audio Select “Audio”. Select “Settings”. Settings Select “Open listening”. The following options are available: Open listening Standard mode US mode Select the open listening mode. The current mode is displayed. Save the setting. Setting the headset port use This setting defines if a headset or a conference unit is activated when pressing the headset key You can also configure this setting via the web interface (see... -
Page 73: Special Ringers
Configuring the phone default settings USB Headset Select “USB Headset” (or any other headset option). The following options are available: Option No. 1, first configured option, e.g. a conference unit Option No. 2, second configured option, e.g. a USB headset Option No. -
Page 74: Activating Or Deactivating The Ringer
Configuring the phone default settings Enable the selected option and configure the ringer, melody, and sequence for the "Audio settings" à page selected option (see 70). Save the setting. Activating or deactivating the ringer You can see if the function is activated or deactivated from the corresponding icon in the status bar. -
Page 75: Adjusting The Default Volumes
Configuring the phone default settings Adjusting the default volumes You can configure different default volumes for the following audio output: Loudspeaker Ringer Handset Headset Handsfree Rollover Alert beep Call waiting tone Press the key to open the main menu. Open “Service/Settings”. Service/Settings Open “User settings”. - Page 76 Configuring the phone default settings You can also configure this setting via the web interface (see "Web inter- face (WBM)" à page 161). Press the key to open the main menu. Open “Service/Settings”. Service/Settings Open “User settings”. User settings Enter and confirm the user password, if required. Select “Phone”.
-
Page 77: Call Settings
Configuring the phone default settings Select the scope for the key clicking sound: Dialpad only All keys Save the setting. Call settings Call waiting You can determine whether or not you would like to accept second calls (call wait- ing) during a conversation. If your phone belongs to an ONS group, in addition to triggering an alert tone on the engaged telephone, the second call is also signalled with a ring tone on the other phones in the ONS group. -
Page 78: Allowing Call Waiting
Configuring the phone default settings Via “Favourites” Prerequisite: The key “Camp-on” is configured in “Favourites”. Select the key to open the main menu. Select “Favourites”. Favourites Select “Camp-on”. Camp-on Via the Service menu Press the key to open the main menu. Open “Service/Settings”. -
Page 79: Central Speed Dial Numbers
Configuring the phone default settings Assuming “Call waiting” is enabled, you can toggle a configured function key to switch call waiting on or off. Central speed dial numbers Speed dial numbers are set up by the administrator. Speed dial numbers are stored in the system. The central speed dial directory can be obtained, e.g. -
Page 80: Connecting To Openscape Uc
Configuring the phone default settings Save the setting. Connecting to OpenScape UC You can also configure this setting via the web interface (see "Web inter- face (WBM)" à page 161). Press the key to open the main menu. Open “Service/Settings”. Service/Settings Open “User settings”. -
Page 81: Programming The Function Keys
Programming the function keys Programming the function keys The phone features a range of functions that can be attributed to the pro- grammable function keys. The phone comes with programmable keys that can be programmed on two separate levels. After programming a function key, a “label” must be assigned to each cor- responding function. -
Page 82: Programming A Key
Programming the function keys Forward busy Feature toggle CF unconditional - any Mobility CF no reply - any Directed pickup CF busy - any Release CF unconditional - ext. Callback CF unconditional - int. Cancel callbacks CF no reply - ext. Consult CF no reply - int. -
Page 83: Labelling Function Keys
Programming the function keys Save the setting. Via “Settings” Press the key to open the main menu. Open “Service/Settings”. Service/Settings Open “User settings”. User settings Enter and confirm the user password, if required. Select “Phone”. Phone Select “Program keys”. Program keys If a key module is connected, press the function key you want to program. -
Page 84: Setting Up A Selected Dialling Key
Programming the function keys Select “OK” Select “Label”. Label Enter the label text. Press the function key to conclude input. Save the setting. Setting up a selected dialling key Hold down the function key in the left panel, in the menu “Favourites” or on a con- nected key module until the key programming menu is displayed. -
Page 85: How To Program A Function Key With "Send Url
Programming the function keys Keys that can only be configured by the administrator are not reset. Select “Reset all user data” to reset all user settings. Reset all user data How to program a function key with “Send URL” Configuration Select “Favourites”. -
Page 86: Making Calls
Making calls Making calls Incoming calls The phone rings if the ringtone is active. The notification LED also flashes. The call- ing party information (e.g. name, phone number) is displayed in the status bar and in the information section on the central part of the display. Any settings currently made on the phone are interrupted by an incoming call. -
Page 87: Answering A Call Via The Headset
Making calls Answer Select “Answer”. Optionally, select the key shown. The key lights up . The speakerphone function is activated. "Volume" à page Adjust the call volume, if necessary (see 25). Suggestions for using the speakerphone mode Adjust the call volume while speakerphone mode is active. The ideal distance between the user and the phone in speakerphone mode is 50 cm. -
Page 88: Direct Station Selection Keys
Making calls Direct station selection keys Apart from line keys, the administrator can also configure direct station selection (DSS) keys. You can use a DSS key to call an internal station directly, pick up calls for this station or forward calls directly to it. Meaning of LEDs on DSS keys DSS key Meaning... - Page 89 Making calls Prerequisite: You are conducting a call. Select the corresponding DSS key, e.g. “Office”. The connection is established Office through the active line. The first call is placed on “Hold”. If the contact answers, you can toggle, transfer the first call, or initiate a conference. If the administrator has configured transfer instead of consultation, you can only transfer the current call to the DSS contact.
-
Page 90: Answering A Call With The Dss Key
Making calls If the DSS line is registered at more than one device, the devices with the option “Monitor Only” enabled will not be able to answer the calls; they will be able to only monitor the status of the line. Deflecting a call to a DSS contact Prerequisite: The Option “Deflect”... -
Page 91: Selectively Picking Up A Call
Making calls During the call Press the flashing "Pickup" key. The first call is on hold while you are connected to Pickup the second call. Ending the second call and returning to the first Press “Set free” to disconnect. Set free Selectively picking up a call The direct call pick-up key must be configured by the administrator. -
Page 92: Ending A Call
Making calls Ending a call Press the illuminated key. The key is no longer lit. Optionally, press the illuminated key. The key is no longer lit. Optionally, hang up the handset. Optionally, select “End”. After the call has ended (either by you or the remote party), end of call notification with duration of the call will be shown in “Conversations”. -
Page 93: Dial With The Handset On Hook
Making calls Dial with the handset on hook The connection is set up with on-hook dialling via a connected headset or via the loudspeaker (speakerphone mode). The line is seized before dialling. Enter phone number via the dialpad without lifting the handset and confirm when finished. -
Page 94: Dialling With A Connected Headset
Making calls Participant does not answer or is busy Press key. LED goes out. Select “Callback”. Callback Dialling with a connected headset Prerequisite: The headset is connected. Internal: Enter the phone number. External: Enter external code and phone number. The key illuminates. -
Page 95: Calling With A Direct Station Select (Dss) Key
Making calls Calling with a direct station select (DSS) key Prerequisite: A DSS key is configured on your phone, e.g. a key with label “DSS X” (see "Setting up a selected dialling key" à page 84). Select the corresponding function key. DSS X When the participants answer, enter speakerphone mode. -
Page 96: Using Speed Dial
Making calls set, the conversation list is displayed on the landing screen and is a collection of contact details and data from the call log." à page 39). Select “Conversations”. Conversations Calls you have missed are indicated with Select the contact and confirm. The call is set up with the number displayed. John Doe Using speed dial This function must be configured by the administrator. -
Page 97: Forwarding Calls
Making calls Use speed dialing Select “Use speed dialing”. Enter the speed dial number. The connection is immediately established. Dialling with individual speed dial numbers Prerequisite: You have set up individual speed dial numbers. Press the key to open the main menu. Open “Service/Settings”. -
Page 98: Use Call Forwarding
Making calls Use call forwarding You can immediately forward internal or external calls to your lines to different internal or external telephones (destinations) (external destinations are also pos- sible if the system is configured accordingly). If call forwarding is activated, a special dial tone sounds when the handset is lifted. -
Page 99: Activating Immediate Call Forwarding
Making calls User settings Open “User settings”. Enter and confirm the user password, if required. Select “Configuration”. Configuration Select “Incoming calls”. Incoming calls Select “Forwarding”. For a description of the settings and call forwarding types, Forwarding "Programming the function keys" à page Activating immediate call forwarding All calls are forwarded regardless of other settings. -
Page 100: Accepting A Callback
Making calls Accepting a callback An participant for whom a callback was saved is now no longer busy or has phoned in the meantime. Your phone now rings. Lift the handset. Optionally, press the key. The LED lights up Checking or deleting a saved callback Press the key to open the main menu. -
Page 101: Switching From Handset To Speakerphone Mode
Making calls You are conducting a call. Adjust the volume using the toggle key. Switching from handset to speakerphone mode Note that there are two different modes (US and Standard) and you can activate your preferred setting as appropriate. Prerequisite: You are conducting a call via the handset. The microphone and loudspeaker functions are activated by the administrator. -
Page 102: Open Listening To The Room
Making calls Open listening to the room You can let other people in the room join in on the call. Let the other party know that you have turned on the loudspeaker. Prerequisite: You are conducting a call via the handset. Activating open listening To activate open listening, press the key shown. -
Page 103: Placing A Call On Hold
Making calls Placing a call on hold You can use this function to place an ongoing call on hold, e.g. to prevent the another party hearing a conversation with a colleague in the same room. Prerequisite: You are conducting a call. Select and confirm the option shown. -
Page 104: Transferring A Call
Making calls Ending a consultation call Select “Set free”. Set free Switching to the held party (alternating) Select “Toggle”. Toggle Transferring a call If the person you are speaking to wishes to be forwarded to one of your col- leagues, you can transfer the call. Prerequisite: You are conducting a call. -
Page 105: Carry Out Dtmf Suffix / Dial Tone
Making calls Ending the second call, resuming the first call Select “Set free”. Set free Optionally, hang up the handset. Optionally, lift the handset. Carry out DTMF suffix / dial tone In order to control devices, such as answering machines or automatic information systems, you can send out DTMF signals. -
Page 106: Making Calls Via Multiple Lines ("Multi-Line")
Making calls via multiple lines (“multi-line”) Making calls via multiple lines (“multi- line”) This section describes the settings for a MultiLine phone and how to use a MultiLine phone. Line keys Line keys can be set up on the freely programmable feature keys. Any key assigned the “Line”... -
Page 107: Line Usage
Making calls via multiple lines (“multi-line”) Line usage Private line: A line that is used by a single telephone. This line cannot be used as a secondary line by another telephone. Shared line: A line that is configured on multiple phones. The line status is displayed by a LED for all phones that share this line (if configured). -
Page 108: Accepting Calls On The Line Keys
Making calls via multiple lines (“multi-line”) put on "hold" or "exclusive hold" is waiting on a line key. You can also display information about the caller on the active line. Prerequisite: You have accepted a call on a line key. The LED of another line key flashes quickly, the "Temp preview"... -
Page 109: Activating And Deactivating Ringing Mode (Call)
Making calls via multiple lines (“multi-line”) Activating and deactivating ringing mode (call) If you are making a phone call on one line, ringing for other incoming calls may dis- rupt your conversation. If the “Ring on/off” function is enabled, your phone will no longer ring. -
Page 110: Dialling With Line Keys
Making calls via multiple lines (“multi-line”) Dialling with line keys The phone can be set up with automatic or selectable line seizure. The admin- istrator responsible determines if a line, and which line, is to be automatically seized if the handset is lifted or speakerphone mode enabled. The message “PPlease select an outgoing line to use”... -
Page 111: Call Waiting With A Direct Station Select (Dss) Key
Making calls via multiple lines (“multi-line”) The input field in “Conversations” opens. Enter the phone number and confirm. You can also search for and use the contact from the conversation list. Selecting a line from “Favourites” Prerequisite: The line is accessible via “Favourites” and a key module is not con- nected. -
Page 112: Exclusively Holding And Accepting A Call On A Line Key
Making calls via multiple lines (“multi-line”) Line x Briefly press the current line key. Optionally, select speakerphone mode. The line key on which the call is on hold flashes slowly. The call can be continued on any phone in the team on which the LED of this line key is slowly flashing. Exclusively holding and accepting a call on a line key Prerequisite: You have accepted a call on a line key or you are making a con- sultation call that only you are able to, intend to, or are permitted to continue. -
Page 113: Most Recent Extension Number Dialled For A Particular Line
Making calls via multiple lines (“multi-line”) Change password # Select “Confirm password # Dial”. The last saved number is redialled. Dial Most recent extension number dialled for a particular line The most recent extension number dialled via your main line is automatically saved. -
Page 114: Identifying The Line Used
Making calls via multiple lines (“multi-line”) Press the key on the dialpad. The information about the caller is displayed. Carrying out a callback request A callback request is displayed. Select and confirm. The participant is called on the corresponding line. Caller Next entry There is more than one entry. -
Page 115: Ending Connection On A Line Key
Making calls via multiple lines (“multi-line”) Ending connection on a line key Press the key. The LED goes out. Optionally, hang up the handset. Entering a call on a line (three-way) Prerequisite: You are speaking on a line. The LED of the line key lights up. Press the line key. - Page 116 Making calls via multiple lines (“multi-line”) Allowing entry It can be pre-set for your primary line that nobody can enter the line if it is busy. In this case you may allow entry. The authorization applies to the current or following call.
-
Page 117: Witness Or Tape Connection
Making calls via multiple lines (“multi-line”) Privacy on Select “Privacy on”. Entry is now prevented. Witness or tape connection During a call a previously determined participant can be prompted to enter the call as a “witness” via a programmed function key “Silent monitor”. The third par- ticipant in the call is not informed of the connection of the “witness”. -
Page 118: Switching Calls Directly To The Manager
Making calls via multiple lines (“multi-line”) Pickup Select “Pickup”, if configured. Ending a call - back to the first call Select “Release and return” and continue the call with the first call partner. Release and return Transferring a call to the manager Prerequisite: You have accepted a call for the manager in the secretarial office. -
Page 119: Accepting A Call For Another Management Or Secretarial Team
Making calls via multiple lines (“multi-line”) Accepting a call for another management or secretarial team If several “Management / Secretarial” teams are set up, they can also accept calls for other teams. Lift the handset. Press the programmed function key,e.g. “Manager 3”. Manager 3 Pickup is also possible during a call. -
Page 120: Using The Buzz Function
Making calls via multiple lines (“multi-line”) Service menu Select “Service menu”. Select “Feature settings”. Feature settings Enable or disable “Camp-on”. Using the buzz function If on the manager’s phone a programmed “Buzz” call has been set up, you can trig- ger a buzzing on a particular target phone (e.g. -
Page 121: Group Calls / Hunt Group
Group calls / hunt group Group calls / hunt group If configured, your connection is part of a team. The team consists of internal phone connections that can make use of particular functions. Switch group calls on or off If your phone is connected to a system network via LAN, pay atten- tion to specific features (see "Leaving or entering a “hunt group”"... -
Page 122: Accepting Calls For A Team Member
Group calls / hunt group Use the navigation buttons to select another group or line number. Enable or disable a single group or all groups using the following options: Group calls off Group calls on #=All groups off *=All groups on If you have activated the call for another group or line, or deactivated the call for all groups or lines to which you belong, a special dial tone rings when you lift up the handset. - Page 123 Group calls / hunt group Save the setting. Connect immediately Optionally, select “Connect immediately”. Optionally, select “Display/Clear”. Display/Clear Select “Clear”. Clear Delete from all ringing group phones Press the key to open the main menu. Select "Answer Group OFF". Answer Group OFF...
-
Page 124: Other Settings And Functions
Other settings and functions Other settings and functions Energy saving mode Set how long the phone screen can remain idle before the background lighting automatically switches off and the screen turns dark. The shorter the time for the screen to dim the less energy is con- sumed. -
Page 125: Setting The Difference Between Daylight Saving And Standard Time
Other settings and functions Prerequisite: The option “Auto DST” is deactivated (see "Enabling automatic day- light saving time" à page 125). Press the key to open the main menu. Open “Service/Settings”. Service/Settings Open “User settings”. User settings Enter and confirm the user password, if required. Select “Date and time”. -
Page 126: Displaying The Date And Time Settings
Other settings and functions Press the key to open the main menu. Open “Service/Settings”. Service/Settings Open “User settings”. User settings Enter and confirm the user password, if required. Select “Date and time”. Date and time Enable or disable “Auto DST”. Auto DST Save the setting. -
Page 127: Delete Saved Reminders
Other settings and functions New Reminder Select “New Reminder”. First reminder: Confirm. Other reminder: Select and confirm. Enter a 3 or 4-figure time, e.g. “845” for “8:45 AM” or “1500” for “3:00 PM”. Save the setting. Delete saved reminders Press the key to open the main menu. Open “Service/Settings”. -
Page 128: Identify Yourself On Another Phone
Other settings and functions Calling with cost allocation Dialling with project assignment Checking your mailbox Using a phone number stored on your phone for redial Entering appointments With an internal PIN you can divert your calls to another telephone at your place of residence (call forwarding “redirect”). -
Page 129: Switch Off Identification On Another Phone
Other settings and functions Switch off identification on another phone Press the key to open the main menu. Open “Service/Settings”. Service/Settings Select and confirm. PIN / COS Select and confirm. Deactivate PIN The identification is automatically switched off if the different device is not used for several minutes CTI calls Beep on auto-answer... -
Page 130: Beep On Auto-Reconnect
Other settings and functions Beep on auto-answer Enable “Beep on auto-answer”. Save the setting. Beep on auto-reconnect You can reconnect a held call both via the CTI application and via the phone. A beep sounds when you toggle between an active call and a held call via the CTI application. -
Page 131: Set Your Own Connection To Another Phone (Mobility)
Other settings and functions Configuration Select “Configuration”. Select “Incoming calls”. Incoming calls Select “CTI calls”. CTI calls Enable “Paging ^”. A paging call can be initiated in two ways: Paging ^ Using the feature access code *84 and the paging extension to RingCentral Pressing the configured “Page”... -
Page 132: Connect To "Guest Phone
Other settings and functions The conversations you have had in the meantime are automatically deleted from the phone once you log off. Data privacy When "logging on" to the "guest phone", the following settings are transmitted from the mobile connection: Key assignment Call forwarding Authorizations (apart from user password) -
Page 133: Connect Back To "Home Phone
Other settings and functions Connect back to “home phone” Log off via the “guest phone” If you no longer require a connection to the "guest phone", or if you want to switch again to your “home phone”, log off from the “guest phone”. Press the key to open the main menu. -
Page 134: Openscape Desk Phone As House Call System (Intercom System)
Other settings and functions OpenScape Desk Phone as house call system (intercom system) You can speak to an internal subscriber on the OpenScape Desk Phone directly using the loudspeaker on their phone to set up a connection. You can also initiate a speaker call from a consultation call. -
Page 135: Speaker Call In A Group
Other settings and functions A connection to the target’s loudspeaker is established immediately, under the fol- lowing conditions: The line is not busy. The handset is not lifted. The speaker call protect is not activated. The caller receives a confirmation tone when the connection is established and they can talk. - Page 136 Other settings and functions The line is not busy. The handset is not lifted. The “do not disturb” mode is not activated. The recipient answers the speaker call by picking up the handset. When the receiver presses the loudspeaker key or the line key (if set up), the con- nection is cancelled.
-
Page 137: Announcement (Broadcast) To All Members Of A Management Group
Other settings and functions Announcement (Broadcast) to all members of a management group With this function, you can send an announcement to all members (10 to 40) of a management group at the same time. After you have set the group call, you will receive a confirmation tone when you can start the announcement. -
Page 138: Save Destination For Fax / Pc / Busy Stations - Call Forwarding Activated
Other settings and functions Destination Select “Destination”. Select “Forwarding type:”. Forwarding type: Select “Variable: All calls”. Variable: All calls Enter the phone number of the other phone and confirm. Enter the PIN and confirm. Enter the destination phone number. Save the setting. Save destination for fax / PC / busy stations - call forwarding activated Press the key to open the main menu. -
Page 139: Call Forwarding For Fax / Pc / Busy Stations
Other settings and functions Select “Feature settings”. Select “Trunk FWD on”. Trunk FWD on Select “Variable: All calls”. Variable: All calls Enter the phone number of the other phone. Enter the PIN. Save the setting. Deactivating Select “Deactivate”. Deactivate Query Select “Search”. -
Page 140: Change Call Forwarding For Other Connection
Other settings and functions Enter the phone number of the other connection. Enter the PIN. Save the setting. Deactivating Select “Deactivate”. Deactivate Save the setting. Change call forwarding for other connection To do this, follow the same procedure as for saving / switching on: For a different phone, see "Save destination for other phone - activate call forwarding"... -
Page 141: Assigning A Contact Avatar
Other settings and functions 4. Select “Choose File” and select an image file from the file system. The file type must be PNG, JPG, or BMP and the image file cannot be larger than 100 kB. 5. Optionally, name the image for better recognition. 6. -
Page 142: Control Openscape Uc Preferred Device Settings From Phone
Other settings and functions Control OpenScape UC preferred device settings from phone You can easily control and modify your UC preferred device from your CP phone. Select “Presence” to open the Presence menu. Your selected preferred device is shown next to the UC preferred device option. To choose another device, highlight UC preferred device and press the key next to The UC preferred device screen shows a list with the names of all the devices you have configured through the UC web client. -
Page 143: Led Displays For Door Opener Keys
Other settings and functions LED displays for door opener keys Meaning LED off: The door opener is in idle mode. LED lights green: Door opened LED lights orange: In progress. LED lights red: Failure, contact the administrator if the problem persists. -
Page 144: Opening The Door
Other settings and functions If the administrator has enabled automatic video for your door opener (default), you will also see the camera image. Speaking with a visitor over the door terminal Prerequisite: The phone is called from the door phone. Lift the handset. -
Page 145: Special Functions For Parallel Call (Ons)
Special functions for parallel call (ONS) Special functions for parallel call (ONS) If your telephone is integrated into an ONS group (ONS = "One Number Service"), you can be connected to all other telephones of this group in the same way as on your own telephone. - Page 146 Special functions for parallel call (ONS) Service menu Select “Service menu”. Select “Feature settings”. Feature settings Select “Join hunt group”. Join hunt group Select “Deactivate”. Deactivate Activate Optionally, select “Activate”.
-
Page 147: Privacy And Security
Privacy and security Privacy and security Activating or deactivating “Do not disturb” If you do not wish to take calls, you can activate do not disturb. Internal callers hear the ringing tone and the message "Do not disturb." External callers are for- warded to the operator. -
Page 148: Caller Id Suppression
Privacy and security Speaker Calling Select “Speaker Calling”. The display shows whether the speaker call protection is switched on or off. Enable or disable the speaker call protection. Caller ID suppression The display suppression applies only to a subsequent call and is not stored during the redial selection. - Page 149 Privacy and security If you repeatedly enter the wrong password (2 to 5 times), additional attempts are blocked. You can make another attempt after a predefined time. It is possible that you will not be able to re-use a previously used password for a period of time, which means you have to create another "new pass- word".
-
Page 150: Deactivating The Password Prompt
Privacy and security Repeat the new password and conclude your input with the function key. Save the setting. The new password is now valid. Deactivating the password input To deactivate the user password, follow the procedure described above and set the new password to the default setting “000000”. -
Page 151: Locking The Phone
Privacy and security Enter six zeros ("000000") to deactivate the password prompt. Select “Confirm password”. Confirm password Enter six zeros ("000000") once again. Save the setting. Locking the phone To protect the phone against unauthorized access, you can lock the phone so that nobody can make calls or change settings without knowing the user password. -
Page 152: Dialling Emergency Numbers
Privacy and security Enter and confirm the user password. The phone is unlocked if the password is correct. Admin unlock Optionally, select “Admin unlock”. Enter and confirm the administrator password, if the user password is not known. The phone is unlocked if the password is correct. If the phone is locked, an emergency number entered by the admin- istrator can be dialled using the dialpad or the option “Emergency call”. -
Page 153: Information About Secure Calls
Privacy and security Encryption Select “Encryption”. “Encryption On”: The call is secure. “Call not encrypted”: The call is not secure. Information about secure calls The administrator can determine whether and how you are notified of unencrypted calls in your communication system. Notification can be either on one of the following ways or both: Warning tone Displaying a message on the screen... -
Page 154: Local Phone Settings
Local phone settings Local phone settings Volumes Set the volume here, for instance, for the loudspeaker, handset, or headset. You can also configure this setting via the web interface (see "Web inter- face (WBM)" à page 161). Press the key to open the main menu. Open “Service/Settings”. -
Page 155: Set Local Ringtones
Local phone settings Set local ringtones Ringer type Select your preferred ringer from the available audio files. If no individual audio files are available, the ring tone “Pattern” is set. To upload your own files in a “*.mp3” or “*.wav” format, use the web interface or consult the administrator. -
Page 156: Ringer Mode
Local phone settings Ringer mode The following ringer mode options determine who generates the ringtone on the phone: OpenScape: the system emits the ringer type and the related ringer, which "Volumes" à page you can adjust later (see 154). Local ringer: the phone sends the ringtone type and you determine which ringtone should be used for the respective ringtone type in the "local ring- tone"... -
Page 157: Secure Call Alert
Local phone settings 13: US DSN-Routine 14: Emergency Select the desired call type and configure it according to your requirements. You can also configure this setting via the web interface (see "Web inter- face (WBM)" à page 161). Press the key to open the main menu. Open “Service/Settings”. -
Page 158: Block Dialling For Outgoing Calls
Local phone settings Save the setting. Block dialling for outgoing calls If block dialling is displayed, when deleting a phone number, for example, all of the characters available in the field are deleted at once. If block dialling is switched on, you can delete individual characters. -
Page 159: Displaying Network Information
Local phone settings Enter and confirm the user password, if required. Select “Configuration”. Configuration Use the navigation keys to scroll, if required. Select “Microsoft® Exchange”. Microsoft® Exchange Edit the settings for the Microsoft® Exchange server by entering the following information: IP address of the server Username User password... -
Page 160: Resetting User Data
Local phone settings LAN information: Data transfer rate of the network. If an interface is not in use, the information “Link down” is displayed. PC autonegotiation: Displays whether the PC interface data transfer rate is set to automatic (“Yes”) or manual (“No”). PC information: Data transfer rate of the PC interface. -
Page 161: Web Interface (Wbm)
Web interface (WBM) Web interface (WBM) You can configure a number of settings for your phone via the “Web Based Man- agement” (WBM). The information is transferred via a secure HTTPS connection. Access to the web based management must be activated by the administrator. -
Page 162: User Menu
Web interface (WBM) 1. Enter the user password, if required. 2. Click a menu heading to display the individual menu entries. 3. Click the menu heading again to close the menu. 4. Click a menu entry to open the corresponding form. 5. -
Page 163: Exporting Contacts Via Wbm
Web interface (WBM) 3. Select “Contacts transfer”. 4. Click on “Choose file” and navigate to a local or remote folder. 5. Select a file. The default format is ".csv". You can use comma or a semi-colon as a value separator for the imported CSV file. - Page 164 Web interface (WBM) Downloading a contact list from the phone via the browser When exporting contacts via Internet Explorer browser, the contacts file “*.CSV” is written directly on to the browser page and must be copied and pasted. 1. Open the user pages in the browser with the URL of the phone. 2.
-
Page 165: Fixing Problems
Fixing problems Fixing problems Error and warning messages Indications that represent full errors that make normal operation impossible are displayed as “errors”. Indications that represent conditions where the phone can still be used but will operate subject to certain restrictions are displayed as “warnings”. Both error and warning “sausages”... -
Page 166: Messages During Remote Configuration
Fixing problems No telephony possible (R**, L*, DO, TT) Example "No telephony possible (LI, RF2)" Warning messages (yellow notification): Limited keyset (WSS) Limited service (B8, NT) (where a failure may disrupt operation) Deployment error (A*, R*, D*) (where cloud deployment failed) Example "Limited service (NT)"... - Page 167 Fixing problems Code Priority Description A connection cannot be established to the Unify redirect server – Rejected A connection cannot be established to the Unify redirect server – Not authorized A connection cannot be established to the Unify redirect server –...
-
Page 168: Index
Index Call settings Index CTI calls Call transfer to the manager Call waiting Accept arranged call accept Accepting a call Callback with line keys CE marking Administration Central speed dial numbers Applications Changing the password Activating an application Changing the user password Selecting an entry Cloud PIN Applications menu... - Page 169 Index Deactivating the user password Deleting a contact Fax messages Dial plan Fixed Function Keys Dialing Forwarding with line keys For another connection Direct station selection (DSS) keys For Fax or PC Answering a call Forwarding calls Call waiting for lines Directory Function key LDAP...
- Page 170 Index Intercom system MultiLine phone Key modules 46-47 One Number Service Mailbox (MWI) Open listening OpenScape Key Module 410 LDAP OpenScape Key Module 710 LED displays Operating instructions Direct station selection keys (DSS) Operating steps Function keys programming a key Level Line keys Accepting a call...
- Page 171 Index Programmable keys Speaker call Speakerphone mode 86, 101 Speed dial Central Remote configuration Status icons Representative (secretarial office) System-wide voice calling Rollover Telephone maintenance Safety notes Telephony interface Save appointments SingleLine ScreenSaver 66-67 Three-party conference Searching for conversations Toggle/connect Second call (manager) Tone dialing Second phone (manager)
- Page 172 Index Variable call forwarding Voicemail Web interface...
- Page 173 Provide feedback to further optimize this document to edoku@atos.net. As reseller please address further presales related questions to the responsible presales organization at Unify or at your distributor. For specific technical inquiries you may use the support knowledge base, raise - if a software support contract is in place - a ticket via our partner portal or contact your distributor.
Need help?
Do you have a question about the Unify OpenScape CP410 and is the answer not in the manual?
Questions and answers