
Related Manuals for Strobel VEB100-6 4


Summary of Contents for Strobel VEB100-6 4
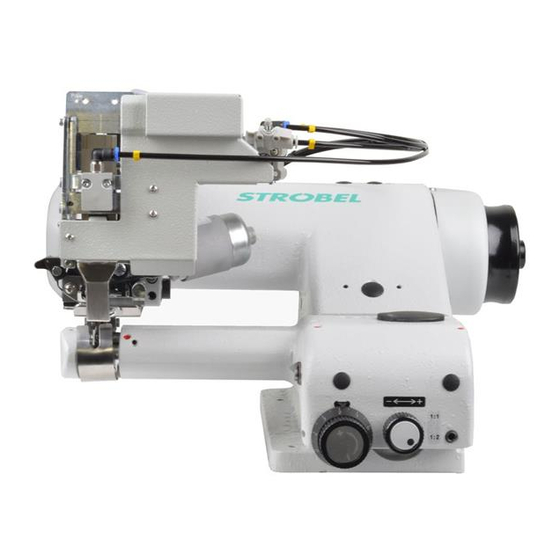
- Page 1 For the professional user Operating Instructions Für den professionellen Anwender Betriebsanleitung Class: VEB100-6 Klasse: Model: Ausführung: Dated: Stand: S p e z i a l m a s c h i n e n G m b H...
- Page 2 The sign of quality ou find the Strobel trademark on every Strobel machine leaving our works. And with good reason. This symbol is a guarantee of the high quality of our products. Quality which creates trust – trust in our technology, our service and, not least of all, in our good name.
- Page 3 We wish you lots of success in your work with your new Strobel machine. S p e z i a l m a s c h i n e n G m b H...
- Page 4 Boschstraße 16 D-82178 Puchheim Tel.: 089/80096-0 Fax: 089/80096-190 info@strobel.biz Maschinenklasse/Machine class: Serien-Nr./Serial No: Auftrags-Nr./Order Confirmation No: Lieferdatum/Delivery Date: Rechnungs-Nr./Invoice No: Rechnungsdatum/Invoice Date: Beanstandung/Complaint: Datum/Date Unterschrift/Signature: Bitte nicht vom Kunden ausfüllen/To be filled out by Strobel: Datum Bemerkung EXA: ETA: PROD: EXA:...
-
Page 5: Table Of Contents
Operating instructions STROBEL-Class VEB100-6 T a b l e o f C o n t e n t s General safety instructions ......................3 General ............................5 Operating instructions ...................... 5 Class description, serial number and initial basis for description ........5 Range of application and intended use ................ - Page 6 Operating the machine......................23 General ..........................23 Switching on ........................23 Placing and removing the material - handling ..............23 Operating modes ......................24 5.4.1 General ......................24 “Sewing with tape“ and without “Stitch counting with tape“ (Fig. 10) ... 24 5.4.2 “Sewing with tape“...
-
Page 7: General Safety Instructions
General safety instructions Manuals and additional information can be found on the STROBEL website at: http://www.strobel.biz Every person in charge of setting up, operating, servicing and repairing the machine must first read and understand the operating instructions and particularly the safety instructions before starting up the machine. - Page 8 It is essential that you observe and follow these instructions as well as the generally valid safety regulations. Warning instructions given in the operating instructions that pertain to especially dangerous parts of the machine must be indicated at these positions using a safety symbol.
-
Page 9: General
General Operating instructions Any person involved in the installation, operation, maintenance and repair of the machine must have read and understood the operating instructions and mainly the safety instructions before starting the machine. Class description, serial number and initial basis for description Für seitenbezogene Beschreibung ist die Bedienungsseite der Maschine die Ausgangsbasis. -
Page 10: Technical Data
Technical data Empfohlene Nennstichzahl / 1800 min-1 Recommended rated speed Stichlänge / stitch length 3,0 - 7,0 mm (abhängig vom Nähmaterial / depend on fabric) Auslieferzustand / delivery condition 7,0 mm Obertransport / top feed Sägeverzahnung / saw thoothing Pyramidenverzahnung / pyramid thoothing optional gefederter Drücker / spring loaded plunger Drückervariation optional /plunger variation... - Page 11 Technischer Auslieferzustand / delivery condition: Motor-Leistung min. / min. motor power 550 W Zahnriemenscheibe Maschine / Z = 38 toothed belt pulley/machine Zahnriemenprofil / toothed belt profile HTD 5M-9 Stichart / stitch type Einfaden-Kettenstich-Blindstich Typ 103 / single thread chain stitch type 103 Anschluss pneumatisch / pneumatic connection 6 bar Luftverbrauch, Mittelwert /...
-
Page 12: Installation And Putting Into Service
Installation and putting into service Unpacking Strobel machines are supplied either as complete units with head, stand and motor, or head with motor only, or the head only. Due to the high weight and to avoid damages during transport, complete units are packed in several smaller cartons. - Page 13 Fig. 1 BA_VEB100-6_A4_230102_en.doc...
-
Page 14: Sense Of Rotation
Sense of rotation The correct sense of rotation of the handwheel is clockwise (clockwise rotation). Motor drive via Toothed belts 3.4.1 Toothed belt tension (Fig. 2) C A U T I O N ! Danger of Injury! When checking the belt tension, switch off the machine at the mains. -
Page 15: Positions (Fig. 3, Fig. 4 Und Fig. 5)
3.4.2 Positions (Fig. 3, Fig. 4 und Fig. 5) C A U T I O N ! Danger of Injury! Danger of pulling in parts of clothing and of hair and danger of crushing fingers and stitching fingers with needles! When checking positions with switched-on machine keep fingers and hands away from moving parts. - Page 16 Needle position (with stop in and outside the seam (Fig. 4)): The needle position must be set in such a way, that when the machine is stopped, the hook of the thread knife catches the thread loop lying over the looper securely without touching the looper.
-
Page 17: Machine Operation
Machine operation Needles, threads and tapes The sewing quality can be influenced to a considerable extent by choosing the most suitable needles and threads for the material to be sewn. It is recommended to use controlled GROZ-BECKERT needles system 1669 EEO only. The machine is supplied with size 90/14 needles. -
Page 18: Threading And Thread Course (Fig. 7)
Fig. 6 Threading and thread course (Fig. 7) C A U T I O N ! Danger of Injury! Switch off machine electrically and confirm that the machine is really in standstill position by operating the treadle for the motor control before threading. -
Page 19: Thread Tension (Fig. 7)
Thread tension (Fig. 7) Depending on thread and fabric quality, nature and thickness the thread tension is set by tension nut (1) (Fig. 7) Tape course, inserting the tape and tape exchange 4.5.1 Tape course (Fig. 8 and Fig. 9) C A U T I O N ! Danger of Injury! Keep fingers and hands away from movable parts when inserting the tape with the machine switched on. - Page 20 Fig. 8 Fig. 9 BA_VEB100-6_A4_230102_en.doc...
-
Page 21: Inserting The Tape (Fig. 10)
4.5.2 Inserting the tape (Fig. 10) Proceed as follows to inserting the tape: Sewing machine is away from the stitch in pos. 2, sewing with tape is switched on and the lifting is open: Manually insert the tape up to the tape transport into the tape clamp and hold lightly. -
Page 22: Tape Exchange (Fig. 10)
4.5.3 Tape exchange (Fig. 10) Proceed as follows to exchange the tape: Sewing machine is away from the stitch in pos. 2, sewing with tape is switched on and the lifting is open: Press button “3” on the V810 operating control. Tape clamp is opened. -
Page 23: Plunger Limit Stop
Plunger limit stop 4.7.1 General (Fig. 11) C A U T I O N ! Danger of Injury! When carrying out settings in the area of the stitch plate, disconnect the machine from the mains, and ensure that the machine is actually switched off by pressing the motor pedal. Otherwise there is a danger of injury from crushing and needle punctures. -
Page 24: Setting The Plunger Limit Stop For Sewing Over Cross Seams (Fig. 11)
4.7.2 Setting the plunger limit stop for sewing over cross seams (Fig. 11) The cloth retainer stroke is set by means of a knurled nut (2) Fig. 11 which serves as upper limit stop. To set the stroke place the material (a normal fabric layer without cross seam). -
Page 25: Material Feed
Material feed 4.8.1 General The fabric is fed by means of a rigid upper feed. The feed (stitch length) is adjustable in 4 steps from 3 to 7 mm. Standard equipment is a saw-teethed feed dog which can be replaced by a pyramid-teethed feed dog. 4.8.2 Setting the stitch length (Fig. -
Page 26: Skip Stitch
Skip stitch 4.9.1 General The machine is equipped with a switchable skip stitch 1:2. The skip stitch principle bases on the repeated lowering of the plunger to an exactly set value (=skip-stitch depth). If the skip stitch is switched on, the needle penetrates the outer fabric layer every second (third) stitch only, i.e. -
Page 27: Operating The Machine
Operating the machine General C A U T I O N ! Danger of Injury! Please observe the sewing area carefully during sewing. Otherwise there is a danger of injury from crushing and needle punctures. Switching on Connect the compressed-air conditioner to the compressed air supplier (10 bar) or to the compressor and set it to 6 bar. -
Page 28: Operating Modes
Operating modes 5.4.1 General The following work procedures are possible during sewing: “Sewing with tape“ and without “Stitch counting with tape“ “Sewing with tape“ and with “Stitch counting with tape“ “Sewing without tape“ and without “Stitch counting without tape“ “Sewing without tape“ and with “Stitch counting without tape“ “Sewing with tape“... -
Page 29: Sewing Without Tape" And Without "Stitch Counting Without Tape" (Fig. 10)
“Sewing without tape“ and without “Stitch counting without 5.4.4 tape“ (Fig. 10) Function sequence: Sewing speed dependent on pedal, controllable up to the set maximum speed (parameter F-111) with pedal position “≥1“. Intermediate halt with pedal position “0“. Intermediate lifting with pedal position “-1“. Seam end with automatic lifting with pedal position “-2“. -
Page 30: Operating And Function Of The Control
Operating and function of the control General The control is switched on and off by the S1 power switch, which is located on the right side of the machine, below the tabletop (Fig. 13). Fig. 13 Assignment and display of button functions on operating control V810 (Fig. 14) Fig. -
Page 31: Switchable Button Functions
Switchable button functions 6.2.1 General Switchable button functions can be changed by pressing a button. The switch status is saved and indicated by the assigned arrows over the respective button (refer to Fig. 14). The function is active until a renewed pressing of the button or an event changes the switch status. - Page 32 Explanation of the function: Switching the function on/off outside of the stitch: Switching the function on: Sewing machine is away from the stitch in pos. 2, sewing with tape is switched off and the lifting is open: Press button “1” on the V810 operating control: In the display the left arrow over the button 1 is switched on.
-
Page 33: Open Tape Clamp
Switching the function off: Sewing machine is in the stitch in pos. 2 or is running, sewing with tape is switched on and the lifting is closed: Press button “1” on the V810 operating control: In the display the left arrow over the button 1 is switched off. The stitch can be stitched to the end completely normally. -
Page 34: Tape Feed On
6.2.5 Tape feed on Function with operating control Button (V810) Tape feed on This function activates the “tape feed on” function. “Tape feed on” function activated left arrow = On “Tape feed on” function deactivated left arrow = Off An activation is only possible when the “sewing with tape”... -
Page 35: Programming At Technician Or Supplier Level
Programming at technician or supplier level 6.3.1 General The parameter values can be changed at the technician or installer level only when a code number has been entered. 1907 Code number at the technician level 3112 Code number at the installer level Parameter values changed at the technician or installer level are saved immediately upon exiting the programming level. - Page 36 Press “+/-” button; in this case the “+” button. Press “>>” button. Numerical value of the digit is changed: Second digit blinks: Press “+/-” button; in this case the “-” button. Press “>>” button. Numerical value of the digit is changed: Third digit blinks: Press “>>”...
-
Page 37: Calling Up And Changing Parameters Directly
6.3.3 Calling up and changing parameters directly Using the example of the F-111 parameter whose value is changed from 2500 to 2000. Press “+/-” (in this case, “+”) to select parameter After entering the code number. First parameter is displayed: until F-111 appears: Press the “E”... -
Page 38: Sewing With Tape
Sewing with tape 6.4.1 Sew-up stitches, stitch end The following functions have an influence on the sew-up stitches at the stitch end: Function with operating control Parameter Number of stitches for sew-up stitches at stitch end F-002 This function sets the number of stitches for a sew-up stitch at the stitch end. Reducing or increasing the stitch number has the effect that the tape endis not sewed- up to the end or beyond the end. -
Page 39: Tape Cutter
Function with operating control Parameter Delay time, tape clamp (BK) “on” F-742 This function sets a delay time for the tape clamp “on” that becomes effective after the pedal position “-2” at the stitch end. That means that the tape clamp is not closed until after this delay time. 6.4.3 Tape cutter The tape cutter (BS) have the function of cutting the tape in the stitch after pedal... - Page 40 Function with operating control Parameter Delay time, tape feed motor (BVM) F-746 This function sets a delay time for the tape feed motor that becomes effective after the delay time of the tape blow device. The delay time needs to be set so that the tape feed motor does not start with the tape feed until the tape blow device has reliably established the “air stream”.
- Page 41 Function with operating control Parameter On-time, tape feed motor (BVM) F-749 at tape feed “u-short” This function sets the on-time for the tape feed motor at a switch-off of the “sewing with tape” function in the stitch that becomes effective after the delay time of the tape feed motor.
- Page 42 Function with operating control Parameter Difference time tape feed “u-short” and tape feed “u- F-750 forwards” to tape feed “u-normal” By this function a possible difference of the transported tape length can be evened out to the actual tape feed “normal” after a tape feed “u-short” and a tape feed “u-forwards”.
- Page 43 Comment: The “u-backwards” tape feed is active when the “sewing with tape” function in the stitch is switched off outside the stitch. The parameter values or times for the “u-backwards” tape feed do not need to be entered separately. The values are determined automatically by the control as follows: Tape feed “u-backwards”...
-
Page 44: Stitch Count
Stitch count 6.5.1 General There are two Strobel-specific stitch counts available: Stitch count when the “sewing with tape” function is Stitch count without tape: switched off. Stitch count when the “sewing with tape” function is Stitch count with tape: switched on. -
Page 45: Stitch Count Without Tape
6.5.2 Stitch count without tape The following functions have an influence on the stitch count without tape: Function with operating control Parameter Stitch count without tape on/off F-601 This function switches the stitch counting without tape on or off. Function with operating control Parameter Stitch number of the stitch count without tape F-701... -
Page 46: Stitch Count With Tape
6.5.3 Stitch count with tape The following functions have an influence on the stitch count with tape: Function with operating control Parameter Stitch count with tape on/off F-602 This function switches the stitch counting with tape on or off. Function with operating control Parameter Stitch number of the stitch count with tape F-702... -
Page 47: Problems During Sewing And Possible Solutions
Problems during sewing and possible solutions C A U T I O N ! Danger of Injury! Switch off machine electrically and confirm that the machine is really in standstill position by operating the treadle for the motor control. Otherwise there is a danger of injury from crushing and needle punctures. - Page 48 Unintended skip stitching Possible reasons: wrong looper setting wrong setting of loop stroke/needle stroke, therefore insufficient loop formation (small/big) chaining finger damaged or not correctly set wrong setting of cloth retainer or cloth retainer pressure Solutions: operate machine manually, check the looper motion check the settings, re-set, if necessary, replace damaged parts change thread feed through thread take-up, if necessary ...
- Page 49 Material feed problems (stitch length different from settings) Possible reasons: feed dog setting is not correct, material cannot be caught sufficiently. unsuitable feed dog toothing different pressures on the left and right hand feed plates feed plates lift is blocked material accumulation in the stitch plate, mainly over cross seams seam or loop are caught by the feed dog unintended stitch length modification...
-
Page 50: Machine Maintenance
Machine maintenance General C A U T I O N ! Danger of Injury! Disconnect the machine from the mains and ensure that it is off by pressing the pedal for switching the motor. Otherwise there is a danger of injury from crushing and needle punctures. - Page 51 Cl. VEB100-6 Standard 580.0286 Stitch plate 6,0 mm opening Standard 288.0246 288.0243 Cloth retainer Standard Optional 182.0331 182.0332 Feed dog Standard 381.0084 Plunger shaft BA_VEB100-6_A4_230102_en.doc...
-
Page 52: Optional Extras
Optional extras The following devices are available as optional extras and can be ordered together with the machine or as separate kits. Digital display 392.0637 BA_VEB100-6_A4_230102_en.doc... - Page 53 Und wir können noch mehr für Sie tun! Unser Lieferprogramm bietet für jede Branche und jegliche Anforderung genau die richtige Problemlösung. And we can do a lot more for you! Our range offers the correct problem solution for every branch and for all requirements. Für die Polster- Für die Bekleidungs- Für die Schuh-...
- Page 54 Then phone, write or simply come and see us. You can have further information about our products at any time, or experience the Strobel machines live in our show room. We’re looking forward to meeting you! S p e z i a l m a s c h i n e n G m b H...
Need help?
Do you have a question about the VEB100-6 4 and is the answer not in the manual?
Questions and answers