
Related Manuals for Strobel VTD410EV


Summary of Contents for Strobel VTD410EV
- Page 1 For the professional user Operating Instructions Für den professionellen Anwender Betriebsanleitung Class: VTD410EV Klasse: Model: Ausführung: Dated: Stand: S p e z i a l m a s c h i n e n G m b H...
- Page 2 The sign of quality ou find the Strobel trademark on every Strobel machine leaving our works. And with good reason. This symbol is a guarantee of the high quality of our products. Quality which creates trust – trust in our technology, our service and, not least of all, in our good name.
- Page 3 Justify your trust. If you wish to profit from the performance and efficiency of your Strobel machine as long as possible, exact handling and thorough care is necessary. For this reason we kindly request that you read the operating instructions closely.
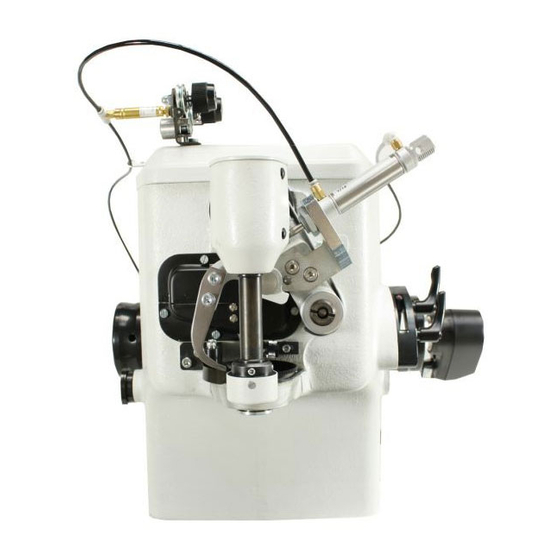
- Page 5 BA_VTD410EV_A2_180706_en...
- Page 6 BA_VTD410EV_A2_180706_en...
-
Page 7: Table Of Contents
Operating Instructions STROBEL – Class VTD410EV Contents General notes on safety .................... 5 General ........................7 Operating instructions ..................7 Class identification, serial number and orientation of the machine....7 Range of application and intended use ............7 Technical data ....................8 Installation and putting into service ................ - Page 8 Operating the machine .................... 24 Right hand treadle ..................24 Operating the gathering device (EV) ............24 5.2.1 Knee lever ..................25 5.2.2 Gathering (left hand treadle) (Fig. 15) ..........25 5.2.3 Operating the shaft coupling for the front cup ........26 5.2.4 Setting the differential feed (Fig.
-
Page 9: General Notes On Safety
General notes on safety Every person in charge of setting up, operating, servicing and repairing the machine must first read and understand the operating instructions and particularly the safety instructions before starting up the machine. Failure to comply with the following safety instructions can lead to bodily injury or damage to the machine. - Page 10 14. Warning instructions given in the operating instructions that pertain to especially dangerous parts of the machine must be indicated at these positions using a safety symbol. Warning instructions given in the operating instructions that pertain to special injury hazards for operating personnel or technicians must be indicated at these positions using a safety symbol.
-
Page 11: General
General Operating instructions Any person involved in the installation, operation, maintenance and repair of the machine must have read and understood the operating instructions and mainly the safety instructions before starting the machine. Class identification, serial number and orientation of the machine The operating side of the machine is the starting point for the description referring to sides. -
Page 12: Technical Data
Technical data Recommended rated speed 1500 min Motor power 600 W Toothed belt pulley/machine Z = 38 Toothed belt profile HTD 5M-9 Stitch length 3 – 8 mm Kind of stitch single thread overseam Stitch type Needle system GROZ-BECKERT 134 Needle size Thread polyester continuous filament... -
Page 13: Installation And Putting Into Service
Installation and putting into service Unpacking the machine The machines of the series 400 are only supplied complete. The thread stand, oil and other machine tool accessories located with in the package. Make sure that all accessories have been unpacked before throwing away any packing material. - Page 14 Fig. 1 BA_VTD410EV_A2_180706_en...
-
Page 15: Sense Of Rotation
Sense of rotation The correct sense of rotation of the hand wheel is clockwise in line of vision on the hand wheel. Motor drive via toothed belt 3.4.1 Tensioning the toothed belt (Fig. 2) C A U T I O N ! Danger of injury! Switch off the machine at the mains when checking the belt tension. -
Page 16: Positions Of The Machine
Positions of the machine C a u t i o n ! Danger of injury! Danger of crushing fingers and needle through stitching as well as pulling in of parts of clothing. Keep fingers and hands away from moving parts when setting the position generator and checking the positions with switched-on machine. - Page 17 To adjust or remove, loosen the two clamping screws (1), Fig. 4. Retighten them well before restarting. Fig. 4 The proper position of the position transmitter to the flange is marked with a spot of paint. BA_VTD410EV_A2_180706_en...
- Page 18 Positions: The machine requires two needle positions and, depending on sewing drive, possibly also a reference position. Reference position (if necessary, e.g. sewing drive DC1550-AB321A (Fig. 5)): The reference position needs to be set so that the tip of the needle concludes with the outer transport table edge in the direction of the piercing.
- Page 19 Needle position (when stop in the stitch (Fig. 7)): This needle position is important when stopping in the stitch (pedal position 0), when swiveling in the separating plate of the hold-back device and for the threading. The needle position needs to be set so that the tip of the needle concludes at a distance of 10 mm after the transport table edge in the direction of the piercing.
-
Page 20: Lubrication
To take off the inner cover first pull out the oil pipe which is plunging in the oil rising pipe of the pump (Fig. 8). Fig. 8 The special STROBEL oil (viscosity 46 c St) supplied with the machine should always be used. The oiling points are lubricated automatically, thus no maintenance is required (see also point “6.1 Checking the oil level/oil quantity”). -
Page 21: Instructions For Use And Maintenance, Accessories
Instructions for use and maintenance, accessories Needles and threads Use needles type GROZ-BECKERT 134. Since there are several needle points available for the different materials to be sewn, choose the most suitable needle point according to the needle manufacturer's catalogue. Recommended needle type for leather is 134LR, for textile material 134R. - Page 22 Fig. 9 Fig. 10 BA_VTD410EV_A2_180706_en...
-
Page 23: Threading - Thread Course (Fig. 9 And Fig. 10)
Threading - thread course (Fig. 9 and Fig. 10) A T T E N T I O N ! Switch off machine electrically and make sure that the machine is really in the standstill position by stepping the treadle for the motor control before threading. Otherwise: DANGER of finger bruises and needle through stitches/punctures. - Page 24 The thread course is as follows (Fig. 11): Put the thread reel over the supporting bolt of the reel stand and pull the thread end through the eye of bow. Next, the yarn is passed through two thread guides (6), and then through the rear eyelets of the yarn guide (8) out (depending on thread through 1-3 holes) and the thread tension discs (1), through the anterior eye of the thread guide (8) to the thread tension discs (1) of the front thread tension, and from there through the thread take-up spring (2) (on certain...
-
Page 25: Thread Tension
Fig. 12 Thread tension The thread tension is regulated by means of the tension nut (1) (Fig. 11) depending on the thread type, quality and thickness. A thick and strong thread requires a tight thread tension. BA_VTD410EV_A2_180706_en... -
Page 26: Setting The Stitch Length
Setting the stitch length A T T E N T I O N ! Switch off the machine electrically and make sure that the machine is really in standstill position by stepping the treadle for the motor control before setting the stitch length. -
Page 27: Setting The Material Guide
Setting the material guide A T T E N T I O N ! Switch off machine electrically and make sure that the machine is really in standstill position by stepping the treadle for the motor control. Otherwise: DANGER of finger bruises and danger of injuries through the screw driver. -
Page 28: Operating The Machine
Operating the machine The machine is operated with an electronic-pneumatic control. The operation is very easy: Right hand treadle By means of the right hand treadle the motor is operated, the front cup is opened and the needle is positioned. The process is as follows: Usually the front cup is opened. -
Page 29: Knee Lever
5.2.1 Knee lever By means of the knee lever the partial cup opening needed for the swivelling of the gathering device is operated. The front cup opens up to the previously set extent (setting see point “3.6.2.2 Mounting of pneumatically controlled shaft” in mechanics instruction”). -
Page 30: Operating The Shaft Coupling For The Front Cup
5.2.3 Operating the shaft coupling for the front cup To eliminate the blocking effect between material and feed cups, mainly when sewing a small radius (heel parts) caused by the double feed system, the front cup drive is equipped with a shaft coupling which can be operated electro pneumatically by means of the left hand treadle. -
Page 31: Inserting And Removing The Material
5.3.1 Sewing Class VTD410EV is used for attaching the insole to the upper. A pneumatically controlled gathering device in combination with a differential feed adjustable during sewing (see point “5.2.4 Setting the differential feed (Fig. 15)”) facilitates gathering of extra fullness at the toe part of Volcano and leather shoes of a medium thickness. -
Page 32: Machine Maintenance
Machine maintenance A T T E N T I O N ! Switch off the machine electrically and confirm that the machine is really in standstill position by stepping the treadle for the motor control. Otherwise: DANGER of finger bruises and needle through stitches/punctures. -
Page 33: Oil Drain Tube
Oil drain tube For easier machine maintenance there is an oil draining tube (2) going through a table plate boring at the lower cover, i.e. waste oil can be drained without the necessity to dismantle the machine head. Oil drain tube (2) is sealed by means of an oil retainer ring (1) and a screw (3) (Fig. - Page 34 Class VTD410EV O P T I O N A L E X T R A S T A N D A R D 182.0252 182.0253 feed cup saw-teethed feed cup Ø68,8 mm, pitch 2,2 mm Ø68,8 mm, pitch 1,5 mm...
- Page 35 Und wir können noch mehr für Sie tun! Unser Lieferprogramm bietet für jede Branche und jegliche Anforderung genau die richtige Problemlösung. And we can do a lot more for you! Our range offers the correct problem solution for every branch and for all requirements. Für die Bekleidungs- Für die Schuh- Für die Polster-...
- Page 36 Then phone, write or simply come and see us. You can have further information about our products at any time, or experience the Strobel machines live in our show room. We’re looking forward to meeting you! Spe zi a l ma s c hine n G m bH...
Need help?
Do you have a question about the VTD410EV and is the answer not in the manual?
Questions and answers