
Subscribe to Our Youtube Channel
Related Manuals for ZKTeco FA2000


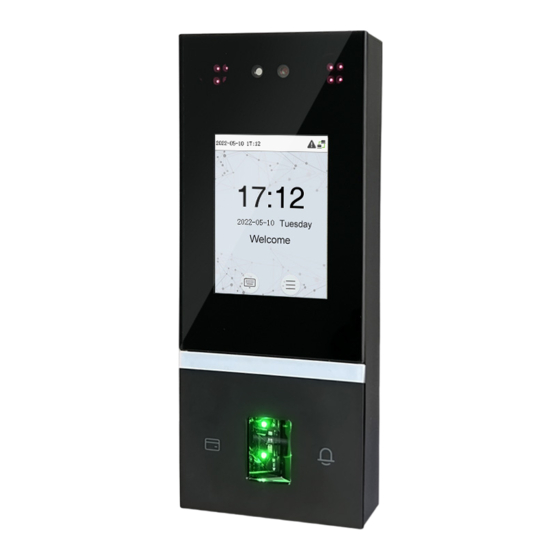
Summary of Contents for ZKTeco FA2000
- Page 1 Product Name and Model Number User Manual User Manual FA2000 Date: January 2021 Doc Version: 1.0 English P a g e Copyright©2020 CO., LTD. All rights reserved.
-
Page 2: Table Of Contents
User Manual Smart Access Control Terminal Table of Contents SAFETY MEASURES ............................. 3 1 INSTRUCTION FOR USE ......................... 6 FINGER POSITIONING .................................. 6 STANDING POSITION, FACIAL EXPRESSION AND STANDING POSTURE ..............6 FACE REGISTRATION ................................... 8 VERIFICATION MODE .................................. 9 1.4.1 FINGERPRINT VERIFICATION ................................ - Page 3 User Manual Smart Access Control Terminal 9 DEPARTMENT MANAGEMENT ......................42 ADD A DEPARTMENT ................................42 EDIT A DEPARTMENT ................................44 DELETE A DEPARTMENT ................................. 45 SHIFT SET ..........................46 ATTENDANCE RULE .................................. 46 SHIFT SETTING .................................... 47 SCHEDULE ....................................48 REPORT ............................
-
Page 4: Safety Measures
User Manual Smart Access Control Terminal Safety Measures The below instructions intend to ensure that the user can use the product correctly to avoid danger or property loss. The following precautions are to keep users safe and prevent any damage. Please read carefully before installation. - Page 5 User Manual Smart Access Control Terminal Electrical Safety • Before connecting an external cable to the device, complete grounding properly, and set up surge protection; otherwise, static electricity will damage the mainboard. • Make sure that the power has been disconnected before you wire, install, or dismantle the device. •...
- Page 6 User Manual Smart Access Control Terminal Note • Make sure whether the positive polarity and negative polarity of the DC 12V power supply is connected correctly. A reverse connection may damage the device. It is not advisable to connect the AC 24V power supply to the DC 12V input port.
-
Page 7: Instruction For Use
User Manual Smart Access Control Terminal Instruction for Use Finger Positioning Index, middle, or ring finger are the recommended fingers to use, and avoid using thumb or pinkie as they are difficult to position correctly on the fingerprint reader and get suitable output. Too low Too close to the edge Vertical... - Page 8 User Manual Smart Access Control Terminal Facial expression Standing posture Note: During enrolment and verification, please remain natural facial expression and standing posture. P a g e...
-
Page 9: Face Registration
User Manual Smart Access Control Terminal Face Registration Try to keep the face in the centre of the screen during registration. Please face the camera and stay still during face registration. The screen looks like the image below: Correct face registration and authentication method Cautions for registering a face ... -
Page 10: Verification Mode
User Manual Smart Access Control Terminal Verification Mode 1.4.1 Fingerprint Verification 1: N fingerprint verification mode It compares the current fingerprint with all the fingerprint data that is available in the device. The device enters the fingerprint authentication mode when a user presses his/her finger onto the fingerprint scanner. Please follow the recommended way to place your finger onto the sensor. - Page 11 User Manual Smart Access Control Terminal Enter the User ID on the main screen to enter 1:1 fingerprint verification mode. Enter the user ID and click [M/OK]. If the user has registered a face, a password and badge in addition to his/her fingerprints and the verification method is set to password/ fingerprint/ badge/ face verification, the following screen will appear.
-
Page 12: Facial Verification
User Manual Smart Access Control Terminal 1.4.2 Facial Verification 1:N Facial Verification It compares the current acquired facial images with all the face data registered in the device. The following is the pop-up prompt box of comparison result. 1:1 Facial Verification ... -
Page 13: Password Verification
User Manual Smart Access Control Terminal After successful verification, the following display screen appears. If the verification fails, it prompts “Please adjust your position!”. 1.4.3 Password Verification It compares the entered password with the registered User ID and password. Enter the User ID on the main screen to enter the 1:1 password verification mode. Enter the user ID and press [M/OK]. -
Page 14: Card Verification
User Manual Smart Access Control Terminal Input the password and press [M/OK]. The following screen displays on successful and failed verification respectively. On successful verification On failed verification 1.4.4 Card Verification Only the product with the card module offers the card verification function. Please place the registered card on the card reader to get verified via card verification. -
Page 15: Combined Verification
User Manual Smart Access Control Terminal 1.4.5 Combined Verification For enhanced security, this device offers the option of using multiple forms of verification methods, as shown in the picture below. Note: 1) "/" means “or”, and "+" means “and”. 2) You must register the required verification information before using the combination verification mode, otherwise the verification may fail. -
Page 16: Main Menu
User Manual Smart Access Control Terminal Main Menu Click [M/OK] on the initial interface to enter the main menu, as shown below: Items Descriptions To add, edit, view, and delete basic information of a user. User Mgt. To set the permission scope of the custom role and enroller, that is, the rights to User Role operate the system. - Page 17 User Manual Smart Access Control Terminal Use USB flash drive to download the attendance statistics form to check on the computer or download the attendance settings form to set shifts on the Report computer, assign shifts to employees and then upload the attendance settings form.
-
Page 18: User Management
User Manual Smart Access Control Terminal User Management Adding Users Select User Mgt. on the main menu and select New User. Register a User ID and Name Enter the User ID and Name by selecting the respective options. Note: 1)... - Page 19 User Manual Smart Access Control Terminal Setting the User Role There are two types of user accounts: Normal Users and Super Admin. If there is already a registered administrator, the normal users have no rights to manage the system and may only access authentication verifications.
- Page 20 User Manual Smart Access Control Terminal Register fingerprint Select Fingerprint to enter the enroll fingerprint page. Users can choose one or more fingerprint(s) to enroll. Press the finger horizontally onto the fingerprint sensor. The registration interface is shown below: Register Face ...
- Page 21 User Manual Smart Access Control Terminal Register password Select Password on the Verification mode page to enter the password registration page. Enter a password and re-enter it. Select M/OK. If the two entered passwords are the same, the system will return to the New User interface.
-
Page 22: Search For Users
User Manual Smart Access Control Terminal Search for Users Select the All Users option in the User Mgt. Then enter the retrieval keyword in the search bar of the user list (keyword may be an ID, surname, or full name). The system will search for the users related to the entered information. -
Page 23: Deleting Users
User Manual Smart Access Control Terminal Deleting Users Choose a user from the list and select Delete to enter its interface. Select the user information to be deleted and click M/OK. Note: If you select Delete User, all information of the user will be deleted. Only fingerprint data is removed Delete Fingerprint Only Delete Face is selected. -
Page 24: User Role
User Manual Smart Access Control Terminal User Role If you need to assign any specific permissions to certain users, you may edit the “User Defined Role” under the User Role menu. You may set the permission scope of the custom role (up to 3 roles) and enroller. Select User Role on the main menu interface. - Page 25 User Manual Smart Access Control Terminal Select Define User Role to assign the privileges to the role. Click ESC to save and return after the privilege assignment is complete. Note: You need to select the features in sub-menus. If the device has a role enabled, you may assign the roles you set to users by selecting User Mgt.
-
Page 26: Communication Settings
User Manual Smart Access Control Terminal Communication Settings Select COMM. on the main menu to get into communication settings and set parameters of the network, PC connection, WIFI, and cloud server. Network Settings When the device needs to communicate with a PC over the Ethernet, you need to configure network settings and ensure that the device and the PC are connecting to the same network segment. -
Page 27: Pc Connection
User Manual Smart Access Control Terminal Item Descriptions The factory default value is 192.168.1.201. Please set them according to the IP Address actual network situation. The factory default value is 255.255.255.0. Please set them according to the Subnet Mask actual network situation. The factory default address is 0.0.0.0. -
Page 28: Cloud Server Setting
User Manual Smart Access Control Terminal Cloud Server Setting The Cloud Server setting option helps to set different configurations used for connecting with the ADMS server. Select Cloud Server Setting on the Comm. Settings interface. Item Description Enable Domain When enabled, the domain name mode “http://...” is used, such as Server Address Name http://www.XYZ.com, while “XYZ”... -
Page 29: System Settings
User Manual Smart Access Control Terminal System Settings It helps to set related system parameters to optimize the performance and usability of the device. Select System on the main menu interface. Date and Time Select Date Time on the System Setting interface. Item Descriptions Manual Date and Time... -
Page 30: Attendance Setting
User Manual Smart Access Control Terminal Note: When restoring the factory settings, the time (24-hour) and the date format (YYYY-MM-DD) can be restored to default, but the device date and time cannot be restored. For example, the user sets the time of the device (18:35 on March 15, 2019) to 18:30 on January 1, 2020. After restoring the factory settings, the time of the device will remain 18:30 on January 1, 2020. -
Page 31: Face Parameters
User Manual Smart Access Control Terminal Face Parameters Select Face option on the System interface. Recommended matching thresholds High Medium Medium High Item Description Under 1:N verification mode, the verification will only be successful when the similarity between the acquired facial image and all registered facial templates is greater than the set value. - Page 32 User Manual Smart Access Control Terminal It is the rotation angle tolerance of a face for facial template registration and comparison. Face Rotation If a face’s rotation angle exceeds this set value, it will be filtered by the algorithm, Angle i.e., ignored by the terminal and, no registration and comparison interface will be triggered.
-
Page 33: Fingerprint Parameters
User Manual Smart Access Control Terminal Fingerprint Parameters Select Fingerprint option on the System interface. Recommended matching thresholds High Medium Medium High Item Descriptions Under 1:1 verification method, the verification will only be successful when the similarity 1:1 Threshold between the acquired fingerprint data and the fingerprint template associated with the Value entered user ID enrolled in the device is greater than the set threshold value. -
Page 34: Factory Reset
User Manual Smart Access Control Terminal Factory Reset Restore the device settings to their factory state, such as communication settings, system settings, etc. (Do not clear registered user data). Select the Reset option on the System interface. Select OK to reset. USB Upgrade Insert the U disk with upgrade file into the device’s USB port, and in the initial interface, press [M/OK] >... -
Page 35: Personalize Settings
User Manual Smart Access Control Terminal Personalize Settings You may customize interface settings under this option. Select Personalize option on the main menu interface. Interface Settings You can customize the display style of the main interface. Select User Interface option on the Personalize interface. Item Description Wallpaper... -
Page 36: Voice Settings
User Manual Smart Access Control Terminal When there is no operation on the device, and the time exceeds the set value, then Menu Screen the device will automatically go back to the initial interface. You can disable the Timeout (s) function or set the value between 60 and 99999 seconds. -
Page 37: Bell Schedules Settings
User Manual Smart Access Control Terminal Bell Schedules Settings Many companies choose to use the bell to signify on-duty and off-duty time. When reaching the scheduled time for the bell, the device plays the selected ringtone automatically until the ringing duration passes. Select Bell Schedules option on the Personalize interface. - Page 38 User Manual Smart Access Control Terminal Edit Bell On the All Bell Schedules interface, select the bell item to be edited. Edit Select to edit the bell schedule time. The editing method is the same as that of a new bell. Delete a Bell ...
-
Page 39: Punch States Options
User Manual Smart Access Control Terminal Punch States Options Select Punch State Options on the Personalize interface. Item Description Select a punch state mode under this menu option. The options are: Off: Select this to keep the punch state key function disabled. The punch state key set under the Shortcut Key Mappings menu becomes invalid. -
Page 40: Shortcut Keys Mappings
User Manual Smart Access Control Terminal Shortcut Keys Mappings Shortcut keys can be defined as punch state keys or menu function key. When the device is on the main interface, pressing the set shortcut key will display the attendance state or enter the menu operation interface. -
Page 41: Data Management
User Manual Smart Access Control Terminal Data Management It helps to delete the relevant data in the device. Select Data Mgt. option on the main menu interface. Delete Data Select Delete Data option on the Data Mgt. interface. P a g e | 40... - Page 42 User Manual Smart Access Control Terminal Item Description Delete Attendance Data To delete all attendance data in the device. Delete All Data To delete information and access records of all registered users. Delete Admin Role To remove administrator privileges. Delete Wallpaper To delete all wallpapers in the device.
-
Page 43: Department Management
User Manual Smart Access Control Terminal Department Management Establishing an organizational structure of the company and arranging departments shift is necessary to view the department information of the device. In this menu option, you can add, edit, or remove a department. - Page 44 User Manual Smart Access Control Terminal Select Dept. Name and enter the department name using the T9 input method. Select the Dept. Shifting of the department. Note: The equipment will automatically assign numbers to departments, starting from 1 and so on. Dept.
-
Page 45: Edit A Department
User Manual Smart Access Control Terminal Edit a Department There are 8 departments in the device by default. You can edit the department name and department shift, but you cannot delete them. In addition to the 8 default departments, additional departments can be edited and deleted. -
Page 46: Delete A Department
User Manual Smart Access Control Terminal Delete a Department It helps to remove one or more department as required. Select Dept. Lists and press [M/OK] to enter. Select a department to delete and press [M/OK] to enter. Select Delete and press [M/OK]. Note: Only departments other than the 8 default departments in the device can be deleted. -
Page 47: Shift Set
User Manual Smart Access Control Terminal Shift Set Set attendance rules, number of shifts to be used, and schedule employees. Select Shift Set option on the main menu interface. Attendance Rule All attendance statistics are conducted according to the attendance rules. Therefore, the staff attendance rules need to be set first, including late, early leave calculation method, and scheduling type. -
Page 48: Shift Setting
User Manual Smart Access Control Terminal Item Descriptions Set a time after which the lateness calculation for an employee should start. Count Late On-duty If it is disabled, the lateness calculation starts with the start of working hours. Set a time before which the early leave calculation for an employee should Count Leave Off-duty start. -
Page 49: Schedule
User Manual Smart Access Control Terminal Use the T9 input method to enter "Shift Name” and set the required start and end times. Note: The device supports a maximum of 24 shifts including two default shifts (Shift 1 and Shift 2). All the shifts are editable, and a single shift includes three-time ranges at most. - Page 50 User Manual Smart Access Control Terminal Department-based Scheduling Select Shift Set > Attendance Rule > Schedule Type > Dept. Shifting to schedule shift for a department. When a shift is selected for a department, it is implemented for all the members of the department. Individual-based Scheduling ...
- Page 51 User Manual Smart Access Control Terminal Edit Schedule Enter the Personal Shift Lists for editing when the scheduling of individual employee needs to be adjusted. Select Personal Shift Lists on the Personal Shift interface. Select a scheduled user and press [M/OK]. Select Edit, press [M/OK] to enter and modify the "Shift Name"...
- Page 52 User Manual Smart Access Control Terminal Delete a shift Personal Shift Lists, to delete an employee's schedule that is no longer required. Go to the Select Personal Shift Lists on the Personal Shift interface. Select a scheduled user and press [M/OK]. Select Delete, press [M/OK], and choose “OK”...
-
Page 53: Report
User Manual Smart Access Control Terminal Report This menu item allows you to download statistical reports of attendance or attendance setting reports to a USB flash drive or SD card. You can also upload attendance setting reports with defined shifts and employees' schedules. - Page 54 User Manual Smart Access Control Terminal Set the on-duty time and press [M/OK]. Set the off-duty time and press [M/OK]. When Data download succeeds, Press [M/OK] to take out the USB disk or SD card. The SSRTemplateS.xls gets stored in the USB disk or SD card. The Schedule Information, Statistical Report of Attendance, Attendance Record Report, Exception Statistic Report, and Card Report can be viewed on a PC.
- Page 55 User Manual Smart Access Control Terminal Schedule Information Report: The report allows you to view schedule records of all employees. Statistical Report of Attendance: The report allows you to query the attendance of each person in a specified period. Salaries can be calculated directly based on this report. Note: The unit of Work hour and Overtime hour in the Statistical Report of Attendance is HH: MM.
-
Page 56: Download Att. Setting Report
User Manual Smart Access Control Terminal Card Report: The report can substitute for clock-based cards and can be sent to each employee for confirmation. Download Att. Setting Report If shifts are complex or the shifts of a person are not fixed, it is recommended that the attendance setting report be downloaded and shifts and schedules be set for employees in the attendance setting report. -
Page 57: Upload Att. Setting Report
User Manual Smart Access Control Terminal Enter the On-duty and Off-duty time in the corresponding columns, where the First time zone shall be the On-duty or Off-duty time of Time 1 of Shift Setting, and the Second time zone shall be the On-duty or Off-duty time of Time 2. -
Page 58: Setting
User Manual Smart Access Control Terminal Select Upload Att. Setting Report on the Report interface and press [M/OK]. After uploading, remove the USB disk or SD card. At this time, the employee information, shift, and department in the setting report can be viewed respectively by the Management User, Shift Number, and Department available in the device. -
Page 59: Access Control
User Manual Smart Access Control Terminal Access Control Select Access Control on the main menu interface. Access Control Options To set the parameters of the control lock of the terminal and related equipment. Select Access Control Options on the Access Control interface. P a g e | 58... - Page 60 User Manual Smart Access Control Terminal Item Description Door Lock Delay The length of time that the device controls the electric lock to be unlocked. Valid value: 1~10 seconds (0 second represents disabling the function). If the door is not closed and locked after opening for a certain duration (Door Sensor Door Sensor Delay), an alarm will be triggered.
-
Page 61: Usb Manager
User Manual Smart Access Control Terminal USB Manager Upload or download data between the device and the corresponding software using a USB disk. Before uploading/downloading data from/to the USB disk, insert the USB disk into the USB slot first. Select USB Manager on the main menu interface. USB Download Select Download on the USB Manager interface. -
Page 62: Usb Upload
User Manual Smart Access Control Terminal USB Upload Select Upload on the USB Manager interface. Item Description To upload all screen savers from USB disk into the device. You can choose [Upload Screen Saver selected picture] or [Upload all pictures]. The images display as screensaver on the device’s main interface after upload. -
Page 63: Attendance Search
User Manual Smart Access Control Terminal Attendance Search When the identity of a user is verified, the record is saved on the device. This function enables users to check their access records. Select Attendance Search on the main menu interface and input the User ID. The interface is shown below. 1) Enter the user ID to be searched and select 2) Select the time range for the records you OK. -
Page 64: Autotest
User Manual Smart Access Control Terminal Autotest The auto test enables the system to automatically test whether the functions of various modules are working normally, including the LCD, voice, sensor, keyboard, and clock tests. Select Autotest option on the main menu interface. Item Description Test All... -
Page 65: System Information
User Manual Smart Access Control Terminal System Information With the system information option, you can view the storage status, the version, and firmware information of the device. Select System Info on the main menu interface. Item Description Device Displays the current device's user storage, password, fingerprint and face storage, Capacity administrators, and attendance records. -
Page 66: Appendix
User Manual Smart Access Control Terminal Appendix Self-Service Attendance Terminal FAQs 1. Does self-service attendance terminal support scheduling based on every other day? A: No. 2. Can the setting records downloaded from the device be edited on WPS software? A: Yes. Setting records are supported in Microsoft Office 2003, Microsoft Office 2007, and WPS Office 2012 Personal. - Page 67 User Manual Smart Access Control Terminal 4. How to calculate special overtime hours? The following cases are deemed special overtime: When an EXCEL schedule record exists and attendance reports are used for attendance calculation, there are check-in and check-out records though there is no schedule (or rest is arranged) for the current date.
- Page 68 User Manual Smart Access Control Terminal 6. What is the correct time format used in the setting reports? A. The correct time format is shown in the following table. First Time Range Second Time Range Overtime Range Shift No. On-duty Off-duty On-duty Off-duty...
- Page 69 User Manual Smart Access Control Terminal B: The following uses four examples to describe the preceding principles. Example 1: Normal attendance Attendance Time Range 09:00 — 12:00 13:00 — 18:00 Attendance time of #1 8:30, 8:35, 11:55,12:01, 12:50, 18:02,19:00 employee Statistical result based on 8:30 12:01...
- Page 70 User Manual Smart Access Control Terminal Example 4: Absence Case 1: Attendance Time Range 09:00 — 12:00 13:00 — 18:00 Attendance time of #1 8:50, 12:50, 18:01 employee Statistical result based on 8:50 12:50 18:01 attendance rules Description: The attendance time 12:50 is adopted based on the principle of adopting a median in the attendance time range.
- Page 71 This equipment should be installed and operated with minimum distance 20cm between the radiator & your body. No.32,Pingshan Industrial Avenue,Tangxia Town, Dongguan City,Guangdong Province,China 523728 Phone : +86 769 - 82109991 : +86 755 - 89602394 www.zkteco.com Copyright © 2022 ZKTECO CO., LTD. All Rights Reserved.
Need help?
Do you have a question about the FA2000 and is the answer not in the manual?
Questions and answers