Table of Contents
Advertisement
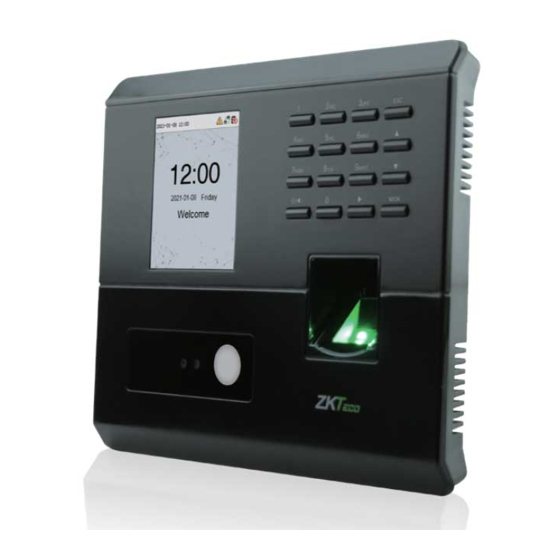
Product Name and Model Number
User Manual
MB10-VL
Date: April 2021
Doc Version: 1.2
English
Thank you for choosing our product. Please read the instructions carefully
before operation. Follow these instructions to ensure that the product is
functioning properly. The images shown in this manual are for illustrative
purposes only.
P a g e
| 1
For further details, please visit our Company's website
www.zkteco.com.
Copyright©2020 ZKTECO CO., LTD. All rights reserved.
User Manual
Advertisement
Table of Contents

Subscribe to Our Youtube Channel
Related Manuals for ZKTeco MB10-VL


Summary of Contents for ZKTeco MB10-VL
- Page 1 Follow these instructions to ensure that the product is functioning properly. The images shown in this manual are for illustrative purposes only. For further details, please visit our Company’s website www.zkteco.com. P a g e Copyright©2020 ZKTECO CO., LTD. All rights reserved.
- Page 2 ZKTeco has been advised of the possibility of such damages.
- Page 3 ZKTeco shall in no way be responsible (i) in case the machine/unit/equipment malfunctions due to any non- compliance of the instructions contained in this manual (ii) in case of operation of the machine/unit/equipment beyond the rate limits (iii) in case of operation of the machine and equipment in conditions different from the prescribed conditions of the manual.
- Page 4 User Manual About the Company ZKTeco is one of the world’s largest manufacturer of RFID and Biometric (Fingerprint, Facial, Finger-vein) readers. Product offerings include Access Control readers and panels, Near & Far-range Facial Recognition Cameras, Elevator/floor access controllers, Turnstiles, License Plate Recognition (LPR) gate controllers and Consumer products including battery-operated fingerprint and face-reader Door Locks.
- Page 5 The general information which helps in performing the operations faster The information which is significant Care taken to avoid danger or mistakes The statement or event that warns of something or that serves as a cautionary example. P a g e Copyright©2021 ZKTECO CO., LTD. All rights reserved.
-
Page 6: Table Of Contents
7 PERSONALIZE SETTINGS ........................42 INTERFACE SETTINGS ..................................42 VOICE SETTINGS ....................................43 BELL SCHEDULES SETTINGS ...............................44 PUNCH STATES OPTIONS ................................46 SHORTCUT KEYS MAPPINGS ..............................47 8 DATA MANAGEMENT .......................... 48 DELETE DATA ....................................48 P a g e Copyright©2021 ZKTECO CO., LTD. All rights reserved. - Page 7 ADD DEVICE ON THE SOFTWARE .............................74 ADD PERSONNEL ON THE SOFTWARE ...........................75 APPENDIX ..............................76 SELF-SERVICE ATTENDANCE TERMINAL FAQS .............................76 STATEMENT ON THE RIGHT TO PRIVACY ..............................81 ECO-FRIENDLY OPERATION ..................................82 P a g e Copyright©2021 ZKTECO CO., LTD. All rights reserved.
-
Page 8: Safety Measures
Lightning - Can install external lightning conductors to protect against electrical storms. It stops power-ups from destroying the system. Recommended installing the devices in areas with limited access. P a g e Copyright©2021 ZKTECO CO., LTD. All rights reserved. - Page 9 Clean the device accessories with a piece of soft cloth or a small amount of cleaning agent. • If you have any technical questions regarding usage, contact certified or experienced technical personnel. P a g e Copyright©2021 ZKTECO CO., LTD. All rights reserved.
- Page 10 • The warranty service does not cover accidental damage, damage caused by mis-operation, and damage due to independent installation or repair of the product by the user. P a g e Copyright©2021 ZKTECO CO., LTD. All rights reserved.
-
Page 11: Instruction For Use
1.55m to 1.85m. Users may slightly move forwards and backward to improve the quality of facial images captured. P a g e | 10 Copyright©2021 ZKTECO CO., LTD. All rights reserved. - Page 12 MB10-VL User Manual Facial expression Standing posture Note: During enrolment and verification, please remain natural facial expression and standing posture. P a g e | 11 Copyright©2021 ZKTECO CO., LTD. All rights reserved.
-
Page 13: Face Registration
If a part of the face is covered by a hat, a mask, an eye patch, or sunglasses, the authentication may fail. Do not cover the face and allow the device to recognize the eyebrows and other features of the face. P a g e | 12 Copyright©2021 ZKTECO CO., LTD. All rights reserved. -
Page 14: Verification Mode
It compares the current fingerprint with the linked fingerprints to the entered User ID via the virtual keyboard. Users can try verifying their identity with 1:1 verification mode if they are unable to get access with the 1:N authentication method. P a g e | 13 Copyright©2021 ZKTECO CO., LTD. All rights reserved. - Page 15 Select the fingerprint icon to enter fingerprint verification mode: Press the fingerprint to verify. The following screen displays on successful and failed verification respectively. On successful verification On failed verification P a g e | 14 Copyright©2021 ZKTECO CO., LTD. All rights reserved.
-
Page 16: Facial Verification
Enter the user ID and press [M/OK]. If an employee has registered a password in addition to face, the following screen will appear. Select the face icon to enter face verification mode. P a g e | 15 Copyright©2021 ZKTECO CO., LTD. All rights reserved. -
Page 17: Password Verification
Enter the user ID and press [M/OK]. If an employee has registered fingerprint and face in addition to password, the following screen will appear. Select the Password icon to enter password verification mode. P a g e | 16 Copyright©2021 ZKTECO CO., LTD. All rights reserved. -
Page 18: Card Verification
The device enters the Card Verification mode when a user put his/her card on the induction area. The following screen displays on successful and failed verification respectively. P a g e | 17 Copyright©2021 ZKTECO CO., LTD. All rights reserved. - Page 19 If the user has registered a face and a password in addition to his/her card, and the verification method is set to password/ fingerprint/ card/ face verification, the following screen will appear. Select the card icon to enter card verification mode: P a g e | 18 Copyright©2021 ZKTECO CO., LTD. All rights reserved.
-
Page 20: Combined Verification
For example, if a user uses Face Registration but the verification mode is Face + Password, then the user won't be able to pass verification. P a g e | 19 Copyright©2021 ZKTECO CO., LTD. All rights reserved. -
Page 21: Main Menu
At this time, the device will give priority to the use of the schedule of the settings form. P a g e | 20 Copyright©2021 ZKTECO CO., LTD. All rights reserved. - Page 22 To automatically test whether each module functions properly, including the Auto test screen, audio, camera, and real-time clock. System Info To view data capacity, device, and firmware information of the current device. P a g e | 21 Copyright©2021 ZKTECO CO., LTD. All rights reserved.
-
Page 23: User Management
The User ID cannot be duplicated. If there is a voice prompt about duplicate User ID, then you need to choose another User ID that should be unique. P a g e | 22 Copyright©2021 ZKTECO CO., LTD. All rights reserved. - Page 24 Fingerprint + Password + Card Select the required Verification Mode to set individual verification mode for the user. Select M/OK to save and return to the New User interface. P a g e | 23 Copyright©2021 ZKTECO CO., LTD. All rights reserved.
- Page 25 Then stay still for a while during face registration. The registration interface is as follows: P a g e | 24 Copyright©2021 ZKTECO CO., LTD. All rights reserved.
- Page 26 Select Password on the Verification mode page to enter the password registration page. Enter a password and re-enter it. Select M/OK. If the two entered passwords are the same, the system will return to the New User interface. P a g e | 25 Copyright©2021 ZKTECO CO., LTD. All rights reserved.
-
Page 27: Search For Users
Select the All Users option in the User Mgt. Then enter the retrieval keyword in the search bar of the user list (keyword may be an ID, surname, or full name). The system will search for the users related to the entered information. P a g e | 26 Copyright©2021 ZKTECO CO., LTD. All rights reserved. -
Page 28: Edit Users
Delete Fingerprint Only Delete Face is selected. Only face data is removed if Only is selected. And only the password is removed if Delete Password Only is selected. P a g e | 27 Copyright©2021 ZKTECO CO., LTD. All rights reserved. -
Page 29: User Role
Select an item to set a defined role. Select the Enable Defined Role option to enable this defined role. Select Name and enter the name of the role. P a g e | 28 Copyright©2021 ZKTECO CO., LTD. All rights reserved. - Page 30 User Mgt. > New User > User Role. If no super administrator is registered, the device will prompt "Please register super administrator user first!” after selecting the enable bar. P a g e | 29 Copyright©2021 ZKTECO CO., LTD. All rights reserved.
-
Page 31: Communication Settings
When the device needs to communicate with a PC over the Ethernet, you need to configure network settings and ensure that the device and the PC are connecting to the same network segment. Select Ethernet on the Comm. Settings interface. P a g e | 30 Copyright©2021 ZKTECO CO., LTD. All rights reserved. -
Page 32: Pc Connection
It is the identification number of the device, which ranges between 1 and 254. If Device ID the communication method is RS232/RS485, you need to input this device ID in the software communication interface. P a g e | 31 Copyright©2021 ZKTECO CO., LTD. All rights reserved. -
Page 33: Wireless Network
When the WIFI is connected successfully, the initial interface will display the Wi-Fi logo. Add WIFI Network Manually The Wi-Fi can also be added manually if the required Wi-Fi does not show on the list. P a g e | 32 Copyright©2021 ZKTECO CO., LTD. All rights reserved. - Page 34 Function Name Description Dynamic Host Configuration Protocol (DHCP) dynamically allocates IP addresses DHCP to network clients. If the DHCP is enabled, then the IP cannot be set manually. P a g e | 33 Copyright©2021 ZKTECO CO., LTD. All rights reserved.
-
Page 35: Cloud Server Setting
It is an HTTP channel with security as its goal. Based on HTTP, HTTPS transmission encryption and identity authentication ensure the security of the data transmission process. P a g e | 34 Copyright©2021 ZKTECO CO., LTD. All rights reserved. -
Page 36: Network Diagnosis
Select Network Diagnosis on the Comm. settings interface. Enter the IP address that needs to be diagnosed and click Start the diagnostic test to check whether the network can connect to the device. P a g e | 35 Copyright©2021 ZKTECO CO., LTD. All rights reserved. -
Page 37: System Settings
Can set date and time manually and click [M/OK] to save. 24-Hour Time The device displays 24-Hour time format, when enabled. Date Format Select the date format. P a g e | 36 Copyright©2021 ZKTECO CO., LTD. All rights reserved. -
Page 38: Attendance Setting
The time interval for which the "Successful Verification" message displays. Authentication Timeout(s) Valid value: 1~9 seconds. To set the time interval for facial template matching as required. Face comparison Interval(s) Valid value: 0~9 seconds. P a g e | 37 Copyright©2021 ZKTECO CO., LTD. All rights reserved. -
Page 39: Face Parameters
If a face’s pitch angle exceeds the set value, it will be filtered by the algorithm, i.e., ignored by the terminal and no registration or comparison interface will be triggered. P a g e | 38 Copyright©2021 ZKTECO CO., LTD. All rights reserved. - Page 40 Improper adjustment of the exposure and quality parameters may severely affect the performance of the device. Please adjust the exposure parameter only under the guidance of the after-sales service personnel of our company. P a g e | 39 Copyright©2021 ZKTECO CO., LTD. All rights reserved.
-
Page 41: Fingerprint Parameters
Show for match: To display the fingerprint image on the screen only during verification. Image Always show: To display the fingerprint image on the screen during enrolment and verification. None: Not to display the fingerprint image. P a g e | 40 Copyright©2021 ZKTECO CO., LTD. All rights reserved. -
Page 42: Factory Reset
System > USB Upgrade to complete firmware upgrade operation. Select USB Upgrade option on the System interface. Note: If an upgrade file is needed, please contact our technical support. Deny firmware upgrade under normal circumstances. P a g e | 41 Copyright©2021 ZKTECO CO., LTD. All rights reserved. -
Page 43: Personalize Settings
Select User Interface option on the Personalize interface. Item Description Wallpaper To select the main screen wallpaper according to your personal preference. Language To select the language of the device. P a g e | 42 Copyright©2021 ZKTECO CO., LTD. All rights reserved. -
Page 44: Voice Settings
Select whether to enable keyboard voice while pressing keyboard, press [M/OK] to Touch Prompt enable it. Adjust the volume of device. Press key to increase the volume, press key to Volume decrease the volume. P a g e | 43 Copyright©2021 ZKTECO CO., LTD. All rights reserved. -
Page 45: Bell Schedules Settings
You can manually set the date and time and press [M/OK] to save. Set repeat, select a ring tone, and select the internal bell delay. P a g e | 44 Copyright©2021 ZKTECO CO., LTD. All rights reserved. - Page 46 Delete a Bell On the All Bell Schedules interface, select a bell item to be deleted. Select Delete and select [Yes] to delete the bell schedule. P a g e | 45 Copyright©2021 ZKTECO CO., LTD. All rights reserved.
-
Page 47: Punch States Options
Select whether an attendance state needs to be selected after verification. ON: Attendance state needs to be selected after verification. Punch State Required OFF: Attendance state need not requires to be selected after verification. P a g e | 46 Copyright©2021 ZKTECO CO., LTD. All rights reserved. -
Page 48: Shortcut Keys Mappings
When the shortcut key is set to Punch State Key, but OFF mode is selected in the Punch State Mode (Personalize > Punch State Options > Punch State Mode > Select OFF), then the shortcut key will not be enabled. P a g e | 47 Copyright©2021 ZKTECO CO., LTD. All rights reserved. -
Page 49: Data Management
It helps to delete the relevant data in the device. Select Data Mgt. option on the main menu interface. Delete Data Select Delete Data option on the Data Mgt. interface. P a g e | 48 Copyright©2021 ZKTECO CO., LTD. All rights reserved. - Page 50 All or Delete by Time Range. Selecting Delete by Time Range, you need to set a specific time range to delete all data with the period. Select Delete by Time Range Set the time range and select Confirm(OK). P a g e | 49 Copyright©2021 ZKTECO CO., LTD. All rights reserved.
-
Page 51: Department Management
In this menu option, you can add, edit, or remove a department. Select Department on the main menu interface. Add a Department Select Add Dept. and press [M/OK] to enter. P a g e | 50 Copyright©2021 ZKTECO CO., LTD. All rights reserved. - Page 52 Dept. Shift: Select the shift attendance used by all users of the department. Shifts can be set in Shift set > Shifts setting, with a maximum of 24 shifts set by default. Refer to Shift Set section. P a g e | 51 Copyright©2021 ZKTECO CO., LTD. All rights reserved.
-
Page 53: Edit A Department
Select a department to edit and press [M/OK] to enter. Modify Dept. Name and Dept. Shifting and press [M/OK] to save. The editing of the department is the same as of Add Dept. P a g e | 52 Copyright©2021 ZKTECO CO., LTD. All rights reserved. -
Page 54: Delete A Department
Select a department to delete and press [M/OK] to enter. Select Delete and press [M/OK]. Note: Only departments other than the 8 default departments in the device can be deleted. P a g e | 53 Copyright©2021 ZKTECO CO., LTD. All rights reserved. -
Page 55: Shift Set
Select Attendance Rule on the Shift Set interface. P a g e | 54 Copyright©2021 ZKTECO CO., LTD. All rights reserved. -
Page 56: Shift Setting
SUN On-duty Enable whether to work normally on Sundays. Shift Setting Select Shift Setting on the Shift set interface. Select a Shift on the list, and press [M/OK]. P a g e | 55 Copyright©2021 ZKTECO CO., LTD. All rights reserved. -
Page 57: Schedule
The shifts should be set based on the actual condition of a company. If no shift is set, the system makes attendance calculations based on default shifts set in attendance rules. Select Schedule on the Shift Set interface. P a g e | 56 Copyright©2021 ZKTECO CO., LTD. All rights reserved. - Page 58 Press [M/OK] to enter Schedule interface and select Add Personal Shift. Enter an ID. The device automatically displays the name. Select Shift Name and then press [M/OK]. Press [ESC] to exit and save. P a g e | 57 Copyright©2021 ZKTECO CO., LTD. All rights reserved.
- Page 59 Select Edit, press [M/OK] to enter and modify the "Shift Name" of the user. Note: The User ID cannot be modified. The other operations are the same as those performed to add a shift. P a g e | 58 Copyright©2021 ZKTECO CO., LTD. All rights reserved.
- Page 60 Select Personal Shift Lists on the Personal Shift interface. Select a scheduled user and press [M/OK]. Select Delete, press [M/OK], and choose “OK” to delete the Shift successfully. P a g e | 59 Copyright©2021 ZKTECO CO., LTD. All rights reserved.
-
Page 61: Report
Note: First insert the USB flash drive into the USB slot of the machine, and then enter the main menu to perform the related operations of the Report. Download Att. Report Select Download Att. Report and press [M/OK]. P a g e | 60 Copyright©2021 ZKTECO CO., LTD. All rights reserved. - Page 62 Attendance Record Report, Exception Statistic Report, and Card Report can be viewed on a PC. The following reports show the preceding information: To make reports more understandable, a report containing two-day attendance records of four employees is provided as an example. P a g e | 61 Copyright©2021 ZKTECO CO., LTD. All rights reserved.
- Page 63 Exception Statistic Report: The report displays the attendance exceptions of all employees within a specified period so that the attendance department handles the exceptions and confirm them with the employees involved and their supervisors. P a g e | 62 Copyright©2021 ZKTECO CO., LTD. All rights reserved.
-
Page 64: Download Att. Setting Report
The shifts that have been set on the attendance machine shall be displayed. (For more details, see Shift Setting. You can modify the 24 shifts and add more shifts. After modification, the shifts shall prevail on the attendance machine. P a g e | 63 Copyright©2021 ZKTECO CO., LTD. All rights reserved. -
Page 65: Upload Att. Setting Report
After setting the attendance setting table, save the “Setting Report.xls” to the USB flash drive and reinsert the USB flash drive into the USB slot of the device. P a g e | 64 Copyright©2021 ZKTECO CO., LTD. All rights reserved. -
Page 66: Setting
Setting Set whether to synchronize the card report and distinguish the device ID when downloading the attendance report. Select Setting on the Report interface and press [M/OK]. P a g e | 65 Copyright©2021 ZKTECO CO., LTD. All rights reserved. -
Page 67: Access Control
Select Access Control on the main menu interface. Access Control Options To set the parameters of the control lock of the terminal and related equipment. Select Access Control Options on the Access Control interface. P a g e | 66 Copyright©2021 ZKTECO CO., LTD. All rights reserved. - Page 68 To transmit a sound alarm or disassembly alarm from the local. When the door is Speaker Alarm closed, or the verification is successful, the system cancels the alarm from the local. P a g e | 67 Copyright©2021 ZKTECO CO., LTD. All rights reserved.
-
Page 69: Usb Manager
Import all the attendance data from the device to a USB disk. Import all the user information, fingerprints, and facial images from the device to a User Data USB disk. P a g e | 68 Copyright©2021 ZKTECO CO., LTD. All rights reserved. -
Page 70: Usb Upload
Click [M/OK] to enable or disable the [Encrypt Attendance Data] and [Delete ATT Data] options. With Encrypt Attendance data-enabled, the data downloads with encryption for better security. Delete ATT Data deletes all the attendance data. P a g e | 69 Copyright©2021 ZKTECO CO., LTD. All rights reserved. -
Page 71: Attendance Search
OK without entering any user ID. 3) The record search succeeds. Select the 4) The below figure shows the details of the record in green to view its details. selected record. P a g e | 70 Copyright©2021 ZKTECO CO., LTD. All rights reserved. -
Page 72: Autotest
To test the RTC. The device checks whether the clock works normally and accurately Test Clock RTC with a stopwatch. Touch the screen to start counting and press it again to stop counting. P a g e | 71 Copyright©2021 ZKTECO CO., LTD. All rights reserved. -
Page 73: System Information
Displays the device's name, serial number, MAC address, face algorithm version Device Info information, fingerprint algorithm version information, platform information, and MCU version. Firmware Info Displays the firmware version and other version information of the device. P a g e | 72 Copyright©2021 ZKTECO CO., LTD. All rights reserved. -
Page 74: Connect To Zkbioaccess Ivs Software
Software side Login to ZKBioAccess IVS software, click System > Communication > Communication Monitor to set the ADMS service port, as shown in the figure below: P a g e | 73 Copyright©2021 ZKTECO CO., LTD. All rights reserved. -
Page 75: Add Device On The Software
After searching, the list and total number of access controllers will be displayed. Click Add in operation column, a new window will pop-up. Select Attendance Area and Time zone from each dropdowns and click OK to add the device. P a g e | 74 Copyright©2021 ZKTECO CO., LTD. All rights reserved. -
Page 76: Add Personnel On The Software
Click Attendance > Attendance Device > Device > Control > Synchronize Software Data to the Device to synchronize all the data to the device including the new users. For more details, please refer to the ZKBioAccess IVS User Manual. P a g e | 75 Copyright©2021 ZKTECO CO., LTD. All rights reserved. -
Page 77: Appendix
? [Attendance rules] Obtain the rule concerning whether Saturday is a work day. Obtain the rule concerning whether Sunday is a work day. Make attendance calculations. P a g e | 76 Copyright©2021 ZKTECO CO., LTD. All rights reserved. - Page 78 Step 5: Insert a USB flash drive into the USB port or SD card into the SD port of the device and upload the Attendance Setting Report.xls to the device. Then, the schedules in the Attendance Setting Report can be used. P a g e | 77 Copyright©2021 ZKTECO CO., LTD. All rights reserved.
- Page 79 Adopt the earliest time for normal attendance and the nearest time for abnormal attendance. b) Adopt the normal attendance time if the normal attendance time and abnormal attendance time coexist. Adopt a median in the attendance time range. P a g e | 78 Copyright©2021 ZKTECO CO., LTD. All rights reserved.
- Page 80 12:00 is from 12:00 to 12:30 (that is, 12:00 + (13:00 - 12:00)/2). Therefore, the calculated time of attendance is shown in the preceding table. P a g e | 79 Copyright©2021 ZKTECO CO., LTD. All rights reserved.
- Page 81 13:00 is from 12:30 to 13:00. Therefore, the check-in time of the employee is blank. The calculated time of attendance is shown in the preceding table. P a g e | 80 Copyright©2021 ZKTECO CO., LTD. All rights reserved.
-
Page 82: Statement On The Right To Privacy
Thank you for choosing this hybrid biometric recognition product, which was designed and manufactured by ZKTeco. As a world-renowned provider of core biometric recognition technologies, we are constantly developing and researching new products, and strive to follow the privacy laws of each country in which our products are sold. -
Page 83: Eco-Friendly Operation
The components which contain toxins or harmful elements are included due to the current economic or technical limitations which prevent their replacement with non-toxic materials or elements. P a g e | 82 Copyright©2021 ZKTECO CO., LTD. All rights reserved. - Page 84 ZKTeco Industrial Park, No. 32, Industrial Road, Tangxia Town, Dongguan, China. Phone : +86 769 - 82109991 : +86 755 - 89602394 www.zkteco.com Copyright © 2021 ZKTECO CO., LTD. All Rights Reserved.
Need help?
Do you have a question about the MB10-VL and is the answer not in the manual?
Questions and answers
i cannot go to the main menu, 8888 does not work and i cannot connect via network
If you cannot access the main menu and are unable to connect to the network on the ZKTeco MB10-VL, follow these steps:
1. Check Device Functionality: Ensure the device is powered on and functioning properly.
2. Access the Main Menu: If the main menu is not accessible, try restarting the device.
3. Verify Network Settings: Navigate to the main menu (if accessible) and check the communication settings:
- Go to COMM. > Cloud Server Setting.
- Ensure the server address and server port are correctly set (default port: 8088).
4. Firmware Upgrade: If the issue persists, consider upgrading the firmware:
- Insert the upgrade file into the device’s USB port.
- On the initial interface, press [M/OK] > System > USB Upgrade.
- Contact technical support if an upgrade file is required.
5. Factory Reset: If none of the above steps work, perform a factory reset if the option is available.
If the problem continues, contact ZKTeco technical support.
This answer is automatically generated
@Mr. Anderson , thank you for responding. Unfortunately, I cannot access the main menu of the device, as I have configured the superadmin using userid 8888. I can time in/out but I cannot go to the main menu, with that I cannot reset the device using the main menu or upgrade the firmware, and another mistake is that I have not configured the device for network communication, so accessing the device via network is not possible too.
how can i go back to menu of the face id?
The ZKTeco MB10-VL device will automatically return to the initial interface when there is no operation for a set period. You can disable the Timeout function or set a value between 60 and 99,999 seconds.
This answer is automatically generated