Table of Contents
Advertisement
Quick Links
Advertisement
Table of Contents

Related Manuals for Nexo P12-PW


Summary of Contents for Nexo P12-PW
- Page 1 DP3946-01a-DI User manual...
-
Page 2: Table Of Contents
ARRAY EQ ____________________________________________________________________________ 12 MAINTENANCE ________________________________________________________________________ 13 TECHNICAL SPECIFICATIONS ___________________________________________________________ 15 USER NOTES _________________________________________________________________________ 16 EU Conformity declaration NEXO SA ZA DU PRE DE LA DAME JEANNE 60128 PLAILLY – France Declare under our sole responsibility that the product Loudspeaker... -
Page 3: Warnings
If the system seems to be malfunctioning or damaged, stop using it at once and have it repaired by a NEXO qualified technician. Do not expose the system directly to the sun or to the rain, do not immerse it into fluids, do not place objects filled with liquid on the system. -
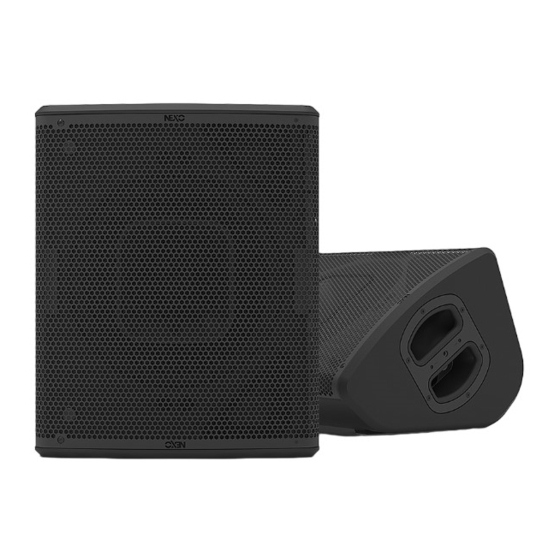
Page 4: Equipment
EQUIPMENT EQUIPMENT 3 locations for hanging, 1 on the back and on both side. On the sides, you’ll find a print for speaker stand. 3 locations for connecting, on the back and on both side. Page 4 / 18... - Page 5 EQUIPMENT Assembly on distance rod or speaker stand Place distance rod on the connector plate (M20) of the Sub. Place P12 on the distance rod / monitor stand (diameter of 35mm), IMPORTANT Speaker stand must be rated for P12 weight. Speaker stand must always be installed on a horizontal surface.
-
Page 6: Description
Amplification • The P12 speakers must be used with a NEXO processor to handle EQ, phase alignment, crossover and excursion/thermal protection for the system loudspeaker. There are two NEXO processor series supporting the P12 speakers: NXAMP (4 channels) amplified processors and DTD processors (stereo + sub). DTD processors ensure optimal performances when used with DTDAMP power amplifiers. -
Page 7: Preset
PRESET PRESET Please consult nexo-sa.com for NEXO TD Controllers firmware information. For the P12, the following setups are available: MAIN is the recommended setup for most FOH application, similar to previous firmware setup. MONITOR is recommended for monitor applications. Warning: this setup is a low latency setup and therefore its phase is not compatible with other NEXO cabinets, including subs. - Page 8 PRESET P12 + Sub Stage monitor applications with Subs (OMNI or CARDIO modes) Front of house applications with Subs (OMNI or CARDIO modes) Page 8 / 18...
-
Page 9: Hf Directivity
When replacing the grille, ensure it is well positioned in the top blade before fasten with quarter-turn screws. CROSSOVER FREQUENCY 60 Hz: Full range application. 85 Hz: Use as « front fill » on stage, complementing a main system. Use with a NEXO subwoofer, e.g. L15. Page 9 / 18... -
Page 10: Accessories
All P12 accessories are specifically rated in agreement with structural computations. Never use other accessories – including push-pins – when assembling P12 cabinets than the ones provided by NEXO: NEXO will decline responsibility over the entire P12 accessory range if any component is purchased from different supplier. - Page 11 ACCESSORIES PNT-WMADAPT With PNI-WMxxx & PNT-BUMP With PNT-BUMP PNI-CLADAPT Ceiling Adapter, use with HBRK12, VBRK12. PNI-WM330 Wallmount for P12, with WMADAPT Page 11 / 18...
-
Page 12: Array Eq
ARRAY EQ PNT-P12FLGPS Flange dispersion adapter PS PNT-P12FLG9040 Flange dispersion adapter 90° - 40° PNT-2CASE12: FLIGHT CASE FOR 2X P12 PNT-ACC12: FLIGHT CASE FOR P12 ACCESSORIES PNT-COV12: COVER FOR P12 ARRAY EQ The ArrayEQ allows to adjust the system frequency response in its lower range (see curves below, with different ArrayEq values): Page 12 / 18... -
Page 13: Maintenance
MAINTENANCE MAINTENANCE Driver access Unlock the 2 quarter-turn screws, Remove the grille. Remove 8 screws. Remove the stickers. Remove the 2 screws. Remove the horn. To access to the HF diaphragm, remove 4 screws. Page 13 / 18... - Page 14 MAINTENANCE Spare parts MARK QUANTITY REFERENCE DESIGNATION 05CAPB01 HF cap black 05CAPB01-PW HF cap White 05P12UA Complete grille Touring Black (with fasteners) 05P12UA-PW Complete grille Touring White (with fasteners) 05SPK01 Speakon NL4 complete (with screws) 05NHP12R/K HF diaphragm (with screws) 05HPC12 P12 driver complete (with screws) Recone Kit 12”...
-
Page 15: Technical Specifications
TECHNICAL SPECIFICATIONS TECHNICAL SPECIFICATIONS P12 WITH NEXO ELECTRONICS Model 60 Hz – 20 kHz Frequency range (±6dB) Peak SPL Level (1m) 138dB Peak (Passive mode) / 140dB Peak (Active mode) Operating voltage 40Vrms (180Vpeak) HF dispersion 60°x60° - 90°x40° - Asymmetrical Dispersion 60° to 100°x40°... -
Page 16: User Notes
USER NOTES USER NOTES Page 16 / 18... - Page 17 USER NOTES Page 17 / 18...
- Page 18 Tel: +33 3 44 99 00 70 NEXO S.A. Fax: +33 3 44 99 00 30 E-mail: info@nexo.fr Parc d’activité de la Dame Jeanne nexo-sa.com F-60128 PLAILLY Page 18 / 18...
Need help?
Do you have a question about the P12-PW and is the answer not in the manual?
Questions and answers