
Related Manuals for Global BH-9982


Summary of Contents for Global BH-9982
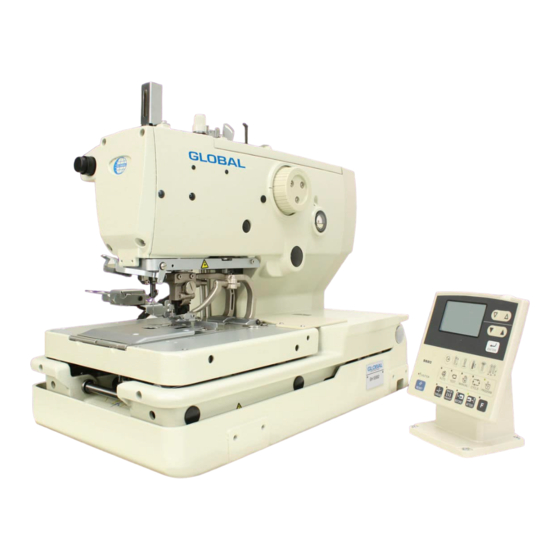
- Page 1 BH 9982 Eyelet buttonhole machines Instruction manual Always switch off the electricity when working on the machine.
- Page 2 This service manual is intended for RH-9820; be sure to read the RH-9820 instruction manual before this manual. Carefully read the “SAFETY INSTRUCTIONS” and the whole of this manual to understand this product before you start maintenance. As a result of research and improvements regarding this product, some details of this manual may not be the same as those for the product you purchased.
- Page 3 SAFETY INSTRUCTIONS [1] Safety indications and their meanings This service manual and the indications and symbols that are used on the machine itself are provided in order to ensure safe operation of this machine and to prevent accidents and injury to yourself or other people. The meanings of these indications and symbols are given below.
- Page 4 [2] Notes on safety DANGER Wait at least 5 minutes after turning off the power switch and disconnecting the power cord from the wall outlet before opening the cover of the control box. Touching areas where high voltages are present can result in severe injury.
- Page 5 CAUTION Sewing This sewing machine should only be used by If using a work table which has casters, the casters operators who have received the necessary training should be secured in such a way so that they cannot in safe use beforehand. move.
- Page 6 [3] Warning labels The following warning labels appear on the sewing machine. Please follow the instructions on the labels at all times when using the machine. If the labels have been removed or are difficult to read, please contact your nearest Brother dealer. Do not touch the knife or press any Safety devices objects against the machine while...
- Page 7 0332B 0331B Belt cover (Rear) 0333B 0486B 0334B 0485B RH-9820...
-
Page 8: Table Of Contents
CONTENTS 1. MACHINE SPECIFICATIONS..5. DISASSEMBLY......2. FUNCTION SETTINGS ....5-1. Covers and presser foot mechanism.........39 5-2. Upper shaft motor unit mechanism........40 2-1. List of special functions when power is turned on....2 5-3. Feed mechanism..............41 2-2. List of advanced functions.............3 5-3-1. - Page 9 7-25-1. Replacing the movable knife and fixed knife..169 6-22. Routing the harnesses ............129 7-25-2. Adjusting the cutting pressure ......170 6-23. Routing the air tubes............131 《Solenoid valve tubes and functions》......133 7-25-3. Adjusting the meshing amount......170 6-24. Lubrication and greasing and routing the oil tubes..135 7-25-4.
-
Page 10: Machine Specifications
1. MACHINE SPECIFICATIONS 1. MACHINE SPECIFICATIONS Lower thread trimmer Thread trimmer Long type Short type -02* -02 specifications are divided into L1422 to L3422 specifications depending on the sewing lengths, so please specify the sewing length when ordering. This is not covered by specification designations, but compatibility is possible by replacement of gauge parts. -
Page 11: Function Settings
2. FUNCTION SETTINGS 2. FUNCTION SETTINGS 2-1. List of special functions when power is turned on This section contains a list of functions and the key operations which are used to call the setting mode for the functions. 4421Q Push the power switch at the ON side to turn on the power. -
Page 12: List Of Advanced Functions
2. FUNCTION SETTINGS 2-2. List of advanced functions This section contains a list of advanced functions and the key operations which are used to call the setting mode for the functions. 4550Q Production counter setting mode Refer to the Instruction manual. Data read/write mode Refer to “3-3. -
Page 13: Memory Switch Setting Method (Advanced)
2. FUNCTION SETTINGS 2-3. Memory switch setting method (Advanced) The settings for the memory switches are valid for all programs. While pressing the TEST key and the PROGRAM key, push the POWER switch at the ON side (1). The mode will switch to memory switch mode. The memory switch number (A) will appear in the top part of the display, and the setting (B) for that number will appear in the bottom part of the display. -
Page 14: List Of Memory Switch Settings
2. FUNCTION SETTINGS 2-4. List of memory switch settings Memory switches which have a “*” in the default value column (050, 752, 850, 851, 852 and 853) are ignored when memory switch initialization is carried out. The settings for these memory switches are only changed when the ENTER key is pressed in memory switch mode. For operator Setting Default... - Page 15 2. FUNCTION SETTINGS Work clamp settings Setting Default Setting items range value Sewing machine starting procedure * This is not overwritten by CF card data. Hand start switch or 2-pedal foot switch Treadle Delay time for 1-pedal operation when cutting before sewing is set (ms) * This is displayed when 1-pedal operation is being used.
- Page 16 2. FUNCTION SETTINGS Upper shaft control settings Setting Default Setting items range value Needle up stop when operation is paused Upper shaft stops immediately when sewing is paused. Upper shaft stops at needle up stop position when sewing is paused. Upper shaft speed correction (rpm) Correction can be carried out with respect to the setting speed.
- Page 17 2. FUNCTION SETTINGS Feed control settings Setting Default Setting items range value Feed timing correction (°) When a smaller value is set, the feed timing is advanced. -20 - 20 Setting can be carried out in units of 2°. Automatic upper shaft deceleration to emphasize feeding Normal The proportional feed time for each stitch is reduced from normal in order to prevent needle deflection.
- Page 18 2. FUNCTION SETTINGS Panel operation settings Setting Default Setting items range value Disabling program mode Normal Switching to program mode is disabled. Shortcut keys are also disabled. Disabling cycle program mode Normal Switching to cycle program mode is disabled. Disabling changing of production counter Normal Changing the production counter is disabled.
- Page 19 2. FUNCTION SETTINGS Device settings Setting Default Setting items range value Hammer on time (ms) When a larger value is set, the period of contact between the hammer and the knife becomes longer. 25 - 200 Setting can be carried out in units of 5 ms. Note: If this is set to a larger value than necessary, it will shorten the useful life of the hammer and the knife.
- Page 20 2. FUNCTION SETTINGS Setting Default Setting items range value Lower thread trimming timing (ms) * This is only displayed for -02 specifications. When a larger value is set, the lower thread trimming timing is delayed by more. 0 - 100 Setting can be carried out in units of 5 ms.
- Page 21 2. FUNCTION SETTINGS Setting Default Setting items range value Sub-hammer on time (ms) * This is displayed when the lapel device is enabled. When a larger value is set, the period of contact between the sub-hammer and the knife becomes longer. 5 - 100 Setting can be carried out in units of 5 ms.
- Page 22 2. FUNCTION SETTINGS Specifications and destination settings Setting Default Setting items range value Machine head specifications * This is not overwritten by CF card data. NOTE: Always be sure to set this to match the machine head specifications. Sets to -00 specifications. Sets to -01 specifications.
-
Page 23: Error History Checking Method
2. FUNCTION SETTINGS 2-5. Error history checking method The past error history can be checked by the following procedure. While holding down the key, push the POWER switch at the ON side (1). The error history (A) will be displayed. (The display starting from the left side will be: history number, error code and production counter.) 0718B 0979B... -
Page 24: Input Checking Method
2. FUNCTION SETTINGS 2-6. Input checking method Use this to check for any malfunctions of the operation panel keys, circuit boards or sensors, and for checking for broken cords and for adjusting sensor positions. This checks if the CPU is reading signals from the key and the sensor correctly. Release the air. - Page 25 2. FUNCTION SETTINGS <Input check list> Check item Checking method Judgment Power supply voltage Normally around 100% → Move the feed base to the left and Left area: No switching ON/OFF X axis home position sensor right by hand. Right area: Switches ON/OFF Left direction: Up Move the feed base to the left and Right direction: Down...
- Page 26 2. FUNCTION SETTINGS Check item Checking method Judgment ENTER key Shortcut 1 key Shortcut 2 key Shortcut 3 key Shortcut 4 key Shortcut 5 key Shortcut 6 key ON: When pressed AUTO key Press the corresponding key. OFF: When not pressed TEST key MANUAL key CYCLE key...
-
Page 27: Output Checking Method
2. FUNCTION SETTINGS 2-7. Output checking method Use this to check for any malfunctions of the circuit boards, and for checking for problems with drive mechanisms and broken cords. This checks if the CPU output signal is working correctly. NOTE: When checking operation, the mechanisms may be obstructed and become damaged, so remove the left and right work clamp plates (Z) before checking output. - Page 28 2. FUNCTION SETTINGS <Output check list> Check item Operation Work clamp The work clamp will be lowered while the start switch is being pressed. Spreader The spreader will open while the start switch is being pressed. Upper thread The thread take-up lever will be lowered while the start switch is being pressed. take-up Lower tension The lower tension will be released for 0.1 seconds.
- Page 29 2. FUNCTION SETTINGS Check item Operation Panel indicators The 11 panel indicators will illuminate one by one. Upper tension The upper tension will be released while the start switch is being pressed. release The buzzer will sound for 0.7 second, and then the work clamp will be lowered, the spreader will open and the feed will move +20 mm in the Y axis direction.
-
Page 30: Software Version Checking Method
2. FUNCTION SETTINGS 2-8. Software version checking method While holding down the key, push the POWER switch at the ON side(1). The control program versions (A) will be displayed. MN … Main control program MT … Motor control program PL … Panel control program When the F key is pressed, the IPL versions (B) will be displayed. -
Page 31: Reading/Writing Data
3. READING/WRITING DATA 3. READING/WRITING DATA 3-1. Precautions when handling CF cards (commercially available) ・ Use CF cards with a capacity of 32, 64, 128 or 256 MB. ・ Do not attempt to disassemble or modify the CF cards. ・ Do not forcibly bend, drop or scratch CF cards or place heavy objects on top of them. ・... -
Page 32: Data Read/Write Mode
3. READING/WRITING DATA 3-3. Data read/write mode With the power turned off, insert the CF card into the CF slot. Small holes NOTE: ・ Make sure the CF card is facing the correct way. (The side with the notches should be facing toward the left, and the side with the small holes should be facing toward the CF slot when the card is inserted.) ・... -
Page 33: Reading Parameter Data From The Cf Card
3. READING/WRITING DATA 3-4. Reading parameter data from the CF card 1. Select R1 in data read/write mode. 2. Press the ENTER key. The parameter data for all programs on the CF card will be read. Once reading is complete, a “COMPLETED” message and the power off symbol will be displayed. -
Page 34: Writing Error Log Data To The Cf Card
3. READING/WRITING DATA 3-8. Writing error log data to the CF card 1. Select W6 in data read/write mode. 2. Press the ENTER key. The error log in the sewing machine will be written to the CF card. The memory switch settings will also be written at this time. However, the file destination will be different from the one mentioned in “3-7.”... -
Page 35: Mechanical Descriptions
4. MECHANICAL DESCRIPTIONS 4. MECHANICAL DESCRIPTIONS Each mechanism operates in the order of the numbers shown in the illustration. * <number> indicate the flow of operations that occur separately from each other. 4-1. Upper shaft and Needle bar mechanisms 1. Motor assembly 2. -
Page 36: Zigzag And Thread Take-Up Mechanisms
4. MECHANICAL DESCRIPTIONS 4-2. Zigzag and thread take-up mechanisms 0659B 1. Upper shaft 2. Hypoid gear 3. Orthogonal shaft 4. Zigzag cam <4> Roller take-up cam 5. Zigzag fork <5> Thread take-up roller 6. Zigzag connecting rod <6> Thread take-up 7. -
Page 37: Needle Bar Rocking Mechanism
4. MECHANICAL DESCRIPTIONS 4-3. Needle bar rocking mechanism 0660B 1. Pulse motor R 2. Theta M pulley assembly 3. Timing belt D 4. Looper pulley assembly <4> Driving looper shaft assembly 5. Looper base assembly <5> Vertical shaft timing pulley U assembly <6>... -
Page 38: Feed Mechanism
4. MECHANICAL DESCRIPTIONS 4-4. Feed mechanism <X direction> 1. Pulse motor X 2. Feed gear 3. Idler gear 4. X rack 5. X feed shaft holder N 6. X feed guide shaft A, B 7. X feed shaft holder S 0661B 8. -
Page 39: Presser Foot Mechanism
4. MECHANICAL DESCRIPTIONS 4-5. Presser foot mechanism <When work clamp is lowered> 1. Clamp cylinder 16X10 2. Clamp cylinder rod 3. Clamp cylinder rod pin 4. Clamp driving lever 5. Clamp lever shaft 6. Clamp lever B 7. Clamp lever 8. -
Page 40: Cloth Opening Mechanism
4. MECHANICAL DESCRIPTIONS 4-6. Cloth opening mechanism <After operation> 0664B 1. Opening cylinder assembly 16X15 2. Opening cylinder rod 3. Opening cylinder rod pin 4. Opening driving lever 5. Opening connecting rod 6. Slide block 7. Fulcrum lever plate 8. Rocker lever 9. -
Page 41: Cutter Mechanism
4. MECHANICAL DESCRIPTIONS 4-7. Cutter mechanism 1. Cylinder 63X100 2. Cylinder rod 3. Cutter lever 4. Cutter link 5. Cutter arm assembly 6. Cutter arm slide block 7. Driving shaft presser 8. Cutter driving shaft 9. Hammer bracket assembly 10. Hammer a. -
Page 42: Spreader Mechanism
4. MECHANICAL DESCRIPTIONS 4-9. Spreader mechanism 1. Lower shaft 2. Lower shaft cam 3. Spreader lever A 4. Spreader lever B 5. Slide block 6. Spreader link shaft 7. Spreader link base 8. Spreader cam link 9. Spreader driving cam 10. -
Page 43: Upper Tension Release Mechanism
4. MECHANICAL DESCRIPTIONS 4-11. Upper tension release mechanism 0669B 1. Upper tension release solenoid 2. Bolt 3. Tension release pin 4-12. Upper thread take-up mechanism 0670B 1. Cylinder assembly 10-30 2. Cylinder joint A 3. Collar B <3> Rubber cushion 4. -
Page 44: Lower Thread Release And Lower Thread Take-Up Mechanisms
4. MECHANICAL DESCRIPTIONS 4-13. Lower thread release and lower thread take-up mechanisms <-01> 1. Lower thread tension release solenoid 2. Lower solenoid shaft 3. Lower thread take-up guide lever (thread take-up) 4. Tension release pin (tension release) <-00, -02:Lower thread release only > 1. -
Page 45: Lower Thread Trimmer Mechanism
4. MECHANICAL DESCRIPTIONS 4-15. Lower thread trimmer mechanism <-01> 0673B Refer to “Principle of the 1. Cylinder assembly 16X30 B thread handler” in “7-25-5. 2. Thread trimmer lever Adjusting the thread handler” 3. Thread cutter lever arm for details about the thread 4. - Page 46 4. MECHANICAL DESCRIPTIONS RH-9820...
-
Page 47: Disassembly
5. DISASSEMBLY 5. DISASSEMBLY DANGER Wait at least 5 minutes after turning off the power switch and disconnecting the power cord from the wall outlet before opening the cover of the control box. Touching areas where high voltages are present can result in severe injury. -
Page 48: Covers And Presser Foot Mechanism
5. DISASSEMBLY Disassemble the parts in the order shown in the illustration. 5-1. Covers and presser foot mechanism 1079B * Start with the machine head in its upright position. 1. Screw (Loosen) 14. Screws [4 pcs] 2. Needle 15. Needle guide cover 3. -
Page 49: Upper Shaft Motor Unit Mechanism
5. DISASSEMBLY 5-2. Upper shaft motor unit mechanism 1080B * Start with the machine head in its upright position. 1. Screws [2 pcs] 2. Belt guide 3. Socket bolts with washers [2 pcs] (Tilt back the machine head.) 4. Socket bolt with washer [1 pcs] 5. -
Page 50: Feed Mechanism
5. DISASSEMBLY 5-3. Feed mechanism 5-3-1. Feed base unit 1081B * Carry out the following with the machine head in the upright position. 1. Screw (Loosen) 2. Hammer 3. Socket bolt (Loosen) 4. Knife 5. Truss screws [2 pcs] 6. Feed base cover U 7. -
Page 51: Feed Unit
5. DISASSEMBLY 5-3-2. X feed unit 1082B * Carry out the following with the machine head tilted back. 17. Socket bolts [3 pcs] 18. X feed assembly 5-3-3. Y feed unit * Disassemble the “5-2. Upper shaft motor unit mechanism” before disassembling the “5-3-3. Y feed unit”. 1083B * Start with the machine head in its upright position. -
Page 52: Lower Thread Tension Mechanism
5. DISASSEMBLY 5-4. Lower thread tension mechanism 1084B * Carry out the following with the machine head tilted back. 1. Socket bolts [3 pcs] 2. Lower thread guide adjust assembly RH-9820... -
Page 53: Spreader Mechanism
5. DISASSEMBLY 5-5. Spreader mechanism * Carry out the disassembly procedure in “5-4. Lower thread tension mechanism” before the disassembly procedure in “5-5. Spreader mechanism”. 1085B * Carry out the following with the machine head tilted back. 1. Screw 2. Tube support B 3. -
Page 54: Looper Mechanism
5. DISASSEMBLY 5-6. Looper mechanism * Carry out the disassembly procedure in “5-5. Spreader mechanism” before the disassembly procedure in “5-6. Looper mechanism”. 1086B * Carry out the following with the machine head tilted back. 1. Screw (Loosen) 2. Socket bolt (Loosen) 3. -
Page 55: Needle Bar Rocking Mechanism
5. DISASSEMBLY 5-7. Needle bar rocking mechanism * Carry out the disassembly procedure in “5-2. Upper shaft motor unit mechanism” before the disassembly procedure in “5-7. Needle bar rocking mechanism”. 1077B * Start with the machine head tilted back. 1. Socket bolts with washers (Return the machine head to its [2 pcs] upright position.) -
Page 56: Looper Base Mechanism
5. DISASSEMBLY 5-8. Looper base mechanism * Carry out the disassembly procedure in “5-5. Spreader mechanism” and the “5-6. Looper mechanism” before the disassembly procedure in “5-8. Looper base mechanism”. 1078B * Carry out the following with the machine head tilted back. 1. -
Page 57: Needle Bar Mechanism
5. DISASSEMBLY 5-9. Needle bar mechanism * Carry out the following with the machine head in the upright position. 1. Socket bolts [4 pcs] 2. Slide block guide F 3. Screws [2 pcs] 4. Needle bar guide support plates [2 pcs] 5. -
Page 58: Lubrication
5. DISASSEMBLY 5-10. Lubrication 1089B RH-9820... - Page 59 5. DISASSEMBLY 1. Screw 22. Oil gauge window 2. Cord holder 23. Screw 3. Felt 24. Cord holder #5 4. Screw 25. Screws [4 pcs] 5. Tube support B 26. Oil plate assembly 6. Felt 27. Screw 7. Felt 28. Cord holder (NK-3N) 8.
-
Page 60: Zigzag And Thread Take-Up Mechanisms
5. DISASSEMBLY 5-11. Zigzag and thread take-up mechanisms * Carry out the following with the machine head in the upright position. <Zigzag mechanism> 1. Screw (Loosen) 2. Needle bar block bracket (screw type) 3. Set screws [2 pcs] (Loosen) 4. Zigzag cam (Slide to remove from zigzag fork.) 5. -
Page 61: Upper Shaft Mechanism
5. DISASSEMBLY 5-12. Upper shaft mechanism 1091B * Carry out the following with the machine head in the upright position. 1. Screw 11. Pulley 2. Set screw (Loosen) 12. Set screws [2 pcs] (Loosen) 3. Set screws [2 pcs] 13. Set screws [2 pcs] (Loosen) (Loosen) 14. -
Page 62: Cutter Mechanism
5. DISASSEMBLY 5-13. Cutter mechanism 1092B * Start with the machine head in its upright position. 1. Screws [2 pcs] (Tilt back the machine head.) 2. Cutter sensor assembly 14. Set screws [2 pcs] (Loosen) 3. Set screws [2 pcs] 15. -
Page 63: Assembly
6. ASSEMBLY 6. ASSEMBLY DANGER Wait at least 5 minutes after turning off the power switch and disconnecting the power cord from the wall outlet before opening the cover of the control box. Touching areas where high voltages are present can result in severe injury. -
Page 64: Cutter Mechanism
6. ASSEMBLY ・ Assemble each part in the order shown in the illustration. ・ Parts indicated by are part of the same assembly. 6-1. Cutter mechanism * Carry out assembly steps <1> to <8> in “6-25. Lubrication and greasing and routing the oil tubes” before carrying out the assembly in “6-1. - Page 65 6. ASSEMBLY 1. Bush cutter lever shaft 18. Cutter sensor pin 36. Cutter arm pin 19. Set screw 37. Set screws [2 pcs] 2. Cutter driving shaft 20. Cutter arm slide block 38. Hammer bracket assembly 3. Guide block 21. Cutter arm pin 39.
-
Page 66: Needle Bar Mechanism (1)
6. ASSEMBLY 6-2. Needle bar mechanism (1) * Refer to “Adjusting the pressure of the needle bar gear block” on the next page. Push the needle bar gear block (5) in as far as it will go. If it is not properly inserted, oil leaks will occur. - Page 67 6. ASSEMBLY Adjusting the pressure of the needle bar gear block Secure the needle bar gear nut (6), and then while pushing the needle bar gear block (5) with a force of 78.4 N, tighten the screw (7). NOTE: If pressure is not applied, it will not be possible to adjust the turning center for the needle bar and looper base, and this will cause problems with sewing such as skipped stitches.
-
Page 68: Zigzag Mechanism
6. ASSEMBLY 6-3. Zigzag mechanism * Refer to the detailed descriptions on the next page for details on A and B in the illustration. Refer to “7-2. Adjusting the zigzag width (stitch width).” Adjust so that there is no play. Adjust so that there is no Align the end... - Page 69 6. ASSEMBLY 1. Zigzag connecting rod 20. Needle bar block collar assembly 2. Shoulder screw 21. Zigzag fork 28. Zigzag crank 3. Nut 4. Zigzag crank screw 5. Nut 22. Zigzag fork support shaft 29. Spacer 6. Plain washer 23. Set screw 30.
-
Page 70: Upper Shaft Mechanism
6. ASSEMBLY 6-4. Upper shaft mechanism * Refer to the detailed descriptions on pages 62 and 63 for details on A to C in the illustration. * For parts with screw stops, install so that the screw at the front in the turning direction is at the screw stop position. - Page 71 6. ASSEMBLY 1. Bearing 11. Pinion 22. Retaining ring C 2. Bearing collar 12. Set screws [2 pcs] 23. Orthogonal shaft 13. Set screws [2 pcs] 24. Zigzag cam 3. Bearing 25. Gear 4. Upper shaft crank 14. Bearing 26. Take-up cam roller 15.
- Page 72 6. ASSEMBLY <Adjusting the pressure of the orthogonal shaft> While pushing the pulley base(27) in the direction of the arrow with a force of 98 N, push the orthogonal shaft (23) in the direction of the arrow with a force of 98 N, and then tighten the two set screws (28). * This adjustment should be carried out immediately after applying adhesive to the orthogonal shaft (23) and to the inside of the bearing (20) and (21).
-
Page 73: Thread Take-Up Mechanism
6. ASSEMBLY 6-5. Thread take-up mechanism Insert the roller (4) into the groove in the thread take-up cam, and then insert the thread take-up L support shaft (8). * Apply the grease specified by Brother (MOLYKOTE LONGTERM W2 manufactured by Dow Corning Corporation) in the places indicated by Apply adhesive (3M DP-125 Insert the wick (1) -
Page 74: Needle Bar Mechanism (2)
6. ASSEMBLY 6-6. Needle bar mechanism (2) * Refer to the detailed descriptions on pages 66 to 68 for details on A to F in the illustration. * Apply the grease specified by Brother (MOLYKOTE LONGTERM W2 manufactured by Dow Corning Corporation) in the places indicated by Refer to “7-30. - Page 75 6. ASSEMBLY 1. Needle bar bush U 13. Slide block 27. Needle bar guide support assembly 14. Crank rod unit plates [2 pcs] 2. Needle bar bush holder 15. Screw (Left-hand thread) 28. Screws [2 pcs] base C 16. Set screws [3 pcs] (Fully 29.
- Page 76 6. ASSEMBLY Slide block guide D installation 1) Provisionally tighten the four socket bolts (10) so that the slide block guide D (9) can still move. 2) While pushing the slide block guide D (9) gently from the face plate side toward the arm installation surface, tighten the fifth socket bolts (10) (f) from the side of the arm.
- Page 77 6. ASSEMBLY Needle bar crank forward/back adjustment 1) Align the screw stop of the needle bar crank (11) with the side where the two set screws (12) are on the upper shaft crank (h) (where the set screw (12) (j) is), and then provisionally tighten the two set screws (12) (i) and (j) so that the needle bar crank (11) can still move back and forth.
-
Page 78: Y Feed Mechanism
6. ASSEMBLY 6-7. Y feed mechanism * Refer to the detailed descriptions on pages 70 to 72 for details on A to F in the illustration. * Apply the grease specified by Brother (MOLYKOTE LONGTERM W2 manufactured by Dow Corning Corporation) in the places indicated by NOTE: After carrying out this procedure, be sure to adjust the Y home position while referring to “7-35. - Page 79 6. ASSEMBLY 1. Ball bearings [2 pcs] 14. Retaining rings C [2 pcs] 26. Socket bolts [2 pcs] 2. Ball bearing stoppers 15. Ball bearings [2 pcs] 27. Socket bolt [2 pcs] 16. Retaining ring C (Temporarily tighten) 3. Screws [2 pcs] 17.
- Page 80 6. ASSEMBLY Belt tension adjustment Repeat steps1 to 3 to adjust the belt tension until it is within the ranges given below. ・ When using a new belt: 80 - 90 N ・ When reusing an old belt: 60 - 70 N 1) Loosen the two screws (b) of the Y pulley support assembly (a).
- Page 81 6. ASSEMBLY Standard installation of motor unit <Y shaft and Y shaft holder installation positions> Align the end (A) of the Y shaft holder (36) and the reference line (B) on the Y shaft (35), and then tighten the socket bolt (37). 0846B 0847B <Y shaft and Y driving shaft holder installation positions>...
-
Page 82: Looper Base Mechanism
6. ASSEMBLY 6-8. Looper base mechanism * Refer to the detailed descriptions on pages 75 to 78 for details on A to F in the illustration. * Apply the grease specified by Brother (MOLYKOTE LONGTERM W2 manufactured by Dow Corning Corporation) in the places indicated by 7-8. - Page 83 6. ASSEMBLY 1. Wick 32. Shoulder screw <-00 and -01 specifications only> 62. Upper movable knife A 2. Spreader cam link 33. Spreader driving cam 63. Screw (Temporarily tighten) 3. Collar 64. Upper movable knife base 4. Shoulder screw 34. LS holder base 65.
- Page 84 6. ASSEMBLY Tie one end of the wick (1) once, and then push that end into the hole (a) in the support shaft base (43). * Push in so that the knot does not protrude from the hole (a). (Viewed from the front) (Viewed from the right) 1184B 1) Tie one end of the wick (8) once, and then push that end into the hole (b) in the LS holder base (34).
- Page 85 6. ASSEMBLY Hook the longer end of twist spring R (19) onto 1) Push the felt (23) into the hole in the looper link spreader R (13), and pass the shorter end through (25). the hole in the LS holder base (34) as shown in the 2) Tie the wick (24) around the looper link (25) as illustration.
- Page 86 6. ASSEMBLY 1) Tie the wick (75) around the wick release plate (78) as shown in the illustration. * Make a double knot in the wick, and then set the wick so that the distance from the knot to the end is as shown in the illustration, and cut off any excess length.
- Page 87 6. ASSEMBLY 1) Apply adhesive (Threebond 1373B) to the outer circumferences of the two ball bearings (91). 2) Insert the two ball bearings (91) into the top and bottom of the looper base mounting hole (i) in the bed. * Insert the two ball bearings (91) securely until their surfaces (j) are fully touching.
-
Page 88: Needle Bar Rocking Mechanism
6. ASSEMBLY 6-9. Needle bar rocking mechanism * Refer to the detailed descriptions on pages 80 to 84 for details on A to G in the illustration. 0922B RH-9820... - Page 89 6. ASSEMBLY 1. Bearing 11. Internal retaining ring 22. Timing belt 2. Set screws [2pcs] 12. Bearing 23. Motor stopper (Temporarily tighten) 13. Internal retaining ring 24. Socket bolts [2 pcs] 3. Set screw collar 14. Tension pulley U 4. Bearing 15.
- Page 90 6. ASSEMBLY Belt tension adjustment for needle bar gear block belt 1) Place the timing belt (8) onto the needle bar gear block (a) and the vertical shaft timing pulley U assembly (7), and then provisionally Measurement position install tension pulley U (14) so that it is gently pressing against the timing belt (8).
- Page 91 6. ASSEMBLY Belt tension adjustment for driving looper belt <Standard installation when belt is tensioned> Attach the timing belt (22) so that the distance from reference line (A) (for installation: 65 ° position) on the looper base (b) to reference line (B) on the bed is 5 mm or less when (d) of the theta M pulley assembly (18) is touching against the motor stopper (23), and then adjust tension...
- Page 92 6. ASSEMBLY Looper base and needle bar gear block position adjustment 1) Loosen the socket bolt (6) of the vertical shaft timing pulley U assembly (7). 2) Turn the needle bar gear block (a) until the socket bolt (6) of vertical shaft timing pulley U assembly (7) is toward the front when the thread guide (e) on the needle bar is at the back.
- Page 93 6. ASSEMBLY 6) Push the vertical shaft timing pulley U assembly (7) up gently until it touches the bearing (1), and then tighten the socket bolt (6). 0932B RH-9820...
-
Page 94: Lower Shaft Mechanism
6. ASSEMBLY 6-10. Lower shaft mechanism * Refer to the detailed descriptions on pages 86 to 89 for details on A to C in the illustration. Press-fit into the arm after assembling. Press-fit into the arm after assembling. 0933B RH-9820... - Page 95 6. ASSEMBLY 1. Bearing 9. Lower shaft 20. Bearings [2 pcs] 2. Bearing collar 10. Set screws [2 pcs] 21. Retaining ring C 11. Set screws [2 pcs] 22. Tension pulley collar 3. Bearing 12. Set screws [2 pcs] 4. Bearing collar 23.
- Page 96 6. ASSEMBLY Belt (upper shaft - lower shaft) installation and belt tension adjustment lower <If the belt ( shaft – upper shaft motor) is not installed (if installing the upper shaft motor later)> 1) Place the timing belt (24) (for lower shaft – upper shaft motor) into the groove (C) in lower shaft tension pulley B (7).
- Page 97 6. ASSEMBLY <If the belt (lower shaft – upper shaft motor) is installed (if the upper shaft motor is already installed)> 1) Turn the upper shaft pulley (d) to the needle up stop position. (Align the pulley groove (E) with the arm reference line (D).) 2) Remove the face plate (e) and the rubber cap (f), and then insert the accessory pin (g) into...
- Page 98 6. ASSEMBLY Lower shaft provisional installation position * This position is the provisional position for the lower shaft until the procedure in “7-5. Adjusting the looper stroke” is carried out. 1) Turn the upper shaft pulley (d) to the needle up stop position.
-
Page 99: Looper Mechanism
6. ASSEMBLY 6-11. Looper mechanism * Refer to the detailed descriptions on the next page for details on A in the illustration. * Apply the grease specified by Brother (MOLYKOTE LONGTERM W2 manufactured by Dow Corning Corporation) in the places indicated by Refer to “7-4. - Page 100 6. ASSEMBLY 1102B Install the wicks as shown in the illustration. ・ Tie in two knots. Fold twice and pass ・ Cut the ends at a through the hole. length 2 mm from the knots. (Viewed from directly above) ・ Tie in two knots. ・...
-
Page 101: Spreader Mechanism
6. ASSEMBLY 6-12. Spreader mechanism * Refer to the detailed descriptions on the next page for details on A and B in the illustration. * Apply the grease specified by Brother (MOLYKOTE LONGTERM W2 manufactured by Dow Corning Corporation) in the places indicated by 1. - Page 102 6. ASSEMBLY Install the wicks as shown in the illustration. Cut at 0 - 2 mm. Tighten so that the Tie. two fastening bands (6) are not lifted up. Tie. Set to 1 mm or less. *1: Cut the ends at a length 4 mm from the knots.
-
Page 103: Upper Thread Trimmer Mechanism
6. ASSEMBLY 6-13. Upper thread trimmer mechanism * Install in the positions shown in the illustration. Clearance: (When at maximum extension) 1. Cylinder assembly 2. Socket bolts [2 pcs] 3. Hammer 4. Hammer guide plate 5. Socket bolts [2 pcs] 6. -
Page 104: Threading Mechanism
6. ASSEMBLY 6-14. Threading mechanism * Apply the grease specified by Brother (MOLYKOTE LONGTERM W2 manufactured by Dow Corning Corporation) in the places indicated by Tighten the shoulder screw (11) followed by the nut (12) so that the gimp thread take-up driving plate (9) and the gimp thread tale-up plate (10) move smoothly with no play. - Page 105 6. ASSEMBLY 1. 2 pedal thread guide pipe <-00 and -02 specifications only> 2. Screws [2 pcs] 18. Gimp thread guide J 3. Pipe clamp plate 19. Socket bolts [2 pcs] 4. Screws [2 pcs] <-02 specifications only> 5. Thread guide pipe 20.
-
Page 106: Feed Base Mechanism
6. ASSEMBLY 6-15. Feed base mechanism Refer to the detailed descriptions on pages 102 and 103 for details on A to K in the illustration. * Apply the grease specified by Brother (MOLYKOTE LONGTERM W2 manufactured by Dow Corning Corporation) in the places indicated by 6-15-1. - Page 107 6. ASSEMBLY 1. Retaining ring C [4 pcs] 50. Clamp cylinder support 99. Nut (Temporarily tighten) 2. Ball bearings [4 pcs] 51. Set screw 100. Bolt 3. Retaining ring C [4 pcs] 52. Retaining ring E 101. Opening cylinder stopper 4.
- Page 108 6. ASSEMBLY Routing the air tubes and harnesses <-00 specifications> The air tubes and harnesses are numbered as shown in the illustration. Check the number of each air tube and harness to make sure that they are routed correctly as shown in the illustration. 0987B RH-9820...
- Page 109 6. ASSEMBLY Routing the air tubes and harnesses <-01 specifications> The air tubes and harnesses are numbered as shown in the illustration. Check the number of each air tube and harness to make sure that they are routed correctly as shown in the illustration. 0988B RH-9820...
- Page 110 6. ASSEMBLY Routing the air tubes and harnesses <-02 specifications> The air tubes and harnesses are numbered as shown in the illustration. Check the number of each air tube and harness to make sure that they are routed correctly as shown in the illustration. 0989B RH-9820...
- Page 111 6. ASSEMBLY Turn the feed base (a) upside down. Place the Place the retaining rings C (4) onto one side of four retaining rings C (1) onto one side of the the ball bearing (5), then apply adhesive four ball bearings (2), then apply adhesive (Threebond 1373B) to the ball bearing (5) and (Threebond 1373B) to the four ball bearings then insert it into the Y bearing (7).
- Page 112 6. ASSEMBLY Set the clamp lever shaft (10) so that the amount of protrusion at the end is as shown in the illustration, then assemble crank lever B (13) so that there is no clearance between it and the inside of the clamp lever shaft (10), and then tighten the socket bolt (14).
-
Page 113: Feed Shaft Holder
6. ASSEMBLY 6-15-2. X feed shaft holder * Refer to the detailed descriptions on pages 105 and 106 for details on A to D in the illustration. * Apply the grease specified by Brother (MOLYKOTE LONGTERM W2 manufactured by Dow Corning Corporation) in the places indicated by * Apply the grease specified by Brother (Shin Lube EJ manufactured by Nippon Steel Chemical Corporation) in the places indicated by... - Page 114 6. ASSEMBLY 1) Apply adhesive (Threebond 1373B) to the four ball bearings (1). 2) Insert the four ball bearings (1) into the holes in the bed so that the layout of the balls (a) is in an "X" pattern on the base of the bed as shown in the illustration.
- Page 115 6. ASSEMBLY 1) Place the feed base unit onto the bed. 2) Insert the Y feed guide shaft (16) on the left side into the hole (d) in the bed so that the end with the screw stop goes in first, and pass it through the two ball bearings (1).
-
Page 116: Feed Mechanism
6. ASSEMBLY 6-16. X feed mechanism * Refer to the detailed descriptions on the next page for details on A to C in the illustration. * Apply the grease specified by Brother (Shin Lube EJ manufactured by Nippon Steel Chemical Corporation) in the places indicated by Apply adhesive to the outer circumferences of... - Page 117 6. ASSEMBLY Assemble as shown in the Place the pulse motor X assembly (10) against the idler illustration. gear (4) so that the amount of play is 0.02 mm or less within a range of 130° as shown in the illustration, and then tighten the two set screws (9).
-
Page 118: Lower Thread Tension Mechanism
6. ASSEMBLY 6-17. Lower thread tension mechanism * Refer to the detailed descriptions on the next page for details on A in the illustration. * Apply the grease specified by Brother (MOLYKOTE LONGTERM W2 manufactured by Dow Corning Corporation) in the places indicated by Refer to “7-32. - Page 119 6. ASSEMBLY [-00 and -02 specifications only] [-01 specifications only] 1. Spring pin 1. Spring pin 2. Stopper 2. Stopper 3. Lower thread release plate 3. Lower thread take-up guide 4. Spring lever 5. Retaining ring C 4. Spring 6. Lower thread guide B 5.
-
Page 120: Upper Shaft Motor Mechanism
6. ASSEMBLY 6-18. Upper shaft motor mechanism * Refer to the detailed descriptions on pages 112 to 114 for details on A to C in the illustration. NOTE: ・ Check that the Y feed motor assembly and the pulse motor R assembly are installed before carrying out this procedure. - Page 121 6. ASSEMBLY Install so that the cord (a) is in the position Align the screw at the front of the timing pulley shown in the illustration. (3) in the direction of rotation with the screw stop on the motor shaft (b), and then tighten the screw so that the shaft projects by 0.5 - 1.0 Screw stop side...
- Page 122 6. ASSEMBLY <If the belt (upper shaft - lower shaft) is installed> 1) Remove the face plate (l) and the rubber cap (m), and then insert the accessory pin (n) into the groove (C) in the upper shaft crank from the hole (B) in the arm to stop the upper shaft from turning.
- Page 123 6. ASSEMBLY 7) Provisionally screw in the two remaining socket bolts with washers (g) at the back of the machine head until they are almost fully tightened, and then place the motor on the lower shaft side. 8) Insert a screwdriver into the gap between the motor holder (d) and the bed (k) and move the upper shaft motor unit (c) to the left to adjust the tension of the belt (h) to within the range...
-
Page 124: Covers
6. ASSEMBLY 6-19. Covers 1064B RH-9820... - Page 125 6. ASSEMBLY 1. Cam cover 2. Screws [3 pcs] 3. Needle guide cover 4. Screws [4 pcs] 5. Main plate 6. Screws [4 pcs] 7. Eye guard assembly 8. Plain washers [2 pcs] 9. Screws [2 pcs] 10. Zigzag window cover 11.
-
Page 126: Work Clamp Plate Mechanism
6. ASSEMBLY 6-20. Work clamp plate mechanism * Refer to the detailed descriptions on pages 119 and 120 for details on A to D in the illustration. * Apply the grease specified by Brother (MOLYKOTE LONGTERM W2 manufactured by Dow Corning Corporation) in the places indicated by Refer to “7-26-4. - Page 127 6. ASSEMBLY 1. Opening slide block 26. Opening slide block 2. Slide block support plate 27. Slide block support plate 3. Screws [2 pcs] 28. Screws [2 pcs] 4. Needle plate L 29. Needle plate R 5. Flat screws [2 pcs] 30.
- Page 128 6. ASSEMBLY Cloth work clamp L sideways position adjustment 1) Set so that the clearance between the clamp shaft holder (6) and clamp lever L (17) is at the distance shown in the illustration. 2) After adjusting, tighten the two set screws (20). 1009B Cloth work clamp L forward/back adjustment 1) Loosen the socket bolt (16) and then adjust the forward/back position of clamp arm L (15).
- Page 129 6. ASSEMBLY Cloth work clamp R sideways adjustment 1) Set so that the clearance between the clamp shaft holder (31) and clamp lever R (42) is at the distance shown in the illustration. 2) After adjusting, tighten the two set screws (45). 1011B Cloth work clamp R forward/back adjustment 1) Loosen the socket bolt (41) and then adjust the forward/back position of clamp arm R (40).
-
Page 130: Lower Thread Trimming Mechanism
6. ASSEMBLY 6-21. Lower thread trimming mechanism <-01 specifications> * Refer to the detailed descriptions on pages 123 and 124 for details on A to E in the illustration. * Apply the grease specified by Brother (MOLYKOTE LONGTERM W2 manufactured by Dow Corning Corporation) in the places indicated by Refer to “7-25. - Page 131 6. ASSEMBLY 1. Bush thread trimmer arm 25. Flat screws [3 pcs] 2. Screws [2 pcs] 26. Movable knife collar 3. Nut 27. Thread nipper opener 4. Spring hook 28. Shoulder screw 5. Screws [2 pcs] 29. Opener spring 30. Screws [2 pcs] 6.
- Page 132 6. ASSEMBLY Spring hook installation 1) Provisionally tighten the nut (3) about halfway onto the spring hook (4). 2) Install the spring hook (4) to the cloth work clamp plate (a), and then tighten the nut (3) until the end of the spring hook (4) is flush with the top surface of the cloth work clamp plate (a).
- Page 133 6. ASSEMBLY Insert the end of the opener spring (29) into Install all parts so that the edges are aligned as the notch (c) of the thread nipper opener (27). shown in the illustration. Align the edges. 1017B 1018B RH-9820...
- Page 134 6. ASSEMBLY <-02 specifications> * Refer to the detailed descriptions on the next page for details on F and G in the illustration. * Apply the grease specified by Brother (MOLYKOTE LONGTERM W2 manufactured by Dow Corning Corporation) in the places indicated by Refer to “7-26.
- Page 135 6. ASSEMBLY 1. Knife support washer 15. Shoulder screw 2. Flat screws [2 pcs] (Temporarily tighten) 3. Bush thread trimmer arm 16. Nut (Temporarily tighten) 4. Screws [2 pcs] 17. Movable knife driving plate 5. Nut 6. Spring hook 18. Roller 7.
-
Page 136: Upper Cover Mechanism (Upper Thread Tension Release And Upper Thread Take-Up Mechanisms And Upper Thread Path)
6. ASSEMBLY 6-22. Upper cover mechanism (upper thread tension release and upper thread take-up mechanisms and upper thread path) * Refer to the detailed descriptions on the next page for details on A to C in the illustration. * Apply the grease specified by Brother (MOLYKOTE LONGTERM W2 manufactured by Dow Corning Corporation) in the places indicated by 0857B Refer to “7-31. - Page 137 6. ASSEMBLY 1. Cylinder assembly 23. Screws [2 pcs] 42. Screws [2 pcs] 2. Cylinder joint A 43. Upper thread guide A 3. Cylinder setting plate A 24. Tension discs [2 pcs] 44. Screw 25. Tension disc presser 4. Screws [2 pcs] 26.
-
Page 138: Routing The Harnesses
6. ASSEMBLY 6-23. Routing the harnesses Route the harnesses from the various parts in the order shown in the table below. Upper tension release Stop switch solenoid <1> Cord holder Cutter sensor <2> Cord bush <3> Cord holder Main valve harness <4>... - Page 139 6. ASSEMBLY Y sensor Gimp thread solenoid Lower tension release Safety switch solenoid X motor θ motor Upper shaft motor Y motor 1107B Routing order Part name Gimp thread solenoid <12> <13> <14> Y sensor <10> <11> <13> <14> Lower tension release solenoid <12>...
-
Page 140: Routing The Air Tubes
6. ASSEMBLY 6-24. Routing the air tubes Cutter cylinder Insert the air tubes (No. 5 and No. 6) of the cutter cylinder (a) into the elbows (b) in the bed base. * Insert the air tubes into the elbows (b) with the same numbers. 1065B Upper thread cutter cylinder 1) Pass the air tubes (No. - Page 141 6. ASSEMBLY Valve unit 1) Pass the air tube (No. 1) of the valve unit (e) from the side marked with “1” into the hole in the side of the arm and out into the bottom of the bed. 2) Pass the air tube (No. 1) through the hole in the bed and out from the rear of the bed. 1069B 1070B Cutting scraps...
-
Page 142: Solenoid Valve Tubes And Functions
6. ASSEMBLY Upper tension release cylinder Pass the air tube (i) for the upper tension release cylinder through the hole in the arm and out from the side of the rear cover. (Left side of arm) 1073B Connecting the air tubes 《Solenoid valve tubes and functions》... - Page 143 6. ASSEMBLY Securing the air tubes Secure the air tubes and the harnesses with the cord holders (k) (2 places). Tubes and harnesses from the feed base 1075B RH-9820...
-
Page 144: Lubrication And Greasing And Routing The Oil Tubes
6. ASSEMBLY 6-25. Lubrication and greasing and routing the oil tubes * <1> to <8> should be done before carrying out the assembly procedure in “6-1. Cutter mechanism”. * Refer to the detailed descriptions on pages 136 to 140 for details on A to J in the illustration. 1029B RH-9820... - Page 145 6. ASSEMBLY <1> Oil tube 14. Cord holder (NK-3N) 38. Cord holder (NK-3N) <2> Felt assembly 15. Screw 39. Screw (Attach with glue) 16. Tube support 40. Sub-tank assembly <3> Tube guide 17. Socket bolts [2 pcs] 41. Socket bolts [2 pcs] <4>...
- Page 146 6. ASSEMBLY Cord holder (20) installation 1) Install the cord holder (20) so that the side with the wider hook is on the right as shown in the illustration, and then while gently pushing it in the direction of the arrow, tighten the two screws (21) to secure it in place.
- Page 147 6. ASSEMBLY Installing the lower shaft cover assembly 1) Pass the oil tube (43) through the hole (f) in the lower shaft cover assembly (32). 2) Pass the oil tube <1> from the arm through the felts. 1035B 1) Secure the oil tube (43) with the cord holder #5 (34).
- Page 148 6. ASSEMBLY 1) Insert the wicks (46) and (47) into the hole in the bed as far as they will go. 2) Push the two felts (48) into the positions shown in the illustration. 3) Insert the four wicks mentioned below into the bed hole (h).
- Page 149 6. ASSEMBLY 1) Pass the thicker oil tube (l) through the underside of the bed. 2) Pass the oil tube (l) through the hole (m), (n) in the bed and out from the looper base side. 3) Push the felt (52) in through the hole (o) in the bed so that it is touching the wick.
-
Page 150: Adjustments
7. ADJUSTMENTS 7. ADJUSTMENTS CAUTION Maintenance and inspection of the sewing machine Disconnect the air hoses from the air supply and wait should only be carried out by a qualified technician. for the needle on the pressure gauge to drop to “0” before carrying out inspection, adjustment and repair Ask your Brother dealer or a qualified electrician to of any parts which use the pneumatic equipment. -
Page 151: Adjusting The Zigzag Width (Stitch Width)
7. ADJUSTMENTS Looper height 0483B Adjust so that the positions of the eye looper (8) and the looper R (9) are as follows. • The clearance <a> between the eye looper (8) and the spreader L (1) should be equal to the thickness of the lower thread (looper thread). -
Page 152: Adjusting The Zigzag Base Line Position
7. ADJUSTMENTS 7-3. Adjusting the zigzag base line position Preparing a short customized needle Prepare a short needle as described below in order to make very small holes in a piece of paper while checking the needle drop position. 1. Use a grinder or similar to grind the tip of the currently-used needle until the length of the needle is 15 middle middle... - Page 153 7. ADJUSTMENTS Adjusting the zigzag base line position The zigzag base line is on the inside of the zigzag. If you change the zigzag width, only the outer needle drop position will change, and the zigzag base line (inner base line) will not change.
- Page 154 7. ADJUSTMENTS <Zigzag base line position adjustment> 9. Remove the face plate (8), and then loosen the socket bolt (9). 0476B 10. Open the cover (10), and then remove the cap (11). 11. Insert a flat-tipped screwdriver into the hole and turn the zigzag eccentric pin (12) to adjust the zigzag base line position.
-
Page 155: Adjusting The Needle And Looper Timing
7. ADJUSTMENTS 7-4. Adjusting the needle and looper timing NOTE: The needle bar moves through two needle drop cycles for each single turn of the upper shaft pulley. The needle drop movement toward the left side (knife cutting side) is called the “inside sewing position”, and the needle drop movement toward the right is called the “outside sewing position”. -
Page 156: Adjusting The Looper Stroke
7. ADJUSTMENTS 7-5. Adjusting the looper stroke The standard looper stroke is 2.7 mm. (It may be preferable to change this depending on the material and thread.) Carry out the adjustment in “7-4. Adjusting the needle and looper timing” before making this adjustment. 0489B 1. -
Page 157: Adjusting The Height Of The Needle Bar
7. ADJUSTMENTS 7-6. Adjusting the height of the needle bar The standard height for the needle bar is 2.5 mm. (It may be preferable to change this depending on the material and thread.) 0497B 0328B 0450B 0496B 1. Remove the face plate. 2. -
Page 158: Adjusting The Clearance Between The Loopers And Needle
7. ADJUSTMENTS 7-7. Adjusting the clearance between the loopers and needle If the needle count has been changed, always be sure to check the clearance between the needle and the loopers, and adjust the clearances if necessary. These adjustments should be made for both the inside sewing position and outside sewing position. -
Page 159: Adjusting The Spreader Installation Positions
7. ADJUSTMENTS 7-9. Adjusting the spreader installation positions 0494B 1. Loosen the set screw (4) and adjust spreader stopper L (5) so that the relative positions of the U-shaped part at the tip of spreader L (1) and the lower thread guide hole (3) in the eye looper (2) are as shown in the illustration below. 2. -
Page 160: Adjusting The Spreader Timing
7. ADJUSTMENTS 7-10. Adjusting the spreader timing Spreader R (1) (at inside sewing position) and spreader L (2) (at outside sewing position) must touch the spreader stoppers (3) and (4) respectively and stop moving immediately before the needle bar reaches its lowest position. Adjustment can be carried out more easily if it is done in manual mode. -
Page 161: Adjusting The Height Of The Throat Plate
7. ADJUSTMENTS 7-11. Adjusting the height of the throat plate <-00 and -01 specifications> <-02 specifications> (Viewed from the front) (Viewed at an angle from above-right) 0560B 0561B 1. Remove the right-side work clamp plate (1). 2. Turn the looper base (2) so that it faces as shown in the illustration. 3. -
Page 162: Changing The Cutting Length (Replacing The Hammer)
7. ADJUSTMENTS 7-12. Changing the cutting length (Replacing the hammer) The cutting length is determined by the length of the hammer. File or replace the hammer in order to change the cutting length. <For -00, -01, -02-L2634/L3442 specifications> <For -02-L1422/L1826/L2230 specifications> 0463B 1. -
Page 163: Adjusting The Cutting Surface Of The Hammer
7. ADJUSTMENTS 7-13. Adjusting the cutting surface of the hammer <Adjustment procedure> 1. Remove the hammer. (Refer to the previous page for instructions on removing the hammer.) 2. Check the cutting surface of the hammer. Refer to the illustration at left, and if the cutting surface looks like (b) - (d), file the cutting surface so that the knife incision is made evenly on the cutting surface. -
Page 164: Adjusting The Contact Between The Knife And The Hammer
7. ADJUSTMENTS 7-13-2. Adjusting the contact between the knife and the hammer The knife incision can be seen more clearly if the cutting surface of the hammer is filled over with a marker pen or similar. 1. Operate the hammer three times with the knife making a mark on it each time. 2. -
Page 165: Making The Cutter Driving Shaft And Driving Shaft Presser Move Together
7. ADJUSTMENTS 7-15. Making the cutter driving shaft and driving shaft presser move together The cutter driving shaft (2) and driving shaft presser (3) are linked by an extension spring (4) so that the hammer bracket (1) can be positioned by being pushed down by hand when aligning the needle with an eyelet buttonhole that has already been made in the material in order to resume sewing. -
Page 166: Replacing The Knife And Adjusting Its Position
7. ADJUSTMENTS 7-16. Replacing the knife and adjusting its position 7-16-1. Replacing the knife CAUTION Do not operate the sewing machine while a knife and hammer with numbers that are different from those which have been set in programs. If this is not observed, damage to sewing machine parts or the needle or serious injury may occur. 0467B <For -00, -01, -02-L2634/L3442 specifications>... -
Page 167: Making Fine Adjustments To The Knife Position
7. ADJUSTMENTS 7-16-2. Making fine adjustments to the knife position Adjust the knife position so that it cuts the material cleanly at the inside sewing position and around the eyelet. Before carrying out this adjustment, check that the procedure in “7-3. Adjusting the zigzag base line position” has been completed correctly. - Page 168 7. ADJUSTMENTS <Forward/back position adjustment> 0557B <For -00, -01, -02-L2634/L3442 specifications> <For -02-L1422/L1826/L2230 specifications> 0556B 8. Loosen the socket bolt (4), and move the knife position forward or back to adjust. 9. Once the knife position has been determined, securely tighten the socket bolt (4). 10.
-
Page 169: Adjusting The Cutting Pressure
7. ADJUSTMENTS NOTE: Relationship between needle drop position and eyelet pattern at the eyelet When switching between cutting before sewing or no cutting 0559B Eyelet pattern a x b and cutting after sewing, the needle drop position at the inside sewing position will change automatically in accordance with the eyelet pattern as shown in the illustration. -
Page 170: Adjusting The Work Clamp Lift Amounts
7. ADJUSTMENTS 7-18. Adjusting the work clamp lift amounts Adjust the work clamp lift amount <a> to one of the values given below. <For -00, -01 specifications>: 12 mm <For -02 specifications>: 16 mm The work clamp lift amount <a> is the value which includes the play in crank lever B (1) and the clamp lever (2). Carry out adjustment for both the left and right work clamps. -
Page 171: Adjusting The Work Clamp Positions
7. ADJUSTMENTS 7-19. Adjusting the work clamp positions The positions of the work clamps relative to the needle plate can be adjusted forward, back and sideways. Adjust the left and right work clamps so that they are both positioned at an equal distance from the needle drop position. (The following describes how to adjust the position of the right-side work clamp.) (Viewed from directly to the right) 0511B... -
Page 172: Adjusting The Positions Of The Work Clamp Plates
7. ADJUSTMENTS 7-20. Adjusting the positions of the work clamp plates Adjust the positions of the work clamp plates (3) so that the throat plate (1) and needle plates (2) do not touch during sewing. The standard adjustment is when there is a gap of 0.8 mm between the throat plate (1) and the needle plates (2) (when the cutting space is set to "0"). -
Page 173: Adjusting The Cloth Opening Amounts
7. ADJUSTMENTS 7-21. Adjusting the cloth opening amounts Adjust so that the opening amounts for the left and right work clamp plates (1) are equal. The cloth opening amounts should always be 0.8 mm or more on each side. <Opening amount measurement method> 0515B 1. -
Page 174: Adjusting The Upper Thread Feeding Amount
7. ADJUSTMENTS <Cloth opening amount adjustment> 0518B 8. Loosen the screw (4). 9. Insert a screwdriver into the notch in the side of the feed base, and turn the adjustment screw (5) to adjust. 10. After tightening the screw (4), measure the opening amounts once more. 11. -
Page 175: Adjusting The Lower Thread Feeding Amount <-01 Specifications Only
7. ADJUSTMENTS 7-23. Adjusting the lower thread feeding amount <-01 specifications only> It is necessary for enough tension to be applied to the lower thread during the time from when the upper thread is picked up by the eye looper at the first stitch until spreader L finishes opening, without the lower thread being pulled out by the thread nipper, so that the first stitch can be sewn correctly at the sewing start. -
Page 176: Adjusting The Upper Movable Knife
7. ADJUSTMENTS 7-24-2. Adjusting the upper movable knife The upper movable knife (1) is adjusted so that only the upper thread that is in front of looper L (2) is cut. If two of the upper thread loops (front and back) are cut, the upper thread trailing length will become too short and skipped stitches may occur at the sewing start. -
Page 177: Adjusting The Position Of The Thread Trimmer Lever Bracket
7. ADJUSTMENTS 7-24-3. Adjusting the position of the thread trimmer lever bracket The position of the needle must be adjusted so that it does not obstruct the upper movable knife when it is at the maximum zigzag width for the outside sewing position. 1. -
Page 178: Replacing And Adjusting The Movable Knife And Fixed
7. ADJUSTMENTS 7-25. Replacing and adjusting the movable knife and fixed knife (for the lower thread and gimp) <-01 specifications> 7-25-1. Replacing the movable knife and fixed knife 1. Remove the two screws (1), and then remove work clamp 0519B plate U (2). -
Page 179: Adjusting The Cutting Pressure
7. ADJUSTMENTS 7-25-2. Adjusting the cutting pressure Adjust the cutting pressure to a suitable pressure so that the threads are trimmed cleanly. NOTE: Do not apply excessive pressure. Excessive pressure will cause the knives to become worn or damaged. 0521B 1. -
Page 180: Adjusting The Thread Nipper Assembly And Opener
7. ADJUSTMENTS 7-25-4. Adjusting the thread nipper assembly and opener The lower thread must pass through thread nipper D (1) and the gimp thread must pass through thread nipper U (2). Therefore, check that the thread nipper assembly (3) is installed in the correct position and that the thread nipper opener (4) moves correctly. - Page 181 7. ADJUSTMENTS 2. The lower thread must go over the projection (9) on thread nipper M (8) and be held securely. To make sure this happens, check that the operations in (a), (b) and (c) below are all correct. 0552B (a) Thread nipper D (1) should open by 0.3 mm or more 0553B when the thread nipper opener (4) pushes down on the...
-
Page 182: Adjusting The Thread Handler
7. ADJUSTMENTS 7-25-5. Adjusting the thread handler The lower thread and gimp are securely separated and guided by the thread handler (1), after which the lower thread needs to go smoothly into thread nipper D (2), while the gimp needs to go smoothly into thread nipper U (3). NOTE: Principle of the thread handler When the thread trimmer arm operates, the throat plate (4) turns 45 degrees. -
Page 183: Replacing And Adjusting The Movable Knife And Fixed Knife (For The Lower Thread And Gimp) <-02 Specifications
7. ADJUSTMENTS 7-26. Replacing and adjusting the movable knife and fixed knife (for the lower thread and gimp) <-02 specifications> 7-26-1. Replacing the movable knife and fixed knife 1. Remove the two screws (1), and then remove work clamp plate U (2). 2. -
Page 184: Adjusting The Movable Knife Installation Position
7. ADJUSTMENTS 7-26-3. Adjusting the movable knife installation position (Viewed from directly above) (Viewed from the side at position B) (Viewed from underneath) 0528B 1. Remove work clamp plate U. (Refer to “7-26-1. Replacing the movable knife and fixed knife”.) 2. -
Page 185: Adjusting The Position Of The Sub Clamp
7. ADJUSTMENTS 7-26-4. Adjusting the position of the sub clamp Trimming of the lower thread and gimp is carried out when the work clamps rise. The sub clamp ensures that the material does not move during thread trimming, in order to maintain a stable thread length after trimming. 1. -
Page 186: Differences From Older Models
7. ADJUSTMENTS 7-26-5. Differences from older models RH-9820 RH-981A 1189B 1190B -00,-01 -00,-01 -02: L2634, L3442 -02: L5, L6, L7 -02:L1422,L2230 -02: L1, L2, L3, L4 L1826 (Position when S (Position when S hammer is being used) hammer is being used) * In order to ensure Knife installation interchangeability with the... - Page 187 7. ADJUSTMENTS RH-9820...
-
Page 188: Adjusting The Gimp Trailing Length <-02 Specifications Only
7. ADJUSTMENTS 7-27. Adjusting the gimp trailing length <-02 specifications only> The gimp is pressed against the material by means of the twisting of the first 2 - 3 stitches at the sewing start, and is then pulled out continuously. Because of this, if strong tension is applied to the gimp when the feed base is at the sewing position and the gimp trailing length (<a>... -
Page 189: Adjusting The Position Of The Lower Thread Presser <-02 Specifications Only
7. ADJUSTMENTS 7-28. Adjusting the position of the lower thread presser <-02 specifications only> Adjust the lower thread presser (1) so that it securely holds the lower thread. 0549B 0550B 0551B (Viewed from the front) (Viewed from directly above) (Viewed from directly to the right) 1. -
Page 190: Adjustment Of The Phase For The Take-Up Roller Cam
7. ADJUSTMENTS 7-29. Adjustment of the phase for the take-up roller cam 0751B 1. Remove the upper cover (1). 2. Loosen the two set screws (3) of the take-up roller cam (2). 3. Remove the face plate (4). 4. Set the sewing machine to the stopped position. 5. -
Page 191: Adjusting The Needle Bar And Looper Base Turning Center
7. ADJUSTMENTS 7-30. Adjusting the needle bar and looper base turning center The turning center for the needle bar and the looper base is accurately adjusted at the time of shipment from the factory. If the sewing machine has been disassembled (such as when replacing the needle bar gear block unit, needle bar or looper base), adjust the position of needle bar bush U (2) so that the clearance <a>... -
Page 192: Adjusting The Upper Thread Loosening Amount
7. ADJUSTMENTS 7-31. Adjusting the upper thread loosening amount 0754B 1. With the plunger (2) of the upper thread tension release solenoid (1) pushed all the way in, loosen the nut (5) and turn the bolt (3) to adjust so that the clearance between the end of the bolt (3) and the solenoid setting plate (4) is 13.8 mm. 2. -
Page 193: Adjusting The Lower Thread Loosening Amount
7. ADJUSTMENTS 7-32. Adjusting the lower thread loosening amount 0781B 1. Loosen the nut (1). 2. Turn the lower thread release plate (2) by hand or push the plunger (3) of the tension release solenoid from the back to turn the lower thread release plate (2) until the tension release pin (4) is sitting on stepped part [A]. -
Page 194: Adjusting The Looper Base Home Position
7. ADJUSTMENTS 7-33. Adjusting the looper base home position NOTE: Before carrying out this adjustment, check that the adjustments in “6-9. Needle bar rocking mechanism: Belt tension adjustment for driving looper belt” have been carried out correctly. 0749B 1. Remove the left and right work clamp plates (Z). 2. - Page 195 7. ADJUSTMENTS 5. Press the key (1) to change the offset value (B). The looper base (5) will move as the keys are pressed. Do this until the looper base reference line (0°) <b> is aligned with the bed reference line <a>. The setting range is -12.86 °...
-
Page 196: Adjusting The Feed Base X Home Position And Y Home Position
7. ADJUSTMENTS 7-34. Adjusting the feed base X home position and Y home position NOTE: Before adjusting the X home position, check that the adjustment in “6-16. X feed mechanism: Standard installation position for motor unit (idle gear adjustment)” has been carried out correctly. Before adjusting the Y home position, check that the adjustment in “6-7. - Page 197 7. ADJUSTMENTS 5. [Adjusting the X home position] (When the looper base is turned 0°) (When the looper base is turned 180°) 0765B Carry out the following adjustments so that the distances <a> (when the looper base is turned 0°) and <b> (when the looper base is turned 180°) between the end of the projection on the throat plate (5) and the sides of feed base cover R (6) and feed base cover L (7) on the feed base are equal.
-
Page 198: Adjusting The Needle Up Signal Home Position For The Upper Shaft And Upper Shaft Motor
7. ADJUSTMENTS 6. Press the ENTER key (9). The home position detection operation will be carried out, and the offset value (B) will be saved. NOTE: If you continue to the next step without pressing the ENTER key (9), the offset value will not be changed. 7. - Page 199 7. ADJUSTMENTS 4. While holding down the key (7), push the POWER switch at the ON side (8). The mode will switch to input checking mode. 5. Press the key (7) or key (9) to set the checking signal (A) to “18 (needle up signal)”. 0769B 0784B 0770B...
-
Page 200: Adjusting The Upper Shaft Stop Position
7. ADJUSTMENTS 7-36. Adjusting the upper shaft stop position Adjust the stop position so that upper thread loops are maintained when the upper thread is trimmed. 1. While holding down the keys (1), push the 0973B POWER switch at the ON side (2). 2. -
Page 201: Installing (Replacing) The Sub Clamp On The Left Side
7. ADJUSTMENTS 7-37. Installing (replacing) the sub clamp on the left side If necessary, the sub clamp can be removed from the right side and can be installed on the left side instead. In this case, the following optional parts are required. To install the sub clamp on the left side, first have the following option parts ready. - Page 202 7. ADJUSTMENTS (Bottom) (Viewed from above) 1169B 5. Remove the two screws (7), and then remove the sub clamp cylinder assembly (8). 6. Replace the air hoses (2) and (3) with the optional air hoses (9) and (10). 7. Remove retaining ring C (11) and pull out the shaft (12). 8.
- Page 203 7. ADJUSTMENTS (Top) 1171B 12. Route the tubes as shown in the illustration, and then connect the air hose (9) to the joint (4) and the air hose (10) to the joint (5). 13. Secure the air hoses (9) and (10) in four places using the four bead bands (17) as shown in the illustration. Work clamp plate R assembly (Viewed from the underside) 1172B...
- Page 204 7. ADJUSTMENTS 18. Remove retaining ring C (26), loosen the two set screws (27), and then Work clamp plate L assembly remove the clamp support shaft (28) in the direction of the arrow. (Viewed from the underside) 1173B Work clamp plate L assembly (Viewed from the underside) 1174B 19.
- Page 205 7. ADJUSTMENTS Work clamp plate R assembly (Viewed from the underside) 1175B 25. Insert the clamp support shaft (28) in the direction of the arrow, and then install retaining ring C (23). 26. Tighten the two set screws (24) so that the clearance between the clamp shaft holder (37) and clamp lever R (38) is 2.5 ± 0.5 * Check that the sides of work clamp R (39) and needle plate R (40) are aligned at this time.
-
Page 206: Electrical Mechanism
8. ELECTRICAL MECHANISM 8. ELECTRICAL MECHANISM DANGER Wait at least 5 minutes after turning off the power switch and disconnecting the power cord from the wall outlet before opening the cover of the control box. Touching areas where high voltages are present can result in severe injury. -
Page 207: Inside The Control Box And Operation Panel Structure
8. ELECTRICAL MECHANISM 8-2. Inside the control box and operation panel structure Main P.C. board Secured to the side. This is the P.C. board that controls sewing machine operation. PMD P.C. board Secured to the base plate. This P.C. board drives the pulse motors and solenoids. Power supply motor P.C. -
Page 208: Description Of Fuses
8. ELECTRICAL MECHANISM 8-3. Description of fuses When replacing the fuses, be sure to use the fuses specified below. If the components on the P.C. boards are damaged, the fuses may blow again soon even after they have been replaced. Part name Parts code Symptom when fuse blows... -
Page 209: Description Of Connectors
8. ELECTRICAL MECHANISM 8-4. Description of connectors A large number of problems are often caused by connectors that are not inserted correctly or which are contacting poorly. As a result, check that all connectors are inserted correctly and that the pins and wires are crimped properly before carrying out problem diagnosis. - Page 210 8. ELECTRICAL MECHANISM PMD P.C. board 0693B Power supply motor P.C. board 4593Q RH-9820...
- Page 211 8. ELECTRICAL MECHANISM Panel P.C. board 0694B RH-9820...
-
Page 212: Symptoms When There Are Poor Connections
8. ELECTRICAL MECHANISM 8-4-2. Symptoms when there are poor connections This divides the functions of the connectors into five sections, but some connectors have more than one function, so be sure to refer to the trouble symptoms in other sections too. Feed mechanism Trouble symptom Connector No. - Page 213 8. ELECTRICAL MECHANISM Thread trimming mechanism Trouble symptom Connector No. and position • Gimp solenoid and lower thread solenoid do not operate. (No error displayed) 0757B Sewing operations Trouble symptom Connector No. and position • Power indicator does not illuminate and sewing machine does not operate.
- Page 214 8. ELECTRICAL MECHANISM Other Trouble symptom Connector No. and position • DC fan motor does not operate. • [E740] is displayed. 0758B • Operation panel display is incorrect. • Power indicator does not illuminate. • Operation panel keys do not work. •...
-
Page 215: Troubleshooting
8. ELECTRICAL MECHANISM 8-5. Troubleshooting 8-5-1. Troubleshooting procedure Carry out troubleshooting by following the procedure given below. With the power turned off, check that all connectors are securely inserted while Checking connectors referring to “8-4. Description of connectors”. Carry out diagnosis while following the steps in “8-5-2. Diagnosis flowchart” on the next Diagnosis flowchart page, and if a problem # is reached, continue to the next procedure. -
Page 216: Diagnosis Flowchart
8. ELECTRICAL MECHANISM 8-5-2. Diagnosis flowchart Description of symbols Setting and status Switch operation Continued on previous/next page Judgment Power switch OFF “Problem” symbol in the “8-5-3. Remedy” lists 0760B RH-9820... - Page 217 8. ELECTRICAL MECHANISM 0761B RH-9820...
- Page 218 8. ELECTRICAL MECHANISM 0762B RH-9820...
-
Page 219: Remedy
8. ELECTRICAL MECHANISM 8-5-3. Remedy Problem #1 The power indicator does not illuminate when the power is turned on. Cause Inspection/Remedy/Adjustment Replacement if a malfunction 1. Malfunction of voltage select a. Check if there is a broken wire in the voltage Voltage select harness *** harness *** select harness. - Page 220 8. ELECTRICAL MECHANISM Problem #1 The power indicator does not illuminate when the power is turned on. Cause Inspection/Remedy/Adjustment Replacement if a malfunction 3. Malfunction of power cord Disconnect connector P9 (ACIN) on the power supply motor P.C. board from the circuit board, turn on the power, and then measure the voltage between pins 3-4 of the cord-side connector.
- Page 221 8. ELECTRICAL MECHANISM Problem #2 When the power is turned on, an error code is displayed. Cause Inspection/Remedy/Adjustment Replacement if a malfunction 1. If [E025] or [E035] is displayed, 1) Check if the foot switch is still depressed. Treadle unit the foot switch is still depressed.
- Page 222 8. ELECTRICAL MECHANISM Problem #3 Feed base does not move at all when the start switch is depressed. Cause Inspection/Remedy/Adjustment Replacement if a malfunction 1. Malfunction of treadle unit With connector P6 (FOOT) inserted into the main Treadle unit P.C. board, turn on the power and then measure the voltages between pins 2-3 at the cord-side connector.
- Page 223 8. ELECTRICAL MECHANISM Problem #5 When the start switch is depressed, an error code [E200] is displayed. Cause Inspection/Remedy/Adjustment Replacement if a malfunction 1. If the X feed does not operate Remove fuse F2 from the power supply motor Fuse and [E200] is displayed, there is P.C.
- Page 224 8. ELECTRICAL MECHANISM Problem #6 When the start switch is depressed, an error code [E210] is displayed. Cause Inspection/Remedy/Adjustment Replacement if a malfunction 1. If the feed mechanism does not 1) Disconnect connector P8 (YPM) from the Pulse motor Y assembly move and [E210] is displayed, PMD P.C.
- Page 225 8. ELECTRICAL MECHANISM Problem #8 Work clamp is not lowered during sewing. Cause Inspection/Remedy/Adjustment Replacement if a malfunction Malfunction of valve or valve harness 1) Check that connector P12 (AIR1) is Valve harness inserted into the main P.C. board. 2) Check the air. Problem #9 Hammer does not operate (When set to cutting before sewing).
- Page 226 8. ELECTRICAL MECHANISM Problem #11 An error code is displayed after the sewing machine operates. Cause Inspection/Remedy/Adjustment Replacement if a malfunction 1. If [E120] (Needle drop signal 1) Check that connector P5 (SYNC) is inserted Motor assembly CCD-9820 error), [E130] (Upper shaft signal into the power supply motor P.C.
- Page 227 8. ELECTRICAL MECHANISM Problem #14 Lower thread trimming does not operate. Cause Inspection/Remedy/Adjustment Replacement if a malfunction Malfunction of valve or valve harness Check that connector P12 (AIR1) is inserted Valve harness into the main P.C. board. Problem #15 Hammer does not operate (when set to cutting after sewing). Cause Inspection/Remedy/Adjustment Replacement if a malfunction...
-
Page 228: Error Codes
9. ERROR CODES 9. ERROR CODES DANGER Wait at least 5 minutes after turning off the power switch and disconnecting the power cord from the wall outlet before opening the cover of the control box. Touching areas where high voltages are present can result in severe injury. If a problem should occur with the sewing machine, the buzzer will sound and an error code and error message will appear in the display. - Page 229 9. ERROR CODES Upper shaft motor-related errors Code Cause Remedy Page Turn the upper shaft pulley until the point where the error display disappears. E110 Needle up stop position error If the error display does not disappear, turn off the power and check the connection of the synchronizer connector P5 at the power supply motor P.C.
- Page 230 9. ERROR CODES Feed mechanism-related errors Code Cause Remedy Page X-feed motor home position cannot be Turn off the power, and then check that the X-feed motor detected. connector P10 is connected at the PMD P.C. board and E200 Problem with X-feed motor or poor X home that the X pulse motor encoder connector P20 is position sensor connection.
- Page 231 9. ERROR CODES Communication and memory-related errors Code Cause Remedy Page Connection error detected between the main Turn off the power, and then check that connector P17 on E401 P.C. board and power supply motor P.C. the main P.C. board and connector P6 on the power board when the power was turned on.
- Page 232 9. ERROR CODES Software-related errors Code Cause Remedy Page Press the RESET key to clear the error. * This error is displayed when a power supply motor Program version error between main and E569* P.C.board different model installed. motor detected. Replace with the power supply motor P.C.B.
- Page 233 9. ERROR CODES Optional device-related errors Code Cause Remedy Page Sub-hammer is not set even though Turn off the power, and then check that connector P12 straight buttonhole program is being E940 and connector P24 on the main P.C. board are properly sewn.
-
Page 234: Troubleshooting
10. TROUBLESHOOTING 10. TROUBLESHOOTING • If there is a problem with operation, first check that the threads are correctly threaded and that the needle is correctly installed. • Please check the following points before calling for repairs or service. • If the following remedies do not fix the problem, turn off the power switch and consult a qualified technician or the place of purchase. - Page 235 10. TROUBLESHOOTING Problem Cause Remedy Page Broken needle Needle is bent. Replace with a new needle. Needle, looper and spreader adjustment Adjust correctly. is incorrect. 146 – 151 Needle guard is covering the needle too Adjust the needle guard. far. Select a needle that is suitable for the Instruction Needle is too thin.
- Page 236 SERVICE MANUAL Printed in Japan RH-9820 I6100920B 2007. 03. B (1)
Need help?
Do you have a question about the BH-9982 and is the answer not in the manual?
Questions and answers