Global BH 1000 Parts And Service Manual
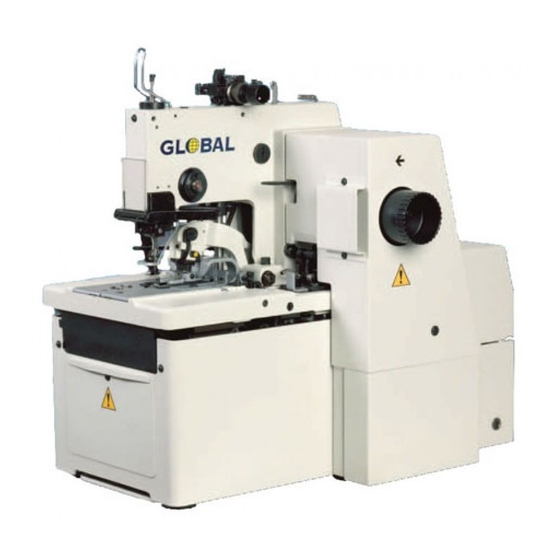
Eyelet buttonhole machine
Hide thumbs
Also See for BH 1000:
- Parts and service manual (117 pages) ,
- Parts and service manual (116 pages)

Subscribe to Our Youtube Channel
Related Manuals for Global BH 1000


Summary of Contents for Global BH 1000
- Page 1 GLOBAL BH 1000 MODEL EYELET BUTTONHOLE MACHINE PARTS AND SERVICE MANUAL I .____ ______ ___, MACHINE SERIAL N•-...
-
Page 2: Table Of Contents
GLOBAL BH 1000 TABLE OF CONTENTS Page A-INTRODUCTION l.INS1RUCTIONFORSAFETYOFWORK ........................1-l 2. INS1RUCTIONS FOR TilE SECURITY OF THE OPERATORAND MAINTENANCE ....................... 1-2 3.LI S TOFTilESAFETYLABELSANDDEVICES ......................1-4 4.POSITTONOFTilELABELSANDilffiSAFETYDEVICES ................... 1-5 B-MACHINE INSfALLATION 1.CONTENTOFTHESHIPPINGBOX ..........................1-<i 2.MACHINEUNPACKINGANDASSEMBLING ....................... 1-7 3.ADWSTMENTOFTHE T-BELT1ENSIONFORSEWING .................. -
Page 3: A-Introduction
The machine BH 1000 has safety appliance which protects operator but also machine and respects valid safety and hygienic rules for usual technological using of the machine. These safety appliances include plug of supply, operating switch ( circuit breaker) and covers. -
Page 4: Of The Operatorand Maintenance
GLOBAL BH 1000 A - INTRODUCTION 2. INSTRUCTIONS FOR THE SECURITY OF THE OPERATOR AND MAINTENANCE When the machine is set to the working area, it is recommended to keep the mirumal distance said in the drawing. DANGER! Before machine connection to the power make sure, whether all safety covers are mounted. - Page 5 GLOBAL BHI000 A - INTRODUCTION Before changing the needle, switch off the operating sv.�tch ( circuit breaker). In case when the operator will not work on the machine, disconnect the power supply by removing the plug from the socket. Before cleaning or any maintenance work on the machine, disconnect the power supply by removing the plug from the socket.
-
Page 6: Li S Toftilesafetylabelsanddevices
GLOBAL BR 1000 A - JNTRODUCTION 3. LIST OF THE SAFETY LABELS AND DEVICES GLeBAL BH 1000 Standard label. Rotational direction (located on the right cover, left side of the rear cover, motor). © Warning by the cover removing (front cover of the frame, right cover of the drive, rear folding cover, motor cover). - Page 7 2 - - - GLOBAL BH 1000 A - INTRODUCTION 4. POSITION OF THE LABELS AND THE SAFETY DEVICES Machine head Locking screw Folding ----1 Table rear cover •• = � ••> < - • - ...!::i = = = = =· � = = = = = :=:c ::i ��...
-
Page 8: B-Machine Insfallation
GLOBAL BH 1000 B - MACHINE INSTALLATION o ® "" 1. CONTENT OF THE SHIPPING BOX 0�. 1. The delivery usually contains two boxes. One box contains the table and wiring, second the head of machine. 2. The box contain also carton with accessories and operation instruction with spare parts manual and the thread stand O. -
Page 9: Machineunpackingandassembling
GLOBAL BH 1000 B - MACHINE INSTALLATION 2. MACHINE UNPACKING AND ASSEMBLING After unpacking it is necessary to put the table together according to the enclosed documentation. Delivered table is standardly took apart For connection of the table frame, use enclosed connecting parts.For ensuring of the conductive connection among all metal parts of the table is necessary to put... - Page 10 GLOBAL BH 1000 B - MACHINE INSTALLATION WA RN ING! It is commended to use original table, part number 04.90.17 .0.xxx, for delivered machine. If the user has to use another table, producer can not take the respons ibility for possible troubles. In this case it is necessary to use such equipment, which allows to reach on the left driving pulley for the machine cycle max.
- Page 11 GLOBAL BH 1000 B- MACHINE INSTALLATION Fold the rear covers and tilt the head in the frame, make rear screws accessible during the assembly. Since some deliveries can have the covers partly dismantled, fix them to their place by using drawings in parts manual.
- Page 12 GLOBAL BH 1000 B - MACHINE INSTALLATION 3. ADJUSTMENT OF THE T - BELT TENSION FOR SEWING The driving belt is placed under the right side cover. After its dismantling, loosen the pulley screw and adjust the V - belt pulley so that, so that during pushing on the front br nch of the belt , there should be a sag about 25 mm (l "), as illustrated.
- Page 13 GLOBAL BH 1000 B - MACHINE INSTLLATION 4. ADJUSTMENT OF THE LEFT T-BELT TENSION Toe access to the belt will be obtained after folding of the folding rear cover. Then adjust the idler pulley until 13 mm, (1/2") of flex is obtained in the belt, as illustrated.
-
Page 14: Threadstandinstallation
GLOBALBHl000 B - MACHINE INSTALLATION 5. THREAD STAND INSTALLATION Put the thread stand together acc ordi n g to the drawing. Position of the locking ri n g 0 allows assembly of the thread stand for various thickness of the table top. - Page 15 GLOBAL BH 1000 C - OPERI\ T OR INSTRUCTIONS 1. PREPARING TO SEW Read throu gh all safety instructions and ensure all covers are installed. Only Cord Trim - Check on the air p ressure regulator that p ressure is inrange4.5 - 5 bars ( 0.45 - 0.50 MPa ) , see note above the regulator.
-
Page 16: C-Operatorinstructions
GLOBAL BH 1000 C - OPERATOR INSTRUCTIONS 2. NEEDLEINSTALLATION Loosen needle locking screw e) and dismantle the original needle. Insert the new needle, so that the needle flat A is on opposite side from screw@ of the tension. Do not install a bent or broken needle. Roll the needle on a flat surface to check for straightens. - Page 17 GLOBAL BH 1000 C - OPERt\.TOR INSTRUCTIONS Threading the gimp and upper thread to the machine - BH 1000 To change the upper thread tension, use th e nut O. Upper thread -- .J Gimp thread 1-15...
- Page 18 GLOBAL BH 1000 C - OPERATOR INSTRUCTIONS Lower thread Use the manual nut Oto change the lower thread tension. ----· '�� � --- � 1 � _' � r ------- Lower thread 1-16...
-
Page 19: Stitches Density Adwstment - Straight Section
GLOBAL BH 1000 D - MACHINE ADJUSTMENT 1. STITCHES DENSITY ADJUSTMENT - STRAIGHT SECTION Remove auxili rear cover. Loosen the stud nut O. Shift the rod stud@ in direction 1 to increase the stitch density, in direction 2 to decrease stitch density. - Page 21 GLOBAL BH 1000 D - MACHINE ADJUSTMENT Adjustment of the main shaft brake The main shaft brake equalizes the stitch density of the buttonhole seam for the left and right-hand sides. ® Loosen the locking nut 0 ofthe adjustment screw in the main shaft brake�-...
- Page 22 GLOBALBHl000 D - MACHINE ADJUSTMENT 2. ADJUSTMENT OF THE STITCHES DENSITY IN THE EYE Fold the rear cover. Loosen the screws and€}. Move with shim@ forward operator and the stitch density will de crease. Tighten the screws and€}. � 1-20...
-
Page 24: Change Of The Buttonhole Shape
GLOBAL BH 1000 D - MACHINE ADJUSTMENT 4. CHANGE OF THE BUTTONHOLE SHAPE - CHANGE OF THE LATERAL CAM Fly bar Loosen the screw O. came. Lift the roll stud@, so that the locking lever© allows the insertion of new lateral... - Page 26 GLOBAL BH 1000 D -MACHINE ADJUSTMENT 3,4 - 4,0 mm 2,0 - 2,6 mm � 1. , � , -- - 1-24...
- Page 27 GLOBAL BH 1000 D - MACHlNE AD,TTJSTMENT Adjustment of the width bite in the cross bar The cross bar can be narrow down onl y b y maximally 0.6 mm in ad j usted width bite ; . Remove the side cover of the head.
-
Page 28: Principlesofsewing
GLOBAL BH 1000 D - MACHINE ADJUSTMENT 6. PRINCIPLES OF SEWING BH 1000 macrnne, sews two-thread, chain stitches with possibility to insert the gimp. Upper thread Lower thread Gimp 1-26... - Page 30 GLOBAL BH 1000 D - MACHINE ADJUSTMENT The looper carrier continues moving to the right, carrying the lower thread, the left-hand looper, and the spreader, fully enter the formed loop. Needle Throat plate Upper thread Gimp L.B. looper RH.looper The left-hand spreader opens, making room for the needle to pass through a loop formed by the lower thread.
- Page 32 GLOBALBHl000 D - MACHINE ADJUSTMENT The looper carrier continues moving to the left. The right-hand looper and spreader fully enter the formed loop. Needle Throat plate Upperthread Lower thread Needle guard The right-hand spreader opens, making room for the needle to pass through a loop formed by the upper thread.
- Page 33 GLOBAL BH 1000 D - MACHINE ADJUSTMENT The looper carrier moves to the right as the needle "strips" the loop previously formed. The left-hand looper enters the new loop which is being formed. Needle Upper thread Gimp Lower thread RH. loo p er & spreader R.H.
-
Page 34: Bedplaiealignment
GLOBALBHl000 D - MACHJNE ADJUSTMENT 7. BED PLATE ALIGNMENT Make the adjustment with the lateral cam for sewing of the buttonhole without eye and without fly bar. Remove feet plates and instead of stitching plate install support of the gauge from a=ssories. -
Page 35: Turning Mechanism
1-33 n---t1urning lever segment GLOBAL BH 1000 D - MACHINE ADJUSTMENT 9. TURNING MECHANISM WARNING ! This adjustment can be performed only by well trained mechanic. If 1he stitches are not vertical to 1he catted hole, it is necessary to adjust 1he turning mechanism: The machine must be in home position. - Page 36 GLOBAL BH 1000 D - MACHINE ADJUSTMENT . . . 11[=;· 5 �}) ..:--: Space 1.rowof Table slot stitches : : : stitches ..Gauge : : : : ..
-
Page 37: Stoppingmechanism
GLOBAL BH 1000 D - MACHINE ADJUSTMENT 10. STOPPING MECHANISM WARNING I Switch off the main power to prevent accidental engagement of the machine. Rotate the handle until the machine is in the home position. In the home position, the bedplate no longer moves to 1he rear. -
Page 39: Setting-Upofthemechanismforfabric Clamping
GLOBAL BHI000 D - MACHINE ADJUSTMENT 11. SETTING-UP OF THE MECHANISM FOR FABRIC CLAMPING Basic position of the feet plates with the feet is possible to adjust in position, when by turning the hand wheel the rollers are on the spreader block of the knife holder (picture, page 1-37) and feet plates are opened. -
Page 40: Clampplaie Spreading
GLOBAL BH 1000 I) - MACHJNE ADJUSTMENT 12. CLAMP PLATE SPREADING The amount of spread distance is determined by the sewing application. Loose fabric ( especially tbin) should cause stitches missing. Rotate the left-handle until the clamp plate rollers are positioned to ihe widest part of ihe spreader block .. -
Page 41: Leng1Hsetting-Upofthesecondbuttonholerow
GLOBAL BH 1000 D - MACHINE ADJUSTMENT 13. LENGTH SETTING-UP OF THE SECOND BUTTONHOLE ROW Loosen the locking nut and rotate the adjustable screw � for the correct last stitch stop location. Rotating the screw in, the second row of stitches will be shorten, rotating the screw out, the second row of stitches will be longer. -
Page 42: Needlebarheight
GLOBALBHI 000 D - MACHINE ADJUSTMENT 15. NEEDLE BAR HEIGHT Perform this ad j ustment when the machine is in the home p osition Remove the throat p late and the needle. Install the s upp ort of the gauge 0 , instead of throat p late. and check the needle bar hei ght, with the needle bar set at the Install the needle bar height g auge bottom of the stroke. - Page 43 After setting of the loopers is necessary to adjust center puncture to the buttonhole axis. Differently adjust the needle bar by the machines BH 1000, see MACHINE ADJUSTMENT ROUND BUTTONHOLE Differently position of the machine mechanisms BH 1000. The standard clearance between the loopers and needle is 0.05 to 0.1 mm, (0.002 to 0.004").
-
Page 44: Spreaders Adwstment
D - MACHINE ADJUSTMENT GLOBAL BH 1000 17. SPREADERS ADJUSTMENT © Install left and right spreader @, spreader stops and its springs Left fork spreader adjust above the hole in the left looper©. Inner side of right spreader adjust to the same level with appropriate inner side of the right looper 0. -
Page 45: Adjustmentoftheloopersmovement
GLOBAL BH 1000 D - MACHINE ADJUSTMENT 18. ADJUSTMENT OF THE LOOPERS MOVEMENT Tum the left handle of the machine until the drive shaft is released. Tum the right hand wheel until the needle bar is in the lower position of the center puncture. - Page 46 Note : Repeating the above mentioned steps is usual for reaching of the correct adjustment CA U TIO N Using BH 1000 desi ed replacement parts, will ensure the best quality and highest production possible. The part numbers are listed in the Parts Section of this manual.
- Page 55 GLOBAL BH 1000 D - MACHINE ADJUSTMENT To adjust the actuator 0, loosen the actuator Picture2 adjusting screw ®, then move the end position of the thread trimmer knife until the point of the knife passes the point of the right-hand looper,...
-
Page 56: Threaddrawoffmechanism
GLOBAL BH 1000 D - MACHINE ADJUSTMENT 25. THREAD DRAW OFF MECHANISM Basic position of the lever of the upper thread draw off is adjusted after loosing of the arresting screw@. Measure of the upp er thread draw off is... -
Page 58: E-Machinema.intenance
E - MACHJNE MAINTENANCE GLOBAL BR 1000 2. PERIODIC MAINTENANCE WA RN ING I Before making any machine maintenance, switch off the power switch ( circuit breaker), which will prevent the accidental start-up and possible operator injury. Once a day (I 0 hours of operation) -
Page 61: F -Documentation
GLOBAL BHl000 F - DOCUMENTATION 1. ELECTRICAL WIRING DIAGRAMS WARNING! If the machine is not used with standard table, it is necessary to keep the connection, which correspond to safety precaution of the country, which is pursued in. Standard table has motor 1425/1725 rotation a minute (50/60 Hz) 550 W. After machine connection is necessary to ensure electrical power supply of the machine in every fuse by the thermal fuse 10 A. -
Page 65: Diagram Of Connection3N+Pe400V/50Hz
DIAGRAM OF CONNECTION 3N+PE 400V/501-Iz MAIN SWITCH IW0RKSWIICH,CIRCa118RIIK!RI I BUS-BAR ma111.ornimc11,I socKET I FORK !MOVABLE FEEDING SOC KET TUBE FUSE PE and N WIIH0V!RCURR!H IPR0!EC!I0R MO,VOLTAGER!lEASE AUXILIARY OEYICE FORK OF THE PLUG T Q M 1 •W1 � E::J E::J 10 A E::J "'l... -
Page 66: Diagram Of Connection 3N+Pe230V/60 Hz
..• ""' DIAGRAM OF CONNECTION 3N+PE 230V/60Hz � ..MAIN SWIT CM I WORKSW llCH-CIR CUll BR!!!ER I HO-VOl T AGE RElEAS EITUB E FUSE I BUS- BAR ISOCK ETI FORK l!CURIHlK! IIIUIK0� 0 CKE TI FORK I MOVABLE FEEDING AUXILIARY DEVICE WITH0YERCUITPROTEC T IOH OF TME PLUG... - Page 68 TROUBLESHOOTING GLOBAL BH 1000 _ _ _ __.I LI _ __ P _o _ s _ s _ m _ LE_CHAN __ G_E _ · __ P_R_ o _ B_AB_LE_s_o_L_un __ o_N _ __JL_P _ A _ G_E s_YMP __ ro_MS...
- Page 69 �--- s _Y _ MP _ T _o _M ___ �I LI ___ P_o_s_s_m_L_E_C_A_u_s_E ___ ,.._ _ _ P_R_o_B_AB_L_ E _s _ o _L_u_n_ o _N _ ____, Correctly adjust the pressure. Incorrect stop mechanism function. t h Replace or correctly adjust the stop ho .
- Page 71 Needle contacts the holder. C orrectly increase the the clearance. Thread patch is worn or damaged. Replace the thread patch. ° GLOBAL BH 1000 TROUBLESHOOTING ___.11 __ o _ M ___ s_Y_MPT L... ___ P_o_s_srn _ L_ E_C_A_U_S_E _ __ P_R_O_B_AB_LE __ s_o_L_UT _ I _ O _ N _ �...
- Page 72 SYMPTOM POSSIBLE CAUSE PROBABLE SOLUTION pos1t10n. prassure. GLOBAL BH 1000 TROUBLESHOOTING � Excessive bobbin thread tension. Correctly decrease the tension. incorrect left - hand spreader Correct the left - hand spreader installation. :Needle contacts the looper. Correctly increase the clearance.
- Page 73 1IDtia p os1t1on. pos1t10n. Correctly increase the cutting width. GLOBAL BH 100{ TROUBLESHOOTING �I �I ___ � ___ s _v_MPT __ o_M_s __ P_o_s_ s _m_LE_c_A_u_s_E _ _ � _ _ P_R _ o_B_AB_L_E _ · _so_L_U_T_1 o _N _ _ �...
- Page 74 GLOBAL BH 1000 TROUBLESHOOTING...
- Page 75 Top Thread Trimmer Assembly .................... 3-27 Take-Up Lever and Top Thread Tension Assembly ............3-28 Head ............................3-29 Top Thread Trimmer Assembly Actuator ................3-30 Right Hand Stop Wheel ......................3-31 Annex 1 Global Accessories ....................3-32 Special Accessories ..................... � ..3-33...
-
Page 77: Covers And Base Assembly
1s ""'1Q &::: � r GLOBAL BH 1000 COVERS AND BASE ASSEMBLY ...,.--- �==--· _.1----1---, 11 12 13 11 37 ----39 40 3- 2... - Page 78 GLOBAL BH 1000 COVERS AND BASE ASSEMBLY DESCRIPTION DET PARTNUMBEK DESCRIPTION DET PART NUMBER 17.0019.0.441 17.0083.6.370 Bracket Washer 08.6300.8.065, Bolt 17.0026.3.231 Sprtng 17.0032.2.030 17 .0095.1.272 Washer 17.0094.0.154 Stud 17 .0095.1.273 Rubber 17.0095.1.309 Bushing 17.0075.4.012 Co-.er 17.0094.0.029 Stop 17.0042.1.279 Thread Guide 17.0019.0.346...
-
Page 79: Crankand R.h. Belt Pulley
GLOBAL BH 1000 L.H. CRANKAND R.H. BELT PULLEY PART NUMBER DliSCRIPTION PART NUMBER DESCRIPTION 17.0012.4.042 Screw 17.0033.2.133 Bushing 17.0063.5.184 Ct;ink 17.0004.3.485 Plate 17.0002.4.140 Feed Clutch 17.0013.1.343 Screw 17.0031.0.480 17.0041.2.149 Roll 17.0042.5.256 Collar 08.6850.4.000 Washer 17.0026.0.481 Spring 17.0012.0.227 Screw 17.0021.1.068 17.0027.1.463 Thread Guide 17.0042.4.120... -
Page 80: Main Stitch Shaft
GLOBAL BH 1000 MAIN STITCH SHAFT � DET PART NUMB DESCRIPTION DET PART NUMBER DESCRIPTION 17.0011.1.261 Screw 17.0067.2.098 Counterweight 17.0041.5.030 Shaft Bushing 17.0081.8.377 Washer 17.0081 .4.376 Washer 17.0013.2.120 Screw 17.0013.2.119 Screw 17.0012.0.114 Screw 18.0056.2.117 Gear 17.0041.0.232 Bushing 17.0021.1.070 17.0055.2.172 Gear 17.0043.1.011... -
Page 81: Bite Adjustment And Barrel
GLOBAL BH 1000 BITE ADJUSTMENT AND BARREL 3 7 3 6 DET PART NUMBER DESCRIPTION DET PART NUMBER DESCRIPTION 17.0019.0.364 Washer 17.0044.2.534 Knob 17.0016.1.190 17.0063.4.169 Fork Le.er 17.0016.1.140 17.0032.0.194 Stud 17.0016.1.142 17.0011.1.230 Screw 17.0019.2.061 Washer 17.0026.3.123 Spring 17 .0064.1.090 Bracket 17.0031.0.199... -
Page 82: Needle Bar Drive
GLOBAL BR 1000 NEEDLE BAR DRIVE 1 2 3 2 4 2 1 20 DET PART NUMBt:11: DESCRIPTION DET PART NUMBER DESCRIPTION 17.0017.4.058 17.0003.5.475 Eccentric 17.0019.0.371 Washer 17.0063.0.253 Rick Link 17.0019.0.225 Washer 12.2050.0.000 Bearing 17.0004. 7.242 Screw 17.0019.2.077 Washer 17.0033.0.102 17.0081.4.375... -
Page 84: Stitch Shaft And Drive
GLOBAL BH 1000 STITCH SHAFT AND DRIVE � 2 0 2 1 22 ��7 7 DET PART NUMBER DESCRIPTION PART NUMBER DESCRIPTION 18.0056.2.118 B e1,0I Gear 17.0016.1.179 17.0013.2.120 Screw 17.0032.2.282 Shaft 17.0042.5.287 Bearing 17.0019.0.222 Washer 17.0019.0.226 Washer 17.0042.5.247 Bushin g 17.0016.1.165... -
Page 85: Looperandspreaderdrive
GLOBAL BH 1000 LOOPERANDSPREADERDRIVE 1 0 1 1 12 \/ 6· � 19 / / -------,. 26 .. ··•• - 1 �,i�. - / DET PART NUMBER DESCRIPTION PART NUMBER DESCRIPTION 17.0032.2.268 Stud 17.0019.0.346 Washer 17.0014.1.015 Scriew 17.0033.3.129 Stud 17.0064.6.117 Clamp 17.0016.1.143... -
Page 86: Right & Left Loopers/Spreaders/Spreader Stops
GLOBAL BH 1000 RIGHT & LEFT LOO PERS/ SPREADERS/ SPREADER STOPS ..,LI;=;:� _,,,--33 1---'5 ------1 2 DET PART NUMBEllt DESCRIPTION PART NUMBER DESCRIPTION 17.0016.1.149 08.6010.3.006 Screw 17.0016.1.179 17.0012.1.139 Screw 17.0082.1.027 17.0003.5.711 Thread Guide Looper Canier 18.0081.8.706 Spreader Wedge 17.0033.3.158 Stud 17.0004.4.829... -
Page 87: Race
3-12 GLOBAL BR 1000 RACE - - - 1 � - - 1 5 ----.. DET PART NUMBER DESCRIPTION PART NUMBER DESCRIPTION 17.0064.7.263 17.0084.1.001 Thread Guide Throat Plate* AF 17.0026.4.035 Spring 17.0012.0.290 Screw 17.0031.0.428 17.0081.5.003 Bracket 17.0026.0.215 17.0031.0.426 Spring 17.0064.7.162 Plate 17.0073.1.018... -
Page 89: Bottom Shaftassembly
GLOBAL BR 1000 BOTTOM SHAFT ASSEMBLY �� �6 PART NUMBER DESCRIPTION DET PART NUMBER DESCRIPTION 17.0013.2.192 08. 6000 .4. 025 Screw Screw 17.0094.1.143 Bushing 17.0044.1.325 Bearing 17.0019.0.610 Washer 17.0045.9.059 Bearing Housing 17.0044.5.114 Spool 17.0019.5 .049 Washer 17.0012.0.232 Scre w 17.0019.6.033 Lockwasher 17.0094.3.142... -
Page 90: Main Cam And Brake Band
GLOBAL BH 1000 MAIN CAM AND BRAKE BAND 1 3 1 4 15 20 2 1 \ ..16 1 7 18 19 : 24 5: ..� ·• PART NUMBER DESCRIPTION DET PART NUMBER DESCRIPTION Brake Band 17.0002. -
Page 91: Sectorshaftandguard
GLOBAL BH 1000 SECTORSHAFTANDGUARD 1 3 \ 14 I � l'__j : � � 19 ✓-' : �----l _____ ( ____ _ ___, 21 ) : 18 - - - - - - __ .,, ' - - - - - - - - - - - - - - - - - - - - - - - - - - _ _.,,. -
Page 92: Cutting Leverassembly
3-17 GLOBAL BH 1000 CUTTING LEVERASSEMBLY (_ 1 5 \ � diblri 17 - - -1.l:. 1s- -� 35 36 3 7 ----28 DESCRIPTION DET PART NUMBER DESCRIPTION PART NUMBER Screw 17.0012.0.246 17.0013.4.027 Screw 17.0074.4.504 Knife Holder 17.0063.6.220 Knife Holder 17.0082.4.545... -
Page 93: Lateral Cam Shaft Assembly
2 3 2 4 10----t->-<1 GLOBAL BH 1000 � LATERAL CAM SHAFT ASSEMBLY -- l-- - - - L! - -- .:! � i:l '-----,="1 9---7.._ _,,, PART NUMBER DESCRIPTION DET PART NUMBER DESCRIPTION 17.0067.4.102 Lateral Cam 12.2010.0.002 Bearing 17 .0034.2.219... -
Page 96: Clamp Yoke Assembly
�29 � 22 2 3 24 25 3-21 GLOBAL BH 1000 CLAMP YOKE ASSEMBLY � i6 21 DET PART NUMBER DESCRIPTION PART NUMBER DESCRIPTION 17.0041.2.020 Roll 17.0031.0.430 08. 6700.6. 300 17.0012.0.233 Screw 17.0013.2.092 Screw 17.0012.0.262 Screw 17.0016.1.182 17.0031.2.022 17.0019.0.364 Washer 17.0081.5.091... -
Page 97: Clamping Lever Assembly
�Jk� ��-21 3-22 ---20 GLOBAL BH 1000 CLAMPING LEVER ASSEMBLY .c==;�ri DET PART NUMBER DESCRIPTION PART NUMBER DESCRIPTION 17.0031.1.089 08.6310.6.016 Screw 17.0026.3.256 Spring 17.0012.0.319 Screw 17.0016.1.291 17.0081.5.171 Washer 17.0033.1.011 Screw 17.0063.6.293 Clamp Arm 17.0044.1.255 Roll 17.0015.4.031 Adjustment Knob 08.6700.6.300 17.0016.1.165 17.0027.4.090... -
Page 98: Starting Leverand Switch Leverassembly
GLOBAL BH 1000 2 9 30 31 3-23 STARTING LEVERAND SWITCH LEVERASSEMBLY "" �: �!' DESCRIPTION DESCRIPTION PART NUMBER DET PART NUMBER 08.6000.5.012 Screw Starting Le-er 17.0063.6.295 Screw Washer 17.0033.2.030 17.0019.0.346 17.0031.0.396 17.0016.1.142 Screw 17.0033.3.134 17.0011.1.148 Screw Shifter Le-.er Spring 17.0063.6.297... -
Page 101: Rocking Lever
GLOBAL BH 1000 ROCKING LEVER DET PART NUMBER DESCRIPTION DET PART NUMBER DESCRIPTION 17.0063.6.312 Rocking Lel.ef Asm. 17.0002.4.121 Brake Shoe 17.0016.1.161 17.0013.1.413 Screw 17.0019.0.441 Washer 17.0061.2.415 Link 17.0094.0.172 Elastomer Spring 17.0012.6.096 Screw 17.0062.5.179 Bolt 17.0041.8.400 Roll Latch 17.0016.3.400 17.0062.5.178 17. 0041. 0. 665 Bushing 17.0013.1.461... -
Page 102: Top Thread Trimmerassembly
3-27 GLOBAL BH 1000 TOP THREAD TRIMMERASSEMBLY DET PART NUMBER DESCRIPTION PART NUMBER DESCRIPTION 17.0026.2.078 Spring Screw 17 .0015.2.110 17.0026.2.063 Spring-Jeans 17.0016.1.185 17.0082.1.167 Bracket 17.0011.1.229 Screw 17.0031.0.440 17.0063.5.266 Bracket 17.0082.6.273 Pin Holder 17.0031.8.198 Stud 17.0012.6.078 Screw 17.0083.9.268 Le"9r 17.0033.5.138 Stud 17.0031.0.328... -
Page 103: Take-Upleverand Top Thread Tension Assembly
GLOBAL BH 1000 TAKE-UPLEVERAND TOP THREAD TENSION ASSEMBLY :- � , '· ·,.._ 1 s·,. , ··..;--... __ _ •. 1 ;·-- ••.. . ·• .•. _ 1 8 l PART NUMBER DESCRIPTION 08.6850.5.000 Washer 08.6010.3.006 Screw 17.0082.1.136 Bracket 17.0044.1.286... -
Page 104: Head
GLOBAL BR 1000 HEAD �' a,.:.• -=� DESCRIPTION DESCRIPTION PART NUMBER DET PART NUMBER 17.0004.8.932 Co\er 17. 0094.5.255 Screw 170004.8.933 Co\er 17. 007 4.6. 151 Guard Screw 17.0012.4.103 Screw 08.6000.4.006 17.0011.1.251 17.0082.5.911 Bracket Screw 17.0027.1.419 Guard 08.6010.3.006 Screw 17.0013.1.415 Screw 17.0027.1.370... -
Page 105: Top Thread Trimmerassembly Actuator
3-30 GLOBAL BH 1000 TOP THREAD TRIMMERASSEMBLY ACTUATOR PART NUMBER DESCRIPTION 17.0064.6.284 Block 17.0012.0.218 Screw 17.0011.1.250 Screw 17.0016.1.165 17.0011.2.014 Screw 17.0004.4.950 Le\er 17.0012.0.217 Screw 17.0082.6.191 Plate 17 .0026.3.168 Spring 17.0004.4.951 Block 17.0032.2.305 17.0027.4.083 Lockwasher 17 .0026.3.244 Spring 17.0032.8.209 Stud... -
Page 106: Right Hand Stop Wheel
3-31 GLOBAL BR 1000 RIGHT HAND STOP WHEEL DET PART NUMBER DESCRIPTION DESCRIPTION DET PART NUMBER Stop 14.1155.1.000 17.0034.9.201 Shaft 08.6010.4.012 Screw 17.0002.4.277 Stitch Dri\e Hub Asm. 17.0017.4.075 Lock Nut 17.0021.0.021 17.0019.5.047 Lockwasher 14.1089.0.000 Clutch Dog. Asm. 17.0019.2.086 Spring Washer 08.6010.4.008... -
Page 107: Annex 1 Global Accessories
3-32 GLOBAL BH 1000 ANNEX 1 GLOBAL ACCESSORIES PART NUMBER DESCRIPTION 17.0009.4.107 Accesorv BH 1000, Basic 22.0218.0.000 Foot Pedal Assy, Wide 04.9000.0.050 Kit Transmitter Assembly 17.0067.4.153 Lateral Cam Eye Flybar 16mm 17.0067.4.157 Lateral Cam Eve Flybar 22mm 17.0067.4.151 Lateral Cam Eye Flybar 13mm 17.0064.5.849... -
Page 108: Special Accessories
3-33 GLOBAL BH 1000 SPECIAL ACCESSORIES LUBRICATING OIL ESSO ESS0 TERESTIC 68 Oil is �ed for all models of Industrial Sewing Machines and all types wnere equlprne a medium viscosity petroleum lubricanl of superior quality is indicated. AA temperatu below or aboVe 40"C. - Page 109 3-34 GLOBAL BH 1000...
- Page 110 GLOBAL BHI000 INDEX PART NUMBER PAGE DET PAGE DET PART NUMBER PAGE DET PART NUMBER 12.1014.0.004 3-31 3-12 01.5450.0.000 08.6010.4.012 3-18 12.2010.0.002 01.5450.0.000 3-31 08.6010.4.012 3-28 12.2010.1.001 01.7667.0.000 3-31 08.6010.4.012 3-31 12.2050.0.000 08.6010.5.012 02.0501.0.011 12.2050.1.001 08.6010.5.012 3-17 02.0503.3.113 3-15 3-15 12.2050.1.002...
- Page 111 INDEX GLOBAL BH 1000 PART NUMBER PAGE DET PAGE DE T PART NUMBER PAGE DET PART NUMBER 17.0011.2.014 3-30 17.0012.0.543 17.0004.4.795 3-10 3- 7 17.0012.0.543 17.0004.4.797 17.0011.2.107 3-25 17.0012.0.549 3-15 17.0004.4.806 3-13 17.0011.3.022 17.0012.0.565 3-24 17.0004.4.812 17.0011.3.113 3-17 3-22 17.001 2.0.56 8 17.0004.4.819...
- Page 112 GLOBAL BH 1000 JNDEX PART NUMBER PAGE DET PART NUMBER PAGE DET PART NUMBER PAGE DET 17.0019.0.225 3-13 17.0016.1.146 17.0013.2.090 3-14 17.0019.0.226 3-11 17.0016.1.149 17.0013.2.090 3-18 3-11 17.0019.0.228 3-26 17.0016.1.161 3-21 17.0013.2.092 3-20 17.0019.0.228 17.0016.1.165 17.0013.2.119 17.0019.0.251 3-28 3-11 17.0016.1.165 17.0013.2.119...
- Page 113 GLOBAL BHl000 JNDEX PAGE DET PART NUMBER PAGE DET PART NUMBER PAGE DET PART NUMBER 3-23 17.0026.3.271 3-26 17.0031.0.396 17.0019.6.033 3-14 3-17 17.0026.4.035 3-12 17.0031.0.405 3- 27 17 .0026.4.257 17.0031.0.406 3-12 17.0021.0.018 17.0026.4.292 3-11 17.0031.0.423 3-21 17 .0021.0.018 3-14 17 .0026.4.293 17.0031.0.425...
- Page 114 GLOBAL BH 1000 INDEX PART NUMBER PAGE DET PART NUMBER PAGE DET PART NUMBER PAGE DET 3-16 17.0043.6.018 17.0034.6.039 3-18 17.0032.1.074 17.0043.6.277 3-26 17.0034.8.068 17.0032.2.030 17.0043.6.280 17.0034.9.155 3-13 17.0032.2.030 3-21 17.0043.6.351 17 .0034.9.156 3-14 3-27 17.0032.2.204 17.0043.6.351 17.0034.9.201 3-10 17.0032.2.268 3-10 17.0043.6.352...
- Page 115 GLOBAL BH 1000 INDEX PART NUMBER PAGE DET PAG E DE T PART NUMBER PAGE DET PART NUMBER 17.0069.4.049 3-11 17 .0061.2.345 3-25 17.0064.1.089 3-13 17.0071.0.104 3-25 3-22 17.0064.1.090 17.0061.2.346 17.0071.4.170 3-19 3-26 17.0064.5.170 3-17 17.0061.2.415 17.0073.1.018 3-12 17.0064.5.753 3-19 17.0061.3.351...
-
Page 116: See
INDEX GLOBAL BHI000 PAGE DET PART NUMBER PART NUMBER PAGE DET PAGE DET PART NUMBER 17 .0094.2.092 3-15 17 .0082.5.563 3-17 3-13 17.0094.3.085 17 .0082.5.869 3-14 17.0094.3.141 3-20 17 .0082.5.884 3-14 17.0094.3.142 3-20 17.0082.5.893 17.0094.5.052 3-11 17.0082.5.898 17 .0094.5.255 3-29 3-25 17 .0082.5.904...
Need help?
Do you have a question about the BH 1000 and is the answer not in the manual?
Questions and answers