Sign In
Upload
Manuals
Brands
Global Manuals
Sewing Machine
BH-9982
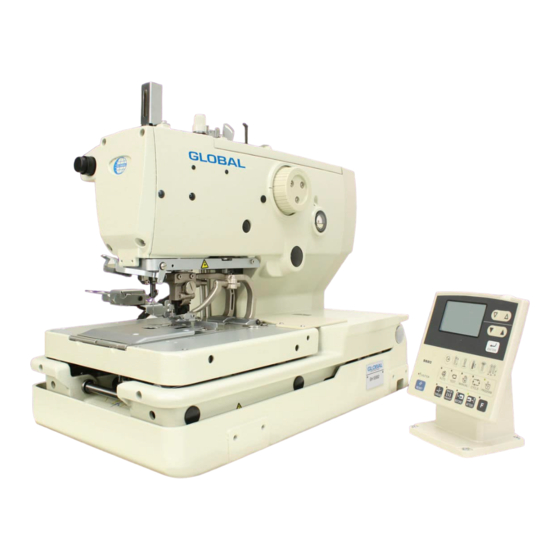
Global BH-9982 Manuals
Manuals and User Guides for Global BH-9982. We have
2
Global BH-9982 manuals available for free PDF download: Instruction Manual, User Instructions
Global BH-9982 Instruction Manual (236 pages)
Eyelet buttonhole machines
Brand:
Global
| Category:
Sewing Machine
| Size: 5 MB
Table of Contents
Table of Contents
8
Machine Specifications
10
Function Settings
11
List of Special Functions When Power Is Turned on
11
List of Advanced Functions
12
Memory Switch Setting Method (Advanced)
13
List of Memory Switch Settings
14
Error History Checking Method
23
Input Checking Method
24
Output Checking Method
27
Software Version Checking Method
30
Reading/Writing Data
31
Precautions When Handling CF Cards (Commercially Available)
31
Structure of a CF Card Folder
31
Data Read/Write Mode
32
Reading Parameter Data from the CF Card
33
Writing Parameter Data to the CF Card
33
Reading Memory Switch Data from the CF Card
33
Writing Memory Switch Data to CF Cards
33
Writing Error Log Data to the CF Card
34
Updating the Main Control Program
34
Updating the Panel Control Program
34
Mechanical Descriptions
35
Upper Shaft and Needle Bar Mechanisms
35
Zigzag and Thread Take-Up Mechanisms
36
Needle Bar Rocking Mechanism
37
Feed Mechanism
38
Presser Foot Mechanism
39
Cloth Opening Mechanism
40
Cutter Mechanism
41
Looper Mechanism
41
Spreader Mechanism
42
Upper Thread Trimmer Mechanism
42
Upper Tension Release Mechanism
43
Upper Thread Take-Up Mechanism
43
Lower Thread Release and Lower Thread Take-Up Mechanisms
44
Gimp Thread Take-Up Mechanism <-01 Specifications Only
44
Lower Thread Trimmer Mechanism
45
Disassembly
47
Covers and Presser Foot Mechanism
48
Upper Shaft Motor Unit Mechanism
49
Feed Mechanism
50
Feed Base Unit
50
Feed Unit
51
Y Feed Unit
51
Lower Thread Tension Mechanism
52
Spreader Mechanism
53
Looper Mechanism
54
Needle Bar Rocking Mechanism
55
Looper Base Mechanism
56
Needle Bar Mechanism
57
Lubrication
58
Zigzag and Thread Take-Up Mechanisms
60
Upper Shaft Mechanism
61
Cutter Mechanism
62
Assembly
63
Cutter Mechanism
64
Needle Bar Mechanism (1)
66
Zigzag Mechanism
68
Upper Shaft Mechanism
70
Thread Take-Up Mechanism
73
Needle Bar Mechanism (2)
74
Y Feed Mechanism
78
Looper Base Mechanism
82
Needle Bar Rocking Mechanism
88
Lower Shaft Mechanism
94
Looper Mechanism
99
Spreader Mechanism
101
Upper Thread Trimmer Mechanism
103
Threading Mechanism
104
Feed Base Mechanism
106
Feed Base
106
Feed Shaft Holder
113
Feed Mechanism
116
Lower Thread Tension Mechanism
118
Upper Shaft Motor Mechanism
120
Covers
124
Work Clamp Plate Mechanism
126
Lower Thread Trimming Mechanism
130
Upper Cover Mechanism (Upper Thread Tension Release and Upper Thread Take-Up Mechanisms and Upper Thread Path)
136
Routing the Harnesses
138
Routing the Air Tubes
140
Solenoid Valve Tubes and Functions
142
Lubrication and Greasing and Routing the Oil Tubes
144
Adjustments
150
Adjusting the Heights of the Spreaders and Loopers
150
Adjusting the Zigzag Width (Stitch Width)
151
Adjusting the Zigzag Base Line Position
152
Adjusting the Needle and Looper Timing
155
Adjusting the Looper Stroke
156
Adjusting the Height of the Needle Bar
157
Adjusting the Clearance between the Loopers and Needle
158
Adjusting the Needle Guard
158
Adjusting the Spreader Installation Positions
159
Adjusting the Spreader Timing
160
Adjusting the Height of the Throat Plate
161
Changing the Cutting Length (Replacing the Hammer)
162
Adjusting the Cutting Surface of the Hammer
163
Filing the Cutting Surface of the Hammer
163
Adjusting the Contact between the Knife and the Hammer
164
Adjusting the Axial Play of the Hammer
164
Making the Cutter Driving Shaft and Driving Shaft Presser Move Together
165
Replacing the Knife and Adjusting Its Position
166
Replacing the Knife
166
Making Fine Adjustments to the Knife Position
167
Adjusting the Cutting Pressure
169
Adjusting the Work Clamp Lift Amounts
170
Adjusting the Work Clamp Positions
171
Adjusting the Positions of the Work Clamp Plates
172
Adjusting the Cloth Opening Amounts
173
Adjusting the Upper Thread Feeding Amount
174
Adjusting the Lower Thread Feeding Amount <-01 Specifications Only
175
Replacing and Adjusting the Upper Movable Knife
175
Replacing the Upper Movable Knife
175
Adjusting the Upper Movable Knife
176
Adjusting the Position of the Thread Trimmer Lever Bracket
177
Replacing and Adjusting the Movable Knife and Fixed
178
Knife (for the Lower Thread and Gimp)
178
Specifications
178
Replacing the Movable Knife and Fixed Knife
178
Adjusting the Cutting Pressure
179
Adjusting the Meshing Amount
179
Adjusting the Thread Nipper Assembly and Opener
180
Adjusting the Thread Handler
182
Replacing and Adjusting the Movable Knife and Fixed Knife (for the Lower Thread and Gimp) <-02 Specifications
183
Replacing the Movable Knife and Fixed Knife
183
Adjusting the Cutting Pressure
183
Adjusting the Movable Knife Installation Position
184
Adjusting the Position of the Sub Clamp
185
Differences from Older Models
186
Adjusting the Gimp Trailing Length <-02 Specifications Only
188
Adjusting the Position of the Lower Thread Presser <-02 Specifications Only
189
Adjustment of the Phase for the Take-Up Roller Cam
190
Adjusting the Needle Bar and Looper Base Turning Center
191
Adjusting the Upper Thread Loosening Amount
192
Adjusting the Lower Thread Loosening Amount
193
Adjusting the Looper Base Home Position
194
Adjusting the Feed Base X Home Position and y Home Position
196
Adjusting the Needle up Signal Home Position for the Upper Shaft and Upper Shaft Motor
198
Adjusting the Upper Shaft Stop Position
200
Installing (Replacing) the Sub Clamp on the Left Side
201
Electrical Mechanism
206
Precautions While Carrying out Adjustments
206
Inside the Control Box and Operation Panel Structure
207
Description of Fuses
208
Description of Connectors
209
Connector Positions
209
Symptoms When There Are Poor Connections
212
Troubleshooting
215
Troubleshooting Procedure
215
Diagnosis Flowchart
216
Remedy
219
Error Codes
228
Troubleshooting
234
Advertisement
Global BH-9982 User Instructions (125 pages)
Brand:
Global
| Category:
Sewing Machine
| Size: 3 MB
Table of Contents
Safety Instructions
3
Safety Indications and Their Meanings
3
Notes on Safety
4
Environmental Requirements
4
Maintenance and Inspection
5
Warning Labels
6
Table of Contents
8
Names of Major Parts
10
Machine Specifications
11
Specifications
11
Sewing Shapes
12
Installation
13
When Setting up on Top of the Table
14
When Embedding into the Table
15
Installing the Control Box
16
Installing the Table Reinforcement Plates (Embedded Installation Only)
17
Installing the Machine Head
17
When Setting up on Top of the Table
17
When Embedding into the Table
19
Tilting Back and Returning the Machine Head
20
Installing the Belt Cover and Feed Bar Cover U
21
Installing the Oiler
21
Installing the Operation Panel
22
Installing the Cotton Stand
22
Installing the Air Unit and Valve Unit
23
Installing the 2-Pedal Foot Switch (When Using the 2-Pedal Foot Switch)
23
Installing the Treadle Unit (When Using the Treadle)
24
When Setting up on Top of the Table
24
When Embedding into the Table
24
Installing the Hand Start Switch (When Using the Hand Start Switch)
25
Connecting the Cords
27
Connecting the Connectors Inside the Control Box
27
Connecting the Ground Wire
31
Connecting the Power Cord
32
Connecting the Air Tubes
33
Securing the Cords
33
Installing the Air Hose
34
Adjusting the Air Pressure
34
Installing the Eye Guard
35
Setting the Scrap Holder for the Knife
35
Installing and Removing the Work Clamp Plates
36
Lubrication
37
Adding Oil
37
Lubrication
38
Preparation before Sewing
39
Installing the Needle
39
Threading the Upper Thread
40
Threading the Lower Thread
41
Threading the Gimp
42
Threading the Threads When the Cotton Stand Is Installed on the Right Side
43
Setting the Material
44
Using the Sewing Machine (Operation Panel: Basic Operation)
45
Name and Function of each Operation Panel Item
45
Starting the Sewing Machine
47
Program Setting Method
48
Shortcut Keys
49
Parameter List
50
Checking the Sewing Pattern in Test Mode
55
Switching Cutting Operation
57
Changing the Material Setting Position
58
Using Threading Mode
59
Using the Sewing Machine (Sewing Operation)
60
Automatic Sewing (Automatic Mode)
60
Using the STOP Switch
61
Pausing Sewing During Automatic Sewing
61
Canceling Manual Sewing or Test Feeding
63
Adjusting the Thread Tension
64
Tension Adjustment
65
Using the Sewing Machine (Operation Panel: Advanced Operation)
66
Using Cycle Programs
66
Setting Memory Switches
69
List of Memory Switch Settings
70
Resetting the Data (Initialization)
71
Changing the Production Counter Setting
72
Displaying the Help Screen
73
Manual Sewing (Manual Mode)
74
Switching the Sewing Mode While Sewing Is in Progress
76
Cleaning and Inspection
77
Daily Cleaning and Inspection
77
Cleaning
77
Checking the Air Filter
78
Checking the Needle
78
Monthly Cleaning and Inspection
78
Cleaning the Control Box Air Inlet Port
78
Cleaning and Inspection as Required
79
Draining Lubricating Oil
79
Cleaning the Eye Guard
79
Lubrication
79
Draining Water
79
Standard Adjustments
80
Adjusting the Heights of the Spreaders and Loopers
80
Looper Height
81
Adjusting the Zigzag Width (Stitch Width)
81
Adjusting the Zigzag Base Line Position
82
Adjusting the Needle and Looper Timing
85
Adjusting the Looper Stroke
86
Adjusting the Height of the Needle Bar
87
Adjusting the Clearance between the Loopers and Needle
88
Adjusting the Needle Guard
88
Adjusting the Spreader Installation Positions
89
Adjusting the Spreader Timing
90
Adjusting the Height of the Throat Plate
91
Changing the Cutting Length (Replacing the Hammer)
92
Adjusting the Cutting Surface of the Hammer
93
Filing the Cutting Surface of the Hammer
93
Adjusting the Contact between the Knife and the Hammer
94
Adjusting the Axial Play of the Hammer
94
Making the Cutter Driving Shaft and Driving Shaft Presser Move Together
95
Replacing the Knife and Adjusting Its Position
96
Replacing the Knife
96
Making Fine Adjustments to the Knife Position
97
Adjusting the Cutting Pressure
99
Adjusting the Work Clamp Lift Amounts
100
Adjusting the Work Clamp Positions
101
Adjusting the Positions of the Work Clamp Plates
102
Adjusting the Cloth Opening Amounts
103
Adjusting the Upper Thread Feeding Amount
104
Adjusting the Lower Thread Feeding Amount <-01 Specifications Only
105
Replacing and Adjusting the Upper Movable Knife
105
Replacing the Upper Movable Knife
105
Adjusting the Upper Movable Knife
106
Adjusting the Position of the Thread Trimmer Lever Bracket
107
Replacing and Adjusting the Movable Knife and Fixed Knife (for the Lower Thread and Gimp) <-01 Specifications
108
Replacing the Movable Knife and Fixed Knife
108
Adjusting the Cutting Pressure
109
Adjusting the Meshing Amount
109
Adjusting the Thread Nipper Assembly and Opener
110
Adjusting the Thread Handler
112
Replacing and Adjusting the Movable Knife and Fixed Knife (for the Lower Thread and Gimp) <-02 Specifications
113
Replacing the Movable Knife and Fixed Knife
113
Adjusting the Cutting Pressure
113
Adjusting the Movable Knife Installation Position
114
Adjusting the Position of the Sub Clamp
115
Adjusting the Gimp Trailing Length <-02 Specifications Only
116
Adjusting the Position of the Lower Thread Presser <-02 Specifications Only
117
Error Codes
118
Troubleshooting
123
Advertisement
Related Products
Global BH 1000
Global BM-9280
Global BM 345
Global BH 1793
Global BS 9917
Global B5473
Global BS 377
Global BM-9260-1
Global BM 360
Global BM 364
Global Categories
Sewing Machine
Indoor Furnishing
Fan
Industrial Equipment
Heater
More Global Manuals
Login
Sign In
OR
Sign in with Facebook
Sign in with Google
Upload manual
Upload from disk
Upload from URL