
Subscribe to Our Youtube Channel
Related Manuals for Global BH 1793


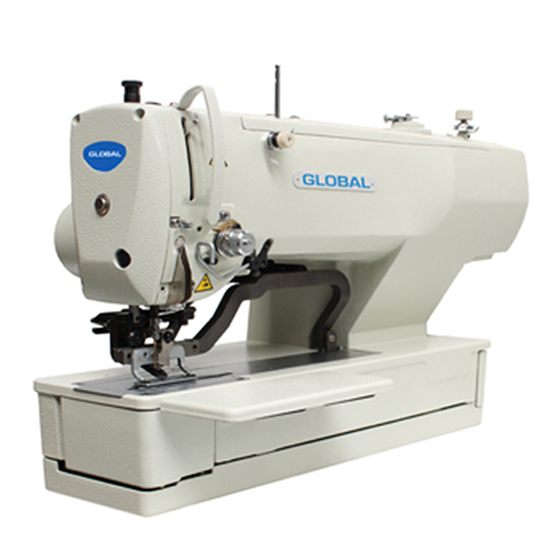
Summary of Contents for Global BH 1793
- Page 1 BH 1793 Computerized control system for square buttonhole machine Instruction & spare parts manual...
- Page 3 Computerized Control System for Square Buttonhole Machine Forewords Forewords Thank you for using our Computerized Control System for Buttonhole Machine. It is appreciated that you do read this manual carefully in order to operate the machine correctly and effectively. If the user operates the machine contrary to regulations herein, thus causes losses to user or third party, we will not take any responsibility.
- Page 5 Computerized Control System for Square Buttonhole Machine Safety Matters for Attention Safety Matters for Attention 1. Signs & Definitions of Safety Marks This User’s Manual and the Safety Marks printed on the products are for you to use this product correctly so as to be away from personal injury.
- Page 6 Safety Matters for Attention Computerized Control System for Square Buttonhole Machine Grounding is a must. If the grounding cable is not fixed, it may cause the electric-shock and mis-operation of machine The entire cables shall be fixed with a distance at 25mm away from the moving component at least. By the way, don’t excessively bend or tightly fixed the cable with nails or clamps, or it may cause the fire or electric shock.
-
Page 7: Table Of Contents
Computerized Control System for Square Buttonhole Machine Table of Content Table of Content 1 General Information ..............................1 1.1 General ................................1 1.2 Function and Specification ..........................1 1.3 Standardization ..............................2 1.4 Matters for Safe Using ............................. 2 1.5 The Preventions on Instruction ........................4 1.6 Operation Method ............................ - Page 8 Table of Content Computerized Control System for Square Buttonhole Machine 5 Continuous Sewing ..............................49 5.1 Function List ..............................49 5.2 Edition of Continuous Sewing ........................50 5.2.1 Selection of Continuous Sewing Pattern ..................... 50 5.2.2 Edition of Continuous Sewing Pattern ....................50 5.2.3 Continuous Sewing Pattern Registration ...................
- Page 9 Computerized Control System for Square Buttonhole Machine Table of Content 9.1 Check the Maintenance Information ......................104 9.2 Set the Maintenance Time ..........................106 9.3 Method to Release the Warning ........................107 9.4 Information of Production Control ......................108 9.4.1 Via Information Interface ......................... 108 9.4.2 Via Sewing Interface ........................
-
Page 11: General Information
Computerized Control System for Square Buttonhole Machine General Information 1 General Information 1.1 General This computerized control system for sewing machine features the following advantages: 1) Adoption of the world leading AC servo control technology on main shaft motor provides high torque, good efficiency, stable speed and low noise;... -
Page 12: Standardization
General Information Computerized Control System for Square Buttonhole Machine Input Voltage AC175V~AC265V Motor Small AC Servo Motor 400W Direct Driving Size Width 200mm、Height 360mm、Length 570mm Head Weight 70Kg Presser Specification: Presser 1 Presser 2 Presser 3 Presser 5 Width 3-6mm(Set at will) Sewing Length (Max) 25mm 35mm... - Page 13 Computerized Control System for Square Buttonhole Machine General Information If other attachments are needed, please turn off the power and pull off the power plug. Power Cable Do not press power cable with force or excessively twist power cable. The power cables shall be fixed with a distance at 25mm away from the rotating component at least.
-
Page 14: The Preventions On Instruction
General Information Computerized Control System for Square Buttonhole Machine The meaning of the figure are shown at below:。 1.5 The Preventions on Instruction Warning 1、When you leave the machine, please turn it off. 3、If user needs tilt the head or replace the 4、Grounding the machine with ground cable needle or thread the Needle thread, please turn off the power... -
Page 15: Operation Method
Computerized Control System for Square Buttonhole Machine General Information 8 、 Please keep it away from the machine 9、f user needs the external signal socket to creating the high cyclic disturbance connect the attachments, the connecting wire shall be as short as possible. The long cable may cause the wrong operation. -
Page 16: Sewing List
General Information Computerized Control System for Square Buttonhole Machine Never use sharp object to touch the screen, otherwise the touching panel will suffer the permanent damage. 1.7 Sewing List 05 Radial Straight 01 Square 02 Round 03 Radial Square 04 Radial Bar-tacking 06 Radial Taper 09 Eyelet Straight... -
Page 17: Preparation Before Sewing
Computerized Control System for Square Buttonhole Machine Preparation before Sewing 2 Preparation before Sewing 2.1 Installation of Needle In order to avoid the personal injury caused by the sudden start of machine, user has to turn off power and make sure the motor stops before performing the following operation 1)... -
Page 18: Installation Of Bobbin
Preparation before Sewing Computerized Control System for Square Buttonhole Machine As shown in the picture above, please follow the steps from 1 to 12. At threading, the threading device can help user to d this job in an easy and fast way. 2.3 Installation of Bobbin In order to avoid the personal injury caused by the sudden start of machine, user has to turn off power and make sure the motor stops... -
Page 19: Threading At Bobbin
Computerized Control System for Square Buttonhole Machine Preparation before Sewing 2.4 Threading at Bobbin In order to avoid the personal injury caused by the sudden start of machine, user has to turn off power and make sure the motor stops before performing the following operation 1)... -
Page 20: Installation Of Knife
Preparation before Sewing Computerized Control System for Square Buttonhole Machine When the threading open ① is at up position, user need pull out the bobbin thread upward and adjust the tension in the way below: Straight Hold and swing the thread from bobbin case, the case will go down 0.05~0.15N Buttonhole slightly. - Page 21 Computerized Control System for Square Buttonhole Machine Preparation before Sewing 1) Remove the knife screw ② to disassemble the knife ① and shim. 2) Press the knife and adjust the distance from the knife to the needle plate to 1~2mm as shown in the picture at above.
-
Page 22: Method For Adding Oil
Preparation before Sewing Computerized Control System for Square Buttonhole Machine 2.7 Method for Adding Oil In order to avoid the personal injury caused by the sudden start of machine, user has to turn off power and make sure the motor stops before performing the following operation 1)... -
Page 23: Operating Instruction
Computerized Control System for Square Buttonhole Machine Operating Instruction 3 Operating Instruction 3.1 Name and Description of Each Part (Front) (Right Side) ① Touch Panel • LCD Displayer ② READY Key → Shift between the data input interface and sewing interface Information Key →... -
Page 24: Common Buttons
Operating Instruction Computerized Control System for Square Buttonhole Machine 3.2 Common Buttons The buttons for the common operation in each interface are shown at below: Figure Functions Remarks ESC → Quit the current interface. At data change interface, it is for cancelling the change of data. -
Page 25: Operation Of Normal Pattern
Computerized Control System for Square Buttonhole Machine Operating Instruction ③ Set machine to Ready Sewing Status Press READY key . The back-light of LCD displayer changes to blue color and the machine is ready for sewing. Area A is to set the speed and Area B is to display the customer management. - Page 26 Operating Instruction Computerized Control System for Square Buttonhole Machine ② Press to sleet the normal sewing mode ③ Press and then press to display the main interface of Normal Sewing ④ Select the sewing pattern ⑤ Set the necessary sewing parameter ⑥...
-
Page 27: Operation Of Continuous Sewing
Computerized Control System for Square Buttonhole Machine Operating Instruction ⑧ Press to enter the sewing interface for sewing ⑨ Set knife and speed at sewing interface ⑩ Set the counter ⑪ Select the Trial Sewing if necessary ⑫ Drop the presser, step the pedal and start sewing 3.5 Operation of Continuous Sewing The interface for the continuous sewing is shown... - Page 28 Operating Instruction Computerized Control System for Square Buttonhole Machine ② Press then select ③ Press and then press to display the main interface of continuous sewing ④ In the main interface of continuous sewing, please add the pattern used and the cloth-feeding amount.
-
Page 29: Operation Of Cyclic Sewing
Computerized Control System for Square Buttonhole Machine Operating Instruction ⑥ Press to enter the sewing interface for sewing ⑦ Set knife and speed at sewing interface ⑧ Set the counter ⑨ Select the Trial Sewing if necessary ⑩ Drop the presser, step the pedal and start sewing 3.6 Operation of Cyclic Sewing The interface for the cyclic sewing is shown at right. - Page 30 Operating Instruction Computerized Control System for Square Buttonhole Machine ② Press then select ③ Press and then press to display the main interface of cyclic sewing ④ In the main interface of cyclic sewing, please select the fabric ⑤ Move the sewing position and add the pattern for cyclic sewing ⑥...
- Page 31 Computerized Control System for Square Buttonhole Machine Operating Instruction ⑧ Press to enter the sewing interface for sewing ⑨ Set knife, tension and speed at sewing interface ⑩ Set the counter ⑪ Select the Trial Sewing if necessary ⑫ Drop the presser, step the pedal and start sewing...
-
Page 32: Normal Pattern Sewing
Normal Pattern Sewing Computerized Control System for Square Buttonhole Machine 4 Normal Pattern Sewing When the system is sold, the default mode in it is the normal pattern sewing mode. The operation steps of it are described in “3. Operation Instruction”. In this chapter, we will give the detailed description on this mode. 4.1 Function Keys (1)Interface for Inputting Sewing Data The interface of data input is shown as the Figure... - Page 33 Computerized Control System for Square Buttonhole Machine Normal Pattern Sewing Figure Function Remarks Winding Pressing this button can enter the pattern selection Pattern No. Selection interface Set Upper-Thread Tension S52 and S56 will be influenced by the data switch (S51,S52,S55,S56) of sewing.
- Page 34 Normal Pattern Sewing Computerized Control System for Square Buttonhole Machine (2)Interface of Sewing Press to enter the Sewing Interface shown as the figure at right. For detailed functions please take the Function Key List for reference. Function Key List: Figure Function Remarks P Pattern Selection Key...
-
Page 35: Pattern Registration
Computerized Control System for Square Buttonhole Machine Normal Pattern Sewing Figure Function Remarks Left Width of Knife Groove Right Width of Knife Groove Length of Cloth Cutting Single Stitching/ Double Stitching Numbers of Basting Total Number of Stitches Current Sewing Speed Counter Value :Sewing Counter :No. - Page 36 Normal Pattern Sewing Computerized Control System for Square Buttonhole Machine ② Select the 1st bar-tacking Sewing shape After setting the pattern number, user can press to enter the interface for selecting the 1st bar-tacking sewing shape (as shown in right figure).
-
Page 37: Pattern Copy
Computerized Control System for Square Buttonhole Machine Normal Pattern Sewing 4.3 Pattern Copy ① Select the target pattern Press to enter the interface for copying the pattern (as shown in right figure). A 、Among the registered patterns, select the pattern number of the copied one and press . -
Page 38: Pattern Naming
Normal Pattern Sewing Computerized Control System for Square Buttonhole Machine 4.4 Pattern Naming Press to enter the interface for naming pattern (as shown in the right figure), 12 figures can be inputted at the most. :Icon Right-moving :Icon Left-moving :Caps Locks :Eraser A、Select the figure wanted, press to end the... -
Page 39: Winding
Computerized Control System for Square Buttonhole Machine Normal Pattern Sewing 4.6 Winding ① Install the shuttle core Fit the shuttle core fully onto the winder shaft. Then push the thread guide in the direction of the arrow (as shown in the figure in right) ②... -
Page 40: Select The Type Of Presser
Normal Pattern Sewing Computerized Control System for Square Buttonhole Machine Select the Type of Presser ① Display the data input Interface Only at the data input interface (orange), can user change the contents of setting. In the sewing interface (blue), press READY key to display the data input interface. -
Page 41: Pattern Selection
Computerized Control System for Square Buttonhole Machine Normal Pattern Sewing 4.8 Pattern Selection Press to enter the interface for selecting pattern (as shown in the right figure), the upper area shows the shape and relevant data of the selected pattern while the lower area shows the registered number of the pattern. -
Page 42: Sewing Shape Selection
Normal Pattern Sewing Computerized Control System for Square Buttonhole Machine 4.9 Sewing Shape Selection Press to enter the interface for selecting the sewing shape ① Select the 1 bar-tacking There are five common 1 bar-tacking shapes, which are Square Type, Radial Type, Eyelet Type, Semi-lunar Type and the Round Type. - Page 43 Computerized Control System for Square Buttonhole Machine Normal Pattern Sewing ② Finish the sewing shape selection Select the end shape; press to return to the main interface. Press to quit directly. The shape number will not be changed either ③ Parameter K04 K04 = 12 K04 = 20 K04 = 30...
-
Page 44: Sewing Data Setting
Normal Pattern Sewing Computerized Control System for Square Buttonhole Machine 13 Semi-lunar 14 Semi-lunar 15 Semi-lunar Taper 11 Semi-lunar 12 Round Square Square Straight Bar-tacking Bar-tacking 19 Square 16 Eyelet Semi-lunar 17 Eyelet Round 18 Square Radial 20 Square Round Semi-lunar 21 Square Straight 22 Square Taper... - Page 45 Computerized Control System for Square Buttonhole Machine Normal Pattern Sewing Select to enter the interface (as shown in right). Select to enter the interface(as shown in right). ② Sewing Data List The sewing data is related to the sewing shape selected. The different shape has the different sewing data with different default values In mode status, user can set whether to open some sewing data.
- Page 46 Normal Pattern Sewing Computerized Control System for Square Buttonhole Machine Item Range Unit Remarks Length of cloth cutting This item sets the length of cloth that is cut by knife. However, in case of the shapes of No. 27, 28, 29 and 30, sewing length 3.0~120.0 0.1mm will be set.
- Page 47 Computerized Control System for Square Buttonhole Machine Normal Pattern Sewing Item Range Unit Remarks Left Taper Bar-tacking This item sets length of bar-tacking section in taper 0.00~3.00 0.05mm Remarks 1 bar-tacking shape Right Taper Bar-tacking This item sets length of bar-tacking section in taper 0.00~3.00 0.05mm Remarks 1...
- Page 48 Normal Pattern Sewing Computerized Control System for Square Buttonhole Machine Item Range Unit Remarks Clearance This item sets the clearance between 1st bar-tacking and knife 0.0~4.0 0.1mm groove. This item is applied to all shapes Clearance This item sets the clearance between 2nd bar-tacking and knife 0.0~4.0 0.1mm groove.
- Page 49 Computerized Control System for Square Buttonhole Machine Normal Pattern Sewing Item Range Unit Remarks Compensation of Left Side Position at Basting Remarks 2 This item sets the adjustment amount of the standard sewing -2.0~2.0 0.1mm Remarks 3 position at basting from the center of left over-edging. Compensation of Right Side Position at Basting Remarks 2 This item sets the adjustment amount of the standard sewing...
- Page 50 Normal Pattern Sewing Computerized Control System for Square Buttonhole Machine Item Range Unit Remarks Set Needle Thread Tension at Sewing Start 0~200 Set the needle thread tension of bar-tacking at sewing start Set the Needle Thread Tension at Basting 0~200 Remark 3 Set the needle thread at basting ACT Timing Adjustment at 1st Bar-tacking Start...
- Page 51 Computerized Control System for Square Buttonhole Machine Normal Pattern Sewing Item Range Unit Remarks Knife motion This item sets "With/without motion" of knife。 :Knife Off :Knife On Knife motion at 1st lap of double stitching This item sets "With/without motion" of cloth cutting knife at 1st lap at double stitching Remarks 2 Remarks 3...
-
Page 52: Direct Selection Of Pattern
Normal Pattern Sewing Computerized Control System for Square Buttonhole Machine 4.11 Direct Selection of Pattern The user can register the 10 frequently used patterns to the direct keys for selecting directly, press enter the interface of selection as shown below. 4.12 Trial Sewing (1)Display the interface of sewing... - Page 53 Computerized Control System for Square Buttonhole Machine Normal Pattern Sewing (2)Display of Trial Sewing In the sewing interface. Press to enter the trial sewing interface (As Shown at Right): :Return to Origin :Return :Forward :Tension at Stitch Point :Current/ Total Stitch Number :Sewing Order :Thread Trimming Order :Jump Feed Order...
-
Page 54: Set Needle Thread Tension
Normal Pattern Sewing Computerized Control System for Square Buttonhole Machine 4.13 Set Needle Thread Tension At Changing the Thread Tension ① Display the Data Input Interface Only on the data input screen (orange) or sewing screen (blue), needle thread tension can be changed. At the sewing screen (blue), press READY switch and display the data input screen (orange). -
Page 55: Operation Of Counter
Computerized Control System for Square Buttonhole Machine Normal Pattern Sewing Set value on panel In case of the radial eyelet shape, Initial set the bar-tacking value tension to ①Parallel 120 Crest is lowered Crest is raised approximately 120 section tension Zigzag ②Bar-tacking and make the... -
Page 56: Emergency Stop
Normal Pattern Sewing Computerized Control System for Square Buttonhole Machine 4.15 Emergency Stop When STOP switch is pressed during sewing, the sewing machine interrupts sewing and stops. The interface, as the figure at right, is displayed Press to release the error. And the interface of single-step motion comes out (shown as the figure at right) The operation is same as the operations in trial sewing. -
Page 57: Vdt Pattern Operation
Computerized Control System for Square Buttonhole Machine Normal Pattern Sewing 4.12 VDT Pattern Operation 4.12.1 Display and Operation of VDT Pattern User can use the pattern-making software to create the patterns in VDT format. By inputting it from U disk to memory, the user can activate the data input interface and sewing interface as below: Press to enter the sewing data setting interface,... -
Page 58: Sewing Data Of Vdt Pattern
Normal Pattern Sewing Computerized Control System for Square Buttonhole Machine 4.12.2 Sewing Data of VDT Pattern Sewing Data List of VDT Pattern: Item Range Unit Initial Value Right Width of Knife Groove Set the interval between the knife and right -2.00~2.00 0.05mm parallel part. -
Page 59: Continuous Sewing
Computerized Control System for Square Buttonhole Machine Continuous Sewing 5 Continuous Sewing This kind of sewing can sew 6 shapes at most without lifting presser. At most, 50 continuous sewing patterns can be registered. 5.1 Function List Figure Function Remarks New Pattern Registration Pattern Copy Pattern Naming... -
Page 60: Edition Of Continuous Sewing
Continuous Sewing Computerized Control System for Square Buttonhole Machine Figure Function Remarks Sub-pattern Selection Sewing Data Edition 5.2 Edition of Continuous Sewing 5.2.1 Selection of Continuous Sewing Pattern Press to enter the interface for selecting the pattern (as shown in right figure). Please operate in the following way: A、Press &... - Page 61 Computerized Control System for Square Buttonhole Machine Continuous Sewing Figure 2 Figure 1 ② Select Pattern Press to enter the interface for selecting pattern (as shown in right figure) A、In this interface, there are two ways to select pattern: Press to input the pattern number Input pattern number directly B、Press...
- Page 62 Continuous Sewing Computerized Control System for Square Buttonhole Machine ③ Change Sewing Data Press to enter the interface for setting the sewing data (as shown in figure 2 at right). Figure 1 Figure 2...
-
Page 63: Continuous Sewing Pattern Registration
Computerized Control System for Square Buttonhole Machine Continuous Sewing 5.2.3 Continuous Sewing Pattern Registration 50 continuous patterns can be registered for the most. press to enter the interface of Pattern Registration (shown as the right figure) : ① Input Pattern No. Input the number of the pattern via key board. -
Page 64: Continuous Sewing Pattern Copy
Continuous Sewing Computerized Control System for Square Buttonhole Machine 5.2.4 Continuous Sewing Pattern Copy ① Select the target pattern Press to enter the interface of pattern copy (as shown at right). Among the registered patterns, select the pattern number of the copied one and press Press to check the pattern shape... -
Page 65: Deletion Of Continuous Sewing Pattern
Computerized Control System for Square Buttonhole Machine Continuous Sewing 5.2.5 Deletion of Continuous Sewing Pattern ① Select the target pattern Press to select pattern. Press return to the main interface, as shown at right. Press to delete the continuous sewing pattern ②... - Page 66 Continuous Sewing Computerized Control System for Square Buttonhole Machine ③ Finish the Deletion After deleting the continuous sewing pattern, user can have system to return to main interface. Then user can edit the pattern again.
-
Page 68: Continuous Sewing Interface
Continuous Sewing Interface Computerized Control System for Square Buttonhole Machine 5.3 Continuous Sewing Interface Press to enter the interface for sewing (as shown in right figure). 5.3.1 Function List Figures Functions Remarks Trial Sewing Knife Function Shift knife functions Threading (Presser Down) Winding Pattern Number Display Needle Thread Tension Setting... -
Page 69: Trial Sewing For Continuous Sewing
Computerized Control System for Square Buttonhole Machine Continuous Sewing Interface Figures Functions Remarks Length of Cloth Cutting Single Sewing/ Double Sewing Number of Basting Stitch Number Current Sewing Speed Counter Value :Sewing Counter :No. of piece counter Speed Setting Pattern Number Input at Continuous Sewing Data Display of Sewing Shape 5.3.2 Trial Sewing for Continuous Sewing (1)Display the interface of sewing... - Page 70 Continuous Sewing Interface Computerized Control System for Square Buttonhole Machine (2)Display of Trial Sewing In the sewing interface. Press to enter the trial sewing interface (As Shown at Right): :Return to Origin :Return :Forward :Tension at Stitch Point :Current/ Total Stitch Number :Sewing Order :Thread Trimming Order :Jump Feed Order...
-
Page 72: Cyclic Sewing
Cyclic Sewing Computerized Control System for Square Buttonhole Machine 6 Cyclic Sewing This function is used to sew several patterns in a cyclic order. User can input as many as 30 shapes within a cyclic sewing pattern. At most, 50 cyclic sewing patterns can be registered. -
Page 73: Edition Of Cyclic Sewing
Computerized Control System for Square Buttonhole Machine Cyclic Sewing Figure Function Remarks Selection of Fabric Sewing Data Change Direction Key 9~12 Pattern Selection Delete Sub-pattern Delete the sub-pattern covered by icon Enable to delete the entire sub-pattern within Delete All Sub-pattern the current cyclic sewing Sewing Order 6.2 Edition of Cyclic Sewing... -
Page 74: Pattern Copy
Cyclic Sewing Computerized Control System for Square Buttonhole Machine 6.2.2 Pattern Copy ① Select the target pattern Press to enter the interface of pattern copy (as shown at right). Among the registered patterns, select the pattern number of the copied one and press Press to quit the copy operation. -
Page 75: Selection Of Cyclic Sewing Pattern
Computerized Control System for Square Buttonhole Machine Cyclic Sewing 6.2.3 Selection of Cyclic Sewing Pattern Press to enter the interface for selecting the cyclic sewing pattern (as shown in right). The operation is same to the operation of normal pattern selection. Press to quit the pattern selection 6.2.4 Edition of Cyclic Sewing Pattern... - Page 76 Cyclic Sewing Computerized Control System for Square Buttonhole Machine ② Pattern Selection :Input number to inquire patterns :Delete the pattern :Shift to selection of patterns for continuous sewing Select the proper pattern and press to end the selection. Press to quit directly. ③...
-
Page 77: Change Fabric
Computerized Control System for Square Buttonhole Machine Cyclic Sewing 6.2.5 Change Fabric Press to enter the interface for selecting the fabric (as shown in right figure).In this section, the user can modify the reference design in the interface of sewing data input. Press to quit;... -
Page 78: Cyclic Sewing Interface
Cyclic Sewing Interface Computerized Control System for Square Buttonhole Machine 6.3 Cyclic Sewing Interface Press to enter the sewing interface (as shown in right) 6.3.1 Function List Figures Functions Remarks Trial Sewing Knife Function Shift the knife activation Threading (Presser Down) Winding Pattern Number Display Needle Thread Tension Setting... -
Page 79: Right Width Of Knife Groove
Computerized Control System for Square Buttonhole Machine Cyclic Sewing Interface Figures Functions Remarks Right Width of Knife Groove Length of Cloth Cutting Single Sewing/ Double Sewing Number of Basting Stitch Number Current Sewing Speed Counter Value :Sewing Counter :No. of piece counter Speed Setting Sewing Order Reverse Return to the previous sewing order... -
Page 80: Trial Sewing At Cyclic Sewing
Cyclic Sewing Interface Computerized Control System for Square Buttonhole Machine 6.3.2 Trial Sewing at Cyclic Sewing (1)Display Sewing Interface At data input interface, press , the background of screen will change to blue, and the system enters the interface of sewing。 (2)Display of Trial Sewing In the sewing interface. - Page 81 Computerized Control System for Square Buttonhole Machine Cyclic Sewing Interface (3)Start Trial Sewing By using to start trial sewing. Under this mode, step on the pedal switch to start the machine for sewing the leftover stitches (4)End Trial Sewing Press to return to the sewing interface from trial sewing interface...
-
Page 82: Mode Setting
Mode Setting Computerized Control System for Square Buttonhole Machine 7 Mode Setting Press to shift between the Data Input Interface and Mode Interface (as shown in the right figure), and the detailed edition and setting can be carried out under this interface. Note: For some button, user has to hold open them. -
Page 83: Function List
Computerized Control System for Square Buttonhole Machine Mode Setting 7.1 Function List Figure Function Remarks Level 1 Parameter Setting Sewing Data Edition P Pattern Setting Initialization Software Version Inquiry Keyboard Lock User Management Setting Test Mode Sewing Type Setting Brightness Adjustment Level 2 Parameter Setting Counter Setting Parameter Back-up &... -
Page 84: Level 1 Parameter Setting
Mode Setting Computerized Control System for Square Buttonhole Machine 7.2 Level 1 Parameter Setting ① Set Parameter Select to enter the interface of Level 1 parameter setting (shown as the figure at right). Press to quit the setting interface When some parameters are changed, the system will display the “Modified”... - Page 85 Computerized Control System for Square Buttonhole Machine Mode Setting ② Parameter Encryption A、Press “Encryption” to enter the password input interface. Press to clear all the content Press to erase one figure at each pressing B、 Input the right password to enter the interface for parameter encryption Select the parameter for encryption Press 【Select All】...
- Page 86 Mode Setting Computerized Control System for Square Buttonhole Machine ③ Check the changed parameters A、 When parameter is changed, the system will display “Modified” key at parameter setting interface. B、 In the parameter setting interface, press 【 Modified 】 to check the changed parameters.
- Page 87 Computerized Control System for Square Buttonhole Machine Mode Setting Parameter Range Unit Default value Lifting position of presser foot of 2-pedal 5~95 Operation of 2-pedal is set Set needle thread tension at sewing end 0~200 Needle thread tension at thread trimming 0~200 Needle thread tension at basting 0~200...
-
Page 88: Level 2 Parameters Setting
Mode Setting Computerized Control System for Square Buttonhole Machine Parameter Range Unit Default value start distance Input the distance for needle thread trimmer motor to release the trimmer at sewing start. Bobbin thread trimming release motion 0~15.0 0.1mm 1.5mm start distance Input the distance for bobbin thread trimmer motor to release the trimmer at sewing start. - Page 89 Computerized Control System for Square Buttonhole Machine Mode Setting ② Parameter Encryption For the steps of the parameter encryption, please refer to “7.2 Level 1 Parameter Setting”. Press to quit the parameter encryption interface. ③ Check the changed parameters When parameter is changed, the system will display “Modified”...
- Page 90 Mode Setting Computerized Control System for Square Buttonhole Machine Parameter Range Unit Default value Selection of machine type (0-Standard type,1-Non-oil Type) Set max. speed limitation 400~4200 100rpm 3600rpm When K06 Selection of machine type is set to non-oil type, max speed is automatically limited to 3,300 rpm.
-
Page 91: Counter Setting
Computerized Control System for Square Buttonhole Machine Mode Setting Parameter Range Unit Default value Presser lifter speed selection K189 Adjustment of Thread-breakage Detection Sensitivity 1~10 K190 Adjustment on sensitivity of button K200 Restore to original parameters ※ Protected by Password 7.4 Counter Setting Press to enter the interface for counter setting(as... -
Page 92: Functions
Mode Setting Computerized Control System for Square Buttonhole Machine of counter exceed warning will be displayed. Press to restore the existing value to 0 No of piece DOWN counter: Every time a cyclic sewing or a continuous sewing is performed, the existing value is counted down 1. When the existing value is reached to "0", the interface of counter exceed warning will be displayed. -
Page 93: Settings On User Management
Computerized Control System for Square Buttonhole Machine Mode Setting 7.5 Settings on User Management Register parameters which are frequently used to Management button and use them. Press to enter user management setting interface (shown as the right figure) ①Register to Management Button The management buttons can be registered up to four buttons. -
Page 94: Edition Of Sewing Data
Mode Setting Computerized Control System for Square Buttonhole Machine :Compensation of bar-tacking width, left : Compensation of bar-tacking width, right; :Setting of needle thread tension at the start of sewing 7.6 Edition of Sewing Data Some sewing data can be set to be opened, press to enter the interface of sewing data edition under the Mode Setting Level 2 (as shown in the right figure) :Sewing data is opened... -
Page 95: Change Sewing Mode
Computerized Control System for Square Buttonhole Machine Mode Setting 7.7 Change Sewing Mode Press to enter the interface of sewing type selection (as shown in the right figure). :Normal Sewing :Continuous Sewing :Cyclic Sewing After confirming the sewing type, press to end the operation. - Page 96 Mode Setting Computerized Control System for Square Buttonhole Machine Press to enter the interface of direct button registration (as shown in right figure). Press to quit the Pattern Registration Function 10 pattern numbers can be registered to the direct buttons at most. On 10 displayed direct buttons, the user presses the button he wishes to register, and then enters the pattern select interface.
-
Page 97: Test Mode
Computerized Control System for Square Buttonhole Machine Mode Setting 7.9 Test Mode In the Mode Setting Level 2 interface, press to enter the interface of Test Mode (as shown in right). The function of each figure is shown as below: Name I01 Needle thread trimming I02 Down thread trimming... - Page 98 Mode Setting Computerized Control System for Square Buttonhole Machine necessary value, at last press F to return to the origin. ③ Press to return to the Test Mode Interface (2)Adjustment of Down Thread Trimmer ① Adjusting Method In the interface of Test Mode, press (I02 Down thread trimming)to enter the adjustment interface of Down thread trimming (as shown in the right figure):...
- Page 99 Computerized Control System for Square Buttonhole Machine Mode Setting E:Head Tilt Sensor F:Stop Switch G:Needle Rocking Sensor H:Semi-lunar Sensor of Sewing Machine I:Y Feeding Origin J:Presser Origin K:Needle Thread Trimming Motor Origin L:Bobbin Thread Trimmer Motor Origin (4)Inspection of LCD Display In the interface of Mode Inspection, press (I04 Inspection of LCD Display) to enter the interface of LCD...
- Page 100 Mode Setting Computerized Control System for Square Buttonhole Machine (5)Correction of Touching Panel A、 In the interface of Mode Inspection, Press (I05 Correction of Touch Panel). Then system will hint user 【Enter Touching Panel Correction Mode?】. Press to enter the interface for Touch Panel Correction (as shown in right figure).
- Page 101 Computerized Control System for Square Buttonhole Machine Mode Setting (7)Speed Test ① Interface for Speed Test In the interface of Mode Inspection, Press (I07speed test) to enter the interface for Speed Test (as shown in right figure). The speed of main shaft motor can be tested in that interface.
-
Page 102: Brightness Adjustment
Mode Setting Computerized Control System for Square Buttonhole Machine 7.10 Brightness Adjustment In the Mode Setting Level 2 interface, press enter the interface for brightness adjustment (as shown in right figure), the brightness value can be adjusted from 20 to 100 by pressing , it also can be adjusted by inputting the value via keyboard. -
Page 103: Continuous Sewing Interface
Computerized Control System for Square Buttonhole Machine Mode Setting under the pattern number. Only can the available figures shown under the status of keyboard locking. ③ Scope of locking keyboard 1.Normal sewing data input interface: 1) Pattern Registration 2) Pattern Copy 3)... -
Page 104: Initialization
Mode Setting Computerized Control System for Square Buttonhole Machine 7.12 Initialization Press to enter the interface for setting the keyboard lock. In this interface, user can operate: U Disk Initialization Memory Initialization Customized Initialization Press the relating functions keys and enter the corresponding interface. - Page 105 Computerized Control System for Square Buttonhole Machine Mode Setting ② Press “Memory” to initialize memory patterns The following patterns can be initialized: Normal Pattern Continuous Sewing Pattern Cyclic Sewing Pattern Registered P Pattern Press to initialize all the files in memory Press to quit ※...
-
Page 106: Parameter Back-Up & Restoration
Mode Setting Computerized Control System for Square Buttonhole Machine ④ Under the Interface of Custom Initialization, press to display the free room of the memory and the number of patterns in each format. Press to return to the upper interface. 7.13 Parameter Back-up &... -
Page 108: Communication
Communication Computerized Control System for Square Buttonhole Machine 8 Communication At Communication, user can perform the following functions: Download the sewing data made at other sewing machines or produced by the pattern-designing software to the sewing machine; Load sewing data to U disk or computer Load parameters from U disk Input the parameters within the operation panel to U disk Update the software within the operation panel... -
Page 109: Pattern Transfer
Computerized Control System for Square Buttonhole Machine Communication 8.3 Pattern Transfer ① Display the Communication Interface In communication interface, press: A: Input patterns from U Disk to Operation Panel B: Output patterns from Operation Panel to U Disk Path of U Disk:DH_PAT ※... - Page 110 Communication Computerized Control System for Square Buttonhole Machine to display the interface shown at F、Press right. Input the pattern number for saving; Press to copy the selected pattern within U Disk and save it to the pointed pattern number and return to the upper interface Press to quit.
-
Page 111: Parameter Transfer
Computerized Control System for Square Buttonhole Machine Communication 8.4 Parameter Transfer ① Display the Communication Interface In communication interface, press: A: Input parameters from U Disk to Operation Panel B: Output parameters from Operation Panel to U Disk ※ When inputting patterns from U disk, user has to save the parameters into the DH_PARA in the U disk with name PS_Param. -
Page 112: Software Update
Communication Computerized Control System for Square Buttonhole Machine ③ Press Button B to Output Parameters to U Disk A、Press to output parameters from operation panel to U disk and quit B、Press to quit directly 8.5 Software Update ① Display the Interface In Communication interface, press A to enter Software Update Interface... - Page 113 Computerized Control System for Square Buttonhole Machine Communication ② Update Selection The software update contains: Operation Panel Software Icon Font Power-on Screen Press to turn the page A、Press to finish the selected update and quit B、press to quit directly C、User can select several items for update at same time.
-
Page 114: Information
Information Computerized Control System for Square Buttonhole Machine 9 Information There are three functions in the information function as below 1)Oil replacement time, needle replacement time, cleaning time and so on, are designated and the warning notice is performed when the designated time has passed; 2)Speed can be checked at a glance, and the target achieving consciousness of group is increased as well, by using the function to display the target value and the actual value. - Page 115 Computerized Control System for Square Buttonhole Machine Information ② Display the maintenance interface。 Please press button (B)。 Information on the following three items is displayed in the maintenance information interface. :Needle replacement (1,000 stitches) :Cleaning time (hour) :Oil replacement time (hour) Each item is displayed as C.
-
Page 116: Set The Maintenance Time
Information Computerized Control System for Square Buttonhole Machine 9.2 Set the Maintenance Time ① Display the information interface (maintenance personnel level) In the data input interface, hold the information key (A) for 3 second, the interface of information (maintenance level) will be displaced. In the interface, 6 keys are displayed. -
Page 117: Method To Release The Warning
Computerized Control System for Square Buttonhole Machine Information ③ Maintenance Setting In the maintenance information interface, the same information as that in the normal maintenance interface is displayed. Press button (C) to activate the relating input interface. Press to set the time for cleaning. Press to quit to information interface ④... -
Page 118: Information Of Production Control
Information Computerized Control System for Square Buttonhole Machine • Needle Replacement :M031 • Oil Replacement Time:M032 • Cleaning Time :M033 9.4 Information of Production Control In the production control interface, the system can display the number of production from the start to present and the target number of production, as long as, receiving the start order. -
Page 119: Via Sewing Interface
Computerized Control System for Square Buttonhole Machine Information There are five items displayed on the interface of production control as below: A:Existing Target Value The number of current target pieces is automatically displayed according to the pitch time. B:Actual Result Value The number of the finished pieces is displayed automatically. -
Page 120: Setting Of Production Control Information
Information Computerized Control System for Square Buttonhole Machine 9.4.3 Setting of Production Control Information ① Display the production control interface Press to display the production control interface ② Input the Final Target Value At first, please input the number of production target pieces in the process to which sewing is performed from now on. - Page 121 Computerized Control System for Square Buttonhole Machine Information ③ Input Pitch Time Then please input the pitch time needed in one process. Press the Pitch Time Key (D) in the former page to enter the interface for inputting the pitch time. Press the number keys or the “+”...
- Page 122 Information Computerized Control System for Square Buttonhole Machine ⑤ Start to count number of production pieces Press (I); then the 【Final Target Value】, 【Existing Target Value】 and 【Actual Result Value】 will go dark and the system will start counting the number of the production pieces.
-
Page 123: Threading Figure
Computerized Control System for Square Buttonhole Machine Information ⑦ Clear the counted value When clearing the counted value, make sure the counter is stopped, and then press Clear Key The present target value and the actual value can be cleared. (Note:The Clear Key can only be displayed at the counter stopping.)... -
Page 124: Warning Record
Information Computerized Control System for Square Buttonhole Machine 9.6 Warning Record ① In the interface of maintenance level, press the inquire the warning records. ② Press to check the records As in the picture, the warning information and the times of occurrence are displayed Function of Keys:... -
Page 125: Running Record
Computerized Control System for Square Buttonhole Machine Information ③ Press the number key at the left of the column to display the details of the warning records Press “ ” to hint the information at right A、Press to quit 9.7 Running Record ①... -
Page 126: Setting Of Periodical Password
Information Computerized Control System for Square Buttonhole Machine ② The Running records contain: :Accumulated running time(Hour) :Accumulated times for thread trimming :Accumulated time of power-on (Hour) : Accumulated number of stitch (1000stitch) A. Press to quit B、Press to clear the record 9.8 Setting of Periodical Password ①... - Page 127 Computerized Control System for Square Buttonhole Machine Information ② Press To input User ID ③ Input the Correct Factory ID to enter the password setting interface Procedure for setting the periodical password: A、 Continue inputting other periodical passwords...
- Page 128 Information Computerized Control System for Square Buttonhole Machine ④ Input Board Number Press 【Board Number】 to enter the board number input interface. Input the board number and press to finish the input ※ The board is a four-figure number, from 0~9999 ⑤...
- Page 129 Computerized Control System for Square Buttonhole Machine Information ⑥ Input the super password Press the【Super Password】 to enter the interface for setting super password ※ At most, nine super passwords can be input ※ At the password confirmation, make sure the two input passwords are same ⑦...
- Page 130 Information Computerized Control System for Square Buttonhole Machine ⑧ Input other periodical password The setting of other periodical password is same to that in step ⑦. Please take the reference to that ※ The next activation date shall be later than the previous date.
- Page 131 Computerized Control System for Square Buttonhole Machine Information ⑨ Save Password A 、 After inputting the password, please press to save it. B、After the password is saved, the system will display【Save the password successfully】. Press to finish the operation and return to the 【main interface of information】.
- Page 132 Information Computerized Control System for Square Buttonhole Machine Clear Password at Activation If the system has password and that password is still effective, it will be activated at the activation day. If user wants to use the machine he should input the right password.
-
Page 134: Warning List
Appendix 1 Computerized Control System for Square Buttonhole Machine 10 Appendix 1 10.1 Warning List Name of Problem How to recover E-001 Pedal not at intermediate Position Self-recovery E-002 Emergency stop Press “Reset” E-004 Main voltage(300V)too low Turn off Machine E-005 Main voltage(300V)too high Self-recovery... -
Page 135: Hint List
Computerized Control System for Square Buttonhole Machine Appendix 1 Name of Problem How to recover E-043 Parameter transfer error Press E-044 Head board EEROM I/O error Press E-254 Undefined error Press 10.2 Hint List Name Content M-001 Set value too large Please input value within range M-002 Set value too small... - Page 136 Appendix 1 Computerized Control System for Square Buttonhole Machine M-026 No warning record M-027 Clear warning record Are You Sure?Yes:enter No:X M-028 USB is pulled out USB is pulled out M-029 Can not find pattern in U disk Software version is saved to the root directory of U M-030 Save software version successful disk...
-
Page 137: Common Problems And Solutions
Computerized Control System for Square Buttonhole Machine Appendix 1 Press Enter to recover default setting M-064 EEPROM knife parameter error M-065 Restore all the settings Are You Sure?Yes:enter No:X M-066 Restore the selected items Are You Sure?Yes:enter No:X M-067 Not select an item Please select one or several parameters Are You Sure?Yes:enter No:X M-068... - Page 138 Appendix 1 Computerized Control System for Square Buttonhole Machine E-008 Supplementary device 1、 Check the connection of cable L451 (X16 Port (24V) over-voltage Cable on control box); E-009 Supplementary device 2、 Check needle-thread-trimming motor and bobbin thread-trimming motor (24V) low-voltage E-013 Encoder error or 1、...
- Page 139 Computerized Control System for Square Buttonhole Machine Appendix 1 Cable on control box); 4、 Check the feeding motor and its cable(X13 Port Cable on control box), as well as its connection 5、 Enter the Input Test Mode and check the feeding origin sensor.
-
Page 140: Default Values Of Sewing Shapes
Appendix 1 Computerized Control System for Square Buttonhole Machine Cable on control box) 4、 Check the connection of cable L451; 5、 Check the motor and its connecting cables. If the motor has problem, please replace the motor. E-030 1、 Check the Connection of the Cable C059-1 (inside control box) Step driver 2、... -
Page 141: Length Of Cloth Cutting
Computerized Control System for Square Buttonhole Machine Appendix 1 Item Unit Sewing Shape Length of cloth 12.7 12.7 12.7 12.7 12.7 12.7 12.7 12.7 12.7 12.7 12.7 12.7 12.7 12.7 12.7 cutting Knife groove width, 0.10 0.10 0.10 0.10 0.10 0.10 0.10 0.10... -
Page 142: Number Of Basting
Appendix 1 Computerized Control System for Square Buttonhole Machine Single/ Double - Single Single Single Single Single Single Single Single Single Single Single Single Single Single Single Sewing Select Cross at - < < < < < < < < <... - Page 143 Computerized Control System for Square Buttonhole Machine Appendix 1 Bar-tacking - Tension Bar-tacking - Tension Set Needle Thread Tension at Sewing - Start Needle Thread Tension at - Basting Timing Stitch Adjustment at 1st Bar-tacking Start Timing Stitch Adjustment at Right Over-edging Start Timing Stitch...
- Page 144 Appendix 1 Computerized Control System for Square Buttonhole Machine Horizontal Adjustment of Bar-Tacking Sewing at Sewing End Knife motion - Knife motion at 1st lap of double - stitching Speed 3600 3600 3600 3600 3600 3600 3600 3600 3600 3600 3600 3600 3600...
- Page 145 Computerized Control System for Square Buttonhole Machine Appendix 1 Length of Eyelet - - - - - - - - - - - - - buttonhole Number of stitches 针 - - - - - - - - - - -...
- Page 146 Appendix 1 Computerized Control System for Square Buttonhole Machine Right Side Position at Basting Basting Speed 2000 2000 2000 2000 2000 2000 2000 2000 2000 2000 2000 2000 2000 2000 - Pair-sewing - - - - - - Pair-sewing Width -...
- Page 147 Computerized Control System for Square Buttonhole Machine Appendix 1 Sewing at Sewing Start Horizontal Adjustment of Bar-Tacking Sewing at Sewing Start Bar-tacking Width at Sewing End Bar-tacking Stitch Number at Sewing Stitch Vertical Adjustment of Bar-Tacking Sewing at Sewing Horizontal Adjustment of Bar-Tacking Sewing at Sewing End...
-
Page 149: Installation Size Of Control Box
Computerized Control System for Square Buttonhole Machine Appendix 2 11 Appendix 2 11.1 Installation Size of Control Box At present, there are two installation types for the controller, which are 4-hole installation and 3-hole installation. Please refer to the picture at below for the detailed size: Figure 1 4-hole Installation Figure 2 3-hole Installation... -
Page 150: Installation Size Of Operation Panel
Appendix 2 Computerized Control System for Square Buttonhole Machine 11.2 Installation Size of Operation Panel Figure 3 Installation Size of Operation Panel... -
Page 151: System Diagram
Computerized Control System for Square Buttonhole Machine Appendix 2 12.3 System Diagram...
Need help?
Do you have a question about the BH 1793 and is the answer not in the manual?
Questions and answers