Table of Contents
Advertisement
Quick Links
Advertisement
Chapters
Table of Contents

Related Manuals for Global ZZ-2565 AUT Series


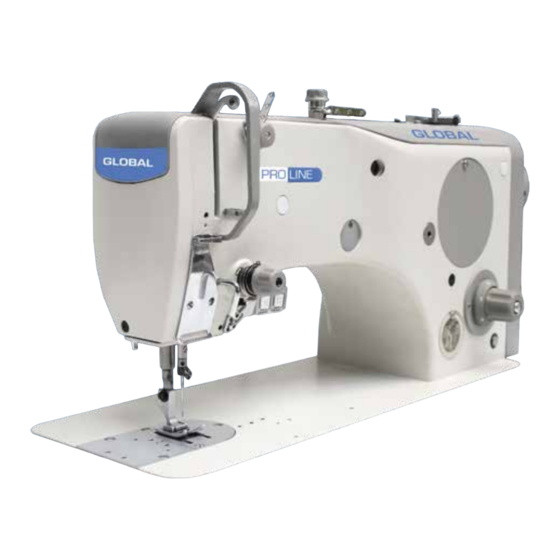
Summary of Contents for Global ZZ-2565 AUT Series
- Page 1 ZZ-2565/2567/2568 AUT SERIES INSTRUCTION MANUAL & PARTS LIST...
- Page 2 2565/2567/2568 AUT SERIES INSTRUCTION MANUAL...
-
Page 3: Table Of Contents
CONTENT 1 Safety operating guide........2 2 Operating notice..........2 3 Operating condition...........2 4 Chief specification...........2 5 Install belt..........3 6 Install belt cover..........3 7 The needle bar position adjustment......4 8 Operation guide..........4 9 To lubricate the machine........4 10 The hook lubricating condition adjustment.....4 11 Time machine cleaning.........5 12 Wind the bobbin..........5 13 Install the needle..........6... - Page 4 36 Form stitch of patterns cam with part number....17 37 Backtacking with solenoid........18 38 Presser foot lifting..........19 39 Bobbin winder..........20 40 Thread trimming..........20 41 Machine electronic control and drive......21...
-
Page 5: Safety Operating Guide
Thank you to choose zigzag stitch series industrial sewing machine This is an instruction manual & parts list, it could help you how to use machine & how to care of machine correctly and make you convenience to look up parts. In order to avoid trouble occurring, please read this instruction manual carefully before operating machine, and please accept safety operating guides with come from special technicians or peoples of having operator experiences. -
Page 6: Install Belt
Stitch type double thread zig-zag lockstitch Stitch length max.5mm Foot lifting with hand lever 12mm Foot lifting with knee lever or solenoid Lubricating mode Semi-automatic lubricating Needle system 134;134-35 DC mot Manually controlled subclass or-positioning motor without further functions Solenoid-controlled subclass DC motor (AC servo) positioning motor with reverse run after thread trimming Sewing head weight... -
Page 7: The Needle Bar Position Adjustment
The needle bar stop position adjustment If the localizer adopts external hanging type, please refer to the motor instruction book for the adjustment method → “Up” Position When the pedal is kicked down by heel, the machine should stop at “Up” position, i.e. the highest position of take-up lever. →... -
Page 8: Time Machine Cleaning
Time machine cleaning The hook, feed dog and other parts of machine should be cleaned daily, and drop two or three coal oil into hook and other parts that need to be lubricated. Clean all the spilth after ending of highest speed operation of machine, then lubricate the machine with oil. -
Page 9: Bobbin Fixing And Hook Threading
Insert the needle Please use DPx17 NO. 90-120 needle, the thickness of needle should be decided according to the thickness of sewing material & thread. When insert the needle, rotate the hand wheel until the needle bar has reached its top position, loosen the screw on the lower part of the needle bar and insert the needle. Be sure that the long groove of the needle directly toward the operator and check whether the needle shank has reached the bottom of the needle hole. -
Page 10: To Thread Upper Thread
To thread upper thread Let the take up lever (A) at its highest position. Then threading as shown in picture. Unwind a sufficient portion of thread, and pass it through the thread guide (1) and (2), then lead it through the tension assembly (3) and thread take up spring (4), thread guides (5) and (6) into the thread take up lever (A). -
Page 11: The Thread Take Up Spring Tension Adjustment
The thread take up spring tension adjustment Loosen thread tension assembly screw (1), take away the thread tension assembly from machine to adjust the take up spring (4). Firstly loosen the screw (2) of bushing (3), and then adjust the angle position of lever (5). - Page 12 Setting of zig-zag stitch width (throw) and position Attention! At setting the zig-zag stitch width (throw) and position the needle must not be inside the sewn material. There is a threat of the needle breaking! Setting of zig-zag stitch width Press the lever (1) in the arrow direction (A) until it strikes the lever (2).
-
Page 13: Tooth Clearance Setting Of Zigzag Stitch Gear
Tooth clearance setting of zigzag stitch gear The tooth clearance of zigzag stitch should be as small as possible. No overlap instead of clearance, however, may arise in any mutual position of the gears. → Dismantle the machine top cover. →... -
Page 14: Zigzag Stitch Width
→ Fix the lever (5) so that the mark (6) is located opposite the zero on the zigzag stitch scale (7). Zigzag stitch width The zigzag stitch width setting must be limited to the value prescribed for the applied sewing equipment with the setting tolerance -5% of the prescribed value. →... -
Page 15: Lateral Setting Of Needle Stab Position
Lateral setting of needle stab position Both dead centers of the needle lateral motion at the zigzag stitch sewing should be at the same distance from the throat plate needle hole edges. → Dismantle the cover (1) and the hole stop (2) from the rear side. →... -
Page 16: Lateral Setting Of Straight Stitches On Throat Plate Needle Hole Edges, Arresting Of Zigzag Stitch Setting Mechanism
Lateral setting of straight stitches on throat plate needle hole edges, arresting of zigzag stitch setting mechanism If the sewing equipment allows using the maximum zigzag stitch width, which is characteristic of the particular machine type, the position of the border straight stitches should be adjusted so that it aligns with the zigzag stitch border. If the throat plate needle hole is narrower than the maximum zigzag stitch width of the particular sewing machine type, the lever for the position setting of the border stitch must be fixed in the central position. -
Page 17: Bobbin Case Driver
Bobbin case driver The distance between the bobbin case driver and the bobbin case groove bottom should be (A)=0.7mm. → Dismantle the throat plate and tilt the machine. → Loosen the screw (1). → Shift the driver (2) to the distance (A)=0.7mm. →... -
Page 18: Timing Between Needle And Feed Dog Motion
Timing between needle and feed dog motion(see below picture) When needle point A reaches needle plate top surface B, feed dog surface C should be keep accordant on height with needle plate top surface. It is the standard synchronous relationship. Adjusting method as below: →... -
Page 19: Form Stitch Of Patterns Cam Series
Form stitch of patterns cam series The setting should be carried out in the sequence as described herein. Tooth clearance setting of form stitch gear The tooth clearance of the form stitch gear should be as small as possible. No overlap instead of clearance, however, may arise in any mutual position of the gears. -
Page 20: Setting Of Needle Stab Position
Setting of needle stab position If the wheel steering cam of the straight stitch is mounted, the needle should be located in both directions in center of the throat plate needle hole. → Adjust the needle position in feeding direction as per section 24 →... -
Page 21: Backtacking With Solenoid
Backtacking with solenoid At the maximum stitch length, at the backtacking mechanism dislocation with the solenoid, its movable core should not strike the fixed one. → Set the maximum stitch length. → Press the backtacking lever down to the stop and hold it in this position. →... - Page 22 Foot lifting with knee lever Regulation The foot stroke with the knee lever should be 12.5mm, the space (A) = approximately 2mm if the knee lever is in the initial position. → Lower the presser foot on the throat plate. →...
-
Page 23: Bobbin Winder
Bobbin winder Regulation If the bobbin winder is switched off, the space between the driving and driven wheels of the bobbin winder should be as small as possible, but they must not touch each other. When winding the thread, the bobbin winder should automatically switch off when the thread is wound up to 0.5mm under the bobbin outer diameter. - Page 24 Trimming lever Regulation The trimming lever (6) should be located as high as possible, but it should not rub the plate (5). The eccentric bolt (2) groove should be in horizontal position. → Tilt the machine. → Loosen the screw (3) and turn the eccentric bolt (4) so that the lever does not rub (6) the plate (5), however, it should be positioned as high as possible.
- Page 25 Trimming cam Regulation If the trimmer is not active, then the shortest distance between the cam (3) and roller (4) should be 0.1mm. Timing of the cam: if the needle point is approximately (A) = 1mm over the throat plate, the cam screws should be turned downwards and their axes perpendicularly to the machine base plate.
- Page 26 ZZ-2565/2567/2568 AUT SERIES PARTS LIST...
- Page 27 CONTENT Arm bed and its accessories ………………………… 2 Bobbin winder and Thread tension parts ……………4 Arm shaft and needle bar thread take up parts …… 6 Needle bar vibrating parts …………………………… 10 Needle bar vibrating parts …………………………… 12 F. Presser foot parts…………………………………… 14 Stitch length adjustment and backstitch parts ……...
-
Page 28: Arm Bed And Its Accessories
A. Arm bed and its accessories... - Page 29 A. Arm bed and its accessories Part No. Name ZZ-2568 AUT ZZ-2567 AUT A01 7.02.11.589 Thread take up lever guard cover A02 7.02.15.1087 Screw A03 7.02.16.058 Plastic plug A04 7.02.16.559 Rubber plug A05 7.02.11.587 Upper cover plate A06 7.02.16.500 Line card A07 7.02.15.1080 Upper clip of supply cord screw A08 7.02.16.167 Upper clip of supply cord A09 7.02.16.166 Upper clip of supply cord...
-
Page 30: Bobbin Winder And Thread Tension Parts
B. Bobbin winder and thread tension parts... - Page 31 B. Bobbin winder and thread tension parts Part No. Name ZZ-2568 AUT ZZ-2567 AUT B02 7.02.01.210 Top cover thread tension assy. Regulating handle Spring Tension disc Thread guide lever B03 7.02.08.369 Thread tension plate bushing B04 7.02.15.056 Screw B05 7.02.20.070 Thread winder thread cutter B06 7.02.15.1031 Thread cutter screw...
-
Page 32: Arm Shaft And Needle Bar Thread Take Up Parts
C. Arm shaft and needle bar thread take up parts... - Page 33 C. Arm shaft and needle bar thread take up parts Part No. Name ZZ-2568 AUT ZZ-2567 AUT 7.02.10.091 Thread take up lever support stud 7 .02.15.411 Thread take up lever support stud screw 7.02.05.066 Thread take up lever assy 7.02.05.530 Thread take up lever assy(ZZ-2565/2565 AUT) 7.02.06.036 Libra crank...
- Page 34 C. Arm shaft and needle bar thread take up parts...
- Page 35 C. Arm shaft and needle bar thread take up parts Part No. Name ZZ-2568 AUT ZZ-2567 AUT C32 7.02.15.399 Arm shaft bushing screw C33 7.02.04.024 Arm shaft bearing C34 7.02.08.095 Arm shaft bushing C39 7.02.15.428 Collar screw C40 7.02.08.102 Arm shaft bearing collar C41 7.02.07.051 Vibrating needle drive gear C42 7.02.15.126...
-
Page 36: Needle Bar Vibrating Parts
D. Needle bar vibrating parts(一)... -
Page 37: Needle Bar Vibrating Parts
D. Needle bar vibrating parts(一) Part No. Name ZZ-2568 AUT ZZ-2567 AUT D01 7.02.15.405 Fixed bracket screw D02 7.02.18.071 Washer D03 7.02.13.043 Needle bar vibrating fixed bracket D04 7.02.01.039 Needle bar vibrating bracket D05 7.02.15.407 Needle bar vibrating bracket screw D06 7.02.15.391 Tighten screw D07 7.02.15.406 Tighten screw D08 7.02.08.096 Needle bar vibrating shaft bushing (left) - Page 38 E. Needle bar vibrating parts(二)...
- Page 39 E. Needle bar vibrating parts(二) Part No. Name ZZ-2568 AUT ZZ-2567 AUT E01 7.02.08.367 Eccentric bushing E02 7.02.15.268 Nut E03 7.02.15.047 Screw E04 7.02.13.440 Vibrating bracket E05 7.02.18.016 Washer E06 7.02.18.055 Elastic washer E07 7.02.15.008 Screw E08 7.02.10.303 Retainer ring E09 7.02.18.057 Washer E10 7.02.15.1031 Screw E11 7.02.06.084 Turntable...
-
Page 40: Presser Foot Parts
F. Presser foot parts... - Page 41 F. Presser foot parts Part No. Name ZZ-2568 AUT ZZ-2567 AUT F01 7.02.15.414 Presser foot pressure adjustive screw F02 7.02.15.415 Presser bar spring support screw F03 7.02.17.085 Presser bar spring F04 7.02.18.072 E-ring F05 7.02.10.092 Presser bar pin F06 7.02.16.033 Felt F07 7.02.12.045 Presser bar slide block...
-
Page 42: Stitch Length Adjustment And Backstitch Parts
G. Stitch length adjustment and backstitch parts... - Page 43 G. Stitch length adjustment and backstitch parts Part No. Name ZZ-2568 AUT ZZ-2567 AUT G01 7.02.19.040 Backstitch electromagnetic G02 7.02.10.304 Backstitch electromagnetic connecting pin G03 7.02.18.031 E-ring G04 7.02.13.443 Backstitch electromagnetic mounting plate G05 7.02.18.055 Spring washer G06 7.02.15.1085 Screw G07 7.02.15.1080 Screw G08 7.02.18.098...
-
Page 44: Lower Shaft, Feed Dog And Presser Foot Lifting Parts
H. Lower shaft, feed dog and presser foot lifting parts... - Page 45 H. Lower shaft, feed dog and presser foot lifting parts Part No. Name ZZ-2568 AUT ZZ-2567 AUT H01 7.02.16.067 Oil spile H02 7.02.03.079 Feed shaft H03 7.02.08.103 Feed shaft bushing (left) H04 7.02.15.428 Bushing screw H05 7.02.15.448 Feed crank (left) screw H06 7.02.05.081 Feed crank (left) H07 7.02.15.408...
-
Page 46: Hook Assembly
I. Hook assembly... - Page 47 I. Hook assembly Part No. Name ZZ-2568 AUT ZZ-2567 AUT I01 7.02.18.026 Elastic stop ring I02 7.02.04.031 Bearing I03 7.02.06.041 Opener cam I04 7.02.15.434 Opener cam screw I05 7.02.04.033 Opener cam bearing I06 7.02.08.112 Opener cam bushing I07 7.02.08.111 Hook opener I08 7.02.15.017 Hook opener screw I09 7.02.07.058...
-
Page 48: Hook Assembly (Small Hook)
J. Hook assembly (Small hook) - Page 49 J. Hook assembly (Small hook) Part No. Name ZZ-2565 AUT ZZ-2568 AUTZZ-2567 AUT J01 7.02.18.026 Elastic stop ring J02 7.02.04.031 Bearing J03 7.02.06.093 Opener cam J04 7.02.15.434 Opener cam screw J05 7.02.04.033 Opener cam bearing J06 7.02.08.112 Opener cam bushing J07 7.02.08.111 Hook opener J08 7.02.15.017 Hook opener screw J09 7.02.07.072 Hook drive gear...
-
Page 50: Thread Trimming Parts
L. Thread trimming parts... - Page 51 L.Thread trimming parts Part No. Name ZZ-2568 AUT ZZ-2567 AUT L02 7.02.15.104 Screw L03 7.02.02.073 Slide plate L04 7.02.20.031 Fixed knife L05 7.02.15.103 Fixed knife screw L06 7.02.11.102 Movable knife guide plate L07 7.02.20.030 Movable knife L08 7.02.11.103 Movable knife support plate L09 7.02.11.098 Movable knife assistant support plate L10 7.02.18.061 Spring washer L11 7.02.15.101 Movable knife assistant support plate screw...
-
Page 52: Tension Release, Electrocircuit Board, Oil Circuit Parts
M. Tension release, electrocircuit board, oil circuit parts... - Page 53 M. Tension release, electrocircuit board, oil circuit parts Part No. Name ZZ-2568 AUT ZZ-2567 AUT M01 7.02.19.039 Thread releasing solenoid M02 7.02.15.1080 Screw M03 7.02.11.594 Mounting plate M04 7.02.15.797 Screw M05 7.02.15.432 Screw M06 7.02.16.505 Collection circuit board housing M07 7.02.15.1083 Support screw M08 7.02.15.017 Pressure plate screw...
- Page 54 N. Lower direct drive parts...
- Page 55 N. Lower direct drive parts Part No. Name ZZ-2568 AUT ZZ-2567 AUT Lower direct drive timing belt wheel 7.02.07.345 Timing belt wheel screw 7.02.15.057 Timing belt 7.02.07.346 Motor mounting plate 7.02.11.615 Washer 7.02.18.016 7.02.15.1051 Mounting screw (inner hexagonal round head) Hexagonal column 7.02.15.1111 Belt cover...
-
Page 56: Special Parts For Cam Patterns Zigzag Machine
O. Special parts for cam patterns zigzag machine... - Page 57 O. Special parts for cam patterns zigzag machine Part No. Name Remar Qty(ZZ-2567/2567AUT) 01 7.02.15.382 Hexagonal nut 02 7.02.17.113 Spring washer 03 7.02.06.060 Cam 04 7.02.16.077 Seal cover 05 7.02.10.133 Worm wheel shaft 06 7.02.08.094 Worm wheel shaft bushing (back) 07 7.02.15.399 Screw M6×14 08 7.02.15.431 Screw...
-
Page 58: Accessories
P. Accessories... - Page 59 P. Accessories Part No. Name ZZ-2565 AUT ZZ-2568 AUT ZZ-2567 AUT P01 7.02.21.140 Needle P02 7.02.21.144 Bobbin P03 7.02.21.142 Open end wrench P04 7.02.21.003 Screw driver (big) P05 7.02.21.002 Screw driver (middle) P06 7.02.21.001 Screw driver (small) P07 7.02.21.238 Hexagonal wrench M6mm P08 7.02.21.143 Hexagonal wrench M5mm P09 7.02.21.099...
Need help?
Do you have a question about the ZZ-2565 AUT Series and is the answer not in the manual?
Questions and answers