SMA SUNNY MINI CENTRAL 4600A Installation Manual
Pv inverter
Hide thumbs
Also See for SUNNY MINI CENTRAL 4600A:
- Installation manual (84 pages) ,
- User manual (2 pages) ,
- User manual (24 pages)

Related Manuals for SMA SUNNY MINI CENTRAL 4600A


Summary of Contents for SMA SUNNY MINI CENTRAL 4600A
- Page 1 PV Inverter SUNNY MINI CENTRAL 4600A / 5000A / 6000A Installation Manual SMC46-60A-IA-IEN120471 | IME-SMC50A_60A | Version 7.1...
-
Page 3: Table Of Contents
SMA Solar Technology AG Table of Contents Table of Contents Information on this Manual......7 Validity ..........7 Target Group . - Page 4 Connecting the PV Array (DC) ........33 Connection of the SMA Power Balancer ....37 5.5.1...
- Page 5 Sunny Mini Central 4600A........
- Page 6 Table of Contents SMA Solar Technology AG Accessories ........85 Contact .
-
Page 7: Information On This Manual
You will find further information on special topics such as designing a miniature circuit‑breaker or the description of the operating parameters in the download area at www.SMA.de/en. Refer to the user manual provided for detailed information on operating the inverter. -
Page 8: Symbols Used
Information on this Manual SMA Solar Technology AG 1.4 Symbols Used The following types of safety precautions and general information are used in this manual: DANGER! DANGER indicates a hazardous situation which, if not avoided, will result in death or serious injury. -
Page 9: Safety
When designing the PV plant, ensure that the values comply with the permitted operating range of all components at all times. The free design program "Sunny Design" (www.SMA.de/en/SunnyDesign) will assist you. The manufacturer of the PV modules must have approved the modules for use with this Sunny Mini Central. -
Page 10: Safety Precautions
Comply with the local regulations for grounding the PV modules and the PV array. In order to maintain the best possible protection for both the PV plant and human life, SMA Solar Technology AG recommends connecting together the PV array frame and other electrically conductive surfaces and grounding them. -
Page 11: Explanation Of Symbols
DC connectors ® QR‑Code ** for SMA bonus program You will find information on the SMA bonus program at www.SMA‑Bonus.com. * This function is valid from firmware version 2.15 ** QR-Code is a registered trademark of DENSO WAVE INCORPORATED. -
Page 12: Symbols On The Type Label
Safety SMA Solar Technology AG 2.3.2 Symbols on the Type Label Symbol Explanation Beware of hazardous voltage. The inverter operates at high voltages. All work on the inverter may only be carried out by an electrically qualified person. Beware of hot surface. -
Page 13: Unpacking
Cheese‑head screws (M6x16): 1 x for enclosure lid (replacement), 1 x for ground terminal Jumpers (1 x for fan test, 1 x for the SMA Power Balancer wiring) Cheese‑head screws (M6x8) for securing the inverter to the wall mounting bracket... -
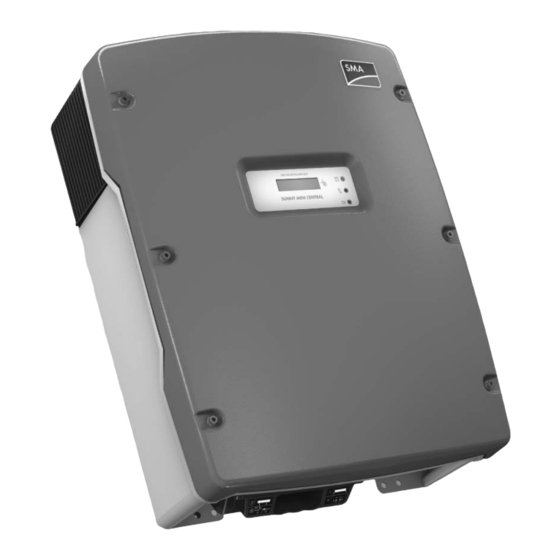
Page 14: Identifying The Inverter
Unpacking SMA Solar Technology AG Object Quantity Description Set of documents with explanations and certificates Supplementary sheet with inverter default settings 3.2 Identifying the Inverter You can identify the inverter using the type label. The type label is on the right‑hand side of the enclosure. -
Page 15: Mounting
SMA Solar Technology AG Mounting 4 Mounting 4.1 Safety DANGER! Danger to life due to fire or explosion. Despite careful construction, electrical devices can cause fires. • Do not mount the inverter on flammable construction materials. • Do not mount the inverter in areas where highly flammable materials are stored. - Page 16 Mounting SMA Solar Technology AG • Mount vertically or tilted backwards by max. 45°. • The connection area must point downward. • Never mount the device with a forward tilt. • Never install the device with a sideways tilt. • Do not mount horizontally.
-
Page 17: Mounting The Inverter With The Wall Mounting Bracket
SMA Solar Technology AG Mounting 4.3 Mounting the Inverter with the Wall Mounting Bracket 1. Mark the position of the drill holes using the wall mounting bracket and drill the holes. Use at least 2 of the 6 holes, with 1 hole on the right and 1 on the left. - Page 18 Mounting SMA Solar Technology AG CAUTION! Risk of injury due to the heavy weight of the inverter. The inverter weighs approx. 63 kg. • Attach the wall mounting bracket with the corresponding mounting material (depending on the surface). • Use the side handles (above and below) or a steel rod (maximum diameter of 30 mm) for transport and mounting.
- Page 19 "rechts/right" and "links/left" on the inside. The fan guards prevent dirt and insects from entering the device and, if necessary, can be reordered from SMA Solar Technology AG (see section 13 "Contact" (page 86)). Optional anti‑theft protection To protect the inverter against theft, the back panel can be secured to the wall at the bottom using 2 safety screws.
-
Page 20: Electrical Connection
Jack for connecting the Electronic Solar Switch (ESS) DC load disconnection unit Cable glands for optional communication via RS485 (PG16) Cable gland for connection to the power distribution grid (AC) (12 mm ... 25 mm) Cable glands for SMA Power Balancer SMC46-60A-IA-IEN120471 Installation Manual... -
Page 21: Interior View
SMA Solar Technology AG Electrical Connection 5.1.2 Interior View The following figure shows the various components and connection areas of the open inverter. Installation Manual SMC46-60A-IA-IEN120471... - Page 22 LEDs for displaying the operating states Jumper slot for SMA Power Balancer Terminals for SMA Power Balancer Flat male tab for grounding the cable shield when connecting the SMA Power Balancer Additional terminal for grounding Terminals for AC cables Cable glands for the SMA Power Balancer...
-
Page 23: Connection To The Power Distribution Grid (Ac)
Cable Design Use "Sunny Design" version 2.0 or higher for the dimensioning of the conductor cross‑sectional areas (see "Sunny Design" program at www.SMA.de/en). Halving the cable losses If 3 inverters with symmetrical feed‑in are combined to form a three‑phase system, the neutral conductor is not subjected to any load, and the cable losses are halved. - Page 24 The maximum permissible fuse protection can be found in section 11 "Technical Data" (page 77). Detailed information and examples for the rating of a miniature circuit‑breaker can be found in the Technical Information "Miniature Circuit Breaker" in the SMA Solar Technology AG download area at www.SMA.de/en. DANGER! Danger to life due to fire.
-
Page 25: Connecting The Inverter To The Power Distribution Grid (Ac)
AC nom The exact operating range of the inverter is specified in the operating parameters. The corresponding document is available in the download area at www.SMA.de/en. 2. Disconnect the miniature circuit‑breaker and secure against reconnection. 3. Loosen all screws of the enclosure lid and remove the lid. - Page 26 Electrical Connection SMA Solar Technology AG 9. Tighten the lock nut firmly to the cable gland. 10. Secure the enclosure lid with all screws and the corresponding conical spring washers. Tighten the screws with 6 Nm torque in the order shown in the figure on the right.
-
Page 27: Additional Grounding Of The Enclosure
SMA Solar Technology AG Electrical Connection 5.2.3 Additional Grounding of the Enclosure If the installation requires, you can use the ground terminal to connect a second protective conductor or as equipotential bonding. Procedure 1. Insert the stripped grounding cable (D) under the clamping bracket (C) (max. -
Page 28: Setting The Display Language
Italian national standard DK 5940. You can see the standard to which the inverter was set upon delivery on the type label and the supplementary sheet provided with the default settings. For more information, see the Technical Description "Operating Parameters" at www.SMA.de/en. Procedure 1. -
Page 29: Connecting The Pv Array (Dc)
SMA Solar Technology AG Electrical Connection 5.4 Connecting the PV Array (DC) 5.4.1 Conditions for the DC Connection Using Y adapters for parallel connection of strings Y adapters may not be visible within close proximity of the inverter or freely accessible. • The DC electric circuit may not be interrupted by Y adapters. -
Page 30: Assembling The Dc Connectors
Electrical Connection SMA Solar Technology AG 5.4.2 Assembling the DC Connectors All PV module connection cables must be equipped with the included DC connectors before connecting them to the inverter. To assemble the DC connectors, proceed as follows. Ensure the connectors have the correct polarity. - Page 31 SMA Solar Technology AG Electrical Connection Result Measure ☑ If the stranded wire is not visible in the • Loosen the clamping bracket. To do so, chamber, the cable is not correctly insert a 3.5 mm screwdriver into the positioned.
-
Page 32: Opening The Dc Connector
Electrical Connection SMA Solar Technology AG 5.4.3 Opening the DC Connector 1. Unscrew the screw connection. 2. Unlocking the DC connector: Insert a 3.5 mm screwdriver into the snap slot on the side and lever it out. 3. Carefully pull the DC connector apart. -
Page 33: Connecting The Pv Array (Dc)
SMA Solar Technology AG Electrical Connection 5.4.4 Connecting the PV Array (DC) DANGER! Danger to life due to high voltages in the inverter. • Before connecting the PV array, ensure that the miniature circuit‑breaker is switched off. NOTICE! Excessive voltages can destroy the measuring device. - Page 34 Electrical Connection SMA Solar Technology AG NOTICE! Overvoltage can destroy the inverter. If the voltage of the PV modules exceeds the maximum input voltage of the inverter, it can be destroyed by overvoltage. This will void all warranty claims. • Do not connect strings with an open‑circuit voltage greater than the maximum input voltage of the inverter.
- Page 35 SMA Solar Technology AG Electrical Connection – Plug the sealing plug into the DC connector. – Tighten the DC connector (torque: 2 Nm). – Insert the DC connectors with sealing plugs into the corresponding DC inputs on the inverter. ☑ The DC connectors click audibly into position.
- Page 36 Electrical Connection SMA Solar Technology AG 8. Check the Electronic Solar Switch for wear, as described in section 8.3 "Checking the Electronic Solar Switch (ESS) for Wear" (page 64) and attach it firmly. NOTICE! Manipulating the connector in the handle can damage the Electronic Solar Switch.
-
Page 37: Connection Of The Sma Power Balancer
Electrical Connection 5.5 Connection of the SMA Power Balancer The Sunny Mini Central is equipped with the SMA Power Balancer as standard. This enables a circuit connection of 3 Sunny Mini Central inverters to a three‑phase feed‑in system. Each of the 3 Sunny Mini Central devices in a group must be connected to a different line conductor of the low‑voltage grid (L1, L2 and L3). - Page 38 Electrical Connection SMA Solar Technology AG Configuration Options There are 4 different configuration options for the "PowerBalancer" parameter. Local connection requirements Select the respective setting and always observe the local connection requirements and provisions of your grid operator. • FaultGuard This operating mode allows for the implementation of a three‑phase line voltage monitoring,...
- Page 39 SMA Solar Technology AG Electrical Connection • PhaseGuard This operating mode allows for the implementation of a three-phase grid voltage monitoring. – If 1 of the 3 inverters indicates a line voltage fault and stops feeding in, the other 2 inverters also disconnect from the power distribution grid automatically.
- Page 40 SMA Solar Technology AG • Off The SMA Power Balancer is deactivated (default setting). – In the event of a device fault or line voltage fault at an inverter, only this inverter is disconnected from the power distribution grid and the other two inverters continue to run at an undiminished power level.
-
Page 41: Cabling
SMA Solar Technology AG Electrical Connection 5.5.2 Cabling Cable Requirements For cabling the SMA Power Balancer, use a "LiYCY" cable, structured as shown here: • Indoor: LiYCY 2 x 2 x 0.25 • Outdoor: Li‑2YCYv 2 x 2 x 0.25 Position... - Page 42 Electrical Connection SMA Solar Technology AG Overview of the Connection Area Object Description Screw terminals for the wire bridge Screw terminals for connecting the cables Jumper slot Flat male tab for grounding the cable shield Silicone tube/cable route Cable glands...
- Page 43 SMA Solar Technology AG Electrical Connection Procedure 1. Open the inverter as described in section 7.2 "Opening the Inverter" (page 55). 2. Insert the cable into each inverter. Use 1 of the 2 enclosure openings (F) on the right‑hand side. DANGER! Danger to life through high voltage if there is a fault with the SMA Power Balancer cable.
- Page 44 Connection with a Sunny Mini Central 9000TL, 10000TL or 11000TL In order to be able to connect the SMA Power Balancer with a Sunny Mini Central 9000TL, 10000TL or 11000TL, the Sunny Mini Central 4600A, 5000A or 6000A must be equipped with a special plug.
-
Page 45: Testing The Functioning
Electrical Connection 5.5.3 Testing the Functioning To test whether the SMA Power Balancer operates correctly, proceed as follows. 1. Select the "PhaseGuard" setting of the "PowerBalancer" parameter for all 3 inverters. 2. Check whether all inverters in the group are feeding the power distribution grid normally. -
Page 46: Communication
To change grid‑relevant parameters, you need a personal access code – the so‑called SMA Grid Guard Code. The application form for the personal access code is available in the download area at www.SMA.de/en, in the "Certificate" category of the respective inverter. -
Page 47: Setting Stand-Alone Grid Operation
SMA Solar Technology AG Electrical Connection 5.7.2 Setting Stand‑alone Grid Operation To operate the inverter in a stand‑alone grid system with Sunny Island, you must set the "Default" parameter to stand‑alone grid ("OFF-Grid") operation. You have several possibilities to set the inverter to stand‑alone grid operation: •... -
Page 48: Commissioning
Commissioning SMA Solar Technology AG 6 Commissioning 6.1 Commissioning the Inverter 1. Check the following requirements before commissioning: – The inverter is securely in place. – AC cables are correctly connected (power distribution grid). – DC cables (PV strings) are completely connected. -
Page 49: Display Messages During The Startup Phase
SMA Solar Technology AG Commissioning 6.2 Display Messages During the Startup Phase • After commissioning, the inverter displays the SMC xxx device type in the startup phase. Wrxxx • After 5 seconds or when you tap again on the enclosure lid, the firmware version of the internal processors is displayed by the inverter. -
Page 50: Self-Test In Accordance With Dk 5940, Ed
Commissioning SMA Solar Technology AG 6.3 Self‑test in Accordance with DK 5940, Ed. 2.2 (Applies to Italy Only) 6.3.1 Starting the Self‑Test by Tapping You can start testing the disconnection times by tapping on the enclosure lid. A prerequisite here is that the country configuration of the inverter has been set to Italy (IT/DK5940) or "trimmed". -
Page 51: Completion Of The Self-Test
SMA Solar Technology AG Commissioning 6.3.2 Completion of the Self‑test Note the values which are displayed during the self‑test. These values must be entered into a test report. The test results of the individual tests are displayed 3 times, one after the other. - Page 52 Commissioning SMA Solar Technology AG Undervoltage Test After the overvoltage test, the inverter performs the undervoltage test. During the test sequence, the current calibration value of the voltage limit applied is shown in the display of the inverter. The voltage limit is increased successively until the disconnection threshold is reached and the inverter disconnects from the power distribution grid.
- Page 53 SMA Solar Technology AG Commissioning Maximum Frequency In a third step, the inverter tests the maximum frequency. During the test sequence, the frequency limit applied is shown in the display of the inverter. The frequency limit is reduced successively until the disconnection threshold is reached and the inverter disconnects from the power distribution grid.
- Page 54 Commissioning SMA Solar Technology AG Minimum Frequency In the last step, the inverter tests the minimum frequency. During the test sequence, the frequency limit applied is shown in the display of the inverter. The frequency limit is increased successively until the disconnection threshold is reached and the inverter disconnects from the power distribution grid.
-
Page 55: Opening And Closing
SMA Solar Technology AG Opening and Closing 7 Opening and Closing 7.1 Safety DANGER! Risk of lethal electric shock. Before opening the inverter, observe the following: • Ensure that no voltage is present on the AC side. • Ensure that neither voltage nor current is present on the DC side. - Page 56 Opening and Closing SMA Solar Technology AG 4. Unlock and disconnect all DC connectors. To do this, insert the screwdriver into one of the side slots (blade width: 3.5 mm) and pull the DC connectors straight down. Do not pull on the cable while doing this.
- Page 57 SMA Solar Technology AG Opening and Closing 6. Loosen all 6 screws of the enclosure lid and remove the enclosure lid from the front. 7. Verify the absence of voltage L with respect to N at the AC terminal with an appropriate measuring device.
-
Page 58: Closing The Inverter
Opening and Closing SMA Solar Technology AG 7.3 Closing the Inverter 1. Secure the enclosure lid with the 6 screws and the corresponding conical spring washers. Tighten the screws with 6 Nm torque in the order shown in the figure on the right. The toothing of the conical spring washers must point toward the enclosure lid. - Page 59 SMA Solar Technology AG Opening and Closing 4. Check the Electronic Solar Switch for wear, as described in section 8.3 and attach it firmly. NOTICE! Manipulating the connector in the handle can damage the Electronic Solar Switch. The connector inside the handle must remain movable in order to ensure proper contact.
-
Page 60: Maintenance And Cleaning
Maintenance and Cleaning SMA Solar Technology AG 8 Maintenance and Cleaning 8.1 Cleaning the Inverter If the inverter is dirty and the visibility of the operating data and operating states of the inverter is only limited, clean the enclosure lid, the display and the LEDs with a damp cloth. Do not use any corrosive substances (e.g., solvents or abrasives) for cleaning. - Page 61 SMA Solar Technology AG Maintenance and Cleaning Cleaning the Fans 5. Press the front latches backward and the rear latch forward. 6. Remove the fan by pulling it slowly and carefully downward. 7. Unlock and remove the plug. The fan cables are long enough that you can lift the fans far enough out to disconnect the internal plug in the inverter.
-
Page 62: Checking The Fans
• Plug the provided jumper into the system control board. Setting Parameters 1. Request the installer password from the SMA Service Line (contact: see Page 86). 2. Set the "Fan‑Test" parameter to "1" in the installer mode. 3. Check the fans' air flow. -
Page 63: Cleaning The Fan Guards
SMA Solar Technology AG Maintenance and Cleaning 4. Check the fans' air flow. The inverter takes cooling air in from underneath and then blows it back out on the upper sides. Listen for any unusual noise, which could indicate incorrect installation or that the fans are faulty. -
Page 64: Checking The Electronic Solar Switch (Ess) For Wear
Maintenance and Cleaning SMA Solar Technology AG 8.3 Checking the Electronic Solar Switch (ESS) for Wear Check the Electronic Solar Switch for wear before plugging it in. Depending on the shape of the Electronic Solar Switch, you can estimate the wear on either the metal tongues (shape A) or on the plastic (shape B). -
Page 65: Troubleshooting
Do not perform any repairs that are not described here and take advantage of the 24‑hour replacement service (inverter ready for shipping and handed over to a freight‑forwarding company within 24 hours) and the SMA Solar Technology AG repair service instead. 9.1 Blink Codes... -
Page 66: Error Messages
• If the line voltage is continually within the tolerance range and this error message is still displayed, contact the SMA Service Line. Bfr‑Srr Internal measurement comparison fault or hardware defect. Corrective measures • If this fault occurs frequently, contact the SMA Service Line. SMC46-60A-IA-IEN120471 Installation Manual... - Page 67 EEPROM data is defective. The inverter has switched itself off because the loss of data has disabled important functions of the inverter. Corrective measures • Contact the SMA Service Line. EeRestore One of the duplicate records in the EEPROM is defective and has been reconstructed without loss of data.
- Page 68 Description and corrective measure MSD-Fac Internal measurement comparison fault or hardware defect. Corrective measures • If this fault occurs frequently, contact the SMA Service Line. MSD‑Vac Internal measurement comparison fault or hardware defect. Corrective measures • If this fault occurs frequently, contact the SMA Service Line.
- Page 69 (operating parameters: Vac‑Min and Vac‑Max). • If the line voltage lies within the tolerance range, yet "Vac‑Bfr" or "Vac‑Srr" faults are still displayed, contact the SMA Service Line. Installation Manual SMC46-60A-IA-IEN120471...
-
Page 70: Red Led Is Permanently Lit
Corrective measures Watchdog Srr • If this fault occurs frequently, contact the SMA Service Line. 9.3 Red LED is Permanently Lit If the red status display LED is permanently lit during operation, there is a ground fault in the PV array or at least one of the varistors for overvoltage protection is defective. -
Page 71: Checking The Pv Array For Ground Faults
SMA Solar Technology AG Troubleshooting 9.3.1 Checking the PV Array for Ground Faults 1. Disconnect the inverter from both the DC and AC sides as described in section 7.2 "Opening the Inverter" (page 55). DANGER! Risk of lethal electric shock. • Only touch the cables of the PV array on their insulation. - Page 72 Troubleshooting SMA Solar Technology AG Result Measure ☑ You have found a ground fault. • The installer of the PV array must remedy the ground fault in the affected string. You can determine the location of the ground fault as described below.
-
Page 73: Checking The Function Of The Varistors
B and C. Result Measure ☑ There is a conductive connection. There is probably a different error in the inverter. • Contact the SMA Service Line (see section 13 "Contact" (page 86)). Installation Manual SMC46-60A-IA-IEN120471... - Page 74 The varistors are specially manufactured for use in the inverter and are not commercially available. They must be ordered directly from SMA Solar Technology AG (see section 12 "Accessories" (page 85)). • To replace the varistors, proceed to step 3.
-
Page 75: Decommissioning
SMA Solar Technology AG Decommissioning 10 Decommissioning 10.1 Disassembling the Inverter 1. Open the inverter as described in section 7.2 "Opening the Inverter" (page 55). 2. Remove all cables from the inverter. 3. Close the inverter with the 6 screws and the corresponding conical spring washers. -
Page 76: Packing The Inverter
Dispose of the inverter at the end of its service life in accordance with the current locally applicable disposal regulations for electronic waste. Alternatively, send it back to SMA Solar Technology AG with shipping paid by sender, and labeled "ZUR ENTSORGUNG" ("for disposal") (contact see Page 86). -
Page 77: Technical Data
SMA Solar Technology AG Technical Data 11 Technical Data 11.1 DC/AC 11.1.1 Sunny Mini Central 4600A DC Input Maximum DC power at cos φ = 1 5 250 W Maximum input voltage* 600 V MPP voltage range 246 V … 480 V Rated input voltage... - Page 78 Technical Data SMA Solar Technology AG AC Output Rated power at 230 V, 50 Hz 4 600 W Maximum apparent AC power* 5 000 VA Rated grid voltage 230 V Nominal AC voltage 220 V/230 V/240 V AC voltage range 160 V …...
-
Page 79: Sunny Mini Central 5000A
SMA Solar Technology AG Technical Data 11.1.2 Sunny Mini Central 5000A DC Input Maximum DC power at cos φ = 1 5 750 W Maximum input voltage* 600 V MPP voltage range 246 V … 480 V Rated input voltage 246 V... - Page 80 Technical Data SMA Solar Technology AG AC Output Rated power at 230 V, 50 Hz 5 000 W Maximum apparent AC power 5 500 VA Rated grid voltage 230 V Nominal AC voltage 220 V/230 V/240 V AC voltage range 160 V …...
-
Page 81: Sunny Mini Central 6000A
SMA Solar Technology AG Technical Data 11.1.3 Sunny Mini Central 6000A DC Input Maximum DC power at cos φ = 1 6 300 W Maximum input voltage* 600 V MPP voltage range 246 V … 480 V Rated input voltage 246 V... -
Page 82: General Data
Technical Data SMA Solar Technology AG Efficiency Maximum efficiency, η 96.1% European weighted efficiency, η 95.3% 11.2 General Data Width x height x depth with 468 mm x 613 mm x 242 mm Electronic Solar Switch Weight 63 kg Length x width x height of packaging... -
Page 83: National Standards
SMA Solar Technology AG Technical Data 11.4 National Standards National standard as at 01/2012 VDE0126-1-1 ✓ ✓ ✓ ✓ ✓ ✓ ‒ ‒ VDE-AR-N-4105 ✓ ✓ ✓ ‒ ‒ ‒ ‒ ‒ AS 4777 ○ ○ ○ ‒ ✓ ✓ ‒... -
Page 84: Features
Technical Data SMA Solar Technology AG 11.6 Features DC connection SUNCLIX DC connector AC connection screw terminal Display LC text display ® Bluetooth Wireless Technology optional RS485, galvanically isolated optional 11.7 Electronic Solar Switch (ESS) Electrical endurance in the event of a short circuit, min. - Page 85 SMA Solar Technology AG Accessories 12 Accessories You will find the corresponding accessories and spare parts for your product in the following overview. If required, you can order these from SMA Solar Technology AG or your specialty retailer. Designation Brief description SMA order number...
- Page 86 Contact SMA Solar Technology AG 13 Contact If you have technical problems concerning our products, contact the SMA Service Line. We need the following data in order to provide you with the necessary assistance: • Inverter type • Inverter serial number •...
- Page 87 Legal Restrictions The information contained in this document is the property of SMA Solar Technology AG. Publishing its content, either partially or in full, requires the written permission of SMA Solar Technology AG. Any internal company copying of the document for the purposes of evaluating the product or its correct implementation is allowed and does not require permission.
Need help?
Do you have a question about the SUNNY MINI CENTRAL 4600A and is the answer not in the manual?
Questions and answers