Table of Contents
Advertisement
Quick Links
Advertisement
Table of Contents

Related Manuals for Daikin Modular T Pro ATB


Summary of Contents for Daikin Modular T Pro ATB
- Page 1 Installation, use and Installation, use and maintenance manual maintenance manual Modular T Pro ATB Modular T Pro ATB D-EIMAH01706-22_00EN Modular T Pro ATB Modular T Pro ATB DATE June 2022 Translation of the original instructions Translation of the original instructions...
-
Page 3: Table Of Contents
Contents IMPORTANT WARNINGS Purpose of the manual Intended use of the unit Safety regulations Residual risks Safety devices UNIT CHARACTERISTICS Environmental conditions Environmental contamination Noise Ceiling and air duct specifications Technical data Overall dimensions Safety measurements Summary of unit operation RECEIPT OF THE PACKAGES TRANSPORT UNPACKING AND VERIFICATION OF INTEGRITY... -
Page 4: Important Warnings
Important warnings The pictogram shows a situation of immediate danger or a dangerous situation that might cause injuries or death. The pictogram shows that it is necessary to adopt suitable behaviour in order to avoid jeopardising staff safety and cause damages to the equipment. The pictogram shows particularly important technical information that should be taken into consideration by the people installing or using the equipment. -
Page 5: Safety Regulations
Safety regulations SKILLS REQUIRED FOR THE INSTALLATION OF THE UNIT Installers must perform operations according to their professional qualifications: all activities not within one's expertise (i.e. electrical connections) must be carried out by specialised and qualified staff so as not to endanger one's safety and the safety of the other operators interacting with the unit. - Page 6 Read this manual carefully before unit installation and maintenance and keep it for any further future consultation by the various operators. Do not remove, tear out or rewrite any part of this manual. Failure to follow these instructions may cause damage and injuries, even fatal, voids the warranty and relieves the Manufacturer of any liability.
-
Page 7: Residual Risks
Residual risks Despite having implemented and adopted all the safety measures indicated by applicable regulations, some residual risks remain. In particular, in some operations of replacement, adjustment and tooling maximum attention is always required in order to work in the best possible conditions. LIST OF OPERATIONS WITH RESIDUAL RISKS Risks for qualified personnel (electricians and mechanics): •... -
Page 8: Unit Characteristics
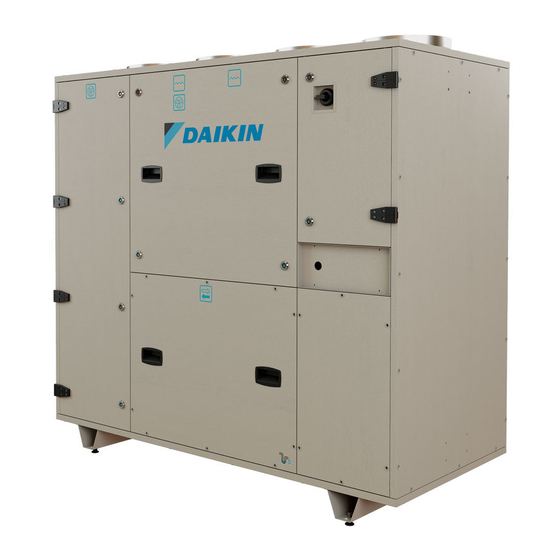
Unit characteristics Modular T units are produced in a standard version which includes an aluminium counter-current heat exchanger, ePM1 50% (F7) class filter in supply and ePM10 75% (M5) class filter in return, 50 mm double skin panel with insulation in mineral wool. The accessories can be purchased separately as an option and installed on site. -
Page 9: Ceiling And Air Duct Specifications
Ceiling and air duct specifications floor must where you plan to position the unit • perfectly flat and without roughness; • vibration resistant; support the weight of the equipment considering an appropriate safety margin • able to (see table of technical data on page 10). air ducts (not supplied) must be connected directly to the unit: when assembly is completed, they must not be stretched, in order to avoid damage and transmission of vibrations. -
Page 10: Technical Data
Technical data SIZE TECHNICAL DATA TABLE u.m. Nominal air flow rate 1650 2300 2700 3900 Thermal efficiency 1060 1190 1820 Electrical connection 230 V, 1 ph 230 V, 1 ph 230 V, 1 ph 230 V, 1 ph 230 V, 1 ph UNIT/SECTION WEIGHT TABLE u.m. -
Page 11: Overall Dimensions
Overall dimensions KEY ON PAGE 13 RIGHT CONFIGURATION UNITS SIZE 3-4: unit with one section, B SECTION B: heat recuperator + electrical panel + supply SIZE 5: unit with two sections, B1 and B2 SECTION B1: supply SECTION B2: heat recuperator + electrical panel SIZE 6-7: unit with three sections, B1, B2, B3... - Page 12 LEFT KEY ON PAGE 13 CONFIGURATION UNITS SIZE 3-4: unit with one section, B SECTION B: heat recuperator + electrical panel + supply SIZE 5: unit with two sections, B1 and B2 SECTION B1: supply SECTION B2: heat recuperator + electrical panel SIZE 6-7: unit with three sec- tions, B1, B2, B3...
-
Page 13: Safety Measurements
Safety measurements >20 mm* >20 mm* SIZE u.m. Height 1450 1450 1750 1700 1900 1580 1650 2170 2620 2950 Length 1570 1430 1560 Width Duct collar diameter Operating space in front 1100 1100 1100 1200 of the unit * without cooling coil... -
Page 14: Summary Of Unit Operation
Summary of unit operation VERSION UNITS VERSION UNITS Air flows in the unit... - Page 15 By-pass damper Exhaust air Duct Outside air Counter flow/ heat exchanger Return air Return fan Supply air V-shaped supports with adjustable feet Supply fan ePM1 50% (F7) supply filter ePM10 75% (M5) supply filter Electrical panel Condensate drain pan POS. COMPONENT NAME CONSTRUCTION MATERIAL 7- 8...
-
Page 16: Receipt Of The Packages
Receipt of the packages Handle the equipment following the Manufacturer's instructions on the packaging and in this manual. Always use personal protective equipment. The means and method of transport must be chosen by the transport operator according to the type, weight and size of the unit. - Page 17 correct transport BY SIDE BY SIDE FRONT FRONT BY SIDE FRONT BY SIDE FRONT ATB15 ATB25 BY SIDE FRONT BY SIDE FRONT BY SIDE FRONT ATB16 ATB36 ATB26 ATB17 ATB37 ATB27 Lift the unit with the forks resting on its bottom, not on the foot brackets Correct transport of the packed unit...
-
Page 18: Unpacking And Verification Of Integrity
Please note that complaints or claims of damage reported after 10 days of receipt of the unit can- not be accepted A: Manufacturer's name and data DAIKIN APPLIED EUROPE S.P.A. Via Piani di Santa Maria, 72 - 00072 Ariccia (Roma) - Italy Tel: (+39) 06 93 73 11 - Fax: (+39) 06 93 74 014... -
Page 19: Product Nomenclature
Product nomenclature Modular T Main module Size 03 Size 04 ..Size 07 right configuration left configuration Release Advanced controller solution (Microtech) Smart controller solution (VAM PCB) Electric post heating coil internal water post heating coil no internal post heating coil Aluminium heat recuperator Membrane heat recuperator Iso Coarse (G4) supply filter... -
Page 20: Storage Waiting For Installation
Storage waiting for installation Waiting for the installation, the components of the unit and the relative documents must be stored in an area that: • is dedicated exclusively to the storage of the units; • is protected from the weather (preferably prepare a closed area), with adequate temperature and humidity. •... -
Page 21: Installation
Installation All installation, assembly, electrical connections to the mains and extraordinary maintenance only by qualified personnel authorised by the Retailer or Manufacturer, must be performed in compliance with the regulations in force in the country the equipment is to be used and the standards on the systems and safety in the workplace. - Page 22 PHASE 0: TRANSPORT OF THE UNITS TO THE PLACE OF INSTALLATION Transport the units until they reach the place intended for installation. The units must be transported with a transpallet or a forklift, suitable for the weight and size of the package. The choice of the most appropriate means and way remains the responsibility of the transport operator.
- Page 23 PHASE 1: UNIT CHECK AND SETTINGS Check that all components supplied are present SIZE Installation and operation manual (IOM) Wiring diagram Declaration of conformity Adjustable feet and hex nut Door release key Stainless steel washer Split spring washer M6x70 hex bolt M6 hex nut Gasket 1 roll...
- Page 24 Check that the following have been planned at the installation site: an electrical system compliant with current regulations and with specifications that meet the needs of the unit; a floor or wall drain, with siphon, connected to the sewer system; an aeraulic system (ducts for the air to be conveyed to the rooms.
- Page 25 PHASE 2: FEET ASSEMBLY Before positioning the unit, assemble the provided feet; do not use other types of supports or try to modify the feet supplied. DO NOT tilt the unit or turn it over. To attach the feet With a transpallet or with a forklift, suitable for the weight and dimensions of the unit, lift it as little as necessary to NEVER position yourself under the unit itself.
- Page 26 PHASE 3: FITTING THE GASKET (ONLY SIZES 05-06-07) SIZE 5 SIZES 6-7 gaskets gaskets gaskets SIZES 05-06-07, gasket application...
- Page 27 PHASE 4: MECHANICAL UNION BETWEEN SECTIONS (ONLY SIZES 05-06-07) Pass all the cables through the holes provided and then join the various sections as shown in the figure. Size 5 has two sections, sizes 6 and 7 have three sections. (sizes 06-07 only) SIZES 05-06-07: coupling of sections...
- Page 28 PHASE 5: ELECTRICAL WIRING BETWEEN SECTIONS (ONLY SIZES 05-06-07) Make the connections shown in the figure. To facilitate understanding, the cables have been schematized outside the sections, in reality the connectors are located inside the unit as shown in the previous figure. SIZE 5 •...
- Page 29 SIZES 6-7 Make the connections shown in the figure. To facilitate understanding, the cables have been schematized outside the sections, in reality the connec- tors are located inside the unit as shown in the previous figure. • 2x - 6-pole BUS connector; •...
- Page 30 PHASE 6: ROOM THERMOSTAT CONNECTION The unit can be supplied with a room thermostat which must be connected as shown in the figure. Thermostat connection ....................................................................................................................................................................................................................................................................................................................................................................................................................................
- Page 31 PHASE 7: ELECTRICAL CONNECTIONS power supply For the it is necessary to connect the unit to an electrical panel in compliance with current regulations. Always refer to the wiring diagram that is specific to the unit that you bought (it was shipped with the unit). If it is not on the unit or has been lost, contact the salesperson of reference who will send a copy (specify the unit's serial number).
- Page 32 N 6T3 The Manufacturer is not responsible for connections made in a manner that does not comply with regulations, with the specifications of this manual, and in the event of tampering with any electrical component of the unit. Electrical connection...
- Page 33 PHASE 8: CONNECTION TO A DRAIN The units are equipped with two 3/4” F drains in the lower part: • the drain empties the condensate collected from the drain pan located under the exchanger; • the drain must only be connected if an optional DX or hot/cold water coil has been installed. VERSION UNITS VERSION UNITS 3/4F drain...
- Page 34 Min. 2% Possible positions of the drain The drain pipe must have a larger diameter than the unit drain (3/4 ”F) and a minimum inclination of 2% in order to guarantee its operation. In case of wall drain, it is advisable to use a 90MF 3/4” fitting (not supplied) to avoid narrowing in the drain pipe.
- Page 35 PHASE 9: AERAULIC CONNECTIONS Air ducts are not supplied with the unit. The installer must buy and install them separately. For a correct installation • Clean the joint surfaces between the duct and the unit/coil. • Apply a gasket to the flange in order to prevent air infiltration. •...
- Page 36 PHASE 10: TESTING To commission the unit it is necessary to (tick "√" the operations completed): check for accurate fluid inlet and outlet pipe connections to the coils (if applicable) Check that there is a suitable siphon for all the water being drained. check unit integrity;...
-
Page 37: Maintenance
Maintenance Safety precautions for maintenance solely by the operator assigned Ordinary and extraordinary maintenance must be carried out to perform maintenance (mechanical and electrical maintenance staff ) according to the regulations in force in the country of use and complying with the laws regarding systems and work safety. -
Page 38: Ordinary Maintenance
Ordinary maintenance Proper maintenance of the systems maintains efficiency (reducing costs) and consistent performance over time, and increase the usable life of the equipment. FREQUENCY ACTIVITY A B C D E √ General cleaning of the unit. √ Check and eventual disassembly and washing of filters. in case of alarm Replacing the filters (when they have deteriorated). - Page 39 GENERAL INFORMATION ON CLEANING PROCEDURES Read the safety instructions at the beginning of this manual and page. 37 Warning: turn off the unit before ordinary and extraordinary maintenance and wait at least 120 seconds before carrying out any maintenance You should consult with your supplier of chemical products to choose the most suitable for clean- ing the unit components.
- Page 40 FAN ASSEMBLY The unit must be disconnected from the power supply when cleaning the fans. Fans can be cleaned with compressed air or by brushing them with soap and water or with a neutral detergent. Finish the cleaning by rotating the fan by hand to verify the absence of abnormal noises. CLEANING FILTERS The unit must NOT be running when the filters are removed to avoid drawing in outside air that might be contaminated.
-
Page 41: Extraordinary Maintenance
Extraordinary maintenance Turn off the unit before routine maintenance and wait at least 120 seconds before per- forming maintenance. One can not predict extraordinary maintenance as it is normally due to effects of wear or fatigue caused by the incorrect operation of the unit. REPLACEMENT OF PARTS The replacement of parts should be performed by expert personnel:: •... - Page 42 Filter disassembly...
- Page 43 M5x20 Exchanger removal...
-
Page 44: Disposal Of Used Materials - Waste
Disposal of used materials - waste The unit is made with metal, plastic and electronic components. All these components must be disposed of in compliance with local disposal laws and, where applicable, with those transposing Directive 2012/19/EU (WEEE). Diagnostics GENERAL DIAGNOSTICS The unit's electrical system includes quality electromechanical components and is therefore extremely durable and reliable over time. -
Page 46: Troubleshooting Table
Troubleshooting table MALFUNCTION TYPE COMPONENT POSSIBLE CAUSE/SOLUTION Impeller deformed, unbalanced or loose Fan impeller Nozzle damaged Foreign bodies in the fan Transmission Motor or fan not attached well Bearings Bearing worn or deteriorated NOISE LEVEL Incorrect supply voltage Motor Worn bearings Contact between the rotor and stator Excessive speed in the ducts Ducts... -
Page 47: Optional Accessory Assembly
Optional accessory assembly D-EIMOC2009-20_MODULAR TOP ADDITIONAL FILTER D-EIMOC2009-21_MODULAR TOP INTERNAL WATER/DX COILS D-EIMOC2009-22_MODULAR TOP ELECTRIC PRE/POST HEATING D-EIMOC2009-23_MODULAR TOP INTERNAL POST HEATING WATER COIL D-EIMOC2009-25_MODULAR TOP MIXING DAMPER D-EIMOC2009-27_MODULAR TOP DIGITAL NODE D-EIMOC2009-28_MODULAR TOP PRE HEATING WATER COIL... -
Page 48: Repair Log
Repair log DATE SERVICE TYPE TIME REQUIRED SIGNATURE... - Page 49 DATE SERVICE TYPE TIME REQUIRED SIGNATURE...
- Page 50 This publication is drawn up only as a technical support and does not constitute a binding commitment for Daikin Applied Europe S.p.A. Daikin Applied Europe S.p.A. has drawn up the content to the best of its ability. No explicit or implicit guarantee is given as to the completeness, precision or reliability of its content.
Need help?
Do you have a question about the Modular T Pro ATB and is the answer not in the manual?
Questions and answers