
Related Manuals for Sam4s SAP-6600


Summary of Contents for Sam4s SAP-6600
- Page 1 SAP-6600/4800II & SAP-630/SAP-530 Sam4POS Operator Manual Sam4POS Operators Manual v2.33 2017, CRS, Inc. All specifications are subject to change without notice.
- Page 2 CRS, Inc. Limited Warranty and Disclaimers of Warranty This manual has been developed by CRS, Inc. It is intended for the use of its customers and service personnel and should be read in its entirety before attempting to install, use or program the product(s). Nothing contained in this manual shall be deemed to be, and this manual does not constitute, a warranty of, or representation with respect to, the product or any of the products to which this manual applies.
- Page 3 Precaution Statements Follow these safety, servicing and ESD precautions to prevent damage and to protect against potential hazards such as electrical shock. 1-1 Safety Precautions 6. Observe the original lead dress, especially near the Be sure that all built-in protective devices are following areas : sharp edges, and especially the AC replaced.
- Page 4 Servicing Precautions WARNING: First read the-Safety Precautions-section of this manual. If some unforeseen circumstance creates a conflict between the servicing and safety precautions, always follow the safety precautions. WARNING: An electrolytic capacitor installed with the wrong polarity might explode. 5. Check the insulation between the blades of the AC 1.
-
Page 5: Table Of Contents
Ground Guard Conditioners ..................13 Uninterruptible Power Supplies (UPS) ..............13 Controls & Connections ......................14 SAP-6600 ........................14 SAP-6600 Connection Panel ................15 SAP-4800II ........................ 16 SAP-4800-II Connection Panel ................17 Rear VFD Display (optional) ..................18 SAP-630/SAP-530 ..................... 19 Side Connections .................... - Page 6 End Of Day Screen ....................34 Program Mode Screen ....................34 Screen Saver ..........................35 Passwords ..........................35 Password Notes ......................35 Initial Clear/Re-boot ........................ 36 Initial Clear ........................ 36 Reboot ........................36 Navigation Tips ........................37 Common Icons ......................37 Function Key..........................
- Page 7 Auto Scale Entry ....................62 Tare Weight ....................... 62 Auto Tare Weight ....................62 Manual Tare Weight Entry ................. 63 Open Tare Weight Entry ..................64 Promo ........................65 Split Pricing – Decimal ....................66 Split Pricing – Whole# ....................67 Not Found PLU ........................
- Page 8 Food Stamp Subtotal & Tender ................. 81 Foreign Currency Subtotal & Tender ................ 82 Integrated Payment Transactions ..................... 83 Sample Transaction - Credit ..................83 Sample Merchant and Customer Drafts (without tip) ......... 84 Sample Merchant and Customer Drafts (with tip) ..........85 Sample Transaction –...
- Page 9 Optional Seat # Entry ..................120 Print Check by Seat Number ................... 121 Payment by Seat Number ..................121 Hold/Print Hold ....................... 123 Hold an Item ..................... 124 Print All Held Items..................124 Print an Individual Item ..................124 Transfer Table ......................125 Tip Declare ......................
- Page 10 Report Mode Icons ....................159 Summary Reports ........................160 Adding Reports to the Quick View ..............160 Edit the Summary Reports ................162 Detailed Reports ........................163 Available Detailed Reports ..................164 Common Report Options .................. 164 Financial Report ....................166 PLU Report.......................
- Page 11 Open Check Report ..................220 Stock Report ..................... 220 Labor Report ..................... 221 Food Cost Report ....................221 Time In Out Report ..................222 Promotion Report ..................... 222 Balancing Formulas ....................... 223 Program Maintenance HELP File ..........................224 PLU Maintenance – Register Mode ..................226 PLU Info Key ......................
- Page 12 EFT Operation Function Key ................258 Performing EFT Operations ..................259 Initialize EFT ....................259 Close Batch....................... 260 Void Sales by Record Number ................. 261 Void Return By Record Number ..............261 Issue Local Transaction ..................262 Gratuity Entry ....................263 Post Authorization ....................
-
Page 13: Introduction
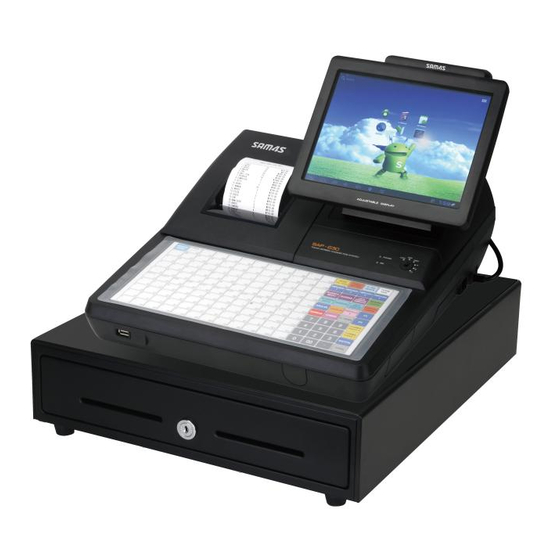
The Sam4s SAP-630 Series registers are ECR-Style all-in-one Android POS terminals. Featuring a hybrid design, Sam4s has combined a 9.7" touch display for operating the Sam4POS application by touch with a large keyboard to support frequently used items, PLU’s a built-in printer, customer display, card reader and cash drawer. -
Page 14: Sap-6600(Ii)
SAP-6600(II) The SAM4s SAP-6600 touch screen terminal is an attractive, powerful and cost-effective Android touch screen terminal that will effectively run a variety of Android software applications. • Intel Braswell Celeron N3160 Quad Core 2.24GHz Fanless Processor • Android 6.0 (Marshmallow) Operating System •... -
Page 15: Hm616
Three USB V2.0 (4GB Max) Software Sam4POS from SAM4s is an entry level POS solution running on the SAM4s SAP-6600 & SAP-630 Android terminals or the Hisense HM616 tablet. Sam4POS is available only as a bundle with the terminal hardware with the software;... -
Page 16: Sam4Pos Power Requirements
Safe Operation • Do not locate your SAM4s Sam4POS in a damp or wet environment. Avoid high humidity, direct sunlight and temperature extremes. • Always plug your Sam4POS into a grounded three-prong outlet. Never use two-prong adaptors or ungrounded outlets. -
Page 17: About Power Conditioning Equipment
About Power Conditioning Equipment Surge Protectors and Power Conditioners Most people are familiar with surge protectors, which guard against damage due to sudden spikes in the electrical current. A power conditioner provides protection against surges in power just as a surge suppressor does, but a power conditioner also maintains a continuous voltage during temporary voltage reductions, such as a brownout. -
Page 18: Controls & Connections
Controls & Connections While the programming on the Sam4POS is essentially the same, the connections and controls may vary on the different terminals. SAP-6600 Standard 3-Track Front Facing Magnetic Card Reader (MCR) Power Button located on the bottom right of... -
Page 19: Sap-6600 Connection Panel
Optional Integrated Rear 2 Line by 20 Character VFD Customer Display SAP-6600 Connection Panel • COM1, COM2 = DB9M With Pin 9 voltage (+5V) • COM3 = RJ45 Pin 8 (0V / +5V / 12V) Voltage selectable in BIOS •... -
Page 20: Sap-4800Ii
SAP-4800II Retired - Standard 3-Track Magnetic Card Reader (MCR) Power Button Located on the bottom of the touch display. Break out tabs for cable management. 16 • Introduction Sam4POS Operators Manual v2.33... -
Page 21: Sap-4800-Ii Connection Panel
SAP-4800-II Connection Panel A - COM4 (Powered) B - USB (2) C - Drawer 1 D - Drawer 2 E - LAN F - COM2 (Powered) G - COM1 (Powered) H - COM3 (Powered) I - DC In (Power Input) Introduction •... -
Page 22: Rear Vfd Display (Optional)
Rear VFD Display (optional) Available as an option on the SAP-6600 & SAP-4800II SD Card Access Optional Rear VFD Display USB Ports (2) Break out tabs for cable management. 18 • Introduction Sam4POS Operators Manual v2.33... -
Page 23: Sap-630/Sap-530
SAP-630/SAP-530 SAP-530 is Retired - 9.7” Operator Touch Display. 3” Thermal Receipt Printer 7 position Mode Key Lock The Power LED will illuminate when the ECR USB Port is powered on. The IRC LED will flash during IRC operations Optional (MCR) Magnetic Card Reader Shown with Flat Keyboard Raised Keyboard Style also available... -
Page 24: Side Connections
Side Connections Adjust the LCD panel for the Customer Display optimum viewing angle Power Switch Access panel for Integrated MCR connection Power Chord Access panel – Not used Rear Customer Display The SAP-630 & SAP-530 terminals come equipped with an integrated rear VFD customer display. Standard Rear VFD Customer Display Turn and/or lift for optimum viewing with nearly 270°... -
Page 25: Sd Memory Card Slot
SD Memory Card Slot The SD Memory Card is located inside the printer compartment. It is seen as a USB by the terminal and can be used to: • Load Application Program Updates • Save/Load Program Settings • Load Graphic Images •... -
Page 26: Control Lock
Control Lock The Key-Lock / Mode Switch has 7 positions that can be access using keys provided with the terminal. Each SAP- 630/SAP-530 is shipped with two full sets of keys. Transaction Void: removes sales totals. VOID VOID The register is inoperable. Register Mode: use for normal sale registrations. -
Page 27: Getting Started
Getting Started Default Screens Main Sign On Screen Upon boot up, the Sign on screen displays. This screen will display regardless of the position of the mode key. Use the default password “1” and touch “enter” to log in the first time. You must sign on to be able to operate the Sam4POS in any mode key position. -
Page 28: Register Mode Screen Layout
Register Mode Screen Layout On the SAP-6600 & SAP-4800II terminals, touch the Register Mode icon on the Main Menu screen to open the Sam4POS Register Mode Operator Screen. On the SAP-630 & SAP-530 terminals, turn the mode key to the REG position. -
Page 29: Register Mode Screen Zones
Register Mode Screen Zones Zone Description Title bar Header – Top Row displays: Back Arrow, current Mode identifier, Utility Information Icon (for more utility functions), Table Display, Receipt On/Off, License Info and Connection method, and Date/Time. Title bar Header – Bottom Row displays: System Identification, PLU Key Info, Price Level, KP Period, Destination and Employee name. -
Page 30: Title Bar Icon Details
Title Bar Icon Details Header Icons - Top Row Back Arrow – Used to exit the register mode. Mode – Indicates the current mode. APP Launcher – Utility Information Icon – Tap to display: EOD Report, Memory Usage percentage, Memo Pad, Team Viewer, and Favorite’s selections. ** Refer to the Expanded Operator Screen Title bar section shown on page 27 for detasils. - Page 31 Header Icons - Bottom Row System Identification – displays the terminal information: PLU Key Info – Touch this icon to choose the information you want to display on PLU keys; ‘Price’ - ‘Stock’ or ‘None’: Price Level – Displays the current Price Level; (Must be enabled in System Option) Touch this icon to select or change to a different price level KP Period –...
-
Page 32: Expanded Register Mode Title Bar
Expanded Register Mode Title Bar When the App Launcher - Utility Information Icon is selected, additional icons display on the title bar, Memory usage, Memo, TeamViewer and Favorites icons display. Utility Information Icons APP Launcher – Utility Information icon – Provides access to the additional functions: End of Day report, Percentage of Memory Used, Memo, Team Viewer and Favorites icons to the title bar. -
Page 33: Memo Icon
Memo Icon The Memo icon is available when you press the APP Launcher - Utility Information icon on the register screen title bar. Selecting the Memo icon allow the operator to add a note or reminder that can be reviewed at a later time. 1. -
Page 34: Team Viewer
10. To edit or delete notes; tap/touch on the desired note from the list: 11. Press the: a. note pad icon to edit the note; b. trash can icon to delete the note; c. print icon to print the selected memo;... -
Page 35: Custom Screen Layouts
Custom Screen Layouts After your authorized dealer has prepared your Sam4POS for installation, your register mode main MLU & FLU screen will look different. Each screen will contain the variety of item and function keys that you require. Your screens will be designed using the following capabilities: The main MLU screen and all other MLU screens can provide up to 56 single size key locations in a 7 x 8... -
Page 36: Sale Screen Size Edit
Sale Screen Size Edit If the option in the Program Mode\Options\Options\General Option: ALLOW SALE SCREEN EDIT is enabled, you can adjust the size of the sales screen in the register mode. 1. If the screen edit option is ON, the gear icon will display above the transaction detail area (Sale List) in REGISTER MODE allowing for the screen size to be edited. -
Page 37: Report Mode Screen
Report Mode Screen On the SAP-6600 & SAP-4800II terminals, touch the REPORT icon on the main menu screen to access, view and print the available register reports without clearing the totals. On the SAP-630 & SAP-530 terminals, the report mode is accessed by turning the mode key to the X-position. -
Page 38: End Of Day Screen
End Of Day Screen Touch the End Of Day icon on the main menu screen on the SAP-6600 & SAP-4800II to access the End Of Day report screen. On the SAP-630 & SAP-530 terminals, turn the mode key to the Z-position. -
Page 39: Screen Saver
Screen Saver A screen saver can be set to display on the operator display after the terminal has been idle for a pre-determined amount of time. Your authorized dealer can install a custom graphic image to display as the screen saver or you can choose to display a clock. -
Page 40: Initial Clear/Re-Boot
4. Sign on to the Sam4POS as normally. Reboot 1. To Reboot the SAP-6600/4800 Sam4POS, use the main power button on the lower right bottom of display to power OFF the Sam4POS terminal. (Right side rear, on the SAP-630/530.) 2. Press the confirmation ‘Power off’ dialog to continue. -
Page 41: Navigation Tips
Navigation Tips Navigating the screens within the Sam4POS application is very intuitive. Screens are setup with easily identifiable icons to quickly access and select the various program areas and options. Many of the icons used are common throughout the operation and programming screens. Common Icons Icon Description... - Page 42 Icon Description Pencil icon allows you to open a window to enter a value for the current program selection. Option check box with option not selected. Option check box with option selected. Note pad – Allows you to Edit the current list. Trash Can\Delete icon –...
-
Page 43: Function Key
Function Key Function Keys are separated into three categories, Function Key, Tender Key and MACRO Key. The options for each will vary by key type selected. Refer to the Function/Tender Key Definitions List for specific information about each key type. Custom descriptors up to 30 characters can be programmed on the keys. For Example: a discount function key may be programmed and labeled to operate as a store coupon key. - Page 44 FUNCTION KEY Description When pressed (REGISTER Mode) a list of EFT functions displays: Close OPERATION Batch, Void Sales &/or Return by Record Number, Gratuity Entry, Get Gift Card Balance, Get EBT Balance, EMV Voucher for EBT, Clear EMV File, Zero Auth, Pin-Pad Reset, Reprint Batch. EMPLOYEE The EMPLOYEE # key is used to sign on a cashier, clerk, or server.
- Page 45 FUNCTION KEY Description PLU INFO If an Employee has authority to Edit PLU’s and Edit PLU from PLU Info: They can view, edit and sell PLU’s from the PLU Info function. If the Employee does not have the authority to Edit PLU’s and Edit PLU from PLU Info: They can only view and sell PLU’s from the PLU Info function.
- Page 46 FUNCTION KEY Description SEAT # Use to identify a specific SEAT # (or person) within a transaction. Facilitates separate payment by seat and identifies to the food preparation staff (through the kitchen printer/KVS) how to assemble meals. Seat numbers may be assigned at the time of entry or, if necessary, later in the transaction.
-
Page 47: Tender Key Definitions
FUNCTION KEY Description WEB key was added to be able to access a specific Web Site as we can from the Program Mode → ETC → Web View screen. Multiple WEB keys can be created to access different web sites. X/TIME Use the X/TIME key to multiply, to register split price items, or display the time in the REG mode. -
Page 48: Displayed Error Messages
Displayed Error Messages The Sam4POS displays error messages in a pop-up window in the sales mode. Note that each of the standard messages described below can be customized. Your program may display slightly different text messages. AGE RESTRICTION The item being registered requires D-Date entry to proceed. CANCEL IS NOT ALLOWED When this item is registered in a sale, the Cancel operation is not allowed. - Page 49 NEED GUEST # FIRST The operator must enter the number of guests when opening a guest check or beginning a sale. NEED SEAT # FIRST Seat # entry required before operation can continue. NEED SUBTOTAL FIRST The SUBTOTAL key must be touched before continuing. NO DRAWER The employee currently signed on is not assigned to a drawer, and is not allowed to perform cash sales, or the drawer is no longer attached and is required in order to continue.
- Page 50 SCALE REQUIRED! This item requires a weight this may be entered either manually or automatically. SINGLE ITEM! This PLU has been programmed as a single item PLU and cannot be used within a sale. SUB-ITEM NEEDS MAIN ITEM This PLU has been programmed to require a condiment entry. TARE# REQUIRED This PLU/scale item requires a tare weight entry.
-
Page 51: Basic Operations
Basic Operations Operation Notes Transactions and other Functions may be initiated using the touch screen or using the real keyboard if you have the SAP-630. Press or touch the function as appropriate; Key labels and descriptors may differ due to custom programming. -
Page 52: Sign Off
Sign Off There are several ways to sign off the current employee. While in the Register Mode: 1. Type the current employee operating code using the 10-key pad then touch the EMPLOYEE key. a. Type “0” then touch the EMPLOYEE key. SIGN OFF b. -
Page 53: Clocking In/Out
Clocking In/Out The Sam4POS provides a basic time-keeping system for daily reporting and weekly payroll. Additional programming is required to utilize this feature. Employees can clock-in from the register mode using the Time In/Out key or Clock in can be performed from the Main Sign on screen. -
Page 54: Main Sign On Screen
– Main Sign On Screen When the Time Keeping option “Display Sign On Screen” is checked, the Time In/Out button appears on the main sign on screen allowing clock in/out operations from the main sign on screen. 1. From the Main Sign On screen; Tap the Time In/Out button at the top of the number entry dialog so it is selected as shown below: 2. -
Page 55: Clock Out For Break
Clock Out for Break If breaks are allowed via time keeping options: 1. Enter the employee clock in code and touch the TIME IN/OUT function key to display the clock in/out window: Clock in time for the day is displayed. 2. -
Page 56: Registering Plu's/Items
Registering PLU’s/Items Preset PLU’s • Touch a preset PLU on the screen or keyboard to register the item or Scan an item programmed into the database to register into the sale. Open PLU’s • Enter the price (up to 8-digits, without the decimal) touch an open priced PLU on the screen or keyboard to register the into the sale. -
Page 57: Plu Price/Halo Override
PLU Price/HALO Override Specific programming is required to allow the override of a preset PLU or the HALO on an open entry PLU. • The Employee must be assigned the authority to perform the override, see: Program Mode →Employee → Authority Level →REG Mode: Can PLU Price/HALO Override •... -
Page 58: Note # Operation
Note # Operation The Note # function key can be used to enter information on a receipt, kitchen printout or guest check. Multiple Note # keys may be created and a specific Note # key may be linked to a destination key to automatically bring up the Note # entry dialog. -
Page 59: Receipt Sample With Note
Receipt Sample with Note # Mel’s Diner 4231 Mall Court St. Paul Minnesota PH: 123-456-7890 Web: www.alsdiner.net 11/11/2021 01:22 PM Order # Note # Tent # 15 ----------------------------------------- 1/4 lb Burger $6.99 Monte Cristo $8.99 Reg-Coke $1.25 Lg-Sprite $1.25 TAX TTL $1.24 TOTAL $19.72... -
Page 60: Alpha Text
Alpha Text The Alpha Text key can be used to type a customer name or special instruction message that will be associated with an order (soft check) or with an item in a sale. Depending on the option setting “Use Alpha Text Descriptor” the Alpha Text key will operate in one of two ways. - Page 61 5. Press OK. The message is displayed and will be printed with the order. Alternately, you can select a pre-defined Alpha Text message as defined in the Message programming. Refer to Program Mode \ Receipt & Message \ Message programming. Basic Operations •...
-
Page 62: Pre-Defined Alpha Text
Pre-defined Alpha Text 1. Press the ALPHA TEXT key any time after registering an item. 2. When the Alpha Text dialog displays, Press the MESSAGE field to open the predefine message categories: 3. Select the desired message category from the list. 4. -
Page 63: Sample Receipt With Alpha-Text
Sample Receipt with Alpha-Text Coffee Shoppe 1234 Mall Court St. Paul Minnesota PH: 123-456-7890 Web: www.coffeeshoppe.net 03-11-2019 09:38 AM ORDER# ---------------------------------- Product ---------------------------------- ** no seat ** Lg-Coffee CREAM SUGAR IRISH CREAM ____________Extra Strong_____________ NO. 00000104 REG: POS-MAIN MANNY ---------------------------------- Basic Operations •... -
Page 64: Price Check
Price Check Use the PRICE CHECK key to check the price of an item without registering it. We can also edit the PLU descriptor and change the price from the Price Check key or print a label for the selected item. T he PLU option ‘Allow Price Change’... -
Page 65: Print Label
Print Label Note: you must have a label printer setup and mapped to the terminal before you can print labels. 8. To print a barcode from the Price Check function – after selecting a PLU, press the print icon ; the PRINT LABEL dialog displays: 9. -
Page 66: Registering Scale Items
Registering Scale Items Direct Scale Entry 1. Place the item on the scale. 2. Touch the SCALE key to display the weight. 3. Register the open or preset Scalable PLU. Manual Weight Entry 1. Enter the weight using the decimal key. 2. -
Page 67: Manual Tare Weight Entry
Manual Tare Weight Entry 1. Place the item in the container on the scale. 2. Touch the SCALE key to display the weight. 3. Touch the TARE ENTRY drop down: 4. Select the appropriate Tare from the list; the weight displays minus the tare: 5. -
Page 68: Open Tare Weight Entry
Open Tare Weight Entry 1. Place the item in the container on the scale. 2. Touch the SCALE key; the weight is displayed: 3. Touch the Open TARE ENTRY field. Place the cursor to the right of the digit you want to enter. 4. -
Page 69: Promo
Promo The PROMO key allows the operator to account for promotional items (i.e. by two, get one free). This key will remove the cost of the item from the sale, but not the count. In the case of by two, get one free the count remains three items, but the customer is only charged for two. -
Page 70: Split Pricing - Decimal
Split Pricing – Decimal When items are priced in groups, i.e. 3 for $1.00, you can enter the quantity purchased and let the register calculate the correct price. The X/Time key can be set to allow Split Pricing. The split pricing can be set for either Whole# or Decimal. When set for Decimal: 1. -
Page 71: Split Pricing - Whole
Split Pricing – Whole# The X/Time key can be set to allow Split Pricing. The split pricing can be set for either Whole# or Decimal. 1. Enter the quantity purchased; press the X/TIME key. Sam4POS For example, if 2 items are sold enter: 12345 City Street [2] X/TIME Hometown, USA 55555... -
Page 72: Not Found Plu
Not Found PLU Designed to be used in a scanning system the NOT FOUND PLU feature allows the operator to immediately enter basic PLU information for an item that is not in the PLU file during the sale. If the "Not Found PLU" message displays when a PLU is scanned the operator can choose to add the item and will be prompted to enter PLU price, and if programmed, the descriptor and linking information. -
Page 73: Shifting Or Exempting Tax
Shifting or Exempting Tax Tax Shift PLU’s can be programmed to automatically add the appropriate tax or taxes. Occasionally, you may need to sell a normally taxable item without tax, or a normally non-taxable item with tax. You can perform tax shifting with the tax shift key. -
Page 74: Corrections & Voids
Corrections & Voids Clear Touch the CLEAR key to erase numeric entries or clear an error condition. Void Item Use the VOID ITEM key to void an item previously entered in a transaction. When a main item is voided, the condiments associated with the item are also removed. -
Page 75: Merchandise Return
Merchandise Return Use this function to return (credit) merchandise inside or outside of a sale. Touch RETURN, and then register the item to be returned. Repeat for each item to be returned. Split Item (Consolidated Items) When like items are consolidated, touch the SPLIT ITEM key to separate items for separate seat assignment or split checks. -
Page 76: Split Item (Single Item)
Split Item (Single Item) Sometime a customer may want to split the cost of a certain item, such as an expensive bottle of wine. The SPLIT ITEM key can be used to split the cost of the item into equal portions. 1. -
Page 77: Change Quantity
Change Quantity The QUANTITY CHANGE key allows the operator to change the quantity of an item that was entered incorrectly. For example: The customer ordered six beers, but the operator incorrectly entered in 9 X/Time Beer instead of entering 6 X/Time Beer. To correct this: 1. -
Page 78: Discounts/Coupons/Surcharges
Discounts/Coupons/Surcharges The DISCOUNT key is programmable and may be set up to handle a variety of discounts, surcharges or coupons. Each Discount key can: • Require Manager to allow the discount, • Apply to a Sale or an Item, • Accept an amount entry or calculate a percentage, •... -
Page 79: Open Amount Sale Coupon
Open Amount Sale Coupon To deduct an open amount coupon against a sale: 1. Register items. 2. Touch SUBTOTAL. 3. Enter the amount of the coupon. 4. Touch the “Sale [-] Coupon” % key. 5. Finalize the transaction. Preset Percentage Sale Coupon To deduct a preset amount coupon against a sale: 1. -
Page 80: Item Discounts
Item Discounts Open Percentage Item Discount To deduct an open percentage discount from an item (or override a preset percentage): 1. Register items. 2. Touch the item to be discounted. 3. Enter discount percentage. If the discount is fractional, use the decimal key. 4. -
Page 81: Surcharges
Surcharges A Surcharge is used to add an additional charge or fee to the cost of an item or sale. Discount keys can be used to apply this added surcharge/fee. Open Percentage Sale Surcharge To add an open percentage surcharge to a sale: 1. -
Page 82: Promotions
Promotions The SAM4POS terminals can automatically apply a discount when a certain number of specified items is registered or when certain combinations of items are registered. This is accomplished via the Promotion programming on Sam4POS. There are four different discount scenarios with the Promotion programming and the Promotion Group programming. Information from the sale of items assigned to the individual Promotions will update the Promotion Report. -
Page 83: Promotion \ Coupon Search
Promotion \ Coupon Search If setup in the promotion programming, The Mix & Match, Multi-Buy, and Combo Discount provide the ability to select a specific coupon/discount to apply. The Promotion function key is used to select and apply the appropriate discount. -
Page 84: Totaling/Tendering
Totaling/Tendering Cash Cash Tender keys can be set as: NORMAL Touch the CASH key or, enter the amount of the cash tendered and touch the CASH key. The register will display the change due. QUICK TENDER Touch the QUICK CASH key, the programmed amount will be applied and any change due will be displayed. NEXT DOLLAR Touch the NEXT DOLLAR key to tender an amount the next whole dollar above the sale total. -
Page 85: Check Cashing
Check Cashing A separate function key is available for check cashing. Check cashing limits may apply and a manager code may be needed to complete the transaction. Enter the amount of the check to be cashed, touch the CHECK-CASHING key. The cash and check-in- ... -
Page 86: Foreign Currency Subtotal & Tender
Foreign Currency Subtotal & Tender 1. Register your items. Sam4POS 2. Press or touch the appropriate conversion key 12345 City Street which is pre-programmed with the exchange Hometown, USA 55555 rate. For example, $1.00 Canadian Dollar may be 2018-02-12 15:43 worth $0.78 US Dollar.) ORDER# 123 POS-1060... -
Page 87: Integrated Payment Transactions
Integrated Payment Transactions The operation examples described here are shown using the Datacap IPTran-LT with the vx805 Pin-Pad. Other Datacap approved pin-pads can be used. The procedure below applies to Miscellaneous Tender keys set to connect to the EFT device and the EFT Key Type set for Credit or Cash Benefit. -
Page 88: Sample Merchant And Customer Drafts (Without Tip)
Sample Merchant and Customer Drafts (without tip) If the Datacap Tip Entry option is set to “Do Not Prompt on PINPAD” (S-Mode System Option/Page 6) a tip line will not be printed, and the customer will not be prompted for tip entry at the PIN-Pad. 2019-02-21 14:51 2019-02-21... -
Page 89: Sample Merchant And Customer Drafts (With Tip)
Sample Merchant and Customer Drafts (with tip) If the Datacap Tip Entry option is set to “Print Blank Tip on Receipt” (S-Mode System Option/Page 6) a tip line will be printed and the customer will not be prompted for tip entry at the PIN-Pad. 2019-02-21 15:32 2019-02-21... -
Page 90: Sample Transaction - Tip Entry At Pin-Pad
Sample Transaction – Tip Entry at PIN-Pad If the Datacap Tip Entry option is set to “Prompt on PIN-PAD” (S-Mode System Option/Page 6) a tip line will not be printed, and the customer will be prompted for tip entry at the PIN-Pad. 1. -
Page 91: Sample Merchant And Customer Drafts
Sample Merchant and Customer Drafts 2019-02-21 15:51 2019-02-21 15:51 ORDER# POS-1_012 ORDER# POS-1_12 ---------------------------------------- PRODUCT TOTAL MERCHANT ID: ****7801 ---------------------------------------- CLERK ID: 1 ** NO SEAT ** GENERAL MDSE $1.00 SALE TIP BY EFT $0.10 MASTERCARD ************0434 ---------------------------------------- ENTRY METHON: CHIP SUBTOTAL $1.20 DATE: 02/21/2019 TIME: 09:59:59... -
Page 92: Sample Transaction - Debit
Sample Transaction - Debit 1. Register a normal transaction. 2. Touch the appropriate MISC TEND key. At the register, the message “WORKING” displays: 3. At the PIN-Pad the message displays: SALE $2.00 – OK? 4. Press the GREEN button on the PIN-Pad keypad. 5. -
Page 93: Sample Merchant And Customer Drafts (Without Tip)
Sample Merchant and Customer Drafts (without tip) 2019-02-21 14:51 2019-02-21 14:51 ORDER# POS-1_008 ORDER# POS-1_008 ---------------------------------------- PRODUCT TOTAL MERCHANT ID: ****7801 ---------------------------------------- CLERK ID: 1 ** NO SEAT ** GENERAL MDSE $10.00 SALE ---------------------------------------- VISA ************0010 SUBTOTAL $10.99 ENTRY METHON: CHIP TAX1 TAXABLE $10.00 DATE: 02/21/2019 TIME: 11:02:52... -
Page 94: Sample Merchant And Customer Drafts (With Tip)
Sample Merchant and Customer Drafts (with tip) 2019-02-21 15:32 2019-02-21 15:32 ORDER# POS-1_009 ORDER# POS-1_009 ---------------------------------------- PRODUCT TOTAL MERCHANT ID: ****7801 ---------------------------------------- CLERK ID: 1 ** NO SEAT ** GENERAL MDSE $10.00 SALE ---------------------------------------- VISA ************0010 SUBTOTAL $10.99 ENTRY METHON: CHIP TAX1 TAXABLE $10.99 DATE: 02/21/2019 TIME: 09:41:14... -
Page 95: Manual Card Entry
Manual Card Entry Manual card entry is allowed on Credit, Gift and EBT transactions if the reader is unable to read the card or for card not present sales. Note: PIN Debit payments must be processed as card-present transactions, card data must be read by the card reader and cannot be manually entered. -
Page 96: Gift Card Sale
Gift Card Sale The gift card sale operation changed at v2.0.33 and later versions as shown below. Complete the gift card sale transaction as you would a normal transaction, enter each gift individually then tender the sale with Cash, Check, or Credit card. You cannot use a gift card to purchase another gift card. The operation is the same if you are activating a new gift card or adding value to an existing card. -
Page 97: Ebt (Food Stamp) Transaction
Refunds & Returns to EBT must be performed in the Void Mode, not as a Merchandise Return operation. If the station is an SAP-630, turn mode key to VOID. If the station is an SAP-6600 need to assign the Void Mode function key to an MLU\FLU. -
Page 98: Merchandise Return
Merchandise Return If a customer returns a purchased product and wishes a refund to their credit card, we can accommodate the merchandise return using the RETURN key. The Return (MDSE RTRN) function key must be assigned to the to an MLU\FLU or to the Real Keyboard (on SAP-630) on the terminal. -
Page 99: Sample Merchant And Customer Draft
Sample Merchant and Customer Draft 2019-02-21 14:22 2019-02-21 14:22 ORDER# POS-1_007 ORDER# POS-1_007 ---------------------------------------- PRODUCT TOTAL MERCHANT ID: ****7801 ---------------------------------------- CLERK ID: 1 ** NO SEAT# ** -1 x @ 15.00 REFUND ==[return]== GENERAL MDSE -15.00 VISA ************0010 ENTRY METHOD: CHIP ---------------------------------------- DATE: 02/21/2019 TIME: 14:21:52... -
Page 100: Void Transaction
Void Mode to make a refund to the customer’s credit card. A VOID MODE function key must be assigned to the SAP-6600 terminals, on the SAP-630 you can turn the mode key to the VOID position. The VOID MODE operation allows the cashier to provide a refund to a customer’s credit card regardless of whether the transaction is in the current batch or not. -
Page 101: Sample Merchant And Customer Draft
Sample Merchant and Customer Draft 2019-0220 21:48 2019-02-20 21:48 MERCHANT ID: 19497807 ORDER# POS-1_005 CLERK ID: TEST ------------------------------------- PRODUCT TOTAL REFUND ------------------------------------- ** TRANS VD ** VISA ************0010 ENTRY METHOD: CHIP GENERAL MDSE -2.01 DATE: 02/20/2019 TIME: 21:48:52 ------------------------------------- INVOICE:00022 SUBTOTAL -2.01 REFERENCE: 1005... -
Page 102: Advanced Operations
Advanced Operations Overview The Sam4POS terminals can be utilized in a variety of common applications such as food service, retail and table service environments. Default key descriptors are used throughout this operation manual. The names and functions described in this manual may differ slightly from your specific application. Consult with your dealer for detailed operation information. -
Page 103: Modifier Keys
Modifier Keys Typically, keys labeled as Small/Medium/Large/etc. are modifier keys. When items are sold in different sizes, touch a modifier (size key) before the desired item. Modifiers can be programmed as: • Stay Down so that registrations will be modified by the same modifier until another modifier is selected, •... - Page 104 The completed item is displayed, and the register is ready for another entry or finalization. Note: When in an MLU Chain, if you need to delete a selection; Press & Hold on the item then tap DELETE from the sub-menu selections. 100 •...
-
Page 105: Quick Service Operations
Quick Service Operations Drive Thru Operations When drive thru operation is implemented, Drive Thru Store, Drive Thru Recall keys, assigned on the screen. (The Drive Thru Store key uses a Store Table function key with the “auto check management” feature enabled. The Drive Thru Recall key uses a Recall Table function key with the “Drive Thru”... -
Page 106: Multiple Tracking Files
Table Service Operations The Sam4POS provides a soft check system for storing and recalling orders on the terminal. Multiple tracking files can be created; This allows you to set up different files for table tracking, phone order tracking, drive-thru tracking for multiple windows, take-out order tracking or whatever your application requires. The following check tracking options are available: •... -
Page 107: List Table
List Table Use the List Table key to view open Tables (checks) in the system. Settings can be made so an employee can see only their own open checks or view all open checks. 1. Touch the LIST TABLE key to display open checks. -
Page 108: Soft Check Posting
Soft Check Posting The Sam4POS terminals use a Soft Check tracking method for storing orders. It is not necessary to print the check at each posting. The PRINT CHECK key is used to print the check for presentation to the customer. The check will print the check at the designated receipt printer for the station. -
Page 109: Beginning A Check
Beginning a Check 1. Depending on how your system is programmed, to begin a check: a. Touch the RECALL TABLE key, if set to automatically assign a check number a new check will be opened. b. Touch the RECALL TABLE function key, enter the check number or customer name; press OK to open the check. -
Page 110: Adding To A Check - Method 1
Adding to a Check – Method 1 1. To add additional items to a stored check, you can either: a. Enter the check number and touch the RECALL Table function – or – b. Use the LIST Table function to select a check from a list to open: 2. -
Page 111: Adding To A Check - Method 2
Adding to A Check – Method 2 If a sale is started but not finalized, we can add the items the sale to an existing check in the system. 1. Register a normal transaction without opening a table. 2. If check numbers are not assigned by the register, Press the Recall Table key: a. -
Page 112: Repeat
Repeat You can repeat the last items posted to a check by using the REPEAT key. This simplifies registration of another round of drinks. The Repeat function may require manager authorization. 1. Open a check. Enter Items. Touch the STORE TABLE key. 2. -
Page 113: Merge & Split Checks For Payment
7. The selected items are added to the check; Press STORE TABLE to store the check again. Merge & Split Checks for Payment The List Table key is used to combine multiple checks together for payment or to split items off from an active check in the system to a new check or to another existing active check in the system. - Page 114 2. Select a check from the list; the check is displayed in the left column. 3. Press the MERGE & SPLIT button. 4. The Split Table screen is displayed with the selected check and the operation buttons: Quick Add Check, Exist Check, New Check, Save, Cancel 5.
- Page 115 6. Select the check from the list on the right (or multiple checks) you want to add to the current check; then press the ADD button. 7. The selected check is added to the current check. 8. Select additioan checks to add to this check or oress CLOSE to return to the Split Table screen.
-
Page 116: Split Check For Payment
10. Press CLOSE to return to the main sales screen. Split Check for Payment The Split Table function key allows you to select an item or items on a soft check for assignment to another check. The List Check key also allows you to select a check and split items off to a separate check. You can choose to split items off to a new check or to an existing active check in the system. - Page 117 2. Select the items you wish to split off. 3. Press the NEW OPEN button to create a new check for the items: 4. Enter the number or name for the new check (up to 10 digits) and press Advanced Operations • 113 Sam4POS Operators Manual v2.33...
- Page 118 5. Touch the MOVE TO THIS CHECK button on the new check; the selected items will now appear on the new check. 6. Alternately, you can press EXIST OPEN to add the items to an existing check in the system: 7.
-
Page 119: Tip Entry
TIP Entry Tips can be entered to open guest checks in the system using the TIP Charge function key. Gratuities/Tips received after a sale is tendered with a credit card can be added to the transaction from the register mode using the EFT Operation function key or the List Paid function key. The EFT Operation menu in the Program Mode, Device, EFT Operation may also to enter tips. -
Page 120: Paying A Check
Paying a Check 1. To pay off an existing check: a. Enter the check number and press Recall Table. b. Press the List Table function, touch a check from the displayed list of active checks to select it and then touch OPEN. 2. -
Page 121: Tip (Gratuity) Entry
TIP (Gratuity) Entry The processor must allow “By Record” operations (Tokenization) for tip entry operations. Tips can be entered to open guest checks in the system using the TIP Charge function key. Gratuities/Tips received after a sale is tender with a credit card can be added to the transaction from the register mode using the EFT Operation function key or the List Paid function key. -
Page 122: Tip Entry (Eft Operation Method)
5. Select the transaction from the list you wish to add a TIP to; then press the TIP ENTRY button. The TIP ENTRY dialog appears. 6. Enter the TIP AMOUNT indicated by the customer and select the EMPLOYEE to apply the TIP to. 7. -
Page 123: Seat # Assignment
Seat # Assignment The seat # system may be employed in a soft check system, its purposes are: To separate orders by seat (or individuals) so that orders can be identified by individual seats on kitchen requisitions for food preparation. To facilitate separate payments by seat. -
Page 124: Changing The Seat # On A Previously Entered Item
Changing the Seat # on a Previously Entered Item If you need to change the current seat# assignment on an item: 1. Touch the item you wish to change the seat# assignment on. 2. Touch SEAT #. The Enter New Seat # entry dialog displays. -
Page 125: Print Check By Seat Number
Print Check by Seat Number 1. Open a check. Identify items by seat number. 2. Touch PRINT CHECK. The print ‘Check dialog’ will offer the following options: SINGLE CHECK – ALL SEATS SEPARATE CHECKS – ALL SEATS SINGLE CHECK –ONE SEAT (When selected, you will be prompted to select a seat number.) ... - Page 126 4. The seat is highlighted and paid; the seat total is adjusted accordingly. 5. Continue to settle each seat until the check is completely paid, or touch STORE CHECK to store the unpaid seats. 6. When the check is opened again, the paid seat no longer appears on the check. 122 •...
-
Page 127: Hold/Print Hold
Hold/Print Hold This feature is used in a table service restaurant. It prevents kitchen printer /KVS instructions from being sent immediately after items are registered and stored. For example, an employee registers a customer order consisting of appetizers and main course entrees. Without this feature, both the appetizer and main course items are sent to the kitchen at the same time. -
Page 128: Hold An Item
Hold an Item 1. Touch the item you wish to hold. 2. Touch the HOLD key. Note that when a main item is held, its condiments or instructions are also held. Note that an ‘H’ displays below the held items. 3. -
Page 129: Transfer Table
Transfer Table If permitted by authority level programming, an employee is allowed to move a check to a different Employee. This can be done multiple times, if necessary. 1. Sign on employee and press the TRANSFER TABLE key. 2. Select the checks from the list you wish to transfer. a. -
Page 130: Tip Declare
Checks three, four and five are transferred to Sonjai 5. The selected checks are transferred to the employee you selected. Tip Declare If the employee time keeping feature is used, the operator may be prompted to enter Tips when clocking out. (Check the employee authority level option “Compulsory Tip Entry”.) The Time In/Out operation can be performed from the Register Mode or you may have the option set to display the Time In/Out on the sign on screen. - Page 131 4. Alternately, the TIP DECLARE function key can be used to enter Tips when the time keeping feature is not used. 5. Touch the TIP DECLARE key. 6. Enter the TIP Declared amounts, select the media type for all Tips: 7.
-
Page 132: Outside Of Sale Operations
Outside of Sale Operations Display Time & Date The Time and date can be displayed anytime from any screen by pressing the Date & Time on the title bar. The screen saver can also be set to display the CLOCK. The screen saver will display after the terminal has been idle for a pre-determined amount of time. -
Page 133: Input Amount
Input Amount 1. Touch the RECD ACCT key and select the Input Amount tab. 2. You can select to view just the CASH, CHECK or MISC media type as desired or select ALL to view & enter all the media types. 3. -
Page 134: Input Count
Input Count The Input Count selection tab allows you to simply count the number of a specific quick cash media, such as pennies, quarters, dollars, ten dollars, etc. These Quick Cash Tender types must be created in the Program Mode\Function Key\Tender Key programming before they will appear on the RA Key, Input Count tab. 1. -
Page 135: Paid Out
Paid Out Paid Out operations are used to remove CASH amounts from the cash drawer totals. Typically, Paid Out operations are performed outside a sale. However, it is possible to perform a Paid Out operation within a transaction. The Paid Out amount will add to the current transaction amount. -
Page 136: Input Count
Input Count The Input Count selection tab allows you to simply count the number of a specific quick cash media; pennies, quarters, dollars, ten dollars, etc. These Quick Cash Tender types must be created in the Program Mode\Function Key\Tender Key programming before they will appear on the PO Key, Input Count tab. 1. -
Page 137: Post-Finalization Procedures
Post-Finalization Procedures These operations are performed from the Register Mode but are only allowed after a sale is complete. Receipt Issue Additional receipts can be printed after a sale is finalized, or, if a receipt is not normally issued, we can print a receipt on request. -
Page 138: List Paid
List Paid Touch List Paid to view previously closed transactions for the current day or for a specified date range. The List Paid key can only be used outside of a transaction. Transactions for all employees or transactions just for selected employees can be previewed, reprinted or exported to a USB or E-Mail account. -
Page 139: List Paid Example
List Paid Example 1. Touch the LIST PAID key; the transaction preview screen is displayed: 2. Touch the TODAY button to view paid transactions for the current day. 3. Alternately, Touch the START DATE to open the start date calendar view. 4. - Page 140 8. The LIST PAID screen is displayed. The default setting is to show paid transactions for all employees. If desired, you can choose to see just the transactions from selected employees. 9. Touch the EMPLOYEE field to display the employee list. Check\Uncheck the SELECT ALL checkbox.
- Page 141 13. Select a transaction from the list to preview the receipt. 14. Press the REPRINT button to print a copy of the receipt. 15. To print a summary of all of the paid transactions in the list, press the Print icon .
-
Page 142: Print List Paid Example
Print List Paid Example Sam4POS 10/26/2021 12:36 PM BarPub (POS-2) LIST PAID DATE : 10/26/2021 12:36 AUTHOR : MANAGER DATA RANGE 10/26/2021 ~ 10/26/2021 ============================================== RECEIPT# 00006013 ORDER# EMPLOYEE MANNY 10/26/2021 12:11 PM TOTAL $32.54 ---------------------------------------------- RECEIPT# 00006012 ORDER# EMPLOYEE MANNY 10/26/2021 12:11 PM TOTAL... -
Page 143: Tip (Gratuity) Entry
TIP (Gratuity) Entry When Integrated Credit is utilized, Tips indicated by the customer can be added after the transaction is tendered from the List Paid screen. Tip entry here is only used with integrated credit, credit card transactions. Note: If the Paid Type is set for TENDER and the Tender Category is set for MISC, you can use this key for easy TIP entry. -
Page 144: Void Sales
Void Sales When Integrated Credit is utilized, Credit transactions can be voided from the batch in the register mode using the List Paid function key. This operation is used only with credit transactions when integrated credit is used. Note 1: If the Paid Type is set for TENDER and the Tender Category is set for MISC, you can use this key for easy TIP entry. -
Page 145: Using The Table Map
Using the Table Map The Sam4POS Table Map (graphical table management) offers the following features: You can design a facsimile of the restaurant floor plan placing tables on multiple seating zones – for example, a main floor, bar, counter, patio, or other serving locations. You can place as many tables for each zone as are necessary. - Page 146 Table Map Operations • If table management is “Manual”: touch the Table Map icon on the Register Mode title bar. • If table management is “Automatic”: sign on an employee to display the Table Map screen. Active tables are displayed with a Bold outline.
-
Page 147: Opening A Table
Opening a Table • Open the Table Map and select the appropriate Seating Zone. • Touch a Table to open the check associated with the table: • Touch the OPEN button to open the check for the selected table. Alternately, you can double-tap a table on the table map to open the table. •... -
Page 148: Merge & Split Tables
Merge & Split Tables When using the Table Map, the Merge & Split button allows you to combine active tables for payment or to select an item or several items from a selected active table and assign the items to another table in the Table Map. You can choose a table in the same zone or, you can choose to merge or split the items to a table in a different zone. - Page 149 6. The Selected table is displayed. 7. Press the ‘NEW OPEN’ or ‘EXIST OPEN’ button. 8. The main Table Map screen is displayed. 9. You can Merge & Split items to any Table on any Zone. Choose the Zone and Table you want to Merge with or Split items to.
- Page 150 11. Select all the items from the table that you would like to move to the other selected table. Press the icon at the top of the check to select all items. Pressing the icon will delete the table from the screen. 12.
-
Page 151: Payment
16. When Table #14 is opened in the register mode, the combined check is displayed; Payment When a table is selected, you have the option to go directly to a payment window without having to open the table first. 1. From the Register screen, Touch the Table Map icon to open the Table Map screen. -
Page 152: Seat Payment
Seat Payment 1. From the Register screen, Touch the Table Map icon to open the Table Map screen. Select the Zone you want to Merge or Split items from. Touch a Table to open the check associated with the table. The ‘Check dialog’ is displayed: 2. -
Page 153: Print Check
Print Check 1. From the Register screen, Touch the Table Map icon to open the Table Map screen. Select the Zone you want to open a table from. Touch a Table to open the check associated with the table. The ‘Check dialog’ is displayed: 2. -
Page 154: Dynamic Table Map
Dynamic Table Map The table map allows you to create multiple tables in a grid formation for table service operations. When the option DYNAMIC is selected in the table map, configuration settings are provided for the Table Map to allow customizing table positions. -
Page 155: Customer Delivery
Customer Delivery Overview The Customer Delivery feature with Sam4POS maintains a customer data file for assigning an order to a customer for eat0in or pick-up or assigning the order for delivery to a customer. The Customer category must be enabled in the program mode before this feature can be utilized, consult with your local dealer for details. -
Page 156: Customer Delivery Function Keys
Customer Delivery Function Keys The function keys used with the Customer \ Delivery feature are defined here. Function Key Description Delivery The Delivery function key can be used to initiate a delivery order transaction. Pressing the Delivery key opens the customer records list screen. Here existing accounts can be opened, new accounts created, or existing accounts deleted. -
Page 157: Delivery Operations
Delivery Operations The Delivery function key can be used to initiate a delivery order transaction. The Delivery key must be linked to a specific Recall Table key for proper storage management of the delivery order. Pressing the Delivery key opens the customer records list screen. -
Page 158: Open Stored Delivery Order
Open Stored Delivery Order When a Delivery order that has not yet been paid for has been delivered to the customer, you can recall the stored order to apply the payment and finalize the transaction. 1. Touch the DELIVERY key to display the customer record screen and select the appropriate customer from the list. -
Page 159: Re-Order Previous Order
Re-Order Previous Order At times a customer may want to reorder the same items as their previous order. With the Sam4pos, previous orders can easily be recalled and ordered again in a new sale. 1. Touch the DELIVERY key to display the customer record screen and select a customer from the list to begin a new delivery order. - Page 160 6. Touch OK to begin an order. A new delivery order the same as the previous order will open with the customer account number as the check number. Pressing CANCEL will exit without creating the delivery order. 7. Items may be added or deleted as necessary, Store the order or tender the order to send to the KP (if used).
-
Page 161: Park Order For Delivery At A Later Time
Park Order for Delivery at a Later Time A customer may want to place a delivery order to be picked up or delivered at a later date and/or time. The Sam4POS provides for this using the Order Park Time and the Order Service Time settings when a delivery order is initiated. -
Page 162: Report Mode
Report Mode Report Mode Menu Touch the REPORT Mode icon on the main program mode screen to view the report mode (X-position on the SAP-630 & SAP-530). When the Report Mode is selected, the default screen displays a grid of six quick view summary reports for managers to quickly see selected report information. -
Page 163: Report Mode Icons
Report Mode Icons Icon Function Description Back Arrow – Exits the report mode. Report Mode title shows the current mode selection and the Terminal Descriptor. Pressing this title will open the detail report list. Up/Down Carrot icons are used to Display/Hide the detailed reports selection sub menu;... -
Page 164: Summary Reports
Summary Reports When the Report Mode is selected, the default screen displays a grid of six quick view summary reports for managers to quickly see selected report information. Specific data can be chosen to display on the summary report grid. The Quick View Summary Reports allow you to view selected report information without having to first run and print the report. - Page 165 CURRENT to view report If the report doesn’t display, touch the icon to see the report data. Select data before EOD is performed or select TODAY to view all report data for the day, including info after an EOD performed. If the Current/Today option is changed, the graphs will be refreshed to display the selected data.
-
Page 166: Edit The Summary Reports
Edit the Summary Reports If desired, the current reports in the report mode quick reports can be changed to display different reports or removed from the quick report view. Touch the Edit icon on the title bar to display or hide the edit icons for each report in the grid. ... -
Page 167: Detailed Reports
Detailed Reports Additional detailed reports are available by selecting the report mode sub menu. Select a report from the list to view the report. From the screen for the selected report you can view, print or save the selected report as a CSV file. -
Page 168: Available Detailed Reports
Available Detailed Reports Financial Group Period Open Check Stock Labor Food Cost Time In Out Promotion Product Mix Inventory Common Report Options The available Date selections, Options and Filters will vary depending on the specific report type that is selected. The information here explains the various selections that may appear on a selected report. DATES You can choose DATES to view reports for Today, Last End of Day, set a Custom period, or choose from 1 Day, 1 Week, 2 Week, 1 Month, 3 Month, 6 Month or Yearly reports. - Page 169 Additional Selections in the Dates Area are: START DATE AND END DATE Use the calendar provided to select the start & end dates. END OF DAY NUMBER You have the option to select a specific End of Day Number (if more than 1 has been performed) TERMINAL You can select to view reports from ALL terminals or select individual terminals.
-
Page 170: Financial Report
Financial Report DATES Date selections include: Today, Last End of Day, Custom Period 1 DAY, 1 WEEK, 2 WEEK, 1 MONTH, 3 MONTH, 6 MONTH, 1 YEAR Additional selections in the Dates area are: START DATE and END DATE END OF DAY NUMBER and TERMINAL SELECTION OPTIONS Training Data, Current Data, Detailed Data, Zero Skip, Drawer Total, Tip Total Reporting By Employee, Signed On Employee, Clocked In Employee, Reporting By Terminal... -
Page 171: Plu Report
PLU Report DATES Date selections include: Today, Last End of Day, Custom Period 1 DAY, 1 WEEK, 2 WEEK, 1 MONTH, 3 MONTH, 6 MONTH, 1 YEAR Additional selections in the Dates area are: START DATE and END DATE END OF DAY NUMBER and TERMINAL SELECTION Not Used (indicates there is no filter selected), My Terminal, select Specific Terminal(s) or Select All OPTIONS Training Data, Current Data, PLU Zero Sales, Waste, Promo, Price Level, Not Found PLU, PLU Profit... -
Page 172: Group Report
Group Report DATES Date selections include: Today, Last End of Day, Custom Period 1 DAY, 1 WEEK, 2 WEEK, 1 MONTH, 3 MONTH, 6 MONTH, 1 YEAR Additional selections in the Dates area are: START DATE and END DATE END OF DAY NUMBER and TERMINAL SELECTION Not Used (indicates there is no filter selected), My Terminal, select Specific Terminal(s) or Select All OPTIONS Training Data, Current Data, Waste, Promo... -
Page 173: Period Report
Period Report DATES Date selections include: Today, Last End of Day, Custom Period 1 DAY, 1 WEEK, 2 WEEK, 1 MONTH, 3 MONTH, 6 MONTH, 1 YEAR Additional selections in the Dates area are: START DATE and END DATE END OF DAY NUMBER and TERMINAL SELECTION Not Used (indicates there is no filter selected), My Terminal, select Specific Terminal(s) or Select All OPTIONS Training Data, Current Data... -
Page 174: Open Check Report
Open Check Report DATES Date selections include: Today, Last End of Day, Custom Period 1 DAY, 1 WEEK, 2 WEEK, 1 MONTH, 3 MONTH, 6 MONTH, 1 YEAR Additional selections in the Dates area are: START DATE & END DATE ALL DATE When selected, Only the TODAY date selection is available, all other date selections are grayed out. -
Page 175: Stock Report
Stock Report DATES Only the TODAY selection is available, all other date selections are grayed out. OPTIONS Below The Minimum Stock Value – When selected, the generated report will display only info for PLU’s that are below the minimum stock level as set on the PLU. FILTERS Group #1, Group #2, Group #3 –... -
Page 176: Labor Report
Labor Report Labor Report data is derived from the Time Keeping report as follows to calculate labor cost. DATES Date selections include: Today, Last End of Day, Custom Period 1 DAY, 1 WEEK, 2 WEEK, 1 MONTH, 3 MONTH, 6 MONTH, 1 YEAR Additional selections in the Dates area are: START DATE and END DATE OPTIONS... - Page 177 Labor Report Example Labor Report shown with TYPE Setting EMPLOYEE TYPE NOT selected: The data is conveyed per Job Code. Labor Report with the TYPE selection: Employee Type selected: The data is conveyed per Employee: Labor Report shwon a Graph Report Mode •...
- Page 178 Printed Labor Report Sample TYPE = NONE TYPE = EMPLOYEE TYPE Sam4POS Sam4POS 05/03/2022 03:35 PM 05/03/2022 11:31 AM BarPub (POS-MAIN) BarPub (POS-MAIN) Labor Report (ALL) Labor Report (ALL) DATE : 05/03/2022 11:31 AM DATE : 05/03/2022 11:31 AM AUTHOR : ANDREW AUTHOR : ANDREW DATA RANGE DATA RANGE...
-
Page 179: Sales & Labor% Report
Sales & Labor% Report The Labor Report has an option selection for Sales And Labor%. When selected a more detailed report showing sales vs. hours worked is displayed. The Sales and Labor % Report uses data from both the Period Report and the Time In Out Report. -
Page 180: Sales And Labor% Report Definitions
Sales And Labor% Report Definitions: There are eight items per every time unit in the Sales and Labor % Report: CUST: and NET SALES: Values are obtained from the Period Report where the AVG/CUST: is division of these two values. −... -
Page 181: Time In Out Report
OPTIONS Training Data, Current Data, Waste, Promo NOTE: Option selections limit the report to display just the specified option selection data. FILTERS Group #1, Group #2, Group #3 – Select specific Groups assigned on PLU group assignment #1, #2, #3 Employee –... - Page 182 EDITING BUTTONS Buttons for editing time entries are also provided. REPORT DATA Name – Job Code – Start Time – End Time – Type The time clock report data can be sorted alphabetically A-Z or Z-A by each column heading by tapping on the column header.
-
Page 183: Time Clock Editing
Time Clock Editing If an employee forgets to clock in or out, authorized personnel can Edit the time clock data from the Time In-Out Report screen. Use the buttons above the time entries to perform the desired operation. The available selections include: •... - Page 184 5. The NEW time entry is added: Edit Time Entry 1. From the Report Mode, select the Time In Out Report from the detailed reports menu; Select the DATES as necessary; choose the desired FILTERS, then press the Refresh icon in the Generate section or press SHOW to display the current employee time entries.
- Page 185 3. We can edit the Job Code, Start Time End Time or Type; Touch the time entry field for the employee time you wish to edit. To Edit Clock In entry, touch the START TIME or the END TIME (MM-DD-YYYY HH:MM) entry field.
- Page 186 6. The edited time entry will now appear in red and will print to the receipt printer (if set in system options) and the new time is applied to the Employee. Note: You must perform all time clock edits before the End Of Pay Report is generated. Edited records will display in red to easily see which times have been changed.
- Page 187 Delete a Time Entry 1. From the Report Mode, select the Time In Out Report from the detailed reports menu, then press SHOW to display the current employee time entries: 2. Select the time entry record you wish to remove; Press the DELETE Button. The selected record is removed: Report Mode •...
-
Page 188: Promotion Report
Promotion Report DATES Date selections include: Today, Last End of Day, Custom Period 1 DAY, 1 WEEK, 2 WEEK, 1 MONTH, 3 MONTH, 6 MONTH, 1 YEAR Additional selections in the Dates area are: START DATE & END DATE END OF DAY NUMBER ALL is the only selection. -
Page 189: Ej Report
EJ Report To utilize the EJ Report it must first be enabled in the Program Mode\ Options\ Options\ Report Options. The EJ report is a useful tool for searching, reviewing and reprinting previously closed transactions and operations. The EJ report can be set to save data to a USB drive or to internal storage. - Page 190 Select Year Select Month Select Date Select Transaction 5. The transactions that correspond to your filter selections will be listed; When a transaction is selected, the transaction detail is displayed: 6. With the selected transaction displayed: you can Backup, Delete, or Print the transaction. ...
- Page 191 EJ Report - EDIT MODE The Edit Mode can be used to Print, Merge, Save and Delete EJ Report data. Print the selected record Merge the selected records Delete the selected records Save the selected records: Select either USB or FTP. Note: On terminals that have an SD port, the SD port is viewed as a USB port.
-
Page 192: Product Mix Report
Product Mix Report DATES Date selections include: Today, Last End of Day, Custom Period 1 DAY, 1 WEEK, 2 WEEK, 1 MONTH, 3 MONTH, 6 MONTH, 1 YEAR Additional selections in the Dates area are: START DATE & END DATE OPTIONS Training Data –... -
Page 193: Inventory
Inventory This report is only used when Ingredient & Recipes are setup for items. DATES Date selections include: Today, Last End of Day, Custom Period 1 DAY, 1 WEEK, 2 WEEK, 1 MONTH, 3 MONTH, 6 MONTH, 1 YEAR START DATE & END DATE OPTIONS Edit Inventory –... -
Page 194: Cash Declaration
Cash Declaration Cash declaration is the process of counting and reporting media amounts in the drawer before a report is taken. Cash declaration can be set as compulsory in the Report Options/EOD Options. Employee’s must have the authority to perform cash declarations. If desired, the cash drawer can be triggered to open when the cash declaration is performed by setting the option in the Drawer Options. -
Page 195: Input Amount
Input Amount The input amount selection allows you simply count selected media type and enter that total amount. You can select to count just the CASH, CHECK or MISC totals as desired or select ALL to view & enter all the media types. -
Page 196: Calendar Report View
Calendar Report View Current monthly totals can be viewed and printed on a monthly calendar format by pressing the calendar view icon on the Report Mode title bar. Monthly Sales data is displayed, broken down for each day and week of the month by selecting the calendar report in the report mode. -
Page 197: End Of Day
End Of Day End of Day operations allow employees with the proper authority level setting to access and generate End Of Day reports. Generating an EOD report will clear the current report totals on the terminal. Report totals are not deleted, only the current totals are cleared. The EOD reports can be generated multiple times in a day to accommodate shift reporting. - Page 198 3. The report summary shows the TOTAL SALES AMOUNT and COUNT for all reports at the top of the screen. The report detail breaks down the data by DATE, transaction COUNT and the TOTAL for the day. 4. The report data can be sorted in ascending or descending order by tapping on the desired column heading. 5.
- Page 199 Detailed Data can be sorted by clicking the column header title. RESET CONSECUTIVE # Check this option to reset the consecutive transaction number that is printed on receipts. RESET ORDER # Check this option to reset the order number that is printed on the kitchen printout. FINANCIAL REPORT BY TERMINAL Used in IRC configurations;...
-
Page 200: End Of Day Sub Menu Reports
End Of Day Sub Menu Reports The End Of Day sub menu provides additional report selections for End Of Pay and End Of Not Found PLU. Touch the END OF DAY title to access the sub menu. 1. Select the END OF PAY or END OF NOT FOUND PLU to view the report details: 196 •... -
Page 201: End Of Pay
End Of Pay The End of Pay report displays the Total time, Labor cost, and overtime for the selected date and employees. You can generate a report for a selected date/employee. • Every day, the manager\owner should run the Time In Out report to verify all the time keeping data is correct. -
Page 202: End Of Not Found Plu
End Of Not Found PLU The End of Not Found PLU report is used to clear the data generated when PLU items are added to the database from the register mode using the Not Found PLU feature. Select individual PLU’s from the list you wish to clear or select all PLU’s. -
Page 203: Report Samples
Report Samples Reports generated in the Sam4POS may be printed to the programmed receipt printer for the station or exported as a .CSV file or .PDF file. The exported report can be sent to a USB drive or to an eMail address. The eMail feature must be setup in the Report Options before using this feature. - Page 204 . . . Continued from previous page Discount Total (D’) 2 -3.50 (-2.50) 10% Sale Disc -2.50 $1.00 Off Item -1.00 When an item discount is set to NET the item total, the Discount Total NET SALES (A) + (T) – (D’) $75.83 (D’) shows the total for all discounts --------------------------------------------...
-
Page 205: Plu Report
PLU Report The PLU report includes the PLU descriptor and the PLU Code (number in the parenthesis). 04/27/2021 11:46 AM BarPub (POS-MAIN) PLU REPORT (ALL) DATE : 04/27/2021 11:46 AM AUTHOR : MANAGER DATE RANGE 04/27/2021 ~ 04/27/2021 END OF DAY NUMBER : ALL OPTIONS CURRENT DATA FILTERS... -
Page 206: Group Report
Group Report 04/27/2021 11:46 AM BarPub (POS-MAIN) GROUP REPORT (ALL) DATE : 04/27/2021 11:46 AM AUTHOR : MANAGER DATE RANGE 04/27/2021 ~ 04/27/2021 END OF DAY NUMBER : ALL OPTIONS CURRENT DATA FILTERS TERMINAL : [NOT USED] EMPLOYEE : [ALL] PLU : ALL ============================================ DESCRIPTION... -
Page 207: Period Report
Period Report The report shown here is just one specific report with the Time Period set at 60 and Type = Sales. With different TYPE selections the reports will appear different. Refer to the Period Report definitions on page 169 in the Detailed Reports chapter for other filter and Type settings. -
Page 208: Open Check Report
Open Check Report If check tracking is utilized and there are open checks in the system, we can print out the Open Check Report to view a summary of the open checks. 04/27/2021 11:52 AM BarPub (POS-MAIN) OPEN CHECK REPORT (ALL) DATE : 04/27/2021 11:52 AM AUTHOR : MANAGER DATE RANGE... -
Page 209: Stock Report
Stock Report Only the TODAY selection is available when generating this report, all other date selections are grayed out. 04/27/2021 01:53 PM BarPub (POS-MAIN) STOCK REPORT (ALL) DATE : 04/27/2021 01:53 PM AUTHOR : MANAGER DATE RANGE FILTERS GROUP : [NOT USED] GROUP #2 : [NOT USED] GROUP #3 : [NOT USED] PLU : 13760000098 ~ 13760000906... -
Page 210: Labor Report
Labor Report This report is used with the Time Keeping feature. With the Employee Type check on the report options, the employees job code is printed below the employee as shown here. 04/28/2021 09:52 AM BarPub (POS-MAIN) LABOR REPORT (ALL) DATE : 04/28/2021 09:52 AM AUTHOR : MANAGER DATE RANGE... -
Page 211: Sales And Labor % Report
Sales And Labor % Report Notes: The Sales and Labor % Report uses data from both the Period Report and the Time In Out Report. You must generate the EOD report every day to get meaningful data on Sales and Labor % report. Sam4POS 05/03/2022 11:31 AM... - Page 212 . . . Continued from previous page 10:00~10:59 CUST: 0 NET SALES: $0.00 AVG/CUST: $0.00 HRS LBR: 06:15 LABOR COST: $35.33 %NET SALES: LABOR$/CUST: $0.00 SALES/MANHOUR $0.00 11:00~11:59 CUST: 10 NET SALES: $278.62 AVG/CUST: $27.86 HRS LBR: 06:15 LABOR COST: $38.13 %NET SALES: 13.69%...
-
Page 213: Sales & Labor % Report Definitions
Sales & Labor % Report Definitions Notes: The Sales and Labor % Report uses data from both the Period Report and the Time In Out Report. You must generate the EOD report every day to get meaningful data on Sales and Labor % report. The Time Period can be defined as DAY or set for a specified number on MINUTES. -
Page 214: Food Cost Report
Food Cost Report This report is used with the Ingredient & Recipe feature only. Refer to the separate Inventory & Product Mix supplement for details. 04/27/2021 11:52 AM BarPub (POS-MAIN) FOOD COST REPORT (5) DATE : 04/27/2021 11:52 AM AUTHOR : MANAGER DATE RANGE 04/27/2021 ~ 04/27/2021 END OF DAY NUMBER : ALL... -
Page 215: Time In Out Report
Time In Out Report Only used with the Time Keeping feature. The report below shows the total time for each employee as well as the total time for each job code. 04/27/2021 03:18 PM BarPub (POS-MAIN) TIME IN OUT REPORT DATE : 04/27/2021 03:18 PM AUTHOR : MANAGER DATE RANGE... -
Page 216: Promotion Report
. . . Continued from previous page BARTENDER 11:04 HR $154.93 CST 0:00 HR $0.00 CST TOTAL LBR 11:04 HR $154.03 CST TOTAL TOTAL REG 31:04 HR $462.72 CST TOTAL OT 0:00 HR $0.00 CST TOTAL LBR 31.04 HR $462.72 CST TOTAL TIPS $0.00 TIP%... -
Page 217: Ej Report
EJ Report The EJ Report save data by Year\ Month\ Day\ Operation. Example of a previously registered transaction from the EJ. 04/22/2021 01:52 PM ORDER# ** EAT IN ** 16” PIZZA $16.95 16” TACO PIZZA $17.95 TAX5 SalesTax Taxable $34.90 Tax5 SalesTax AMOUNT 2.09 TOTAL... -
Page 218: Inventory Report
Inventory Report This report is used with the Ingredient & Recipe feature only. Refer to the separate Inventory & Product Mix supplement for details. 04/28/2021 12:41 PM BarPub (POS-MAIN) INVENTORY REPORT DATE : 04/28/2021 12:41 PM AUTHOR : MANAGER DATE RANGE 04/28/2021 ~ 04/28/2021 ========================================= INVENTORY... - Page 219 . . . Continued from previous page ========================================= INVENTORY Onion ----------------------------------------- BEGINNING INVENTORY 21.450 RECEIPTS 0.000 TRANSFER INS 0.000 TRANSFER OUTS 0.000 RAW WASTE 0.000 THEORETICAL USAGE 6.000 ACTUAL INVENTORY 0.000 ACTUAL USAGE 21.450 ENDING INVENTORY 15.450 VALUE OF INVENTORY 0.386 VARIANCE -15.450...
-
Page 220: Reports Exported To Csv
Reports Exported to CSV The report samples shown below show the report as it would appear exported to a CSV. Financial Report Refer to the Balancing Formulas on page 223 for balancing this report. FINANCIAL REPORT DATE : 2017-10-04 14:39 AUTHOR : MANAGER DATA RANGE 2017-09-27 ~ 2017-10-04... - Page 221 'FD/S-IN-DRAWER '$0.00 'MISC TEND SALES '$0.00 'CONVERSION TOTAL '0.00 'DRAWER TOTAL '$406.15 'SAM4S CASH DRAWER '$75.00 'PROMO '-12.00 'WASTE '$3.25 'GUESTS 'CHECKS PAID '$0.00 'OPEN CHECK '$12.81 'INTERRUPT BALANCE '$0.00 'TIP TOTAL '$0.00 'DECLARATION TOTAL '$0.00 'DECLARATION OVER/SHORT '$0.00 'COUPON SALES '-2.00...
-
Page 222: Plu Report
PLU Report PLU REPORT (ALL) DATE : 2017-10-04 14:31 AUTHOR : MANAGER DATA RANGE 2017-09-27 ~ 2017-10-04 END OF DAY NUMBER : ALL OPTIONS CURRENT DATA FILTERS TERMINAL : [NOT SELECTED] GROUP #1 : NOT SELECTED GROUP #2 : NOT SELECTED GROUP #3 : NOT SELECTED EMPLOYEE : [ALL] PLU : ALL... -
Page 223: Group Report
Group Report GROUP REPORT (ALL) DATE : 2017-10-04 14:31 AUTHOR : MANAGER DATA RANGE 2017-09-27 ~ 2017-10-04 END OF DAY NUMBER : ALL OPTIONS CURRENT DATA FILTERS TERMINAL : [NOT SELECTED] GROUP : NOT SELECTED EMPLOYEE : [ALL] PLU : ALL DESCRIPTION PROMO WASTE... -
Page 224: Open Check Report
Open Check Report OPEN CHECK REPORT (ALL) DATE : 2017-10-04 14:32 AUTHOR : MANAGER DATA RANGE ALL DATE FILTERS TERMINAL : [NOT SELECTED] EMPLOYEE : [ALL] TRACK : ALL START LAST EMPLOYEE TIME ORDER TOTAL TRACK CHECK# GUEST# '$ 21.35 'TOTAL '14:43 '14:45... -
Page 225: Labor Report
Labor Report LABOR REPORT (ALL) DATE : 2017-10-04 14:32 AUTHOR : MANAGER DATA RANGE 2017-09-27 ~ 2017-10-04 FILTERS EMPLOYEE : [ALL] TYPE TIME PERIOD : 60 JOB CODE TIME COST 'TOTAL '228:00 '$ 1402.78 'BARTENDER '76:00 '$ 412.58 'JOB#9 '76:00 '$ 577.62 'WAIT STAFF '76:00... -
Page 226: Time In Out Report
Time In Out Report TIME IN OUT REPORT DATE : 2017-10-04 15:41 AUTHOR : MANAGER DATA RANGE 2017-09-27 ~ 2017-10-04 FILTERS EMPLOYEE : [ALL] EMPLOYEE NUMBER NAME JOB CODE START TIME TIME TYPE MODIFIED 'BARTENDER 'BARTENDER '2017-10-02 09:30:47 '2017-10-02 15:38:00 'OUT 'MODIFIED 'BARTENDER... -
Page 227: Balancing Formulas
Balancing Formulas NET SALES $ Amount PLU Sales Total (ADJST TOTAL) Tax 1 Amount Tax 2 Amount Tax 3 Amount Tax 4 Amount Tax 5 Amount Tax 6 Amount Item Coupon Total (when NET = N) Item Percentage Discount (when NET = N) Sale Coupon Amounts Sale Percentage Discounts Sale Surcharge Amounts... -
Page 228: Program Maintenance
Program Maintenance HELP File A Help File is available in the program mode which provides a list of common programming topics. When you select a topic from the list you will be linked to a YouTube video showing how to use the selected topic. Note: An active internet connection is required to utilize this feature. - Page 229 4. When a topic is selected, the YouTube video for the desired topic can be viewed: 5. You can also use the controls on the display to navigate to the next or previous video. 6. Press the Back Arrow on the title bar to return to the HELP File. Program Maintenance •...
-
Page 230: Plu Maintenance - Register Mode
PLU Maintenance – Register Mode For convenience, changing descriptors & prices on existing item or adding new items to the database can be performed from the register mode using the PLU Info key. PLU Info Key The PLU description and prices can be maintained from the register mode using the PLU Info key. To utilize this feature, the employee signed must have the authority to edit PLU’s from the PLU Info key. -
Page 231: Adding Plu's
Adding PLU’s Items not currently in the PLU file can be added using the PLU Info key. 1. From the Register Mode, press the PLU INFO key; to display the PLU Info dialog. 2. Scan the item, if the item is not currently in the PLU file, the ADD NOT FOUND PLU dialog displays: 3. -
Page 232: Plu Maintenance - Program Mode
PLU Maintenance – Program Mode This is where new items are added to the database and existing items can be maintained or deleted. Each PLU is assigned a descriptor, Price, Cost, PLU code and a few unique options. Each new PLU can be assigned a unique code number up to a maximum of 18-digits in length. -
Page 233: Adding New Plu's
Adding New PLU’s New items (PLU’s) can easily be added to the database. New PLU’s can have up to a 30-character name/descriptor and up to an 18-digit PLU code. 1. Press the add record icon to add new PLU’s to the database. The “NEW” item entry dialog displays: 2. -
Page 234: Plu Sub Menu
PLU Sub Menu PLU’s can easily be maintained in the Sam4POS application, simply select the item and make the appropriate changes. If you select an item and press and hold on the item, a sub menu list of operations is displayed. This sub menu operation list includes: Delete, Inactivate, Copy To New Item, Copy To Existing Items, Copy The Price To Existing Items, Default Item, Remove Default Item. -
Page 235: Copy Plu
Copy PLU The SAM4POS makes creating multiple items that share the same settings very simple with the Copy PLU feature. You can copy a selected PLU to a new item or copy the selected PLU to existing items. You can also choose to copy the just the price of the selected item to existing items in the database. -
Page 236: Copy To Existing Items
Copy to Existing Items Allows you to copy the settings or changes of the selected item to another PLU or multiple PLU’s already in the PLU database. The descriptor does not change, only the options/settings are updated. 1. From the PLU programming screen, select the item you wish to copy. 2. -
Page 237: Copy To Items By Range
Copy to Items by Range This feature allows you to copy a single PLU to a range of sequential PLU’s. This makes creating multiple PLU’s easier than adding them one at a time. Press and Hold the item you wish to copy to open the PLU Dialog Menu selections. Select Copy to Items by Range, the Copy to Items by Range dialog displays: The PLU Descriptor/PLU Code displays at the top of the sub menu. -
Page 238: Default Item
Default Item You can choose any item in the PLU file to be used as the default item. The settings on the Default Item will be copied to all new PLU’s that are added using the add new record icon. (The default item applies to items added using the Not Found PLU feature as well.) You can remove the default item status or change it to another PLU to suite your needs. -
Page 239: Menu Icon
Menu Icon If you have a large PLU file, you can use the Edit/Sort feature to maintain the PLU database more easily. This feature allows you to access the Edit Mode, Sort PLU’s alphabetically or numerically, Search for PLU’s by PLU Status Group, Group assignment, from PLU Code, or search for PLU’s with no sales activity. -
Page 240: Printing Labels From Plu
Printing Labels from PLU Labels can be printed from the PLU programming area or from the Edit Mode. We can choose to print a single label or multiple labels for one or more PLU items. To use this feature, you must have a label printer connected to the terminal, defined in devises and mapped to the station. - Page 241 6. Press OK on the Print Label dialog to print the labels and close the dialog. Alternately, you can select the menu icon an select Edit Mode: 1. Select the EDIT MODE from the menu icon, then select the one or more PLU’s from the list. Press the menu icon then Select Edit Mode Select PLU’s...
-
Page 242: Quick Plu
Quick PLU The Quick PLU menu provides another means to quickly access the programming for a specific PLU or add new PLU’s to the database. Six quick access program areas are provided, PLU, PLU Status Group, Stock, Group, MLU Edit, and Function Key. Select one of these categories to go directly to the programming maintenance screen for that category. - Page 243 3. If you want to access the programming for a specific PLU, you can do so by typing in the desired PLU# or scan the specific item to go to the programming for that PLU. 4. Type in the PLU CODE then press the Done icon 5.
-
Page 244: Quick Plu - Add New Plu
Quick PLU – Add New PLU 1. From the PROGRAM MODE main menu screen select PLU then select Quick PLU. The main Quick PLU selection screen is displayed: 2. In the ‘Input PLU Code’ field, Type in the number for the new PLU or scan the new item; press OK. 3. -
Page 245: Employee File Maintenance
Employee File Maintenance The employee file contains information for register operators as well as employees who use the register only to clock in or out (employee time keeping.) Specific functions that are allowed or disallowed for each employee are determined by assigning the employee to an authority level. Two 10-digit code numbers may be assigned for each employee. -
Page 246: Employee Option Definitions
Select LEFT HANDED or RIGHT HANDED; Controls display position in the sales mode. LINKED DRAWER NUMBER Select the drawer for this employee: No Drawer, Sam4s Cash Drawer, Sam4s Cash DrawerII, or Sam4s Cash DrawerIII. If no drawer is assigned, the employee can only perform check track postings but not payments. -
Page 247: Employee Authority Level
JOB CODE BUTTON The Job Code button is where you will assign the jobs and pay rates the employee will utilize; you can assign as many job codes to an employee as is necessary. Refer to ‘Job Code & Pay Rate’ programming on page 245 for details. - Page 248 SHOW THE MENU OF EMPLOYEE REPORT IN REG MODE With this option checked, tapping the Employee Name in the register mode will display the selections for : Employee Report – Generates the employee report for today for the signed on employee. Employee Report (Current Data) –...
- Page 249 CAN CLOCK-OUT WITH OPEN CHECK GUEST CHECK ENTRIES ONLY If selected, employee must begin a check before registering items in a transaction. ALLOW CANCEL AFTER RECALL When selected, when an employee recalls a check and adds new items, the employee is allowed to press cancel to remove the currently added items –...
-
Page 250: Job Code & Pay Rate
JOB CODE & PAY RATE An employee might have more than one job, possibly with a different pay rate for each job. For example, in a restaurant, an employee might work as a server one day, and on a different day or shift, work as a cashier. Here you can create these different job codes and pay rates to be used for your employees. -
Page 251: Station
STATION Create stations to be assigned to employees. For example you may have a Bar Station and a Server Station. Stations can be assigned to default MLU/MLU GROUP, FLU and Printers. Stations can also have different Receipt, Guest Check, and Kitchen Printer assignments. 1. -
Page 252: Customer File Maintenance
Customer File Maintenance A Customer Delivery feature is available with Sam4POS. Customer records for the delivery feature are entered in the Customer category in the Program Mode. The Customer category has two program areas, Customer and Customer Group. • Fifteen customer information fields are stored for each customer. Customer Groups can be used to assign a Point Rate for customers. -
Page 253: Customer Database
Customer Database The Customer category is where all the individual customer delivery records are maintained. The customer data files contain the customer’s name, address, and other contact information. 1. Select CUSTOMER from the CUSTOMER category menu screen to display the Customer file. 2. -
Page 254: Add New Customer
Add New Customer 1. Select CUSTOMER from the CUSTOMER category menu screen to display the Customer file. 2. Press the add record icon to add a customer to the database, the NEW customer entry dialog will display: 3. Type in the customer information: a. -
Page 255: Customer Data Fields
Customer Data Fields Field # Characters First Name Last Name Customer# Loyalty Points Not currently used Information (Info Tab) Phone# E-mail Title Address 1 Address 2 City State Zip Code Birth Day Select using Calendar Option (Info Tab) Price Level Select the price level to be used for this customer. -
Page 256: Edit Customer Data
Edit Customer Data When a new customer is added, you will need to add the additional information or, at some point the customer data may change, new location, new phone, etc. Customer data can easily be edited as described below. INFORMATION 1. -
Page 257: Customer Group
Customer Group Customer Groups are used to assign a Point Rate for customers, such as Loyalty Points. 1. Select CUSTOMER GROUP from the CUSTOMER category menu screen to display the Customer Group screen. 2. From this screen you can Add new Customer Group or edit existing Customer Groups as needed. Add New Customer Group 1. -
Page 258: Edit Customer Group
6. When the customer group is added the Point Rate entry field is available. GENERAL POINT RATE The customer group is used to assign Points to a customer for each dolloar of sales. The point rate is the multipier number (up to 2-digits; whole digits only) for the points applied. Press the Pencil icon to enter the desired Point Rate. -
Page 259: Appendix
Appendix Integrated Payment – EMV Introduction Integrated Payment operations on the Sam4POS utilize the latest EMV capable Datacap equipment for seamless credit card processing through the terminal. EMV cards are embedded with a microprocessor or smart chip that interacts with the merchant’s point-of-sale device to make sure that the payment card is valid and with the use of a PIN that it belongs to the person using the card. -
Page 260: Eft Operation
EFT Operation EFT Operation Menu Sam4POS supports credit card processing with Datacap integrated payment appliance and supports the EMV integration protocol. (There will be no Non-EMV integration.) Credit Card (EFT) maintenance operations can be performed at the Sam4POS terminal from the EFT Operation menu. In the Pre-EMV environment Datacap stored some information in the Tran that allowed the registers to run some reports, such as the local transaction report. -
Page 261: Datacap Operation Definitions
Datacap Operation Definitions Operation Definition Use this function to initialize the Datacap EFT device. Initialize EFT Closes the current batch and opens. Close Batch Use these operations to void transactions when the card is not present. CAUTION: These voids will not correct ECR totals (i.e. -
Page 262: Eft Operation Function Key
EFT Operation Function Key To avoid giving employees access to the Program mode, certain EFT operations can be accessed from the REG mode using the EFT OPERATION function key. Note: Batch operations may be restricted to employees with assigned authority levels for these functions. Refer to the “Datacap Operation Definitions”... -
Page 263: Performing Eft Operations
Performing EFT Operations When performing EFT Operations, the EFT Operation communication between the ECR and the Tran device is displayed on the Sam4POS. When the specified operation is completed, the register will print the results of the requested operation at the register’s receipt printer. You can also print out the EFT Operation communication to the register receipt if desired. -
Page 264: Close Batch
Close Batch You must close the batch daily (even if not required by your processor.) This procedure clears the EMV File temporarily stored in the ECR memory. NOTE: When a batch is closed, a new batch is automatically opened for the next day. 1. -
Page 265: Void Sales By Record Number
Void Sales by Record Number Void Return By Record Number Note: This operation will not correct ECR sales total but will remove the transaction from the batch. 1. From the main PROGRAM MODE menu screen, select DEVICE, then touch EFT OPERATION. 2. -
Page 266: Issue Local Transaction
Issue Local Transaction The Issue Transaction report summarized transaction in the current batch. NOTE: This report lists the transactions stored in ECR memory for tip and record updating. The transactions here may not be the same as the transactions in the current batch. SAM4POS TERMINAL 2017-09-27 22:37... -
Page 267: Gratuity Entry
Gratuity Entry The processor must allow “By Record” operations (Tokenization) for this operation. Gratuities (Tips) indicated by the customer on the payment draft must be entered at the ECR before the batch is closed. Tips that were not entered at the time of the transaction, are entered using the Gratuity Entry selection on the EFT OPERATION function key menu, or from the Gratuity Entry selection on the EFT OPERATION menu accessed from the Program Mode / Device menu selections. -
Page 268: Post Authorization
3. The Display shows the tip entry on the EFT Operation dialog: 4. Press CLOSE to exit the TIP entry; pressing PRINT will print the information on the display. Post Authorization If electronic authorization is not approved and the merchant receives voice authorization from their processor, the transaction can be entered into the batch with this function. -
Page 269: Get Gift Card Balance
Get Gift Card Balance This procedure will print a receipt with the cardholder’s current balance. 1. Select GET GIFT CARD BALANCE from the EFT Function key menu or from the EFT OPERATION menu. 2. The ECR will display “WORKING” and the PIN-Pad will display “Balance 0.00 OK?”. Press the GREEN button on the PIN-Pad keypad to continue. -
Page 270: Self-Initiated Load
Self-Initiated Load Typically, we would not need to perform this operation. The Tran parameters are loaded each time the device is rebooted You will be asked to enter the Device ID of the IP Tran LT or PDC device. The device will call Datacap’s host PC and load itself. -
Page 271: Diagnostics
Diagnostics Use only with Datacap Support as necessary to troubleshoot Datacap issues. 1. From the main PROGRAM MODE menu screen, select DEVICE, then touch EFT OPERATION. 2. Select Datacap_Operation from the selections. 3. Scroll down the list of options and touch DIAGNOSTICS. 4. -
Page 272: Clear Emv File
Clear EMV File This is the internally stored file that stores the Authorization Response messages that allow the SAM4POS \ SAM4POS to perform “By Record Number” transactions. Specifically, the Void Transaction by Record Number and Gratuity Entry. This file should be cleared each day as we have a limited amount of space to hold the file and most likely By Record Transactions will take place the same day as the original transaction. - Page 273 Sample ZERO AUTH receipt Sam4POS Terminal 10/10/2017 11:22 11:20:04 SEND AT&UE7 11:20:07 SEND AT&UM149 99 1 0 0 * * 0 .00 * 00005 * 3 101017 112004 0 * 00005 0 * * * * * * 1 * 11:20:26 RECEIVE 11:20:26 RECEIVE 11:20:26 SEND...
-
Page 274: Important Notes
Close Batch needs to be performed every day at the register even when the site is set for auto batch with their processor. This is how Sam4s clears the EMV token file. The EMV token file is used to allow for “By Record”... -
Page 275: Backup Program
Backup Program It is a good practice to back up the program data from the ECR after all the programming is completed or edited and the equipment has been tested for proper operation. The database menu, in the program mode system menu selections, provides access to the database backup operations for the current program files. -
Page 276: Remote Ftp Log Backup
Remote FTP Log Backup The Sam4POS terminal automatically generates a log file that saves operational data for the past 10 days. The log backup provides a means to save log data and database files to a USB drive or Internal Storage. When reporting an operation issue or if you experience a generic FAILURE error message, we may ask to receive the terminals Log’s with the Database. - Page 277 4. Enter the IP ADDRESS or URL for the FTP site where you want to send the backup to; Press Next (the icon). 5. Enter 0 for the PORT NUMBER; Press Next (the icon). 6. Enter a ‘Store Name’; Then Press Done (the icon).
-
Page 278: If The Ftp Backup Fails
14. Press the back-arrow icon on the title bar to exit the log backup. 15. When Logs and Database have uploaded; provide the following to CRS: a. Dealer Name b. Store Name c. Terminal Name If the FTP Backup Fails If the backup to the FTP site fails, some things to check would be: 1. -
Page 279: Pin-Pad Errors
Pin-Pad Errors Occasionally, the network will decline or reject a transaction sent to it by the DataTran, or the DataTran will return an error response back to the user system due to a communication or operational problem. The information below describes some common errors when a transaction does not complete. -
Page 280: No Response From Pin-Pad
No response from Pin-Pad If Customer presses OK at the Pin-Pad and then does nothing at the Pin-Pad result is: 499 0 TRANSACTION_NOT_COMPLETE_-_NO_Response_from_Pin-Pad. * * * * * 0 * * * * * * * * * 276 • Appendix Sam4POS Operators Manual v2.33... - Page 281 Vx805 Out Of Memory The VX805 Pin-Pad at times displays an “Out of Memory” error message. After rebooting a couple of times the “Out of Memory” instruction is sent, and the error is resolved with the rebooting of the Pin-Pads. After some time, the VX805 may start to display the “Out of Memory”...
-
Page 282: Manual Revision Record
2/18/2019 Added: Menu Icon info (Register Mode) Updated: screens, Program Maintenance, Integrated Payment Transactions & draft examples v2.0 3/8/2019 Combined SAP-6600/SAP-630 manuals. Updated: Authority Level: Allow EOD in REG Mode. v2.1 3/28/2019 Updated: Function Keys\Stock Check v2.2 4/2/2019 Updated: Add PLU operation - OK AND ADD NEXT PLU option; List Paid information v2.3... - Page 283 Edition Date Revision Contents Published v2.12 2/27/2020 Cash Declaration, R/A & P/O, Training Employee, Added Help File information v2.13 3/20/2020 Alpha Text key v2.14 3/31/2020 Employee Authority Level v2.15 4/15/2020 Employee Authority Level; End Of Day reporting; Report Mode: EJ Report;...
Need help?
Do you have a question about the SAP-6600 and is the answer not in the manual?
Questions and answers
How to factory reset SAP-630F that goes into error mode when powering on unit.
To factory reset the Sam4s SAP-6600:
1. Sign on to SAM4POS as the System Admin from the Sign-On screen.
2. A confirmation dialog will display; press YES to confirm.
3. Navigate to PROGRAM MODE > SYSTEM > DATABASE > APP FACTORY RESET.
4. A confirmation dialog will appear; press YES to confirm or NO to exit without resetting.
5. The SAM4POS application will reset, and the default demo database program will be loaded.
Warning: This operation is irreversible and will erase all programming, settings, and report totals. Ensure you back up any necessary data before proceeding.
This answer is automatically generated
how do you change the rear customer display on the SAP630
The rear customer display on the Sam4s SAP-6600 can be changed by installing and setting up the optional 9.7" SPT Rear Display. A video demonstration is available that explains how to install, set up, and customize the display, including modifying what is presented. The connection panel includes a VGA port (DB15F) for a second display, which can be used for this purpose.
This answer is automatically generated
Hola mi sap 630 me tira un error mensaje #65