
Related Manuals for Sam4s SAM4POS


Summary of Contents for Sam4s SAM4POS
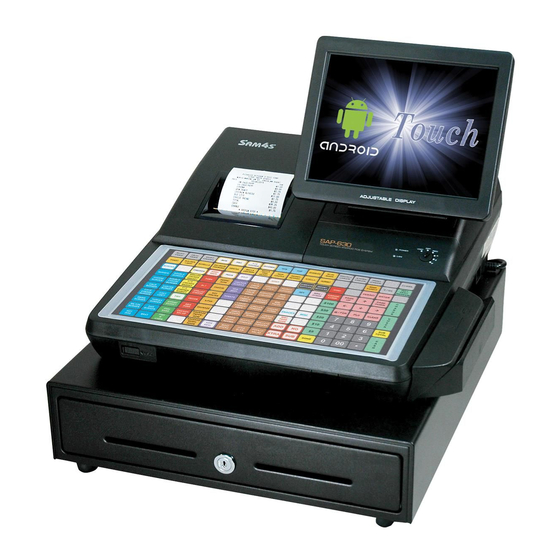
- Page 1 SAM4POS REFERENCE MANUAL SAP-4800II/6600 2016, CRS, Inc. All specifications are subject to change without notice. Sam4POS Quick Start v1.1...
- Page 2 CRS, Inc. Limited Warranty and Disclaimers of Warranty This manual has been developed by CRS, Inc. It is intended for the use of its customers and service personnel and should be read in its entirety before attempting to install, use or program the product(s). Nothing contained in this manual shall be deemed to be, and this manual does not constitute, a warranty of, or representation with respect to, the product or any of the products to which this manual applies.
- Page 3 - even if Never alter or add to the mechanical or the replacement is rated for higher voltage, electrical design of the SAM4POS. wattage, etc. Unauthorized alterations might create a safety Components that are critical for safety are hazard.
- Page 4 Servicing Precautions WARNING: First read the-Safety Precautions-section of this manual. If some unforeseen circumstance creates a conflict between the servicing and safety precautions, always follow the safety precautions. WARNING: An electrolytic capacitor installed with the wrong polarity might explode. 5. Check the insulation between the blades of the 1.
-
Page 5: Table Of Contents
SAP-4800II Controls & Connections ..................18 SAP-4800-II Connection Panel ....................20 Application Installation ................21 Overview ............................21 Installing Sam4POS Application ....................21 Initial Installation ........................22 License Registration ......................... 25 Manual License Registration ....................25 Application Upgrade ........................27 Updating Existing Installations .................... - Page 6 If you had mistakenly chosen the File Manager selection: ............54 SAP-530/4800II ........................54 SAP-6000 ..........................56 Backup Programs ..........................58 Database Backup ........................ 58 Program Backup & Restore ......................60 .CSV Backup / Image Backup ....................60 Passwords ............................61 - 6 - Contents Sam4POS Quick Start v1.1...
- Page 7 Device Mapping (v1.0.80 and Later) ..................71 Adding Kitchen Printers ......................72 Edit Kitchen Printers ........................73 KP Group (v1.0.80 and Later) ....................74 KP Option ..........................75 Manual Revision Record ................76 Sam4POS Quick Start v1.1 Contents - 7 -...
-
Page 8: Introduction
Introduction Overview SAM4POS from SAM4s is an Android based POS solution installed on the SAM4s SAP-6600, SAP- 4800II or SAP-630/530 Android terminals and the Hisense HM616 Android tablet. SAM4POS is available to resellers only as a hardware/software bundle; SAM4POS is not available as a generic application and will not run on other Android devices. -
Page 9: Sap-530
The Sam4s SAP-530 is an ECR-Style all-in-one Android POS terminal. Featuring a hybrid design, Sam4s has combined a 9.7" touch display for operating the Sam4POS application by touch with a large keyboard to support frequently used items, plus a built-in printer, customer display, card reader and cash drawer. -
Page 10: Sap-4800Ii
SAP-4800II The SAM4s SAM4POS with the SAP-4800 II All-In-One touch screen terminal is powered with an ARM Cortex™ quad-core fan less processor to efficiently run the SAM4POS software application. • Vivid LED Backlight for Reliability and Energy Savings • Stylish 15" LCD with 5-Wire Resistive Touch •... -
Page 11: Power Requirements
Isolated Grounding for all equipment within the Sam4POS-500 system. Safe Operation Do not locate your Sam4s Sam4POS-500 in a damp or wet environment. Avoid high humidity, direct sunlight and temperature extremes. Always plug your Sam4POS-500 into a grounded three-prong outlet. Never use two-prong adaptors or ungrounded outlets. -
Page 12: Terminal Controls & Connections
Magnetic Card Reader (MCR) Power Button located on the bottom right of the touch panel Standard 3-Track Front Facing Magnetic Card Reader (MCR) Two v2.0 USB Ports Connection Panel Access Cover Cable Management Access Cover - 12 - Introduction Sam4POS Quick Start v1.1... -
Page 13: Sap-6600 Connection Panel
Power Connection for External 60W, 12V / 5A power adaptor 100-240V / 50-60Hz • DC-Out (12V) Standard Cash Drawer Port (Located on the right side of the connection panel near the DC-Out and the Power Button.) Selectable 24V / 12V Sam4POS Quick Start v1.1 Introduction - 13 -... -
Page 14: Sap-530 Controls & Connections
3” Receipt thermal printer 7 position Mode Key Lock USB Port The Power LED will illuminate when the ECR is powered on. The IRC LED will flash during IRC operations Optional Magnetic Card Reader (MCR) - 14 - Introduction Sam4POS Quick Start v1.1... -
Page 15: Front Panel Angle Adjustment
Set the LCD panel to the optimum viewing angle Power Switch Access panel – Not used Rear Customer Display Standard Rear Display Turn and/or lift for optimum viewing with nearly 270° turning radius Sam4POS Quick Start v1.1 Introduction - 15 -... -
Page 16: Sd Memory Card Slot
• LAN port • 2-USB Ports (1 back panel/1 front) • 4-RS-232C Comm. Ports (2-DB9 Male / 2-RJ45) Front USB port located behind access door (for keyboard, USB memory stick or scanner) - 16 - Introduction Sam4POS Quick Start v1.1... -
Page 17: Control Lock
S MODE Unmarked Not Used Position MODE The Sam4POS SAP-530 Series includes two sets of keys that can be used to access the following control lock positions. Positions Accessible VOID, OFF, REG, X OFF, REG, X OFF, REG, X, Z... -
Page 18: Sap-4800Ii Controls & Connections
SAP-4800II Controls & Connections Standard 3-Track Magnetic Card Reader (MCR) Power Butt on Locat ed on t he bott om of t he t ouch displ ay. Break-Out Tabs for cable management. - 18 - Introduction Sam4POS Quick Start v1.1... - Page 19 Rear VFD Display (optional) SD Car d Access Optional Rear VFD Display USB Ports (2) Break out tabs for cable management. Sam4POS Quick Start v1.1 Introduction - 19 -...
-
Page 20: Sap-4800-Ii Connection Panel
B - USB (2) C - Drawer 1 D - Drawer 2 E - LAN F - COM2 (Powered) G - COM1 (Powered) H - COM3 (Powered) I - DC In (Power Input) - 20 - Introduction Sam4POS Quick Start v1.1... -
Page 21: Application Installation
When you receive the SAP-530, SAP-6600 terminal, you may need to load the Sam4POS application. The Sam4POS application APK file is installed using the AP Installer utility loaded on the SAP- 530/660 terminal. Copy the Sam4pos_.apk to the root of your USB drive and follow the steps below to load the application file. -
Page 22: Initial Installation
Icon” to view the installed Apps: 3. Select the “APK Installer” from the available application selections: 4. Select the “APK Installed” to view the APK files loaded on your USB drive: - 22 - Application Installation Sam4POS Quick Start v1.1... - Page 23 5. Tap the desired Sam4POS_.apk from the list: 6. The installation dialog is displayed: • Tap “INSTALL” to load the file. • When complete, tap “OPEN” to open the Sam4POS application: Sam4POS Quick Start v1.1 Application Installation - 23 -...
- Page 24 7. Choose the appropriate Model: 8. Tap “ACCEPT” on the License Agreement: 9. The Sam4POS Application main sign on screen displays: - 24 - Application Installation Sam4POS Quick Start v1.1...
-
Page 25: License Registration
License Registration All Sam4POS terminals require a license to operate properly. The license must be loaded to allow for full operation. Licenses are available as 1yr, 2yr, 3yr, 5yr licenses, there is also a DEALER license available. To obtain a license for your terminal(s) you must fill out the Sal4POS License Request form. - Page 26 Be sure to select the correct license for the terminal: 8. License Agreement dialog displays; Tap ACCEPT to proceed 9. Enter MANAGER PASSWORD, default password is 9999 10. Terminal is now Licensed: - 26 - Application Installation Sam4POS Quick Start v1.1...
-
Page 27: Application Upgrade
HM616 Tablet uses the (c) application file Updates can be performed locally using a USB drive. 1. Copy the new SAM4POS APK file to a USB flash drive and insert the USB drive into the SAM4POS terminal. 2. From the SYSTEM menu selection screen, press APK INSTALL. The file selection screen appears. - Page 28 3. Tap the appropriate SAM4POS APK file you want to load. (It’s possible to have multiple update files on the same drive.) The Install dialog displays: 4. Press Install to load the selected SAM4POS update. 5. The ‘Installing…’ dialog displays while the new application files are loaded. When it is finished, the ‘APP Installed’...
- Page 29 7. If this is the first installation, the user License Agreement may display; Accept the agreement to continue. Enter the Manager Password at the prompt. 8. The SAM4POS application restarts and the main sign on screen appears. Verify the version in the lower right corner on the sign on screen.
-
Page 30: Default Screens
Upon boot up, the Sign On screen displays. You can sign on or, if the time keeping feature is being utilized, clock in from this screen. To Sign-On to the Sam4POS application for the first time, use the default password “1” and touch “ENTER”. -
Page 31: Main Menu Screen
Main Menu Screen After a successful log-on, the SAM4POS Main Menu screen displays: Main Menu Icon Details: The Operate icon opens the Register Mode, Operator’s sales entry screen. Choose Reports to generate system reports. Choose End of Day to run the end of day reports. -
Page 32: Notes/Reminders
Notes/Reminders Notes and reminders can be added and accessed from the Main menu screen. 1. Sign on to the SAM4POS application from the main Log On screen. 2. Press the Note icon on the upper right of the display to view or add notes. - Page 33 7. Press the note pad icon to edit the note; press the trash icon to delete the note; press the icon to close the note. 8. Press the note icon close the list. Sam4POS Quick Start v1.1 Application Installation - 33 -...
-
Page 34: Register Screen
Register Screen Touch the Register Mode icon on the Main Menu screen to open the SAM4POS Register Mode (Operator Screen). The operator screen is divided into different zones to facilitate regular sales transactions. Touch the Back Arrow icon to close the Register Mode operators screen and return to the main menu screen. -
Page 35: Operator Screen Zones
Connection Method – Tap this icon to access the main Android, Wireless & Network settings. The Manager Password is required for access. Allows you to sign off the current employee and return to the main sign on screen. Sam4POS Quick Start v1.1 Application Installation - 35 -... - Page 36 KP Time Period – Allows the operator to select/change the KP Period. Destination – Tap this icon to set the default destination or select None. Employee – displays the currently signed on employee, touch this icon to display. - 36 - Application Installation Sam4POS Quick Start v1.1...
-
Page 37: Program Mode
Touch any of the categories shown to enter the programming options for that category. Program Mode Title Bar Date & Program Favorites Connection Sign Mode Return Time Scan Method Screen Title Back-Arrow Sam4POS Quick Start v1.1 Program Mode - 37 -... -
Page 38: Program Mode Menu Selection Definitions
Access system utilities: Register License, Database Backup/Restore and Reset, Log Backup, secure System Settings, review Super Macro data, Program Backup & Restore and APK Installation. Allows you to link SAM4POS to a web site. - 38 - Program Mode Sam4POS Quick Start v1.1... -
Page 39: Screen Edit
The Screen Edit program area is used to setup the Table Map, Menu Lookup (MLU Edit) and Function Lookup (FLU Edit) screens that will be used to complete register operations on the SAM4POS. NOTE: The SAP-530 terminals will also have the Real Keyboard programming here. - Page 40 SHOW and HIDE table information. Table Display Pane – displays the table grid. Table Map Seating Zones – Create NEW seating zones, EDIT or DELETE seating zones. - 40 - Program Mode Sam4POS Quick Start v1.1...
-
Page 41: Mlu Edit
MLU key in the vertical panel next to the item area. See the sample at “SAM4POS Register Screen” (Operators Screen) on page 34. If more than five MLUs are available, you can use scroll buttons to view the hidden keys. -
Page 42: Mlu Groups
3. Use the edit icon to select MLU Groups you want to delete from the MLU Group list. 4. After selecting MLU Groups, press the trash can icon to delete the selected MLU Groups. - 42 - Program Mode Sam4POS Quick Start v1.1... -
Page 43: Add A New Mlu
Pressing CANCEL will exit without adding any new MLU’s. 4. Use the icon to select MLU’s you want to delete from the list. 5. Press the trash can icon to delete the selected MLU’s. Sam4POS Quick Start v1.1 Program Mode - 43 -... -
Page 44: Editing A Mlu Group Or A Mlu
Copies the currently selected MLU Group or MLU to a new MLU Group or MLU COPY TO EXISTING ITEMS Copy the currently selected MLU Group or MLU to an existing MLU Group(s) or MLU(s) - 44 - Program Mode Sam4POS Quick Start v1.1... -
Page 45: Programming Mlu Buttons
Press the Back Arrow to return to the MLU item selections. 8. Press OK after you have made all your desired selections; your selections will appear on the MLU. Sam4POS Quick Start v1.1 Program Mode - 45 -... -
Page 46: Editing The Appearance Of Mlu Screens
1. You can rearrange the items as desired on the grid. Press and drag the selection to the desired location. 2. The appearance of the items on the MLU screen can be edited using the elements in the designer pane. - 46 - Program Mode Sam4POS Quick Start v1.1... - Page 47 Input Name 4. When adding items to a selected MLU, if you select more items to load than the number of available spaces on the MLU, the SAM4POS will automatically create additional MLU buttons for you. Sam4POS Quick Start v1.1...
- Page 48 The selected items are added to th e MLU; additional FOOD MLU’s are created as necessary for all th e selected items. e) (i.e. FOOD - #1 thru FOOD #5). - 48 - Program Mode Sam4POS Quick Start v1.1...
-
Page 49: Flu Edit
1. From Screen Edit in Program Mode, select FLU EDIT; The FLU Edit screen displays. FLU Edit Screen Sections FLU Selection Pane FLU Key Assignment Pane; up to 14 keys can be assigned Edit/Design Item Attributes Sam4POS Quick Start v1.1 Program Mode - 49 -... -
Page 50: Flu Selection Pane
4. The new FLU for DISCOUNTS is created and appears in the FLU selection pane. 5. Assign function key or tender keys as needed. 6. The edit icon is used to select and delete FLU’s from the list. - 50 - Program Mode Sam4POS Quick Start v1.1... -
Page 51: Flu Key Assignment Pane
Use the Font Style/Size keys to edit the background color of the keys and text color, style, and size. These Font Align selections allow you to align the font left, center, or right. Sam4POS Quick Start v1.1 Program Mode - 51 -... -
Page 52: Loading Images For Items
4. Choose the ‘Complete action using’ Gallery selection, then select the ‘Always’ option: 5. The Select Photo screen displays: 6. Choose the directory where the desired image/photo resides; The images stored in the file are displayed: - 52 - Program Mode Sam4POS Quick Start v1.1... - Page 53 Programming mode and in the REG Mode: 11. The image selected is added to the key. Sam4POS Quick Start v1.1 Program Mode - 53 -...
-
Page 54: If You Had Mistakenly Chosen The File Manager Selection
3. Go to; Program Mode → System → Settings → Apps → ALL → File Manager 4. On the FileManager ‘LAUNCH BY DEFAULT’ settings, press ‘Clear defaults’. 5. The selected default settings will be cleared: - 54 - Program Mode Sam4POS Quick Start v1.1... - Page 55 6. Exit out of the ‘Settings’; return to the SAM4POS application. 7. From the SAM4POS, select your desired program; PLU / Group / etcetera. Select IMAGE ADD/EDIT 8. The ‘Complete action using’ selection screen that displays: 9. Choose the ‘Gallery’ selection, then select the ‘Always’ option: 10.
-
Page 56: Sap-6000
1. Go to; Program Mode → System → Settings → Device → Apps → File Manager 2. On the File Manager screen, ‘OPEN BY DEFAULT’ settings; Press ‘CLEAR DEFAULTS’. 3. The selected default settings will be cleared, “No Defaults Set”: - 56 - Program Mode Sam4POS Quick Start v1.1... - Page 57 4. Exit out of the ‘Settings’; return to the SAM4POS application. 5. From the SAM4POS, select your desired program: i.e. PLU / Group / etcetera. Select IMAGE ADD/EDIT 6. The ‘Complete action using’ selection screen that displays: 7. Choose the ‘Gallery’ selection, then select the ‘Always’ option: 8.
-
Page 58: Backup Programs
To restore database files, you must sign on as the System Admin. Refer to the Admin Mode Supplement for details. Database Backup 1. Touch DATABASE on the SYSTEM menu selection screen. The Database Backup screen displays. 2. Press the DATABASE BACKUP to open the database backup dialog. - 58 - Program Mode Sam4POS Quick Start v1.1... - Page 59 7. The DatabaseInfo.txt file contains terminal information about the saved DB: 8. As a Best Practice, when you save the DB files from the store, keep them in separate directories for each terminal in the system. Sam4POS Quick Start v1.1 Program Mode - 59 -...
-
Page 60: Program Backup & Restore
Program Backup & Restore provides a means to back up the program files in a CSV format and backup the current image file in the SAM4POS. In version v1.0.86 and later, the ability to scan new program file on FTP was added. -
Page 61: Passwords
You can enter the operating code of any employee that has the ADMIN USER option checked. If an employee card system is used, employees with manager status can swipe their card to complete the transaction. Sam4POS Quick Start v1.1 Program Mode - 61 -... -
Page 62: Initial Clear
1. In versions 1.0.26 and later: Tap the Version information, in the lower right corner, three times to initial clear the SAM4POS terminal. (In versions before 1.0.26: tap the SAM4s logo displayed on the main sign on screen three times.) 2. -
Page 63: Memory All Clear
Be sure to back up the program prior to performing this procedure if you wish to save any of the current program files, settings or report totals. 1. From the Sign-On screen; sign on to SAM4POS as the System Admin. The confirmation dialog displays. -
Page 64: Demonstration Program
Service, Retail, and Table Service are available. After downloading a Demo program to your PC, you can copy the program files to your USB drive so that you can load it into your Sam4POS terminal. Loading/ Restoring database files is reserved for the System Admin, Refer to Admin Mode supplement for details. -
Page 65: Application Notes
7. Press YES to proceed with the restore operation. 8. The selected database will be restored and the Sam4POS application will automatically reboot. 9. After the APP Reboot, you will need to sign back on to the terminal. -
Page 66: Retail-Demo
• Program Mode (hide items) Retail-Demo • Main Screen – Sam4s Logo and Café picture are changeable • Sign on \ Time in/out buttons can be hidden by system option • 1 = Employee – goes right to REG MODE &... -
Page 67: Ts-Demo
Open PLU operation • M&M TS-Demo • Main Screen – Sam4s Logo and Café picture are changeable • Sign on \ Time in/out buttons can be hidden by system option • 1 = Employee – goes right to REG MODE &... - Page 68 Table Map • Single Click vs Double Click • Split Check • Split Item • Wine Bottle • Suggested Gratuity • Easy Tip Entry (discuss – button) • Combo - Beer - 68 - Demonstration Program Sam4POS Quick Start v1.1...
-
Page 69: Connecting Devices
Connecting Devices Device programming is where all the individual peripheral devices used on the SAM4POS system are configured and mapped (routed) to the all the stations in the system. The peripheral devises available for use on the SAM4POS are Printer, Scanner, Line Display, Scale, EFT, Coin Dispenser, Liquor Dispenser, Kitchen Video, and Text Inserter. -
Page 70: Device Setting
TEST – Tests to operation of the selected device. Devise Mapping is required prior to testing the device. • EDIT MODE – Select devices to delete as necessary. • SORT – Sort devices alphabetically. - 70 - Connecting Devices Sam4POS Quick Start v1.1... -
Page 71: Device Mapping (V1.0.80 And Later)
The Device Mapping program area was changed beginning at v1.0.80. Kitchen Printer is a separate selection from Printer mapping. The Kitchen Printer area is used to assign printers that will be used on each of the stations in the Sam4POS system. 1. From the Program Mode/Device menu, select DEVICE MAPPING from the available selections. -
Page 72: Adding Kitchen Printers
Press CANCEL if you want to exit without mapping additional kitchen printers. 3. Your mapped devices are displayed: 4. You can use the buttons at the bottom of the mapping screen to edit existing mapped devices. - 72 - Connecting Devices Sam4POS Quick Start v1.1... -
Page 73: Edit Kitchen Printers
SELECT BACKUP TERMINAL - Select the terminal where the backup device is connected. 2. Press OK when complete to add the device mapping or press CANCEL if you want to exit without mapping additional kitchen printers. Sam4POS Quick Start v1.1 Connecting Devices - 73 -... -
Page 74: Kp Group (V1.0.80 And Later)
KP group and selected the time period for the group. 6. When the printer and time period are selected, the KP OPTION selections are displayed. - 74 - Connecting Devices Sam4POS Quick Start v1.1... -
Page 75: Kp Option
This setting comes from the Device Mapping setting. Press the icon to access the: • EDIT MODE to select and delete KP Groups or select • SORT to sort the KP Groups alphabetically. Sam4POS Quick Start v1.1 Connecting Devices - 75 -... -
Page 76: Manual Revision Record
Manual Revision Record Revision Date Published Revision Contents Number V1.0 12/20/2018 Initial Release V1.1 1/16/2019 Updated Device Mapping, KP Group - 76 - Manual Revision Record Sam4POS Quick Start v1.1...
Need help?
Do you have a question about the SAM4POS and is the answer not in the manual?
Questions and answers