
Related Manuals for Sam4s SAM4POS SAP-6600


Summary of Contents for Sam4s SAM4POS SAP-6600
- Page 1 SAM4POS SAP-6600/4800II Program Reference Manual Sam4POS 6600/4800II Program Manual v2.12 2016, CRS, Inc. All specifications are subject to change without notice.
- Page 2 CRS, Inc. Limited Warranty and Disclaimers of Warranty This manual has been developed by CRS, Inc. It is intended for the use of its customers and service personnel and should be read in its entirety before attempting to install, use or program the product(s). Nothing contained in this manual shall be deemed to be, and this manual does not constitute, a warranty of, or representation with respect to, the product or any of the products to which this manual applies.
- Page 3 Precaution Statements Follow these safety, servicing and ESD precautions to prevent damage and to protect against potential hazards such as electrical shock. 6. Observe the original lead dress, especially near 1-1 Safety Precautions the following areas : sharp edges, and 1.
- Page 4 Servicing Precautions WARNING: First read the-Safety Precautions-section of this manual. If some unforeseen circumstance creates a conflict between the servicing and safety precautions, always follow the safety precautions. WARNING: An electrolytic capacitor installed with the wrong polarity might explode. 5. Check the insulation between the blades of the 1.
-
Page 5: Table Of Contents
Contents Introduction SAM4s SAM4POS Overview ............... 11 Hardware ..................11 Software ................... 12 Memory Supported Features ............12 Power Requirements ..................13 Safe Operation .................. 13 SAP-6600 Controls & Connections .............. 14 SAP-4800II Controls & Connections ............16 Rear VFD Display (optional) ............17 Passwords ...................... - Page 6 Detailed Reports .................... 45 Available Detailed Reports ............... 47 Cash Declaration .................... 60 Calendar Report View ................... 61 End of Day End Of Day Sub Menu Reports ..............64 End Of Pay ..................65 End Of Not Found PLU ..............66 Favorite List Program Mode PLU ........................
- Page 7 Train Option ................... 117 Level Option ................... 117 Guest Check Option ............... 118 KP/KV Option ................118 Print Option ..................120 Report Option ................. 121 Time Keeping Option ..............122 Hash Options .................. 122 System Option ................123 Rounding ..................125 TARE WEIGHT ................
- Page 8 FLU Edit ..................213 Rear Display ................... 216 DEVICE ....................... 217 Device Setting ................. 218 Printer ..................... 219 Scanner ................... 220 Line Display ..................220 Scale ....................221 EFT ....................221 Coin Dispenser ................222 Liquor Dispenser ................222 Kitchen Video ................. 223 Text Inserter ..................
- Page 9 ETC ......................291 Web View ..................291 Help Menu ....................294 Program Scans ..................... 295 Favorite Icon ....................300 Integrated Payment Appendix Introduction ....................301 What to Order? ................301 Configurations ..................... 302 Required Programming for Integrated Payment .......... 304 Device Programming ..............
- Page 10 10 • Introduction Sam4POS 6600/4800II Program Manual v2.12...
-
Page 11: Introduction
Introduction SAM4s SAM4POS Overview SAM4POS from SAM4s is an Android based POS solution that can be installed on the SAM4s SAP- 6600 & SAP-4800II, the SAP-630/SAP-530 terminals, and the Hisense HM616 Android tablet. SAM4POS is available to resellers only as a hardware/software bundle; SAM4POS is not available as a generic application and will not run on other Android devices. -
Page 12: Software
SAP-4800II The SAM4s SAM4POS with the SAP-4800 II All-In-One touch screen terminal is powered with an ARM Cortex™ quad-core fan less processor to efficiently run the SAM4POS software application. • Vivid LED Backlight for Reliability and Energy Savings • Stylish 15" LCD with 5-Wire Resistive Touch •... -
Page 13: Power Requirements
2. Isolated Grounding for all equipment within the Sam4POS system. Safe Operation • Do not locate your Sam4s Sam4POS terminal in a damp or wet environment. Avoid high humidity, direct sunlight and temperature extremes. • Always plug your Sam4POS terminal into a grounded three-prong outlet. Never use two- prong adaptors or ungrounded outlets. -
Page 14: Sap-6600 Controls & Connections
SAP-6600 Controls & Connections Standard 3-Track Front Facing Magnetic Card Reader (MCR) Power Button located on the bottom right of the touch panel Standard 3-Track Front Facing Magnetic Card Reader (MCR) Two v2.0 USB Ports Connection Panel Access Cover Cable Management Access Cover 14 •... - Page 15 Optional Integrated Rear 2 Line by 20 Character VFD Customer Display SAP-6600 Connection Panel • COM1, COM2 = DB9M With Pin 9 voltage (+5V) • COM3 = RJ45 Pin 8 (0V / +5V / 12V) Voltage selectable in BIOS • Audio Line-Out port •...
-
Page 16: Sap-4800Ii Controls & Connections
SAP-4800II Controls & Connections Standard 3-Track Magnetic Card Reader (MCR) Power Butt on Locat ed on t he bott om of t he t ouch displ ay. Break-Out Tabs for cable management. 16 • Introduction Sam4POS 6600/4800II Program Manual v2.12... -
Page 17: Rear Vfd Display (Optional)
Rear VFD Display (optional) SD Car d Access Optional Rear VFD Display USB Ports (2) Break out tabs for cable management. Introduction • 17 Sam4POS 6600/4800II Program Manual v2.12... - Page 18 SAP-4800-II Connection Panel A - COM4 (Powered) B - USB (2) C - Drawer 1 D - Drawer 2 E - LAN F - COM2 (Powered) G - COM1 (Powered) H - COM3 (Powered) I - DC In (Power Input) 18 •...
-
Page 19: Passwords
Passwords Specific passwords may be required to access the Report Mode and Program Mode. A separate Manager Password can also be set to allow access to manager controlled operations and activities. Operations set as ‘Manager Required’ can be completed only after the correct password is entered. Password Notes ... -
Page 20: Initial Clear
1. In versions 1.0.26 and later: Tap the Version information, in the lower right corner, three times to initial clear the SAM4POS terminal. (In versions before 1.0.26: tap the SAM4s logo displayed on the main sign on screen three times.) 2. -
Page 21: Memory All Clear
Memory All Clear This operation clears all programming and returns SAM4POS to the factory default. This operation is reserved for the System Admin only. Contact your local authorized dealer for assistance. Warning: This operation is not reversible; all programming, settings, and report totals will be lost. -
Page 22: Navigating Sam4Pos
Navigating SAM4POS Default Screens Log On Screen Upon boot up, the Sign On screen displays. You can sign on or, if the time keeping feature is being utilized, clock in from this screen. To Sign-On to the Sam4POS application for the first time, use the default password “1”... -
Page 23: Main Menu Screen
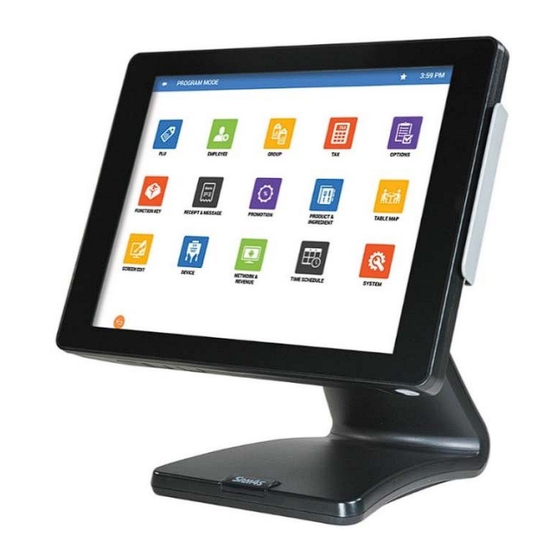
Main Menu Screen After a successful log-on, the SAM4POS Main Menu screen displays: Main Menu Icon Details: The Operate icon opens the Register Mode, Operator’s sales entry screen. Choose Reports to generate system reports. Choose End of Day to run the end of day reports. Displays the Favorite List. - Page 24 Memo/Reminders Notes and reminders can be added and accessed from the main menu screen using the memo icon. 1. Sign on to the SAM4POS application from the main Log On screen. 2. Press the Memo Icon on the upper right of the display to view or add notes.
- Page 25 5. The new note is added to the list. 6. To edit or delete notes; tap/touch on the desired note from the list: 7. Press the note pad icon to edit the note; press the trash can icon to delete the note; press the icon to close the note.
-
Page 26: Navigation Tips
Navigation Tips Navigating the various screens within the SAM4POS application is very intuitive. Screens are setup with easily identifiable icons to quickly access and select the various program areas and options. Common Icons Description Icon Back Arrow, used to exit the current Mode selection, go back one screen. Use the Return icon to go back to the previous screen/selection. -
Page 27: Related Item Sub-Menu
Description Icon Favorites icon – Use to add or remove current selection to the Favorite List. White is not added to favorite list, gold indicates selection is added to favorite list. The favorite list can be accessed from any mode except the Register Mode. Table Map icon. -
Page 28: Left Or Right Hand Display By Employee
Left or Right Hand Display by Employee By operator preference, the screen can be set to for left or right-handed view. (See “Employee Option Definitions” – “General” Options.) Right Hand View Left Hand View Using the On-Screen Keyboard When a program or operation function requires an alphanumeric entry, the screen keyboard will display automatically. - Page 29 NUMERIC KEYS: Press the ?123 numeric key to access. Press the ~ [ < symbol key to access. ADDITIONAL FUNCTION KEYS: Navigating Sam4POS • 29 Sam4POS 6600/4800II Program Manual v2.12...
-
Page 30: Using An External Keyboard
Using an External Keyboard For large scale programming, users may find an external USB keyboard more familiar and quicker to use for entering data. You can hide the on-screen keyboard by touching the ESC key on the external keyboard. The following shortcuts may be used with an external keyboard: If a screen keyboard is displayed, press Esc to hide it, otherwise Esc will perform a back function, returning to the previous screen or program. - Page 31 Edit Mode In a long list, multiple items can be deleted or inactivated from the Edit Mode. 1. Touch the Menu icon and select EDIT MODE to edit the list. 2. Select specific items from the list. For example; edit a PLU list. The action you choose will apply to all selected PLUs.
-
Page 32: Viewing/Hiding Options On Long Lists
Viewing/Hiding Options on Long Lists Options where there are long lists of selections, such as PLU options, PLU Status Options, or Function Options and System Options, are categorized or organized in groups. You can view or hide the detail options within categories. View with option details hidden. -
Page 33: Sam4Pos Operator Screen
SAM4POS Operator Screen Touch the Register Mode icon on the Main Menu screen to open the SAM4POS Register Mode Operator Screen. The operator screen is divided into different zones to facilitate regular sales transactions. Touch the Back Arrow icon to close the Register Mode operators screen and return to the main menu screen. -
Page 34: Operator Screen Zones
Operator Screen Zones Description Zone Header – Top Row displays: Back Arrow, Mode, Menu, Table Display, Receipt On/Off, License Info, Connection method and Date/Time. Header – Bottom Row displays: System Identification, PLU Key Info, Price Level, KP Period, Destination and Employee name. Transaction Detail –... -
Page 35: Expanded Operator Screen Header Bar
Header Icons - Bottom Row System Identification displays the terminal information PLU Key Info – Select to display the PLU ‘Price’ or ‘Stock’ on PLUs or select ‘None’ Price Level – displays the current Price Level, touch this icon to select or change to a dif ferent price level KP Period –... - Page 36 Memory Storage Management: The memory percentage usage icon is available when you press the more functions menu icon on the register screen header bar. When you tap on the memory percentage usage icon, the memory storage management dialog is displayed. This feature is used to view memory resources. •...
- Page 37 Memo Icon The Memo icon is available when you press the more functions menu icon on the register screen header bar. Selecting the Memo icon allow the operator to add a note or reminder that can be reviewed at a later time. 1.
- Page 38 7. The new memo/note/reminder is added to the list. 8. To edit delete notes; tap/touch on the desired note from the list: 9. Press the 10. note pad icon to edit the note; 11. trash can icon to delete the note;...
- Page 39 Sale Screen Size Edit A new option was added in v1.0.73 and later in the Program Mode\Options\Options\General Option: ALLOW SALE SCREEN EDIT in the Sale options section. 1. If this option is ON, the gear icon will display in REGISTER MODE allowing for the screen size to be edited.
-
Page 40: Report Mode
Report Mode When the Report Mode is selected, a grid of six quick view summary reports displays for managers to quickly see selected report information. We can also choose to view or print detailed reports by touching the ‘REPORT MODE ’... -
Page 41: Report Mode Icons
Report Mode Icons Icon Function Description Back Arrow, exits the report mode. Displays/Hides the Detailed Reports Sub Menu selections; press this icon to access all other reports. Cash Declaration Calendar Report View Note-Pad/ Edit – used to show/hide the edit icons on the individual report cells. Press this icon to add or remove the report mode or specific report selections on the favorites list. -
Page 42: Summary Reports
Summary Reports The Report Mode Summary Reports screen allows you to view selected report information without having to first run and print the report. Adding Reports to the Summary Report To add or edit the summary reports that are shown on the report mode quick view display, touch the add record icon in any of the six, quick view summary report grids to display a list of available summary reports. - Page 43 To display the report information, you may need to exit the report mode and then return back again. If the report doesn’t display, touch the icon to see the report data: Report Mode • 43 Sam4POS 6600/4800II Program Manual v2.12...
-
Page 44: Edit The Summary Reports
Edit the Summary Reports If desired, the current reports displayed in the report mode summary report view can be changed to display different reports or removed from the summary report view. Touch the Edit icon on the title bar to display or hide the edit icons for each report in the grid. The “Edit”... -
Page 45: Detailed Reports
Detailed Reports Additional reports are available by selecting the detailed report sub menu. From the sub menu report section, you can view, print or save the selected report as a CSV file. Reports are not cleared from this report mode, to clear reports you would need to go to the “End of Day” report mode. 1. - Page 46 Dates You can choose DATES to view reports for Today, Last End of Day, or set a Custom period; you can also choose from Daily, Weekly, Monthly, 3 Month, 6 Month or Yearly reports. Simply make your selection and press the refresh icon to change the current view to your new selections. TODAY This selection will display the report data for the current day.
-
Page 47: Available Detailed Reports
Options Allow you to further define the report to display specific data. TRAINING DATA REPORTING BY EMPLOYEE CURRENT DATA SIGNED ON EMPLOYEE DETAILED DATA CLOCKED IN EMPLOYEE ZERO SKIP REPORTING BY TERMINAL DRAWER TOTAL TIP TOTAL Filters The filters provide further flexibility by allowing you to filter the report to show all employees or choose a specific employee to view just their individual totals. - Page 48 Financial Report DATES Date selections include: Today, Last End of Day, Custom Period 1 DAY, 1 WEEK, 1 MONTH, 3 MONTH, 6 MONTH, 1 YEAR Additional selections in the Dates area are: START DATE & END DATE END OF DAY NUMBER AND TERMINAL SELECTION OPTIONS Training Data, Current Data, Detailed Data, Zero Skip, Drawer Total, Tip Total Reporting By Employee, Signed On Employee, Clocked In Employee, Reporting By Terminal...
- Page 49 Group Report DATES Date selections include: Today, Last End of Day, Custom Period 1 DAY, 1 WEEK, 1 MONTH, 3 MONTH, 6 MONTH, 1 YEAR Additional selections in the Dates area are: START DATE & END DATE END OF DAY NUMBER TERMINAL SELECTION OPTIONS Training Data, Current Data, Waste, Promo...
- Page 50 Open Check Report DATES Date selections include: Today, Last End of Day, Custom Period 1 DAY, 1 WEEK, 1 MONTH, 3 MONTH, 6 MONTH, 1 YEAR Additional selections in the Dates area are: START DATE & END DATE ALL DATE When selected, only the TODAY selection above is available TERMINAL SELECTION Training Data, Current Data, Waste, Promo...
- Page 51 Labor Report DATES Date selections include: Today, Last End of Day, Custom Period 1 DAY, 1 WEEK, 1 MONTH, 3 MONTH, 6 MONTH, 1 YEAR START DATE & END DATE OPTIONS Sales And Labor % FILTERS EMPLOYEE – Choose ALL or selected Employees TOP –...
- Page 52 Time In Out Report DATES Date selections include: Today, Last End of Day, Custom Period 1 DAY, 1 WEEK, 1 MONTH, 3 MONTH, 6 MONTH, 1 YEAR START DATE & END DATE FILTERS EMPLOYEE – Choose ALL or selected Employees JOB CODE –...
- Page 53 Time Clock Editing If an employee forgets to clock in or out, authorized personnel can Edit the time clock data from the Time In- Out Report screen. Use the buttons above the time entries to perform the desired operation. The available selections include: New –...
- Page 54 Edit Time Entry 1. From the Report Mode, select the Time In Out Report from the detailed reports menu, then press SHOW to display the current employee time entries: 2. Press the EDIT Button; The Time In-Out Edit dialog displays: 54 •...
- Page 55 3. We can edit the Job Code, Start Time End Time or Type; Select the field on the grid for the EMPLOYEE whose data you wish to edit: i.e. to Edit the End Time for Davros, click/tap on the END TIME column on Davros’s time entry line.
- Page 56 Delete a Time Entry 1. From the Report Mode, select the Time In Out Report from the detailed reports menu, then press SHOW to display the current employee time entries: 2. Select the time entry record you wish to remove; Press the DELETE Button. The selected record is removed: 56 •...
- Page 57 Promotion Report DATES Date selections include: Today, Last End of Day, Custom Period 1 DAY, 1 WEEK, 1 MONTH, 3 MONTH, 6 MONTH, 1 YEAR Additional selections in the Dates area are: START DATE & END DATE END OF DAY NUMBER TERMINAL SELECTION OPTIONS Training Data, Current Data, Detailed Data, Zero Skip...
- Page 58 EJ Report When enabled in the Options\Report Options, the EJ report is a useful tool for searching, reviewing and reprinting previously closed transactions. 1. From the Report Mode, select the EJ Report from the Detailed Reports menu. 2. EJ Reports are sorted by, Year \ Month \ Date \ Transaction. Simply press the desired selection to expand;...
- Page 59 4. With the selected transaction displayed: you can Backup, Delete, or Print the transaction. Backup – Backs up the transaction to the memory device Delete – Will delete the selected transaction Print – Prints the transaction to the receipt printer ...
-
Page 60: Cash Declaration
Product Mix Report DATES Date selections include: Today, Last End of Day, Custom Period 1 DAY, 1 WEEK, 1 MONTH, 3 MONTH, 6 MONTH, 1 YEAR Additional selections in the Dates area are: START DATE & END DATE OPTIONS Training Data, Time Period (when unchecked, only the summary of the Product Mix report will print.) GENERATE Refresh, Zoom, Report View, Export Cash Declaration... -
Page 61: Calendar Report View
Calendar Report View Daily Sales data can be viewed on a monthly calendar format, broken down for each day and week of the month by selecting the calendar report in the report mode. 1. From the Report Mode, press the Calendar icon the sales data accumulated for the current month is displayed. -
Page 62: End Of Day
End of Day End of Day operation allows the operator to close, Print and/or E-mail the Financial, PLU, Group, Period, Employee, TIP, and Product Mix Reports for all employees or select specific reports for specified employees. Reports generated from this screen will clear the totals for the selected reports. The CASH Declaration can also be performed from End Of Day screen. - Page 63 3. OPTIONS: Select the options for your report as desired: DETAILED DATA Breaks down the report data by individual transactions. Column headers are changed and include: SALE TIME, CLOSING, EMPLOYEE, SALE AMOUNT, and PAID AMOUNT. Detailed Data is sortable by clicking the column header. Detailed Data can be sorted by clicking the column header title.
-
Page 64: End Of Day Sub Menu Reports
End Of Day Sub Menu Reports The End Of Day sub menu provides additional report selections for End Of Pay and End Of Not Found PLU. 1. Select the END OF PAY report is used to clear the time keeping report data. 2. -
Page 65: End Of Pay
End Of Pay The End of Pay report displays the Total time, Labor cost, and overtime for the selected date and employees. You can generate a report for a selected date/employee. To clear the Time Keeping data, select the date and employees you wish to clear and press the Generate icon. -
Page 66: End Of Not Found Plu
End Of Not Found PLU The End of Not Found PLU report is used to clear the data generated when PLU items are added to the database from the register mode using the Not Found PLU feature. 1. From the main menu, press the ‘END OF DAY’ icon, then press the ‘END OF DAY ’... -
Page 67: Favorite List
Favorite List The Favorite List Menu allows you to quickly access specific program areas or reports that you may use frequently. Adding a favorite is an easy way to go to a screen you visit frequently, such as a certain program mode, or a specific report. If a screen has a white star in the upper-right corner the screen can be listed as a favorite. -
Page 68: Program Mode
Program Mode When you select the program icon from the Main Menu Screen, the main PROGRAM MODE menu categories are displayed. Touch any of the categories shown to enter the programming options for that category. Program Mode Title Bar Return Mode Help File Program... - Page 69 Program Mode Menu Selection Definitions Menu Icon Definition Selection Set PLUs and related functions: PLU programming, PLU Status Groups, PLU Stock, MLU Chains, Set Menu, Group programming, Non-PLU and Quick PLU. Set up Employees, Employee Authority Levels, Job Codes & Pay Rates, and Station programming.
-
Page 70: Plu
PLUs are the products or services that are available for sale. The PLU programming has seven programming categories: PLU, PLU Status Groups, PLU Stock, MLU Chain, Group programming, Non-PLU, and Quick PLU programming. These seven categories will determine the how the PLU is registered in the sales mode. During PLU Programming, each PLU is assigned a descriptor, price or prices and a few unique options. -
Page 71: Plu Programming
PLU Programming This is where new items are added to the database and existing items can be maintained or deleted. Each PLU is assigned a descriptor, Price, Cost, PLU code and a few unique options. Each new PLU can be assigned a unique code number up to a maximum of 18-digits in length. Labels can be printed from the PLU screen as well by pressing the label Print icon, Specific setup is required for this feature. -
Page 72: Plu Option Definitions
PLU Option Definitions DESCRIPTION This is the name of the saleable item, which will appear on receipts and reports. PLU CODE PLU code can be up to 18 numeric digits. PLUs may be entered by code or by scan input. IMAGE ADD/EDIT You can display a thumbnail image of the PLU item. - Page 73 Price PRICE LEVEL (1 – X) Entered here is the price level(s) for each product. Note: Additional Price Level function keys must be created in ‘Function Key’ programming before they can be assigned to PLU’s. GOTO, NEW, EDIT, DELETE GOTO – Press to go to the Price Level programming NEW –...
- Page 74 Cost The PLU Cost tab allows you to enter the cost of merchant cost of the item. 1. From the PLU programming screen, select the PLU you want to add the cost to, press the COST tab. 2. Select the ‘NEW’ button at the bottom right of the display. The cost entry dialog displays. 3.
- Page 75 Print Label Labels can be printed from the PLU screen by pressing the Print icon; Specific setup is required for this feature. Refer to the “Barcode Label Printing from SAM4POS” section on page 341 in the Appendix for details on this feature. Program Mode •...
-
Page 76: Edit/Sort Menu
Edit/Sort Menu If you have a large PLU file, you can use the Edit/Sort Menu feature to maintain the PLU database more easily. This feature allows you to access the Edit Mode, Sort PLUs alphabetically or numerically, Search for PLUs by PLU Status Group, Group assignment, from PLU Code, or search for PLUs with no sales activity. - Page 77 Printing Labels from PLU Labels can be printed from the PLU programming screen or from the Edit Mode area. We can choose to print a single label or multiple labels for one or more PLU items. Specific setup is required for this feature. Refer to the “Barcode Label Printing from SAM4POS” section on page 341 in the Appendix for complete details on this feature.
- Page 78 Enter QTY of labels to print. Select LABEL FORMAT. Select PRICE LEVEL (used when printing PLU Price on the label.) 4. Select the QTY, number of labels for each selected item you want to print. 5. Select the LABEL FORMAT (as defined in the Label Print setup). 6.
-
Page 79: Adding New Plus
Adding New PLUs New items (PLUs) can easily be added to the database. New PLUs can have up to a 30-character name/descriptor and up to an 18-digit PLU code. Press the add record icon to add new PLUs to the database. The “NEW” item entry dialog displays: Type in the PLU descriptor in the “INPUT NAME”... - Page 80 Search PLUs If you have a very large PLU file, you may find it easier to search for a specific PLU by typing the descriptor (or partial descriptor) in the search. 1. From the PLU Programming screen, touch the search area at the top of the PLU list grid: 2.
-
Page 81: Plu Maintenance
PLU Maintenance PLUs can be maintained easily in the SAM4POS application, simply select the item and make the appropriate changes. If you select an item in the PLU list and press and hold on the item, a sub menu list of operations is displayed. The PLU Descriptor/PLU Code displays at the top of the sub menu; the sub menu operation list includes: Delete, Inactivate/Activate, Copy To New Item, Copy To Existing Items, Copy The Price To Existing Items, Default Item, Remove Default Item. - Page 82 Copy PLU The SAM4POS makes creating multiple items that share the same settings very simple with the Copy PLU feature. You can copy a selected PLU to a new item or copy the selected PLU to existing items. You can also choose to copy the just the price of the selected item to existing items in the database. 1.
- Page 83 Copy to Existing Items Allows you to copy the settings or changes of the selected item to multiple items already in the PLU database. The descriptor does not change, only the options/settings are updated. Check the items from the list to copy the selected PLU to. The double Up/Down Arrows go to the Beginning/End respectively;...
- Page 84 Default Item You can choose any item in the PLU file to be used as the default item. The settings on the Default Item will be copied to all new PLUs that are added using the add new record icon. You can remove the default item status or change it to another PLU to suite your needs.
-
Page 85: Plu Status Group
PLU STATUS GROUP In most applications, large groups of PLUs are set with many identical options, while the PLU number, descriptor and price are unique. On the PLU Programming, each PLU is assigned a descriptor, price or prices and a few unique options. The remaining PLU options are determined by linking the individual PLU to a PLU Status Group. -
Page 86: Plu Status Group Definitions
PLU Status Group Definitions General TAX GROUP Check for each tax rate to determine if the appropriate tax(es) is automatically calculated when the item is sold. CONDIMENT ITEM Condiments PLUs differ from non-condiment PLUs in the manner they display and print during operations. - Page 87 Compulsory COMPULSORY ALPHATEXT If selected, an alpha text message must follow the registration of this PLU. COMPULSORY CONDIMENT ENTRY? If selected, then a condiment entry must follow the registration of this PLU. Discount ALLOW SURCHARGE? If selected, the operation of an item surcharge after registration of a PLU reporting to this group is allowed.
- Page 88 KITCHEN VIDEO GROUP # Select the kitchen video group # to which PLUs in this group are to be sent. Condiment PLUs with a "0" status here will "follow" the last main item. COLOR TO DISPLAY ON KV (0-31) The color code set here will control the color or screen format displayed on an optional kitchen video system requisition screen.
-
Page 89: Plu Stock
PLU STOCK PLU stock is a simple inventory system where each whole unit PLU activity subtracts a value of "1" from the stock counter. (Note that if multiplication or decimal multiplication is used when the PLU is registered, the resulting quantity of activity will subtract from the stock counter. Stock is maintained increments to the second decimal position, i.e. -
Page 90: Mlu Chain
5. The appropriate entry window displays: 6. Enter the new quantity and then touch: ADD - to add to the current quantity SUBTRACT - to remove from the current quantity OVERRIDE - to enter a new quantity CANCEL - if you wish to exit without making any changes MLU CHAIN The MLU Chains are used to group certain MLU menus together, these MLU Chains can then be assigned to PLUs. -
Page 91: Group
Group Groups are designated to accumulate totals for sales of PLUs assigned to each group for convenient reporting. A PLU can send its sales information to up to 3 group links. This program allows you to set up the groups that the PLUs will report to. You can create as many groups as are necessary for your application. - Page 92 Group Definitions GROUP LINK # PLUs can be assigned to up to 3 groups for reporting purposes. Select the Group Link # at the top title bar to see the items associated for each of the group links, Group Link #1, #2, and #3. IMAGE ADD/EDIT Choose an image from you image library.
-
Page 93: Non-Plu
NON-PLU The NON-PLU program must be set if you wish to scan UPCs (using the EAN 13 code) with embedded prices, weights or quantities. Important Note: If you are importing or converting a file (SPS-Converts) for the Sam4POS, you need to setup the Non-PLU programming here before the import or convert is performed. Within the EAN 13 code, the first two digits (part a) are used as an identifier and the last digit (part c) is used as a check digit. - Page 94 Program Non-PLU codes: 1. Select NON-PLU from the PLU PROGRAM selection window to display the NON-PLU programming screen. 2. Choose one of the NON-PLU identifier “02” (or “20” through “29” depending on the code printed from the scale). 3. The NON-PLU programming screen displays for the identifier you have chosen to program. 4.
- Page 95 Program Price Embedded PLUs 1. Select PLU form the PLU PROGRAM selection window. The PLU programming screen displays. 2. Press the press the icon to add the price embedded PLU item. 3. Input the Name for the item in the Item Name field. STOCK quantity if this is a stock item.
- Page 96 Price Embedded Barcode Registration Example With the embedded barcode properly programmed, when the item is scanned in the sales mode, SAM4POS will extend the price per pound ($3.99 in this example), by the weight of the item (3.825lbs in this example) and register the amount of $15.26. 96 •...
-
Page 97: Quick Plu
Quick PLU The Quick PLU menu provides another means to quickly access the programming for a specific PLU or program area. Six quick access program areas are provided, PLU, PLU Status Group, Stock, Group, MLU Edit, and Function Key. Select one of these categories to go directly to the programming maintenance screen for that category. - Page 98 5. The PLU code is shown in the window as in the example: 6. Press OK. 7. The programming for the PLU is shown; edit as necessary. 8. When you have finished editing the PLU, press the back arrow to return to the main Quick PLU menu screen.
-
Page 99: Employee
Employee The employee file contains information for register operators as well as employees who use the register only to clock in or out (employee time keeping.) Specific functions that are allowed or disallowed for each employee are determined by assigning the employee to an authority level. -
Page 100: Employee Programming
Employee Programming The Employee programming allows you to program the employee name and add an image for each employee. Create your Employee file and assign the appropriate Passwords, Authority Level, Station, Pay Rate & Job Code for each employee. From the PROGRAM MODE touch EMPLOYEE to view the employee program selection window. Touch EMPLOYEE on the selection window to view all employees and the employee programming options. -
Page 101: Employee Option Definitions
Select LEFT HANDED or RIGHT HANDED; Controls display position in the sales mode. LINKED DRAWER NUMBER Select the drawer for this employee: No Drawer, Sam4s Cash Drawer, Sam4s Cash Drawer II or Printer Drawer. If no drawer is assigned, the employee can only perform check track postings (not payments). -
Page 102: Employee Authority Level
Job Code Button The Job Code button is where you will assign the jobs and pay rates the employee will utilize; you can assign as many job codes to an employee as is necessary. See “JOB CODE & PAY RATE” programming on page 104 for details. - Page 103 ALLOW DISCOUNT When selected, this employee is allowed to enter discounts in a transaction. ALLOW TEAMVIEWER When selected, this employee is allowed to use the TeamViewer application. TIME IN/OUT TIME-IN/OUT ENTRY ONLY When checked, employees are not able to run sales transaction, they are allowed Time-In/Out Only. TIME IN/OUT USING MCR This option forces the employee to use the Mag Card Reader for clocking in and out.
-
Page 104: Job Code & Pay Rate
JOB CODE & PAY RATE An employee might have more than one job, possibly with a different pay rate for each job. For example, in a restaurant, an employee might work as a server one day, and on a different day or shift, work as a cashier. Here you can create these different job codes and pay rates to be used for your employees. -
Page 105: Station
STATION Create stations to be assigned to employees. For example you may have a Bar Station and a Server Station. Stations can be assigned to default MLU/MLU GROUP, FLU and Printers. Stations can also have different Receipt, Guest Check, and Kitchen Printer assignments. 1. -
Page 106: Tax
The SAM4POS provides calculation for up to ten different taxes. Tax calculations can be an ADD ON percentage, TAX TABLE, or VAT (Value-Added Tax). Tax Groups are used to assign taxes to specific PLUs. The Tax Groups are assigned to items through the PLU Status Group programming. -
Page 107: Tax Programming
TAX PROGRAMMING There are three calculation options for each of the ten possible taxes. • Add-On - most sales taxes can be programmed by entering an add-on tax percentage rate. • VAT - if tax is included in the cost of the item, you can use value added tax (VAT) to calculate the tax share of each sale. -
Page 108: Tax Table Programming
Tax Table Programming In some cases, a tax that is entered as a percentage does not follow exactly the tax charts that apply in your area (even if the tax chart is based on a percentage). In these cases, we recommend that you enter the tax rate using tax table programming method. - Page 109 Tax Table Example - 6% Tax Table 1. Examine the printed tax table for the tax you are programming. 2. Examine the pattern of break point differences to determine when the break points begin to repeat. Mark the beginning break points that do not fit a pattern as “Non-Repeat Breaks.” Mark the break points that are repeating in a pattern as “Repeat Breaks.”...
-
Page 110: Tax Group
TAX GROUP Tax Groups are used to assign tax rates to taxable PLUs. A tax group can be assigned a single tax rate, multiple tax rates or no tax rates, depending on the application needs. Individual Tax Groups are assigned in the PLU Status Group programming and the PLU Status Groups are then assigned to individual PLUs to apply the appropriate tax for the item. -
Page 111: Options
Options Options programming is used to define the most fundamental parameters of the register system. Options are separated into categories to simplify finding specific options. Also available on the Options menu are Rounding and Tare Weight programming. 1. From the main Program Mode menu select OPTIONS, the options menu displays: 2. -
Page 112: Options
Options Options programming is used to define the most fundamental parameters of the register system. Options are separated into easily identifiable categories to simplify finding specific options. 1. Select OPTIONS from the Program Mode, OPTIONS menu selections. The list of option categories is displayed. -
Page 113: General Option
General Option Employee USE CLERK INTERRUPT If allowed, a new clerk can be signed on in the middle of a transaction. In this circumstance, the initial transaction is suspended. When the interrupt transaction is completed, the suspended transaction can be continued when the original clerk signs back on. DO NOT USE: disables the clerk interrupt feature. - Page 114 DISPLAY TOTAL / CHANGE AFTER FINALIZATION When checked, the Total and change will display in an information box on the main screen. Press OK to close the message window. Employee is signed out. DISPLAY TOTAL / CHANGE LARGE If set to display the Total/Change after Finalization and this option is checked, the Total and Change is displayed Double High/Wide.
- Page 115 DISABLE ERROR BUZZER Select YES for a momentary error tone; select NO for a continuous error tone that must be cleared. DISABLE TOUCH SOUND Turns off the sound made when touching the screen. ERROR BUZZER IS SPOT Check this option for a momentary error tone; uncheck this option for a continuous error tone that must be cleared.
-
Page 116: Tax Option
Tax Option PRINT TAXABLE AMOUNT ON R/J Select to print the tax eligible subtotals for each tax on the receipt and/or journal, if printed. DISPLAY TAXABLE STATUS INDICATORS Tax eligibility indicators, i.e. T1S2F display on the screen and print on printers adjacent to the item. PRINT TAXABLE STATUS INDICATORS In the default condition (Y), tax eligibility indicators, i.e. -
Page 117: Train Option
OPEN DRAWER FOR ISSUING REPORTS Select to open the drawer at the completion of any report. Drawer will not open on a scheduled EOD report (requires v1.0.48 or later). OPEN DRAWER ALARM WAITING TIME (SEC) Enter length of time (in seconds) the drawer may be open before the open drawer alarm sounds. (0 = No drawer alarm) CASH IN DRAWER LIMIT Set the maximum amount of cash in drawer before an error tone and message display. -
Page 118: Guest Check Option
MODIFIER LEVEL IS STAY DOWN: The modifier will remain active until the next choice. ITEM POPUP: Modifier remains active for the next PLU only, and then returns to the default. TICKET POPUP: Modifier remains active for the remainder of the transaction, and then returns to the default when the transaction is finalized. - Page 119 PRINT DESTINATION DESCRIPTION Select TOP or BOTTOM Send on KP/KV PRINT VOIDED ITEM AT KP/KV If selected, then transaction void orders will not print or display at the appropriate printer/screen. PRINT ORDER ON KP AT SUBTOTAL Select if you wish to send/print items on the KP when the subtotal key is pressed, instead of when the sale is finalized.
-
Page 120: Print Option
Print Option Receipt & Journal PRINT REPRINT ON A REPRINTED RECEIPT When a receipt is reprinted, ** REPRINT ** is printed at the top of the reprinted receipt. PRINT SEAT# When this option is checked, the seat # will print on the receipt and journal. PRINT RECEIPT FOR SIGN ON/OFF If selected, a receipt is printed whenever an employee signs on or off. -
Page 121: Report Option
LINES BEFORE POSTAMBLE Enter the number of lines you wish to after the last receipt line and before the postamble. PRINT HOME CURRENCY SYMBOL ON LABEL When selected, the home currency symbol will print in front of the price for the PRICE element on labels. -
Page 122: Time Keeping Option
EJ REPORT PATH Select the device PATH where the Electronic Journal will be saved; Choose from: USB (default) or Internal Storage. PREAMBLE/POSTAMBLE ON EJ Select this option to print the Preamble/Postamble message on the Journal (Detail) print. LOGO ON EJ BARCODE ON EJ QR CODE ON EJ GRATUITY ON EJ... -
Page 123: System Option
System Option General DECIMAL POSITION: XXX. = 0; XX.X = 1; X.XX = 2; X.XXX = 3 Enter the desire number of decimal places (0-3). CURRENCY SYMBOL Enter desired currency symbol. $ § £ ¢ € ¥ SELECT DATE FORMAT Select desired date format from the list;... - Page 124 REG Title UI Control Check the options here to be able to Edit/Change the selection in the Register mode. Uncheck to not allow changing of the specific option. ENABLE PRICE LEVEL ENABLE KP ROUTE ENABLE DESTINATION ENABLE EMPLOYEE Example with all REG Title UI Control selected DEALER CONTACT Allows entry of dealer contact information, up to 40 characters.
-
Page 125: Rounding
Rounding The Rounding option allows you to choose how the rounding is handled when fractional amounts result during operations like multiplication, division, applying discounts and tax calculations. You can select the rounding method for these operations to always round up, always round down, or round up at .5 (half a cent .005¢). -
Page 126: Tare Weight
TARE WEIGHT A tare is the amount of weight accounted for by the container or packaging. By entering a tare weight (as required by law in some areas) the weight of the container is subtracted and only the true weight of the product is measured on the scale. - Page 127 4. Next, select a tare from the list, touch the pencil icon to enter/edit the tare weight. You can use the X at the end of the Tare Weight filed to clear the current Tare. 5. Press OK or the Done key on the keypad to enter the tare. Program Mode •...
-
Page 128: Function Key
Function Key Function Key Programming is separated into three categories, Function Key, Tender Key and MACRO Key. The options for each vary by key type selected. Refer to the Function/Tender Key List for specific information about each key type. MACRO’s can be programmed to perform a predefined set of functions/operations. We can create as many functions/tenders and MACRO’s as are needed. -
Page 129: Function Key / Tender Key
Function Key / Tender Key 1. From the Function Key programming selection menu, select Function Key or Tender key from the available selections. 2. On the function key or tender key screen, use the to scroll through the list of keys to the key you wish to edit. -
Page 130: Add New Function/Tender Key
6. Press the back arrow icon to return to the function/tender key screen. Add New FUNCTION/TENDER KEY You can add additional functions or tender keys as your application requires. 1. Press Add button to add a new function or tender key to the list. The NEW key dialog displays. 2. -
Page 131: Copy Function/Tender Keys
Copy Function/Tender Keys If your application requires more a certain type of key, you can copy the key with the same type and options as the original key. You can also use this procedure to delete or inactivate specific keys. 1. -
Page 132: Function Key Definitions
Function Key Definitions Cash Out Not utilized at this time. GENERAL HALO Amount – High Amount Lock-Out; This is the maximum amount accepted on Cash Out. Manager Required? – Operation requires input of manager password to complete operation. Alpha Text Used to type a name or message for an item within the sale. - Page 133 Currency Conversion If you normally accept currency from a neighboring nation, you can program the SAM4POS to convert the subtotal of a sale to the equivalent cost in the foreign currency. Only a cash tender is allowed after touching a CURR CONV key.
- Page 134 Discount Used to discount an item or a sale by an amount or percentage, same as the % keys. GENERAL HALO Amount – High Amount Lock-Out; This is the maximum amount accepted when this Discount key is used. Manager Required? – Operation requires input of manager password to complete operation. TAXABLE Check the Tax Rates (1-10) you wish to exempt when this destination is used.
- Page 135 Guest Use to record the number of guests served by a transaction. The entry appears on receipts and the kitchen printer/KVS. GUEST# Compulsory For All Sales? – When checked, the number of guests must be entered for all sales. Hold Use to identify an individual item, or an entire transaction so that the designated items will not print/display at the kitchen printer/KVS at the current finalization.
- Page 136 List Sale Interrupt Allows the operator to list previously interrupted transactions, when the Clerk Interrupt Feature is used. A specific transaction can be selected to preview. We can filter the list to view just No Sale or Cancel transactions. GENERAL Manager Required? –...
- Page 137 No Sale Use to open the drawer outside a transaction. GENERAL Manager Required? – Operation requires input of manager password to complete operation. NO SALE Print On Receipt – PLU Info If an Employee has authority to edit from PLU Info: They can view and edit PLUs from the PLU Info function. If the Employee does not They can only view PLU ‘s from the have the authority to edit from PLU Info:...
- Page 138 Print Hold Use to remove the "Hold" designation from an item or order, so that the items and their instructions are now sent to the kitchen printer/KVS at finalization. GENERAL Manager Required? – Operation requires input of manager password to complete operation. Promo Touch the PROMO key to void the price (the item remains) of an item.
- Page 139 Receipt On/Off Touch RECEIPT ON/OFF to toggle the receipt printing from on to off. This operation can also be performed by pressing the Receipt Icon on the header bar while in the register mode. Receipt Reprint Touch the Receipt Reprint key to issue a transaction receipt at the designated receipt printer. RECEIPT REPRINT Gift Receipt –...
- Page 140 Scale Use to enter SCALE weight when a remote scale is used. GENERAL Manager Required? – Operation requires input of manager password to complete operation. MANUAL ENTRY Allow Manual Entry Of Weight – Select this option for scale operation when scale is not interfaced with the register.
- Page 141 Split Table The Split Table function provides another method of splitting checks for payment. Note that this method works best when check numbers are not automatically assigned. Many programmers/installers will use the table number as the check number, and in this situation, the feature works quite well. GENERAL Manager Required? –...
- Page 142 Time Clock In/Out Touch the TIME CLOCK IN/OUT key to record start and stop work times for the registered employee. Hours worked are maintained by the time clock system. GENERAL Manager Required? – Operation requires input of manager password to complete operation. Tip Charge Use TIP CHARGE to enter TIPs to an open guest check.
- Page 143 Void Mode Put terminal into the Void Mode as if it had a mode key and was turned to VOID. GENERAL Manager Required? – Operation requires input of manager password to complete operation. OPTION Function Is? – STAY DOWN: The selected Seat # will remain active until the next choice POPUP: The selected Seat # remains active for the remainder of the transaction, and then returns to the default when the transaction is finalized.
-
Page 144: Tender Keys
Tender Keys There are four general tender types available in SAM4POS, Cash, Check, Food Stamp and Misc. Each Tender type has additional programming associated with that specific type of tender. Each tender key description can be edited to further identify the specific tender. Cash Use CASH to finalize or tender cash sales. - Page 145 Check Use Check Tender to finalize or tender sales paid for with a written check. Change is computed when the amount of the check tendered is greater than the amount of the sale. GENERAL HALO Amount – High Amount Lock-Out; This is the maximum amount accepted when this tender is used.
- Page 146 Food Stamp Tender Food Stamps may be used to purchase eligible food items at food stores that participate in the program. The SAM4POS can assist a retailer in handling food stamp transactions by sorting food stamp and non-food stamp eligible items within each sale and tracking food stamp payments for eligible items.
- Page 147 Misc Use a Miscellaneous Tender key to finalize or tender sales paid by various credit, debit, and gift cards or other media types. GENERAL HALO Amount – High Amount Lock-Out; This is the maximum amount accepted when this tender is used.
-
Page 148: Macro Key
Macro Key Macro Keys are special function keys used to register a series of specified keystrokes without having to press each key individually. MACRO keys can contain PLUs, Functions Keys, Tender Keys, or MLU’s. 1. From the Function Key programming menu selection screen, select MACRO Key from the available selections. - Page 149 Adding MACRO’s You can create/add as many MACRO keys as are needed for your application. 1. To add a new MACRO, press the icon, the NEW MACRO dialog is displayed. 2. Type in a name in the ‘INPUT A DESCRIPTION’ field for the new MACRO. The X at the end of the description filed can be pressed to clear the current descriptor.
- Page 150 6. As you select items for your MACRO, they will appear in the key sequence grid to the right. You can use the keys to reposition items in the grid. 7. Remove individual items from the key sequence grid by touching the trash can icon next to the item. Items being added to the MACRO appear in this grid.
- Page 151 Menu Icon 1. Press the Menu icon to display the sun-menu: • Select SORT to view the macro keys alphabetically. • The EDIT MODE allows you to select multiple MACRO’s from the list to delete them all. Copy MACRO MACRO keys can be copied to create new MACRO’s with the same operation or you can copy a MACRO to existing MACRO’s in the list by pressing and holding the desired MACRO.
-
Page 152: Receipt & Message
Receipt & Message The information that prints at the top (Header) and at the bottom (Footer) of receipts can be customized to the customer’s preference. Custom messages can be created for certain operations or for special instructions. Error Messages and Report Messages can be edited here as well as the Label Print formats. -
Page 153: Receipt
Receipt Receipt message programming allows you to program the header and footer information that appears on each of your receipts, kitchen and guest check printers that you may have. These receipt messages can then be assigned for use in the Employee - STATION - Receipt Format programming. See “Station”... - Page 154 Receipt Message Design Elements 1. After you have created your receipt messages, you can edit the design of the message by selecting the sections and elements you want to appear on the receipt in the DESCRIPTION section. See “Receipt Description Option Definitions” on page 155 for details of this section. 2.
- Page 155 Receipt Description Option Definitions Element Name Element Description Logo Image 1 Image that appears at the top of the receipt above the pre-amble. Note: Images can be loaded from the terminal image gallery or from the images loaded into the printer; see the chapter “Load a Custom Logo Image to the Receipt” on page 156 for details.
-
Page 156: Load A Custom Logo Image To The Receipt
Load a Custom Logo Image to the Receipt All printers in the ‘Device Mapping’ will receive the same images when printing. You can choose an image from the terminal image gallery or an image loaded in the printer. 1. Select RECEIPT from the PROGRAM MODE, RECEIPT & MESSAGE program area. 2. - Page 157 Image Loaded In Terminal Loading an image saved in the terminals Image Gallery or on a USB/SD memory device installed on the terminal is an easy way to customize the customer’s receipt. 1. Select RECEIPT from the PROGRAM MODE, RECEIPT & MESSAGE program area. 2.
- Page 158 Touch SAVE to load the selected image to the receipt. 6. Touch SAVE in the upper left corner of the screen. 7. The INFORMATION dialog, “DO YOU WANT TO DEFINE THIS IMAGE ON THE INTERNAL RECEIPT PRINTER?” is displayed: 8. Touch YES to save the selected image to the receipt printer and load the logo image for the receipt. 9.
- Page 159 Image Loaded In Printer If you had previously chosen to define images on the internal printer, you can choose from these images to load for the Logo Image. 1. Select RECEIPT from the PROGRAM MODE, RECEIPT & MESSAGE program area. 2.
- Page 160 Image Loaded In Printer Button Beginning at v0.1.140, a new button has been added to the Actions section of receipt programming. This new button allows us to add images to the internal printer. 1. Select RECEIPT from the PROGRAM MODE, RECEIPT & MESSAGE program area. 2.
-
Page 161: Message
Message The Message Programming area allows you to create custom messages that can be used for certain operations or for special instructions. These messages will be available for use with the Alpha Text key. 1. Select MESSAGE from the PROGRAM MODE, RECEIPT & MESSAGE menu selections. The message programming screen displays: 2. - Page 162 6. Type in the message (up to 40 characters) and set the justification: LEFT, CENTER, or RIGHT You can also choose to have the message print DOUBLE WIDTH and/or PRINT RED. 8. Press OK when done. Select OK AND CONTINUE to add more messages for the category. Press CANCEL if you wish to close the window without creating a new message.
-
Page 163: Error Message
Error Message Error messages can be individually selected and edited, edited messages or all messages can be selected to revert (reset) back to the original message. Default Error Messages ERROR MESSAGE DESCRIPTION ERROR MESSAGE DESCRIPTION SUCCESS DELETION OF THIS ITEM IS NOT ALLOWED AS LINKED MLU ITEM EXISTS DELETION OF THIS ITEM IS NOT ALLOWED DELETION OF THIS ITEM IS NOT ALLOWED AS LINKED FLU... - Page 164 ERROR MESSAGE DESCRIPTION ERROR MESSAGE DESCRIPTION TRANSACTION ALREADY CANCELLED RESTORE ERROR PLEASE REGISTER TABLE PLU CODE ALREADY EXISTS FILE NOT FOUND NO AVAILABLE PRICE LEVEL CAN NOT CANCEL PARTIALLY PAID SALE NEED SUBTOTAL FIRST ENTER NON ZERO NUMBER VOID MODE IS INACTIVATED NO DECIMAL ENTRY ALLOWED OVERRIDE NOT ALLOWED FAILED TO DETECT SECOND DISPLAY...
- Page 165 ERROR MESSAGE DESCRIPTION ERROR MESSAGE DESCRIPTION NO PLU STATUS PGM FILE NO KEYLINK PGM FILE NO TAXTBL PGM FILE NO FUNCKEY PRGM FILE NO JOBCODE PGM FILE NO PLU PGM FILE NO PAYRATE PGM FILE NEED A LICENSE SUB TERMINAL IS EXIST. FIRST, IT HAS TO BE IRC OFF. AGE VERIFICATION FORMAT NOT FOUND PRINTER COVER OPEN TURN OFF THE IRC MODE...
-
Page 166: Report Message
GROSS SALES ROUND TOTAL CASH SALES PROMOTION TOTAL CHECK SALES AVERAGE SALES RA TOTAL AVERAGE GUEST PO TOTAL SAM4S CASH DRAWER HASH TOTAL ESTIMATED TIPS AUDACTION CASH OUT TOTAL NO SALE 166 • Program Mode Sam4POS 6600/4800II Program Manual v2.12... -
Page 167: Label Print
Label Print The Label Print programming is used to setup the different label types that may be used; such as product labels and shelf labels. You can customize the information that prints on the label to suit your application needs. You will need to setup a Label Printer in the Device Setting before you can print labels. - Page 168 6. The SELECT ELEMENTS allows you to customize the label as desired by selecting the elements you want to appear on the label. Available elements include: PLU Code b. PLU Description PLU Price d. Barcode Text – type in a custom test to appear on your label; i.e. Joe’s Bait Shoppe Reverse –...
- Page 169 Text Font Styles Program Mode • 169 Sam4POS 6600/4800II Program Manual v2.12...
-
Page 170: Gratuity
Gratuity The Gratuity programming area allows you to create gratuity or fee’s to apply to a sales transaction. 1. From the PROGRAM MODE menu select RECEIPT & MESSAGE, the select GRATUITY from the menu selections. Add a new GRATUITY message category by pressing the icon and type in a descriptor (up to 30 characters) for the new message category. -
Page 171: Receipt Message
Receipt Message Receipt Message programming is available at version 1.0.76 and later. This allows you to edit certain receipt element descriptors. DESCRIPTION SUBTOTAL TOTAL Key Type Message Beginning at v1.0.69 and later, Key Type Messages can be individually selected and edited, this allows further customization of key types. -
Page 172: Promotion
Promotion Retailers often offer discount when multiples of certain items are purchased. The SAM4POS terminals can accommodate four different discount scenarios with the PROMOTION programming and the PROMOTION GROUP programming. Information from the sale of items assigned to the individual Promotions will send to the Promotion Report. - Page 173 Mix and Match The Mix & Match discount situation takes place where the merchant offers a fixed amount or percentage discount when specific quantities of similar items are purchased. For example, “Save $5 on any three bottles of wine”. This discount is implemented by first linking the applicable PLUs to a specific promotion table.
- Page 174 Multi Buy The Multi-Buy discount situation takes place where the merchant offers an amount or percentage discount when a specific combination of items is purchased or offers the items at a fixed price. For example, purchase 2-Hamburgers, 1-French fry and 1-Medium soft drink to receive a $1 meal discount. To implement this discount, you must list each item and the qualifying quantity that must be purchased on the promotion program screen;...
- Page 175 Combo Discount The Combo discount is similar to the multi-buy discount. In both situations, specific items must be sold to qualify. When using the Combo Discount option, instead of the selecting PLUs individually, we assign promotion groups to be used with the discount; see “Promotion Group Programming” on page 178 for details.
- Page 176 Sweet Deal The Sweet Deal promotion is built by first programming a promotion group. The promotion group will have all the items that are eligible for the sweet deal. Then assign the promotion group to the sweet deal promotion and set the parameters for the sweet deal promotion; see page 178 for details about Promotion Group Programming.
- Page 177 If desired, you can copy a promotion or delete a promotion; simply press and hold on the promotion until the dialog show below is displayed. You can Delete the selected promotion or Copy the promotion to a new or existing item. Program Mode •...
-
Page 178: Promotion Group Programming
Promotion Group Programming A promotion group is a group of PLUs that can be applied to a specific combo discount or sweet deal promotion. The promotion groups allow you to quickly add a group of items to be used with a promotion discount without having to add them individually. - Page 179 5. The complete list of PLUs is displayed; Select the PLUs you want to include in the promotion group from the list, you can view PLUs from All groups or choose a specific group to view PLUs from just that group. You can also search for specific PLUs by name; “Pizza” for example. 6.
- Page 180 8. Pressing the GOTO button opens the PLU programming screen. Press the back arrow on the PLU screen to return to the promotion group programming. 9. You can use the DELETE button to remove selected items from the promotion group. 180 •...
- Page 181 Load MLU Button When programming the items for a Promotion Group, we can select items from a specific MLU instead of scrolling through a complete list of PLUs. 1. Choose a Promotion Group from the list; Press NEW to select PLUs to add the promotion group. 2.
- Page 182 4. Choose an item from the selected MLU to add to the Promotion Group. 5. You are returned to the complete list of PLUs for all groups. Repeat the process to add additional items using the Load MLU method to the Promotion Group as desired. 182 •...
- Page 183 6. Press OK when finished adding items. 7. Your selected items now appear on the Promotion Group. Program Mode • 183 Sam4POS 6600/4800II Program Manual v2.12...
-
Page 184: Product & Ingredient
PRODUCT & INGREDIENT Inventory control on the SAM4POS uses menu explosion to break down the PLU or menu item sold to the customer into its component ingredients. This information is then used on the Food Cost Report. NOTE: Be careful not to confuse the separate and distinct inventory features of the SAM4POS •... -
Page 185: Ingredient
Ingredient Before recipes can be created, you must first define all the ingredients that will be used with recipes. These ingredients are the component items that make up your product; i.e. Hot Dog, Burger, Sandwich, etc. could break down in to Buns, bread, meats, lettuce, tomato, and so on. 1. - Page 186 Add Ingredients 1. Select INGREDIENT from the PRODUCT & INGREDIENT menu selections. 2. Press NEW to add a new ingredient to the list, the new item dialog displays 3. Type a description (up to 30 characters) and the merchant cost for the new ingredient; press OK to add the ingredient to your list or press OK And Continue to add more ingredients.
-
Page 187: Recipe
Recipe The Recipe programming allows you organize ingredients into recipes that are then linked to the PLUs being sold. If a PLU is linked to a recipe, PLU sales activity will update information on the Food Cost Report. Recipes are created using items from the ingredient list, recipes can also contain other recipes. Add a New Recipe 1. - Page 188 Add Ingredient-Items / Edit a Recipe If you are editing an existing recipe, use the buttons at the bottom of the screen to revise the recipe as necessary. GOTO – NEW – EDIT – DELETE BUTTONS DEFINITIONS: GOTO – Use this button to go to the Ingredient Programming screen. NEW –...
- Page 189 3. Recipes can contain individual ingredients or other Recipes: Choose the appropriate selection: Ingredient or Recipe from the drop-down list that you wish to add to your selected recipe. b. Next, choose the desired item selection from the list; (Ingredient List or Recipe List) as per selection in previous step.
- Page 190 Delete a Recipe 1. Press and Hold a recipe from the list, the RECIPES dialog displays: 2. Select DELETE from the available selections; the confirmation dialog appears: 3. Press YES to delete the selected recipe, the recipe will be deleted; choose No to keep the recipe. 4.
- Page 191 5. Select the recipes from the selection list you want to copy the ingredients to, then press the copy icon; the confirmation dialog appears: 6. Press YES to copy the ingredient to the selected recipes; you are returned to the main recipe screen. Program Mode •...
-
Page 192: Product Mix
Product Mix Product Mix can be used to implement a simplified ingredient system for tracking only essential ingredients associated with items (i.e. cups for beverages or number of pieces for chicken menus.) Multiple groups of product mix items can be created. 1. -
Page 193: Product Mix Items
Product Mix Items Product Mix items are inventoried as they are purchased; for example, a box of burger patties, case of burger buns, heads/cases of chicken. DESCRIPTION Each product mix group item can have a 30-character descriptor. Product Mix Option Tab UNIT DESCRIPTOR Enter a 4-Character descriptor for the unit, using the Alpha-keyboard overlay. - Page 194 Adding New Product Mix Items 1. On the Product Mix programming screen, select a PMG from the list, touch the PLU tab, then touch the NEW button at the bottom of the screen. The PLU selection screen displays: 2. ALL groups are selected by default in the groups list and all of the PLUs are shown in the PLU list. You can choose a specific group from the list to see just the PLUs in that group.
- Page 195 5. Select the items you wish to include in the Product Mix Group; The SELECTED ITEM COUNT reflects the number of items selected and the number of remaining selections available. Press OK to add the selected items the product mix group. 6.
- Page 196 Load MLU Button We can also add new items to a product mix group by selecting items directly from an MLU screen. 1. Select the desired PMG from the list from the Product Mix programming screen, touch the PLU tab, then touch the NEW button at the bottom of the screen.
- Page 197 4. Continue adding items to the PMG as desired, Press OK when finished adding items. The selected items are added to the product mix group. 5. You can edit the count for any or all the items in the group. Select the items in the list you want to edit; press the EDIT button.
-
Page 198: Screen Edit
Screen Edit The Screen Edit program area is used to setup the Table Map, Menu Lookup (MLU Edit) and Function Lookup (FLU Edit) screens that will be used to complete register operations on the SAM4POS. NOTE: The SAP-530 terminals will also have the Real Keyboard programming here. 1. - Page 199 TABLE MAP The table map allows you to create multiple tables in a grid formation for table service operations. We can create multiple seating zones and tables to represent different seating areas and organize the appearance of the tables with custom names and colors. Enable the System Options “Show Table Map Icon”...
- Page 200 Edit an Existing Table Seating Zone 1. Touch the zone you wish to edit and press the EDIT button in the Table Zone editing area (bottom right of the display). 2. Type in a name for the Table Seating Zone and customize the background and text color as desired. A 25-color palette is provided.
- Page 201 Add Additional Table Seating Zones 1. Press NEW on the table seating zone editing area (bottom right of display). 2. Type in a name (up to 10 characters) for the new seating zone, edit the background and text color as desired with the 25-color palette that is provided.
- Page 202 Adding Tables to Seating Zones 1. Select the table seating zone you wish to add tables to. Press the NEW button at the top of the display (Table Edit Pane). The NEW table edit dialog displays. 2. In the “Input Description” field, type in the name (up to 10 characters) that you want to appear on the new tables.
- Page 203 8. Press the TABLE WIDTH COUNT and select the number tables you want to see per row. Allowable setting range is from 3 to 10. 9. Press the TABLE HEIGHT COUNT to select the number of tables you want to see per column. Allowable settings range is from 3 to 8.
- Page 204 Note: when creating table grids, you can set a starting table number or enter a custom table name by entering in the number you want to start at along with the table name. For Example: New tables created BAR20 with a count of 10 would create tables BAR20 thru BAR29.
-
Page 205: Mlu Edit
MLU Edit The Menu Look Up (MLU) programming determines what is displayed in the item area of the operator screen. The MLU Edit screen is separated into MLU Groups and individual MLU’s. MLUs are selected by touching a MLU key in the vertical panel next to the item area. See the sample at “SAM4POS Operator Screen”... - Page 206 MLU Groups MLU Groups organize the MLUs that will be displayed in the register. The default MLU group can be assigned by station so each station can display a different MLU group as desired. For example: the bar station can have a different default MLU Group than the dining area. Add a New MLU Group 1.
- Page 207 Add a New MLU After creating MLU Groups, Individual MLU’s are created for each group. These MLU’s are the screens that will appear in the register mode. Each MLU can be assigned up to 56 PLUs or functions as necessary. The keys on the MLU screen can be assigned any PLU currently in the database. Additionally, MLU keys can be assigned function keys, tender keys, MACRO’s or other MLU’s.
- Page 208 Editing a MLU Group or a MLU 1. From the MLU Group or MLU pane, press and hold your selection. A list of edit options displays: Function Item Edit the MLU Group or MLU Descriptor EDIT Delete the selected MLU Group or MLU DELETE Copies the currently selected MLU Group or MLU to a new MLU COPY TO NEW ITEM...
- Page 209 Programming MLU Buttons You can save significant setup time by assigning multiple PLUs to locations simultaneously, and by assigning attributes, such as button shape, font and color to a group of buttons simultaneously. 1. Select an MLU Group from the list to view the MLU’s associated with that group. 2.
- Page 210 Editing the Appearance of MLU Screens 1. You can rearrange the items as desired on the grid. Press and drag the selection to the desired location. 2. The appearance of the items on the MLU screen can be edited using the elements in the designer pane. 210 •...
- Page 211 Note: When you select an individual item and type in a new name, the original name Descriptor appears and the TYPE of key is displayed: Key Type & Code Original Descriptor Input Name 3. When adding items to a selected MLU, if you select more items to load than the number of available spaces on the MLU, the SAM4POS will automatically create additional MLU buttons for you.
- Page 212 c) Select more items than the ava ilable cells; Press OK. d) The selected items are added t o the MLU; additional FOOD MLU’s are created as necessar y for all the selected items. (i.e. FOOD - #1 thru FOOD #5).
-
Page 213: Flu Edit
FLU Edit A Function Look Up (FLU) is very similar to a MLU, except that no PLU items can be assigned to a FLU. The FLU keys are displayed on the bottom of the operator screen. If multiple FLUs are available, you can use scroll buttons to view the keys on all available FLUs. - Page 214 FLU Selection Pane You can add new FLU’s or select an existing FLU to edit from this section. The FLU screens provide up to 14 single keys which can have functions, tenders, Macro’s or MLU keys assigned. Add New FLU Screens 1.
- Page 215 FLU Key Assignment Pane The FLU assignment pane allows up to 14 individual keys to be assigned. Choose from function keys, tender keys, Macro’s or MLU’s. These keys can be edited using the design attributes. Design Item Attributes Use this section to assign or delete keys to the FLU and to design the look of the keys. We can change the key style to a double key, vertical or horizontal, or to a quad key.
-
Page 216: Rear Display
Rear Display Available on the SAP-6600 terminal v1.0.99 and later. Rear Display Period in Time Schedule to automatically occur at a predetermined time. 1. From Screen Edit in Program Mode, select REAR DISPLAY; The Rear Display Edit screen displays. 2. Press the add record icon to add a new Rear Display category. -
Page 217: Device
DEVICE Device programming is where all the individual peripheral devices used on the SAM4POS system are configured and mapped (routed) to the all the stations in the system. The peripheral devises available for use on the SAM4POS are Printer, Scanner, Line Display, Scale, EFT, Coin Dispenser, Liquor Dispenser, Kitchen Video, and Text Inserter. -
Page 218: Device Setting
Device Setting The Device setting programming area is where all your devices are configured for the port that they will occupy. Each device will have additional programming options specific to the device; Printer, Scanner, Line Display, Scale, EFT, Coin Dispenser, Liquor Dispenser, Kitchen Video, Text Inserter. To simplify device mapping when multiple terminals are in an IRC network, it is best to program your devices to the same port on each terminal. -
Page 219: Printer
Printer Add all the printers to be used in the system for receipt printers, kitchen printers. AVAILABLE PRINTER TYPES: SAM4S 3 Inch, 2 Inch, EPSON TMT88III, TM-U220, TMT88II, SNBC BTP-L520 (Label Printer) General DEVICE MODEL SAM4S 3 Inch, 2 Inch,... -
Page 220: Scanner
Add all line displays (customer displays) utilized in the system. Note: You can edit the line display message from PROGRAM MODE \ OPTIONS \ OPTIONS \ GENERAL OPTIONS \ ETC \ Line Display Description General DEVICE MODEL SAM4S CDP or SAM4S ML700 COMMUNICATION TYPE Serial Serial COM PORT COM1 thru COM3 /dev/ttyUSB0 –... -
Page 221: Scale
Scale Set up a port for an integrated scale for use when selling Scale and/or Auto-Scale items. General DEVICE MODEL NCI, CAS, OZ COMMUNICATION TYPE Serial Serial COM PORT COM1 thru COM3 /dev/ttyUSB0 – only available when a USB to RS-232 converter is connected to the terminal. PARITY BAUD RATE NONE, EVEN, ODD... -
Page 222: Coin Dispenser
Coin Dispenser General DEVICE MODEL General Coin Dispenser COMMUNICATION TYPE Serial Serial COM PORT COM1 thru COM3 /dev/ttyUSB0 – only available when a USB to RS-232 converter is connected to the terminal. PARITY BAUD RATE NONE, EVEN, ODD 1200, 2400, 9600, 19200, 38400, 57600, 115200 STOP BITS DATA BITS... -
Page 223: Kitchen Video
Kitchen Video General DEVICE MODEL SAM4S KDS COMMUNICATION TYPE Serial Serial COM PORT COM1 thru COM3 /dev/ttyUSB0 – only available when a USB to RS-232 converter is connected to the terminal. PARITY BAUD RATE NONE, EVEN, ODD 1200, 2400, 9600, 19200, 38400,... -
Page 224: Device Mapping (V1.0.79 And Earlier)
Device Mapping (v1.0.79 and Earlier) The Device Mapping programming area is used to assign which devices (Printer, Scanner, Line Display, Scale, EFT, Coin Dispenser, Liquor Display, Kitchen Video, Text Inserter) that will be used on the various stations in the SAM4POS system. 1. - Page 225 7. You can use the buttons at the bottom of the mapping screen to edit existing mapped devices. • GOTO – Brings up the Device Setting programming. • NEW – To add additional devices. • EDIT – Allows changes to the printer and time period selections. •...
- Page 226 Line Display: Input a DESCRIPTION for the device (up to 30 characters). SELECT DEVICE: from the list of available devices as set in the Device Setting screens. Scale: Input a DESCRIPTION for the device (up to 30 characters). SELECT DEVICE: from the list of available devices as set in the Device Setting screens.
-
Page 227: Kp Group (V1.0.79 And Earlier)
KP Group (v1.0.79 and Earlier) Use this programming area to determine the KP Groups that will be used for assignment in the PLU Status Group programming. You can assign KP Groups to different printers at different time periods if desired. Note: You must create a KP printer in the Device Mapping before you can create a KP Group. - Page 228 • EDIT – allows you to change the assigned printer and time period selections. • DELETE – Will delete the printer assignment for the selected printer. 5. Press the menu icon to access the: • EDIT MODE to select and delete KP Groups or select •...
-
Page 229: Device Mapping (V1.0.80 And Later)
Device Mapping (v1.0.80 and Later) The Device Mapping program area was changed beginning at v1.0.80. Kitchen Printer is a separate selection from Printer mapping. The Kitchen Printer area is used to assign printers that will be used on each of the stations in the Sam4POS system. 1. - Page 230 Adding Kitchen Printers Kitchen Printers are listed in the right most column on the Device Mapping Screen. Beginning at v1.0.96, the ability to configure KP by station was added. 1. Press the NEW button to assign a device. The NEW item dialog displays: INPUT DESCRIPTION - Type in a description for the device (up to 30 characters).
- Page 231 • GOTO – Brings up the Device Setting programming. • NEW – To add additional Kitchen Printers. • EDIT – Allows changes to the settings for the selected Kitchen Printer. You can select an individual printer or multiple printers to edit all at one time. •...
-
Page 232: Kp Group (V1.0.80 And Later)
KP Group (v1.0.80 and Later) The KP Group programming was changed beginning at v1.0.80 and later. Use this programming area to determine the KP Groups that will be used for assignment in the PLU Status Group programming. You can assign KP Groups to different printers at different time periods if desired. Note: You must create a KP printer in the Device Mapping before you can create a KP Group. - Page 233 KP Option DESCRIPTION You edit the description for the KP Group here if desired. TICKET COUNT This is the number of tickets you wish to print. This number initially comes from the Device Mapping setting. KP TYPE This setting comes from the Device Mapping setting. Pressing the GOTO button will bring you to the Device Mapping screen.
-
Page 234: Card Read Format
Card Read Format The Card Read Format programming determines the card data that will be utilized when the employee is set to use the MSR for employee Sign On/Off and or for Time In/Out. In addition, we can setup the parameters for cards used for Age Verification. - Page 235 Employee Card One Employee Card setup is provided and cannot be deleted, no additional employee card formats are allowed. CARD DATA Swipe your card to view the data on the card. READ Choose which track you want to read for MSR operations; Track1, Track2, or Track3. CARD ID Check this option if Card ID numbers are to be used, then touch CARD ID enter the ID number (up to a 2-digits entry is allowed) from the magnetic cards that will be accepted.
-
Page 236: Eft Operation
EFT Operation SAM4POS supports integrated credit card processing with Datacap equipment and supports the EMV protocol. (There will be no Non-EMV integration.) Credit Card (EFT) maintenance operations can be performed at the SAM4POS terminal from the EFT operations menu. 1. From the main PROGRAM MODE menu, select DEVICES, then choose EFT OPERATION, from the devices menu selections. - Page 237 Datacap Operation Definitions Definition Operation Initialize EFT Use this function to initialize the Datacap EFT device. Close Batch Closes the current batch and opens. (Requires v1.0.77 or later.) Enhanced Sam4POS to print the batch Reprint Batch information in a more readable format. Also added the ability to reprint the batch information.
- Page 238 Sterling Operation Definitions (Currently NOT Available) Definition Operation Batch Close With Debit Upload Status Report Reset Device Reset Pin Pad Settle Voice Auth (Force Settle) Credit Card Status Check Prepaid Card Balance Request UID Upload PLU’s Download PLU’s Upload Report Diagnostics Get Gift Card Balance Get EBT Balance...
- Page 239 Ingenico CRS (Not used at this time.) Definition Operation Initialize EFT Close Batch Void Sales By Record Number Issue Local Transaction Void Return By Record Number Gratuity Entry Post Authorization Parameter Download Get Gift Card Balance Get EBT Balance EMV Voucher For EBT Test Mode Self Initiated Load Diagnostics...
-
Page 240: Msr Setting
MSR Setting The SAM4POS terminal comes with an integrated 3 track USB MSR. The MSR is already configured with default settings. With the SAM4POS on the SAP-4800II terminal, the MSR is controlled by the OS; we can use the MSR Setting menu to reconfigure the track information on the integrated MSR. These settings are not available on the SAP-6600 or SAP-530 terminal with SAM4POS loaded. - Page 241 4. The current MSR settings are displayed; edit the setting as needed. Use Start Sentinel: Track 1 = % (percent sign) Track 2 = ; (semi-colon) Track 3 = & (ampersand) b. Use End Sentinel: Track 1 = ? Track 2 = ? Track 3 = ? Check the “Use Carriage Return (End of Track#)”...
-
Page 242: Network & Revenue
Network & Revenue IRC (Inter Register Communications) is defined in the Terminal & Network selection in the Network & Revenue programming. The IRC uses standard Ethernet communications. When the IRC is active, all terminals in the system are updated automatically when program changes are made. -
Page 243: Revenue Center
Revenue Center Define the Revenue Center information here as needed. 1. Select REVENUE CENTER from the NETWORK & REVENUE selection menu. 2. Press the add record icon to add a new entry to the Revenue. 3. Type a DESCRIPTION for the selected Revenue Center; the X at the end of the field clears the current description. -
Page 244: Terminal & Network
Terminal & Network This program area is used to view the current Terminal Information and to setup IRC (Inter-Register Communication) for the system. 1. Select TERMINAL & NETWORK from the NETWORK & REVENUE selection menu. The terminal information will REFRESH each time this area is accessed: 2. - Page 245 My Terminal Info TERMINAL DESC – Description for the terminal STORE NAME - Enter a name for the store MAC ADDRESS - This is the MAC address of the current terminal. IP ADDRESS - Internet Protocol address for the current terminal. APP VERSION - SAM4POS application version installed on the current terminal.
-
Page 246: Irc Network Setup
IRC Network Setup Overview IRC (Inter Register Communications) is defined in the Terminal & Network selection in the Network & Revenue programming. The IRC uses standard Ethernet communications. When the IRC is active, all terminals in the system are updated automatically when program changes are made. Connect all the SAM4POS terminals to be included in the system to a network switch. - Page 247 Find Current IP Address on Terminals 1. From the main PROGRAM MODE selection menu, touch NETWORK & REVENUE. 2. The NETWORK & REVENUE selection screen appears: 3. Select TERMINAL & NETWORK. 4. The current terminal information is displayed; TERMINAL DESC APP VERSION STORE NAME DATABASE VERSION...
- Page 248 Change Terminal IP Address The terminal IP address is set in the main Android settings. You can go to these setting from the SAM4POS application. 1. Choose SYSTEM from the main PROGRAM MODE menu selection screen. 2. The SYSTEM menu screen displays. 3.
- Page 249 6. On the Ethernet Settings dialog, check the option ‘Show Advanced Options’ to allow editing of the IP address: 7. Select the IP Settings drop down and select ‘Static’ 8. Set the Ethernet settings; Program Mode • 249 Sam4POS 6600/4800II Program Manual v2.12...
- Page 250 9. You Must enter: IP Address - (first 3 octets must match on all terminals in the system, last octet must be unique at each terminal). Note: The static IP address chosen needs to be out of the DHCP scope range to prevent IP address conflicts. MASK - (same on all terminals in system) DNS - (same on all terminals in system) For the DNS use 8.8.8.8 Gateway - (same on all terminals in system)
- Page 251 The System Settings on the main Android screen can also be accessed from the main Sign On screen: 1. On the Main Sign On screen: Exit the Sam4POS 2. Exit the SAM4POS application by pressing the Exit icon at the top right of the display: 3.
- Page 252 Terminal DESC The Terminal Descriptor is used to help identify each specific station within the IRC system. 1. From the PROGRAM MODE \ NETWORK & REVENUE \ TERMINAL & NETWORK; type in a Store Name at each terminal. Press the X at the end of the field to clear the current name. 2.
- Page 253 7. Press YES to confirm you want to make this terminal the main terminal. 8. Stations on the same IP scheme and Store Name will be will display as shown: 9. When set as the main terminal, additional radial buttons are available: IMAGE SYNC –...
- Page 254 11. The stations will REFRESH: Then the confirmation dialog displays: 12. Press YES to confirm. 13. The Satellite stations will synchronize data files with the main terminal; the stations will Reboot and load back to the main sign on screen. 14.
- Page 255 Main Terminal Radial Button Operation When activating the IRC in a system, one of the terminals in the system must be designated as the Main Terminal. In an IRC configuration the Main Terminal will display as shown: IMAGE SYNC – Press this button to synchronize the images in an IRC network.
- Page 256 Satellite Terminals Radial Button Operation When the IRC is activated in a system, the Satellite Terminals in an IRC configuration (terminals that are not set as the MAIN terminal) will display as shown: INACTIVE – In an IRC network press this button if you wish to set the selected terminal inactive. IMAGE SYNC –...
-
Page 257: Time Schedule
Time Schedule The Time Schedule programming enables certain actions to automatically occur at a predetermined time. Time schedules are available for: Price Level, Screen Level, KP Time Period, Auto Reboot and Auto End Of Day. All the time schedules are programmed in the same manner. 1. -
Page 258: Price Level
Price Level The default program provides one price level however, SAM4POS allows you to create as many different price levels as are necessary for your application. This allows the user to create a matrix of PLUs and Prices each accessed by price level keys. A product price level sales report is available in PLU Reporting showing the total quantity and value sold per price and overall per product also a total for each price. - Page 259 Price Level Settings DESCRIPTION Type in a description (up to 30 characters) for the schedule. PERIOD Check the specific days of the week for the time schedule to occur. Alternately, you can check WEEKDAYS or WEEKENDS or check both selections to select all the days of the week.
-
Page 260: Screen Level
Screen Level MLU screens can be set to automatically load at certain times. This is useful if you want different MLU screens such a Breakfast/Lunch/Dinner to display at a specified time. 1. From the Time Schedule menu screen, touch Screen Level to view/add/edit screen levels. 2. - Page 261 Screen Level Settings DESCRIPTION Type in a description (up to 30 characters) for the schedule. PERIOD Determine the specific days of the week for the time schedule to occur. Alternately you can check Weekdays or Weekends or both to select all the days of the week. Start Activate At –...
-
Page 262: Kp Time Period
KP Time Period You can use the KP Time Period programming to automatically switch the KP Period at specified times. KP Time Periods are used when setting up KP Group programming. 1. From the TIME SCHEDULE menu, touch KP TIME PERIOD to view/add/edit KP Time Periods. 2. - Page 263 KP Time Period Settings DESCRIPTION Type in a description (up to 30 characters) for the KP Time Period. PERIOD Determine the specific days of the week for the KP time period to activate, or choose WEEKDAYS or WEEKENDS or both to select all the days of the week. Start Activate At –...
-
Page 264: Auto Reboot
Auto Reboot The Auto Reboot allows you to set a time for the terminal to automatically reboot. 1. From the Time Schedule menu screen, touch Auto Reboot to view/add/edit auto reboot times. 2. Press the Add Record icon to add a new time activated auto reboot to the list. 3. -
Page 265: Auto End Of Day
Auto End Of Day If desired the End Of Day reporting can be set to automatically run at a specified time. Report totals as defined in the End Of Day (EOD) report screen will be cleared the same as if they were executed from the EOD screen. -
Page 266: Rear Display Period
Rear Display Period Available on the SAP-6600 beginning at v1.0.99 1. From the Time Schedule menu screen, touch Rear Display Period to view/add/edit automated Rear Display selections. Press the Add Record icon add a new time activated setting for the Rear Display operation to the list. - Page 267 Program Mode • 267 Sam4POS 6600/4800II Program Manual v2.12...
-
Page 268: System
System The System menu provides access to the SAM4POS application License information, as well as program backup and restore operations. We can also access the Android terminals settings, access the Super Macro files, load upgrades via APK install, Team Viewer remote access operations and perform touch calibration. -
Page 269: Register License
Register License Displays the current license information for the SAM4POS station. All terminals require a valid license to operate properly or to restore a database file. Be aware that there is a limitation of 25 transactions per day without a current annual license. If needed, the license for the SAM4POS terminal can be loaded or updated. -
Page 270: Database
View EULA When this button is pressed, the SAM4POS End User License Agreement is displayed. When the SAM4POS terminal is licensed, this agreement must be accepted. Accept EULA and enter the manager password at the prompt. Database The database menu provides access to the database backup operations for the current program files. The database can be backed up manually or you can set the backup to execute at a specified date and time. - Page 271 3. Select the device PATH you wish to back up to. PATH selections are: USB, Internal SD Card, External SD Card. 4. Press OK to initiate the backup of the current database. 5. When the backup has completed, the confirmation, ‘Database Backup Success’ displays: 6.
- Page 272 Automatic Backup We can program the SAM4POS to perform a backup automatically on a specified date and time. This backup will occur at the specified time and date as long as the automatic backup is checked. 1. Check the AUTOMATIC BACKUP option at the top of the screen. 2.
- Page 273 7. The Database Backup Success confirmation displays: 8. Press OK. 9. Exit out of the System \ Database menu screen. The backup will initiate at the specified time. 10. After the Automatic backup runs, the Database Backup Success confirmation message displays briefly: Program Mode •...
-
Page 274: Log Backup
Log Backup The log backup provides a means to save log data and database files to a USB drive or an SD Card. SAM4POS Log files are stored for 10 days on the terminal. We can also send the log data to an FTP site if desired. Backing up to an FTP site requires access to an active internet connection. - Page 275 5. Press the radial button for USB, SD Card, or FTP to initiate the backup. Note: PATH and DB FILE NAME are not used when backing up to FTP. Refer to “Remote FTP Log Backup” in the appendix for details. Also note: If selecting to backup to FTP, you have the option to select all terminals: 6.
- Page 276 Log Backup Example 276 • Program Mode Sam4POS 6600/4800II Program Manual v2.12...
-
Page 277: Settings
Settings The settings for the Android terminal can be accessed without having to exit completely out of the SAM4POS application. From the Settings area, we can set the Date & Time, Cash Drawer port voltage setting and turn on COM port voltage. Use caution when accessing the settings menu on the terminal. - Page 278 Large Font If desired, the default FONT on the Register Mode screens can be set larger. 1. Touch the SYSTEM icon on the main PROGRAM MODE screen to display all the program categories. The System menu displays. 2. From the SYSTEM menu touch SETTINGS. 3.
- Page 279 Contrast Setting 1. Touch the SYSTEM icon on the main PROGRAM MODE screen to display all the program categories. The System menu displays. 2. From the SYSTEM menu touch SETTINGS. 3. Enter the MANAGER PASSWORD at the prompt. 4. On the Settings menu, scroll down the category list on the left-side menu to the DEVICE category and select DISPLAY.
- Page 280 COM Port Voltage Setting SAP-6600 COM Port voltage settings is enable in the SAP-6600 bios settings. An external Keyboard is required to access the BIOS settings. 1. Power off the SAM4POS terminal and connect a USB keyboard. 2. Power on the SAM4POS terminal; press Delete when the terminal begins loading. 3.
- Page 281 Sleep Mode SAP-6600 Terminals If the Developer Options are disabled in the Settings, Sam4POS will enter into a sleep mode. If the Developer Options are turned on in the Settings, the Sam4POS may enter into sleep mode if the ‘Satay Awake’ setting is turned off. To wake the terminal from sleep mode, push the power button one time, then push the power button again after about 3~4 seconds.
-
Page 282: Super Macro
Super Macro The super macro (a troubleshooting resource) records the keystrokes performed. The super macro data is organized by date in a text file format (i.e. log20170123.txt). We can back up the super macro data to either an SD card or to a USB drive. We can also print the super macro data to the local printer on the SAM4POS station. 1. -
Page 283: Program Backup & Restore
Program Backup & Restore Program Backup & Restore provides a means to back up the program files in a CSV format and backup the current image file in the SAM4POS. In version v1.0.86 and later, the ability to scan new program file on FTP was added. -
Page 284: Apk Install
APK Install The APK Install provides an easy means to update the SAM4POS application without having to exit out to the main Android splash screen. The most current SAM4POS Application files can be obtained from the CRS Web site at: https://www.crs-usa.com/products/software. Updating the application file does not clear any programing changes you have made. - Page 285 4. Press Install to load the selected SAM4POS update. 5. The ‘Installing…’ dialog displays while the new application files are loaded. When it is finished, the ‘APP Installed’ dialog screen is displayed: 6. After APK file installation is complete, Press “Open”. 7.
-
Page 286: Team Viewer
Team Viewer Team Viewer is a remote access utility that can be used to remotely support the SAM4POS application. The Team Viewer Quick Support application is already pre-loaded on the SAM4POS terminals. A connection to the Internet is required for to be able to use this feature. 1. - Page 287 6. Touch the SAM4POS icon to reinitiate the SAM4POS application. This operation can be accomplished remotely by the support personnel or by the local personnel at the site. 7. The main sign on screen will appear, sign on and perform operations as needed. Note that all the screens now indicate “TEAMVIEWER MODE”...
- Page 288 Team Viewer – Program Mode Note: When signed on with Team Viewer – a REBOOT button is added to the Title Bar in Program Mode. 1. From the main PROGRAM MODE menu, press the REBOOT button on the title bar: 2.
-
Page 289: Calibrator
Calibrator The Calibrator feature allows you to calibrate the touch screen without having to exit the SAM4POS application. Available calibration methods include a 3-Point, 5-Point and 9-Point calibration. The Debug Log can also be enabled from this area and a Draw Test is available here as well. Calibrate 1. - Page 290 Draw Test 1. From the SYSTEM menu selection screen, press CALIBRATOR, then touch ‘Draw Test’. 2. Trace your finger across the display to perform the ‘Draw Test’. 3. Press the return icon twice to return to the SAM4POS System menu. 290 •...
-
Page 291: Etc
SAM4POS has the ability to link to various web sites directly from the SAM4POS application. The ETC programming allows this functionality via the WEB View menu selection. This programming requires an active internet connection. The ETC program area also allows us to view the SAM4POS Version information. 1. - Page 292 3. The NEW entry dialog displays; Input a Name for the site you are adding. 4. Type in the URL for the web site. 5. Press OK to add the site or press OK and Continue to add additional sites. 6.
- Page 293 Edit Web View 1. Press and hold on the Web View link you wish to edit. 2. The dialog below is displayed: 3. Select EDIT to change the name of the link or change the URL for the site. 4. Select DELETE if you want to remove this web link from the list. 5.
-
Page 294: Help Menu
Help Menu Beginning at v1.0.93, a Help Menu is available. Press the Help icon, then select a topic from the list to view a YouTube Video. 294 • Program Mode Sam4POS 6600/4800II Program Manual v2.12... -
Page 295: Program Scans
Program Scans This operation allows you to view the program mode settings and print the settings if desired to the assigned receipt printer. Each of the various program scan categories have options and filters specific to the selected category. 1. From the main PROGRAM MODE menu screen, touch the PROGRAM SCAN icon located on the title bar. - Page 296 Available Scans Include: Options: – Preview, Option Category, Detailed Data Filters: – No PLU Descriptor, Duplicated PLU Code, No PLU Status, No Group, Invalid PLU Code, No Price Level PLU Description From PLU ~ To PLU Group #1, #2, #3 PLU Status Group Link PLU STATUS GROUP Options: –...
- Page 297 Options: – Preview, Option Category TAX GROUP Options: – Preview, Option Category Options OPTIONS Options: – Preview, Option Category Filters: – Options ROUNDING Options: – Preview, Option Category TARE WEIGHT Options: – Preview, Option Category Function Key FUNCTION KEY Options: – Preview, Option Category Filters: –...
- Page 298 Promotion PROMOTION Options: – Preview, Option Category Filters: – Mix And Match, Multi Buy, Combo Discount, Sweet Deal PLU Sort: – PLU Code or Alphabetically PROMOTION GROUP Options: – Preview, Option Category Product & Ingredient INGREDIENT Options: – Preview, Option Category RECIPE Options: –...
- Page 299 Network & Revenue REVENUE CENTER Options: – Preview, Option Category TERMINAL & NETWORK Options: – Preview, Option Category Time Schedule PRICE LEVEL Options: – Preview, Option Category SCREEN LEVEL Options: – Preview, Option Category KP TIME PERIOD Options: – Preview, Option Category AUTO REBOOT Options: –...
-
Page 300: Favorite Icon
Favorite Icon The favorite icon on the main program mode title bar can be used to add the main program mode menu to the favorites list. The favorites list may be accessed by pressing and holding on the favorite icon on the title bar or by pressing the Favorite List icon on main menu selections. Adding a favorite is an easy way to go to a screen you visit frequently, such as a program area setting, or a specific report. -
Page 301: Integrated Payment Appendix
Integrated Payment Appendix Introduction This guide supports integrated payment utilizing Datacap equipment with EMV protocol for the SAM4POS Series ECRs. EMV cards are embedded with a microprocessor or smart chip that interacts with the merchant’s point-of-sale device to make sure that the payment card is valid and with the use of a PIN that it belongs to the person using the card. -
Page 302: Configurations
EMV PIN Pads can be purchased from the following distributors: POS Portal (https://buy.posportal.com/crs) JR’s POS Depot (www.jrorders.com/datacap-specificproducts_c_310.html) POS Data (www.posdata.com) The Phoenix Group (www.tpgpos.com) Configurations Sam4s SAM4POS/ Datacap ECR Configuration Single ECR 302 • Integrated Payment Appendix Sam4POS 6600/4800II Program Manual v2.12... - Page 303 Multi ECR (3 or Less) NOTE: If you have an installation with 3 IPTran LT units, all three have a separate batch and work independent of each other (separate batching, separate reporting). Multi ECR (4 or More) NOTE: If you have multiple PDC’s and a Tran Server there is only one batch and it can be controlled at any of the registers.
-
Page 304: Required Programming For Integrated Payment
Required Programming for Integrated Payment Device Programming Device programming is where EFT device is configured and routed to the all the stations in the system. Device Setting 1. Go to the PROGRAM MODE; Select EFT from the DEVICE \ DEVICE SETTING menu to assign the Datacap IPTran LT or new style PDC device to the appropriate serial port. -
Page 305: Device Mapping
Device Mapping The Device Mapping programming area is used to assign which devices (Printer, Scanner, Line Display, Scale, EFT, Coin Dispenser, Liquor Dispenser, Kitchen Video, Text Inserter) that will be used on the various stations in the SAM4POS system. 1. Select DEVICE MAPPING from the selections on the DEVICE menu. 2. -
Page 306: Options
Options The following options are used for integrated payment operations. Go to the PROGRAM MODE \ OPTIONS \ OPTIONS System Options 1. Select SYSTEM OPTION from OPTIONS menu to view and set the necessary options as indicated below: COLLECT CARD HOLDER NAME Select this option to print the cardholder’s name below the signature line. -
Page 307: Tender Keys
Tender Keys Misc Miscellaneous Tender keys are used for Charge tenders, Debit Card tender, Gift Cards redeemed, and all other tender types that the merchant accepts. GENERAL HALO Amount – High Amount Lock-Out; This is the maximum amount accepted when this tender is used. -
Page 308: Plu Status Group For Gift Cards
Food Stamp Tender In the United States, Food Stamps may be used to purchase eligible food items at food stores that participate in the program. The SAM4POS can assist a retailer in handling food stamp transactions by sorting food stamp and non-food stamp eligible items within each sale and tracking food stamp payments for eligible items. -
Page 309: Load The Emv Parameters
Load the EMV Parameters After connecting the new EMV compatible Datacap device and the PIN-Pad to the ECR and all the required programming is completed, you must load the parameters for the devices. The IPTran LT must be connected to the internet to load the parameters. To load the Datacap device parameters perform the following: 1. - Page 310 3. Select the PATH to save the backup to, selections are: USB or INTERNAL STORAGE. 4. Press OK to back up the current database. 5. When the backup has completed, the confirmation, ‘Database Backup Success’ displays. 6. Press OK. 310 • Integrated Payment Appendix Sam4POS 6600/4800II Program Manual v2.12...
-
Page 311: Eft Operation
EFT Operation EFT Operation Menu SAM4POS supports credit card processing with Datacap integrated payment appliance and supports the EMV integration protocol. (There will be no Non-EMV integration.) Credit Card (EFT) maintenance operations can be performed at the SAM4POS terminal from the EFT Operation menu. In the Pre-EMV environment Datacap stored some information in the Tran that allowed the registers to run some reports, such as the local transaction report. - Page 312 EFT Operation Function Key To avoid giving employees access to the Program mode, certain EFT operations can be accessed from the REG mode using the EFT OPERATION function key. Note: Batch operations may be restricted to employees with assigned authority levels for these functions.
- Page 313 Datacap Operation Definitions 1. From the main PROGRAM MODE menu, select DEVICES, then choose EFT OPERATION: Definition Operation Initialize EFT Use this function to initialize the Datacap EFT device. Close Batch Closes the current batch and opens. Use these operations to void transactions when the card is not present.
-
Page 314: Performing Eft Operations
Performing EFT Operations When performing EFT Operations, the EFT Operation communication between the ECR and the Tran device is displayed on the SAM4POS. When the specified operation is completed, the register will print the results of the requested operation at the register’s receipt printer. You can also print out the EFT Operation communication to the register receipt if desired. - Page 315 Close Batch You must close the batch daily. This procedure clears the EMV File temporarily stored in the ECR memory. (Or perform “Clear EMV File” if Auto Batch is used.) NOTE: When a batch is closed, a new batch is automatically opened for the next day. 1.
- Page 316 Void Sales by Record Number Void Return By Record Number Note: This operation will not correct ECR sales total but will remove the transaction from the batch. 1. From the main PROGRAM MODE menu screen, select DEVICE, then touch EFT OPERATION.
- Page 317 Issue Local Transaction The Issue Transaction report summarized transaction in the current batch. NOTE: This report lists the transactions stored in ECR memory for tip and record updating. The transactions here may not be the same as the transactions in the current batch. This operation is Only to be used for troubleshooting .
- Page 318 Gratuity Entry The processor must allow “By Record” operations (Tokenization) for this operation. Gratuities (Tips) indicated by the customer on the payment draft must be entered at the ECR before the batch is closed. Tips that were not entered at the time of the transaction, are entered using the Gratuity Entry selection on the EFT OPERATION function key menu, or from the Gratuity Entry selection on the EFT OPERATION menu accessed from the Program Mode / Device menu selections.
- Page 319 5. Press CLOSE to exit the TIP entry; pressing PRINT will print the information on the display. Sample Gratuity (TIP) Chit: SAM4POS TERMINAL 2017-10-2017 10:44 SALE AMOUNT: $3.14 TIP AMOUNT: $1.00 INVOICE: 00033 REFERENCE: 1002 AUTH CODE: 08211A RECORD: 17 EMPLOYEE: Employee 1 - - - - - - - - - - - - - - - - - - - - NO.
- Page 320 Get Gift Card Balance This procedure will print a receipt with the cardholder’s current balance. 1. Select GET GIFT CARD BALANCE from the EFT Function key menu or from the EFT OPERATION menu. 2. The ECR will display “WORKING” and the PIN-Pad will display “Balance 0.00 OK?”. Press the GREEN button on the PIN-Pad keypad to continue.
- Page 321 Self-Initiated Load Typically, we would not need to perform this operation. The Tran parameters are loaded each time the device is rebooted You will be asked to enter the Device ID of the IP Tran LT or PDC device. The device will call Datacap’s host PC and load itself. 1.
- Page 322 Diagnostics Use only with Datacap Support as necessary to troubleshoot Datacap issues. 1. From the main PROGRAM MODE menu screen, select DEVICE, then touch EFT OPERATION. 2. Select DATACAP Operation from the selections. 3. Scroll down the list of options and touch DIAGNOSTICS. 4.
- Page 323 Clear EMV File This is the internally stored file that stores the Authorization Response messages that allow the SAM4POS terminal to perform “By Record Number” transactions. Specifically, the Void Transaction by Record Number and Gratuity Entry. This file should be cleared each day as we have a limited amount of space to hold the file and most likely, “By Record Transactions”...
- Page 324 Sample ZERO AUTH receipt SAM4POS Terminal 10/10/2017 11:22 11:20:04 SEND AT&UE7 11:20:07 SEND AT&UM149 99 1 0 0 * * 0 .00 * 00005 * 3 101017 112004 0 * 00005 0 * * * * * * 1 * 11:20:26 RECEIVE 11:20:26 RECEIVE 11:20:26 SEND...
-
Page 325: Important Notes
Important Notes: • “Close Batch” or “Clear EMV File” operation needs to be performed every day at the register even when the site is set for auto batch with their processor. This is how Sam4POS clears the EMV token file. The EMV token file is used to allow for “By Record” transactions (such as Voids and Gratuity Entries). -
Page 326: Appendix
Appendix License Registration All SAM4POS terminals require a license to operate properly. Licenses are available as 1yr, 2yr, 3yr, and 5yr licenses. The license for the SAM4POS terminal must be loaded to allow for full operation. Contact your local dealer to obtain or update your license. Please perform the following: 1. -
Page 327: Uninstall Sam4Pos
Uninstall SAM4POS It is OK to Uninstall and Reinstall the SAM4POS application: 1. From the Program Mode, go to System and select Settings. 2. Enter the Manager Password at the prompt if required. 3. In the Settings choose Apps in the DEVICE section, the installed Apps are displayed: 4. -
Page 328: Factory Data Reset
Factory Data Reset The Factory Data Reset is accessible from the main Android Settings menu. This operation will reset the SAP- 6600 terminal to its default factory settings. ALL applications installed including the SAM4POS application and the SAM4POS license information will be lost! DO NOT perform this operation if you intend to continue using the SAM4POS application with this terminal! You will be required to reload the SAM4POS application;... -
Page 329: Updating Application Software
Updating Application Software Software updates can easily be loaded from a USB drive via the APK Install operation. 1. Copy the latest application software APK file to a USB memory stick. 2. Insert the USB memory stick into SAM4POS terminal USB port. 3. -
Page 330: Loading Images For Items
Loading Images for Items Images for Items, Functions, etcetera, can be loaded from the File Manager Gallery on the Android terminal or from an image file located on a USB drive. Images are automatically formatted to fit the key selection. A video demonstration for loading images can viewed from here: https://www.youtube.com/watch?v=j4Yin34z3fw&list=PLtF-h-a37jHmbhGgLO3nB76hP- avFSW29&index=8... - Page 331 7. Scroll through the images and select the desired image for your key; Note: Pressing CANCEL in the upper right corner will exit without saving the image: 8. The selected Image can be cropped as d esired to the load just the image portion you want.
- Page 332 If you had mistakenly chosen the File Manager selection: 1. The error message ‘Unfortunately, File Manager has stopped’: 2. If you get the error, Press OK. SAP-4800II/SAP-530 3. Go to; Program Mode → System → Settings → Apps → ALL → FileManager 4.
- Page 333 6. Exit out of the ‘Settings’; return to the SAM4POS application. 7. From the SAM4POS, select your desired program; PLU / Group / etcetera. Select IMAGE ADD/EDIT 8. The ‘Complete action using’ selection screen that displays: Choose the ‘Gallery’ selection, then select the ‘Always’ option: 10.
- Page 334 SAP-6000/SAP-630 Very similar to the SAP4800II/SAP530: 1. Go to; Program Mode → System → Settings → Device → Apps → File Manager 2. On the File Manager screen, ‘OPEN BY DEFAULT’ settings; Press ‘CLEAR DEFAULTS’. 3. The selected default settings will be cleared, “No Defaults Set”: 334 •...
- Page 335 4. Exit out of the ‘Settings’; return to the SAM4POS application. 5. From the SAM4POS, select your desired program: i.e. PLU / Group / etcetera. Select IMAGE ADD/EDIT 6. The ‘Complete action using’ selection screen that displays: 7. Choose the ‘Gallery’ selection, then select the ‘Always’ option: 8.
-
Page 336: Change Default Image
Change Default Image The image on the default sign on screen and the main menu screen can be changed to any image you choose. You may want the customers logo on these screens for example. You could choose a different image for each screen if desired. - Page 337 6. The images stored in the directory are displayed: 7. Scroll through the image selections to choose an image from the directory to use as the screen image. 8. When you have selected the image, Press the Save icon at the top of the display to save the image for your key.
-
Page 338: Language Selection
Language Selection Language support for the Sam4POS application include English \ French \ Spanish. 1. From the Program Mode, go to System and select Settings. 2. On the Setting menu selection page go to Personal and select Language & Input. 3. -
Page 339: Online (Internet) Operations
Online (Internet) Operations If your SAM4POS terminal is connected to the Internet, there are many valuable tools available for remote customer support. • Save Log Files with Database via FTP • Upgrade SAM4POS Application Firmware • Export \ Import Configuration Data to CSV •... - Page 340 7. If selecting to backup to FTP, you have the option to select all terminals: 8. Press YES to send the backup from all terminals in system, (eliminates having to send from each terminal individually); press NO if you want to send the backup from just the one station 9.
-
Page 341: Barcode Label Printing From Sam4Pos
Barcode Label Printing from SAM4POS The barcode label printing feature requires SAM4POS v0.1.108 or later. This feature allows label printing for PLUs. The Label Print programming is used to setup the different label types that may be used; such as product labels and shelf labels. - Page 342 Device Mapping 1. Select DEVICE MAPPING from the PROGRAM MODE > DEVICE menu selections. 2. For your station, add the label printer as a new device. 3. Type in a DESCRIPTION for the device: Select the label printer from the list 4.
- Page 343 Label Print You will need to define the labels you want to use in the Label print programming. Refer to Label Print programming on page 167 for details about this program area. You can create multiple labels types for different purposes, such as Self Labels or product labels. 1.
- Page 344 Printing Labels from PLU Labels can be printed from the PLU programming area or form the Edit Mode. We can choose to print a single label or multiple labels for one or more PLU items. 1. Select PLU from the PROGRAM MODE > PLU menu selections. The PLU programming screen displays: Press the label print button 2.
- Page 345 Enter QTY of labels to print. Select the LABEL FORMAT. Select the PRICE LEVEL, used when printing PLU Price on the label. 5. Select the QTY, number of labels for each selected item you want to print. 6. Select the LABEL FORMAT (as defined in the Label Print setup). 7.
- Page 346 Format for sale 1. Select STATION from the PROGRAM MODE > EMPLOYEE menu screen. 2. Go to the RECEIPT FORMAT options. Select the LABEL PRINTER you want to print to. Option for sale – PLU Status Group If checked, a label will print when you store a check or tender the sale.
-
Page 347: Snbc Btp-L520/L540 Label Printers
SNBC BTP-L520/L540 Label Printers Setting Peeler Function to OFF If your printer includes a peeler that you do not wish to use, you can easily turn the peeler function off using the printers Feed Button programming menu. 1. Power on the printer, wait until the green LED is ON. 2. - Page 348 9.DATE SETUP 10.SERIAL COM 11.FACTORY RESET 12.SAVE ALL 9. Press and hold the Feed button (long press) until the LED blinks. Release the Feed button, the printer will initialize and save your new settings. 10. Verify settings by printing a printer self-test: 11.
-
Page 349: Nd Display (Vga Monitor)
Display (VGA Monitor) If you can connect a 2 Display to the VGA port on the SAP-6600 terminal, it will display the same information as the front (operator) screen. There is not yet any feature in Sam4pos to do anything more (i.e.: show pictures, customer display, videos, etc.) If you choose to connect a VGA monitor to the VGA port on the SAP-6600 you must reboot the terminal in order for the terminal to send data to the VGA port. -
Page 350: Manual Revision Record
Manual Revision Record Date Revision Revision contents: Published Number Preliminary 8/31/2017 Initial Preliminary release v0.2 5/18/2018 Edited Screens, Error Message, Report Message, Time Keeping Option Removed blank pages; Edited: Error Message, Options, Authority Level, v2.0 6/28/2018 EOD, Terminal & Network, Receipt & Message, EFT Operation. Added: Password Notes, Language Selection v2.1 7/12/2018...
Need help?
Do you have a question about the SAM4POS SAP-6600 and is the answer not in the manual?
Questions and answers