
Subscribe to Our Youtube Channel
Related Manuals for YOKOGAWA DAQSTATION DX100P


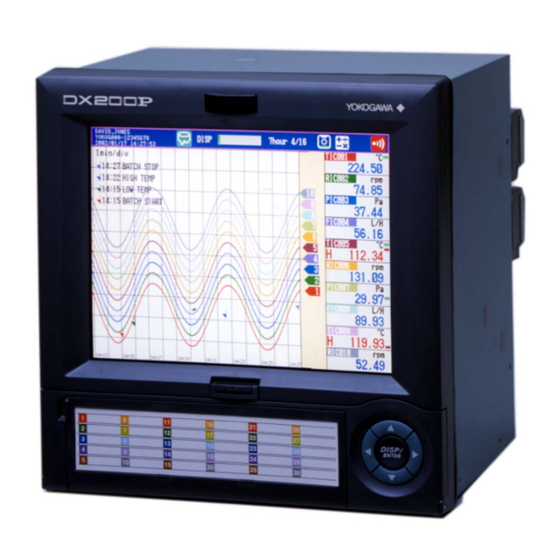
Summary of Contents for YOKOGAWA DAQSTATION DX100P
- Page 1 Operation Model DX102P/DX104P/DX106P/DX112P/DX204P/DX208P/ DX210P/DX220P/DX230P Guide DAQSTATION DX100P/DX200P 4 L 5 A 1 0 2 E 0 2 IM 04L05A01-02E 2nd Edition Yokogawa Electric Corporation...
-
Page 2: Table Of Contents
Contents Foreword ..................................3 Safety Precautions ................................. 4 Introduction of Functions ..............................6 Precautions on the Use of the DXP ..........................7 Installing the DXP ................................8 Wiring ..................................... 9 Turning ON/OFF the Power Switch ..........................13 Inserting/Removing the External Storage Medium ...................... 13 Operation Flow and Basic Operations ......................... -
Page 3: Foreword
Company and product names that are used in this manual are trademarks or registered trademarks of their respective holders. Revisions First edition May 2002 Second edition August 2004 Disk No. RE33 2nd Edition : August 2004 (YK) All Rights Reserved, Copyright © 2002 Yokogawa Electric Corporation IM 04L05A01-02E... -
Page 4: Safety Precautions
• Power Cord and Plug (Desktop Type) To prevent an electric shock or fire, be sure to use the power cord supplied by YOKOGAWA. The main power plug must be plugged into an outlet with a protective grounding terminal. Do not invalidate protection by using an extension cord without protective grounding. - Page 5 YOKOGAWA makes no warranties regarding the product except those stated in the WARRANTY that is provided separately. • YOKOGAWA assumes no liability to any party for any loss or damage, direct or indirect, caused by the user or any unpredictable defect of the product. Symbols Used in This Manual The following symbols are used in this manual.
-
Page 6: Introduction Of Functions
Introduction of Functions Login Function Only registered users can operate the DXP. To operate the DXP, you are prompted to enter the user name, user ID, and password. A user can be an “administrator” or a “user.” • Administrator (see page 17) Can perform all operations. -
Page 7: Precautions On The Use Of The Dxp
If there are any symptoms of trouble such as strange odors or smoke coming from the DXP, immediately turn OFF the power and unplug the power cord. Then, contact your nearest YOKOGAWA dealer. CAUTION Don't put any weight on the DX100P while it is in reclined position with its front feet up, as it may damage the feet. -
Page 8: Installing The Dxp
Installing the DXP Installation Location Install the DXP in a location that meets the following conditions. • To prevent overheating, install the DXP in a well-ventilated location. For the desktop type, a space of 50 mm or more from the right, left and top surface of the DXP is recommended. -
Page 9: Wiring
Wiring Describes the input signal wiring and the power supply wiring. For the wiring to option terminals, etc., see chapter 2 of IM04L05A01-01E (DX100P) or IM04L06A01-01E (DX200P). Rear Panel DX200P Ethernet (See IM04L05A01-17E) Power terminal (100 to 240 VAC) DX100P Ethernet (See IM04L05A01-17E) Power terminal... - Page 10 Wiring • Connecting the input wires in parallel with other devices can cause signal degradation, affecting all connected devices. If you need to make a parallel connection, then • Turn the burnout detection function OFF. • Ground the instruments to the same point. •...
- Page 11 Wiring DX200P Standard Input Terminals Clamped Input Terminals DX204P, DX208P CH3 CH1 Measurement Input −/B Terminal 1 −/B CH4 CH2 Measurement Input CH5 to CH8 are assigned (CH1 to CH4 in the above figure correspond to CH5 to CH8 Terminal 2 on the terminal 2).
- Page 12 • Confirm that the power is turned OFF before connecting the power cord. • To prevent electric shock and the possibility of fire, use only the power cord for the DXP that is supplied by YOKOGAWA. • Always use protective earth terminal to prevent electric shock. Connect the power cord of the DXP to a three-pole power outlet that has a protective earth terminal.
-
Page 13: Turning On/Off The Power Switch
Turning ON/OFF the Power Switch Turning ON the Power Open the front cover by pressing down on the knob that is located in the center of the upper section of the cover and pulling forward. Turn ON the power switch. Close the front cover. -
Page 14: Operation Flow And Basic Operations
Operation Flow and Basic Operations This section describes the main operations for making measurements of a batch process and applying electronic signature to the measured data file. Operation Flow See page 17. Register administrators. Once an administrator is registered, you are required to log in to operate the DXP. -
Page 15: Keys
Operation Flow and Basic Operations Keys DX100P DX200P Soft key menu Soft keys DISP/ START MENU ENTER DISP/ STOP USER FUNC ENTER START STOP USER FUNC MENU Arrow keys Character/number input keys Arrow keys START and STOP key: Used when starting measurements (see page 31) and stopping measurements (see page 35). USER key: A function is assigned to the USER key beforehand. -
Page 16: Entering Numbers And Characters
Operation Flow and Basic Operations Entering Numbers and Characters On the DX100P Pressing the Input soft key displays a window used to enter numbers and characters. Carry out the following procedure. Cursor (blue) Shift the cursor Select the key on the key pad using the arrow keys and press DISP/ENTER... -
Page 17: Registering Administrators
Registering Administrators Entering the System Mode The DXP is in operation mode immediately after it is turned ON. Press MENU. The engineering mode menu appears. Press the Next #/# soft key to show the menu with [System Mode]. DX100P DX200P Next #/# Press the soft key... -
Page 18: Setting The Login Function And Electronic Signature Function
Registering Administrators Setting the Login Function and Electronic Signature Function On the DX100P, press the #4 soft key. On the DX200P, press the #3 soft key. The Admin tool menu appears. DX100P DX200P Press the #1 soft key. The Login setting, Sign record setting screen appears. DX100P DX200P Set each item using the key operation described below. -
Page 19: Registering Administrators
Registering Administrators Registering Administrators Note It is recommended that two or more administrators be registered. If one administrator fails to log in due to erroneous input of the password, the other administrator can fix the registration. Press the #2 soft key. -
Page 20: Setting The Dxp By The Administrator
Setting the DXP by the Administrator Logging in as an Administrator Logging in for the First Time Press FUNC. A window appears for you to enter the user name. Enter the user name and press DISP/ENTER. A window appears for you to enter the user ID. DX100P DX200P Enter the user ID and press DISP/ENTER. - Page 21 Setting the DXP by the Administrator Enter a new password and press DISP/ENTER. A window appears for you to confirm the password. DX100P DX200P Note • The combinations of user IDs and passwords that are identical to those specified by other users or those that have been registered in the past cannot be specified.
-
Page 22: Setting The Date/Time
Setting the DXP by the Administrator Enter the user ID and press DISP/ENTER. A window appears for you to enter the password. DX100P DX200P Enter the password and press DISP/ENTER. The window disappears and you are logged in. DX100P DX200P Note If you repeat the operation of entering a wrong password and pressing DISP/ENTER... -
Page 23: Registering Users
Setting the DXP by the Administrator Enter the date and time. DX100P DX200P Press DISP/ENTER. The setting is applied and the window closes. Registering Users Display the system mode menu (see steps 2 to 4 on page 17). On the DX100P, press the #4 soft key. - Page 24 Setting the DXP by the Administrator Set each item. DX100P DX200P Login method Key: Key operation Key+Com: Key operation and via communications Com: via communications User name Up to 20 characters. User ID Up to 8 characters. Password ??????: Set to the default pass- word as defined by the DXP.
-
Page 25: Setting Other System Mode Items
Setting the DXP by the Administrator Press DISP/ENTER. The settings are confirmed. Set the login modes using the same method as steps10 and 11. Press to return to the system mode menu. Setting Other System Mode Items On the system mode menu, press the soft key corresponding to the item to be entered to display the setting screen. -
Page 26: Logging Out (Exiting System Mode)
Setting the DXP by the Administrator AUX, Time zone DX100P DX200P AUX, Time zone Tag/Channel No. display Channel: Displays channel numbers. Tag: Displays tags. The tags are set in the engineering mode (see page 29). Logging Out (Exiting System Mode) If an item setting screen is displayed, press to return to the system mode menu. -
Page 27: Setting Conditions And Making Measurements
Setting Conditions and Making Measurements This section describes the procedure for setting the measurement conditions, making measurements, and applying electronic signature to the saved measurement data. Of the measurement conditions, the procedure for setting the measurement range, batch conditions, and messages to be written to the measured data are explained. For the procedure for setting other items, see chapter 5 in IM04L05A01-01E (DX100P) or IM04L06A01-01E (DX200P). -
Page 28: Setting Batch Conditions
Setting Conditions and Making Measurements Setting Batch Conditions Press the Next #/# soft key to show the menu with [Batch set]. On the DX100P, press the #9 soft key. On the DX200P, press the #8 soft key. The Batch setting screen appears. DX100P DX200P Set each item. -
Page 29: Setting Messages To Be Written To The Measured Data
Setting Conditions and Making Measurements Setting Messages to Be Written to the Measured Data. Press the Next #/# soft key to show the menu with [Message]. On the DX100P, press the #4 soft key. On the DX200P, press the #7 soft key. -
Page 30: Exiting The Engineering Mode
Setting Conditions and Making Measurements DX100P Trend/Save interval, USER key Display update rate [/div] Time per division on the screen Auto save interval DX200P Trend/Save interval, File, USER key Interval at which the measured data file is saved to the external storage medium. -
Page 31: Starting Measurements
Setting Conditions and Making Measurements Starting Measurements Setting Batch Numbers, Lot Numbers, and Comments Press START. The start window is displayed. DX100P DX200P Select [Batch No.] using the arrow keys and press the Input soft key. Enter the batch number and press DISP/ENTER. DX100P DX200P Batch number... - Page 32 Setting Conditions and Making Measurements Starting Recording Select [Start] using the arrow keys and press DISP/ENTER. Acquisition of measured data to the internal memory starts. The internal memory icon on the status display section is displayed in green. Waveforms are displayed on the trend screen.
-
Page 33: Logging Out
Setting Conditions and Making Measurements Logging Out Using keys Press FUNC. The soft key menu is displayed. Press the Logout soft key. You are logged out from the DXP. DX100P DX200P Soft key menu Using auto logout If there is no key operation for the specified auto logout time (see page 18), you are automatically logged out. - Page 34 Setting Conditions and Making Measurements Writing the specified message (when you selected one of the soft keys from Group1 to Group7) Press the soft key corresponding to the message you wish to write. DX100P DX200P DX100P DX200P A message mark, time, and the message are displayed on the trend display and written to the internal memory.
-
Page 35: Stopping Measurements
Setting Conditions and Making Measurements Stopping Measurements Press STOP. A confirmation window appears. DX100P DX200P Display for models with the computation function (/M1 option). Confirm the batch information such as the header, batch number, lot number, and comments. Select [Mem+Math] ([Yes] on models without the computation function) using arrow keys and press DISP/ENTER. -
Page 36: Applying Electronic Signature
Setting Conditions and Making Measurements Applying Electronic Signature Make sure to check the measured data and alarm information before applying electronic signature. Press DISP/ENTER. The screen menu is displayed. Select [SIGN RECORD] using the arrow keys. DX100P DX200P Press DISP/ENTER. A sign record confirmation window appears. -
Page 37: Logging Out
Setting Conditions and Making Measurements Enter the password and press DISP/ENTER. A window appears for you to select pass or fail. DX100P DX200P Note If you repeat the operation of entering a wrong password and pressing DISP/ENTER three consecutive times, the user is invalidated and you are logged out. You can no longer log in using the same user name. -
Page 38: Applying Electronic Signature Using Daqsignin
Applying Electronic Signature Using DAQSIGNIN The procedure explained below are carried out on a PC in which DAQSIGNIN is installed. For details on the operating procedure of DAQSIGNIN, see IM04L05A01-61E. Operation Flow First confirm the location of the measurement data file. Import the data Display the data on the Viewer Confirm the data... -
Page 39: Confirming The Data
Applying Electronic Signature Using DAQSIGNIN Confirming the Data Make sure to check the measured data and alarm information before applying electronic signature. For the operating procedure of the Viewer, see chapter 3 in IM04L05A01-61E. Apply Electronic Signature Click here. The [Apply signature] dialog box opens. Enter the user name, user ID, and password. - Page 40 Branch Sales Offices / Wien (Austria), Zaventem (Belgium), Ratingen (Germany), Madrid (Spain), Runcorn (United Kingdom), Milano (Italy), Velizy Villacoublay (France), Johannesburg (Republic of South Africa) YOKOGAWA AMERICA DO SUL S.A. Praca Acapulco, 31 - Santo Amaro. Sao Paulo/SP - BRAZIL Phone : 55-11-5681-2400 Fax : 55-11-5681-1274 YOKOGAWA ELECTRIC ASIA PTE.
Need help?
Do you have a question about the DAQSTATION DX100P and is the answer not in the manual?
Questions and answers