
Related Manuals for YOKOGAWA DY025


Summary of Contents for YOKOGAWA DY025
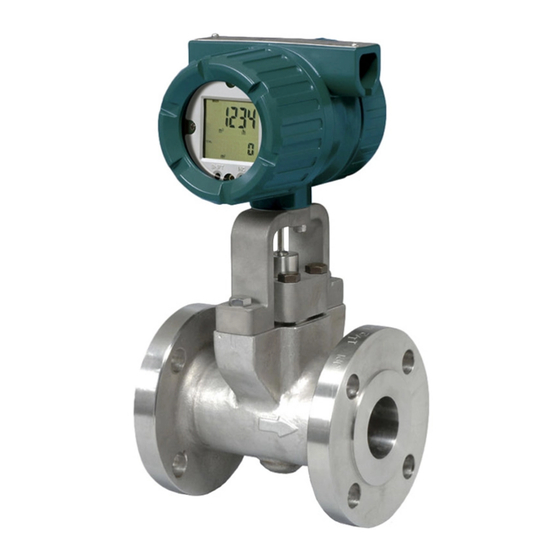
- Page 1 User’s Model DY Manual Vortex Flowmeter (Integral Type, Remote Type) Model DYA Vortex Flow Converter (Remote Type) IM 01F06A00-01E IM 01F06A00-01EN 13th Edition Y okogawa Electric Corporation...
-
Page 2: Table Of Contents
Software Write Protect ............................. 4-14 4.6.8 HART Specific Functions ..........................4-14 4.6.9 Other operations for the HART Configuration Tool ..................4-15 4.6.10 Menu Tree ................................ 4-16 IM 01F06A00-01E IM 01F06A00-01E 13th Edition : Dec. 2011(KP) All Rights Reserved, Copyright © 2001. Yokogawa Electric Corporation... - Page 3 CONTENTS PARAMETER SETUP ........................... 5-1 Parameter Setup ............................5-1 Multi-Variable Type Parameter (Only for /MV) ................... 5-1 Parameters List ............................5-1 Parameter Description ..........................5-9 Error Code Lists ............................5-17 OPERATION ............................6-1 Adjustment ..............................6-1 6.1.1 Zero Adjustment ..............................6-1 6.1.2 Span Adjustment ..............................
- Page 4 CONTENTS 10.2 FM ................................10-5 10.2.1 Technical Data ..............................10-5 10.2.2 Wiring ................................10-5 10.2.3 Operation ................................10-5 10.2.4 Maintenance and Repair ........................... 10-5 10.2.5 Installation Diagram ............................10-6 10.3 SAA ................................10-7 10.3.1 Technical Data ..............................10-7 10.3.2 Installation ................................ 10-7 10.3.3 Operation ................................
-
Page 5: Introduction
However, should any questions injury or death of personnel. arise or errors come to your attention, please contact your nearest Yokogawa sales office that appears on the back of this manual or the sales representative from which you purchased the product. - Page 6 INTRODUCTION Warranty • The warranty of this instrument shall cover the period noted on the quotation presented to the Purchaser at the time of purchase. The Seller shall repair the instrument free of charge when the failure occurred during the warranty period.
- Page 7 • Maintenance on the vortex flowmeter should be performed by expert engineer or skilled person- nel. No operator shall be permitted to perform any operations relating to maintenance. • Always conform to maintenance procedures outlined in this manual. If necessary, contact Yokogawa. IM 01F06A00-01E...
- Page 8 ATEX están disponibles en inglés, alemán y francés. Si desea solicitar las instrucciones de estos artículos antiexplosivos en su idioma local, deberá ponerse en contacto con la oficina o el representante de Yokogawa más cercano. Alla instruktionsböcker för ATEX Ex (explosionssäkra) produkter är tillgängliga på...
- Page 9 INTRODUCTION viii IM 01F06A00-01E...
-
Page 10: Handling Precautions
This section describes important cautions in handling these packing as when shipped from the Yokogawa factory. instruments. Read carefully before using them. If you have any problems or questions, contact your nearest YOKOGAWA service center or sales representative. - Page 11 1. HANDLING PRECAUTIONS (3) Mechanical Shock or Vibration The vortex flowmeter is of sturdy construction, but select an area subject to minimize mechanical vibrations or impact shock. If the flowmeter is subject to vibra- tions, it is recommended that pipeline supports to be provided as shown in Figure 1.2.
-
Page 12: Installation
2. INSTALLATION 2. INSTALLATION (4) Precautions Regarding Piping WARNING (a) Ensure that the process connector bolts are tightened firmly. This instrument must be installed by expert engineer (b) Ensure that no leak exists in the process connection or skilled personnel. The procedures described in this pipeline. - Page 13 Model Code DY015 up to DY050 : Sch 40 or less. ●Installation direction DY025-/R1 up to DY080-/R1 DY040-/R2 up to DY100-/R2 If a pipe is always filled with liquids, the pipe can be Model Code DY080 up to DY300 : Sch 80 or less.
- Page 14 2. INSTALLATION Description Figure Valve positon (T-type piping exist): When pulsation causes by a T-type piping exist, install the valve on the upstream of the flowmeter. Relocating digitalYEWFLO Example:As shown in the figure, when the valve V1 is turned Valve (Off) Flow off, the fluid flow throught B as to meter A the flow is zero.
-
Page 15: Precautions Regarding Installation
2. INSTALLATION 2.3 Precautions Regarding In- • Piping for Avoiding Bubbles stallation Flows containing both gas and liquid cause problems. Avoid gas bubbles in a liquid flow. Piping should be carried out to avoid bubble generation. Install the valve on the downstream side of the flowme- WARNING ter because pressure drop across the control valve may In case of high process temperature, care should be... -
Page 16: Piping To Improve Durability
These can be schedule 40 or lower pipe should be used for 1/2 to 2 ordered separately from YOKOGAWA. Cover the inch flowmeters and schedule 80 or lower pipes for 3 to flowmeter body with heat insulating material so that the 8 inch flowmeters. -
Page 17: Installing The Vortex Flow-Meter
2. INSTALLATION 2.6 Installing the Vortex Flow- Table 2.2 meter Size Major Diameter of Length Flange Rating External Threed of R(mm) (inch) Stud Bolt d (mm) 15mm JIS 10K, 20K/DIN 10, (1/2B) 16,25,40 WARNING JIS 40K 12.7 ANSI 150, 300, 600 The Vortex Flowmeter is a heavy instrument. - Page 18 2. INSTALLATION Table 2.3(a) Installation of Wafer Type Vortex Flowmeter Description Wafer type Horizontal Installation When Installation Collar are required, the Electrical installation vortex flowmeters applied to the Connection following line sizes and flange ratings. Flange Flow Flange Rating Direction Size mm(inch) 15 to 40 Flange...
- Page 19 2. INSTALLATION Table 2.3(b) Installation of Flange Type Vortex Flowmeter Flange type Description Use the bolts and nuts supplied with the Horizontal Installation flowmeter of the user. The gaskets should be supplied by the user. Flow Direction Flange Flange CAUTION Bolt The inside diameter of the gasket must be Gasket...
-
Page 20: Wiring
3. WIRING 3. WIRING 3.2 Wiring for Output Condition WARNING Table 3.1 shows the connection method of several output The wiring of the vortex flowmeter must be performed conditions. by expert engineer or skilled personnel. No operator (1) Analog Output (4 to 20 mA DC) shall be permitted to perform procedures relating to wiring. -
Page 21: Connection
3. WIRING IMPORTANT For pulse output and the simultaneous analog-pulse output ,use the load resistance. Refer to Table 3.1. 3.3 Connection Table 3.1 shows the connection sample of connection for power supply and load resistance. The terminal position of each connection is shown in Figure 3.2. Integral type Remote type Supply... -
Page 22: Pulse Output
3. WIRING Table 3.1 The connection example for simultaneous analog and pulse and alarm, status output. Description Connection Analog Output digitalYEWFLO Electrical Terminal Distributor 24V DC In this case, SUPPLY Communication is – possible (up to a distance 250Ω of 2km when a CEV cable –... -
Page 23: Wiring Cables And Wires
4 to 20 mA DC Output Power Supply and Output Signal Terminals in temperature sensor – If a signal cable kit is supplied by YOKOGAWA, both ends Input Terminals from Pulse Pulse Output Terminal of the cable must be finished in accordance with the vortex detector following instructions as shown in 3.6.1 and 3.6.2. -
Page 24: Method Of Finishing The Signal Cable End(Dyc)
(black area covering the signal cables A 3MAX after delivery, contact your and B) to the converter case, terminal, nearest Yokogawa sales office Yellow(T) 50 and other leadwires. If it is touched, or the sales representative from operation of the converter may be which you purchased the F030601.EPS... -
Page 25: For Vortex Flow Converter (Dya)
(black area covering the signal cables A after delivery, contact your and B) to the converter case, terminal, YELOW(T) 50 nearest Yokogawa sales office 10 10 and other leadwires. If it is touched, or the sales representative from operation of the converter may be which you purchased the F030602.EPS... -
Page 26: Wiring Cautions
3. WIRING 3.7 Wiring Cautions 3.8 Grounding (1) Lay wiring as far as possible from electrical noise sources such as large transformers, motors and power IMPORTANT supplies. (2) It is recommended that crimp-on type solderless lugs be When a lightning protector (option code: /A) is used for large wire ends. -
Page 27: Basic Operating Procedures
4. BASIC OPERATING PROCEDURES 4. BASIC OPERATING PROCEDURES Data setting can be performed with the three keys on the front panel (SET,SHIFT and INC) or using a handheld BRAIN(BT200) terminal and HART communicator. 4.1 Construction of the Display Figure 4.1 shows the configuration of the digitalYEWFLO display panel (if equipped). -
Page 28: Display Contents In Display Section
4. BASIC OPERATING PROCEDURES 4.2 Display Contents in Display Section The display content items are classified in the following three items. Table 4.2 Mode Name List Mode (status) Name Display Contents Flowrate display A mode in which instantaneous flow rates or totalized values are displayed. mode Display content is usually selected either in display content selection mode or by setting parameters via BRAIN communication. -
Page 29: Display Contents In Display Section
4. BASIC OPERATING PROCEDURES 4.3 Display Contents in Display Section The display mode is a mode in which instantaneous flow rates or totalized flow are displayed. In display mode, there are six display modes as shown in Table 4.3. Table 4.3 Display Mode Upper Lower... -
Page 30: Change The Display Mode From % Display To Engineering Unit
4. BASIC OPERATING PROCEDURES 4.3.1 Change the Display Mode from % Display to Engineering Unit The display mode can be changed referring 5.3 parameter list. Indication of % Indicate “ 01 ” of display. engineering unit referring 5.3 parameter list. SHIFT SHIFT Press “... -
Page 31: Indicate The Total Rate In The Lower Display
4. BASIC OPERATING PROCEDURES 4.3.2 Indicate the Total Rate in the Lower Display The display mode can be changed referring 5.3 parameter list. Indication of Indicate “ 01 ” of engineering unit lower the display display. item referring 5.3 Lower display is parameter list. -
Page 32: Setting Mode
4. BASIC OPERATING PROCEDURES 4.4 Setting Mode • When completing setting, press “SHIFT” key and “SET” key simultaneously. The mode move to the “display The setting mode is used for checking parameters and mode”. rewriting data. The following is an overview of the setting mode. -
Page 33: Method Of Parameter Setting
4. BASIC OPERATING PROCEDURES 4.4.2 Method of Parameter Setting ■ Input method of numeric data Example 1: Change the span from 100m /h to 150m The setting mode can be changed referring 5.3 parameter list Indication of % flow Ensure the setting rate. - Page 34 4. BASIC OPERATING PROCEDURES ■ Input method of selection items Example 2: Change the pulse output to alarm output. The setting mode can be changed referring 5.3 parameter list Indication of % unit. Indicate “ 03 ” of alarm output item referring 5.3 parameter list.
-
Page 35: Operation For The Brain Terminal (Bt200)
4. BASIC OPERATING PROCEDURES 4.5 Operation for the BRAIN (2) Connecting BT200 to Flow Converter Terminal (BT200) Removing a cover and indicator, the terminals for brain communication are provided on the circuit board. This section describes the operation procedures using a Connect BT200 to the terminal of HHT-COM on the BRAIN Terminal (BT200). -
Page 36: Displaying Flow Rate Data
4. BASIC OPERATING PROCEDURES ● Function key 4.5.2 Displaying Flow Rate Data The functions of the function keys vary with the commands Flowrate data can be displayed on the BT200 screen being displayed on the display panel. according to the following procedure. Table 4.4 Command Description... -
Page 37: Setting Parameters
4. BASIC OPERATING PROCEDURES 4.5.3 Setting Parameters This section describes the setting method using a BRAIN Terminal (BT200). For details on the method, refer to 5.3 Parameter List. (1) Setting Flow Span Example : Change flow span 100m /h to 150m Enter menu item, and press The data setting can be MENU... - Page 38 4. BASIC OPERATING PROCEDURES (2) Change the Pulse Output to Alarm Output. Enter menu item, and press Pressing the enter key, MENU “ ” key. inverse video bar is flashed. A:DISPLAY B20:CONTACT OUT B:EASY SETUP SCALED PULSE Move the inverse video bar C:BASIC SETUP ALARM to “B : EASY SETUP”.
-
Page 39: Operation Via Hart Configuration Tool
4. BASIC OPERATING PROCEDURES 4.6 Operation via HART configu- 4.6.2 Interconnection between digitalYEWFLO and HART Configu- ration tool ration Tool The HART Configuration Tool can interface with the digitalYEWFLO from the control room, the digitalYEWFLO NOTE site, or any other wiring termination point in the loop, This chapter describes the digitalYEWFLO as an provided there is a minimum load resistance of 250 Ω... -
Page 40: Basic Setup
4. BASIC OPERATING PROCEDURES 4.6.3 Basic Setup 4.6.6 Self-diagnostic ■ Tag and Device Information The self-diagnostic function of the digitalYEWFLO is explained in 5.5 Error Code Lists. The tag number and device information can be checked as follows: It is also possible to carry out this function via HART Configuration Tool. -
Page 41: Other Operations For The Hart Configuration Tool
4. BASIC OPERATING PROCEDURES ■ Multidrop Mode 4.6.9 Other operations for the HART Configuration Tool When set in the multidrop mode, up to 15 field devices in a single communications line can be connected. To activate Regarding other operations for the HART Configuration multidrop communication, the address of the field devices Tool, refer to the HART Configuration Tool operations must be set to a number from 1 to 15. -
Page 42: Menu Tree
4. BASIC OPERATING PROCEDURES 4.6.10 Menu Tree read Offline New Configuration [cr] continuous read Saved Cpnfiguration write Online [u/d] upload/download data Frequency [sel] select Utility method Only for Option code /MV < > Parameter No. in display and BRAIN Terminal Related parameter 1 Process 1 PV [cr]... - Page 43 4. BASIC OPERATING PROCEDURES 3 Fluid [#] [u/d]<C20> Liquid:Volume 1 Volumetric unit[u/d] <C22> [r&w sel](*2) Gas/Steam:Volume k Cum Cuft m Cuft 3 Basic setup k Cuft k gal Impgal k Impgal m bbl k bbl 2 Time unit[u/d] <C40> [r&w sel](*1) 3 End Liquid:Mass Gas/Steam:Mass...
- Page 44 4. BASIC OPERATING PROCEDURES 15mm [r&w sel] 1 Characterize meter 1 Nominal size[u/d] <E10> 25mm 40mm 50mm 80mm 100mm 4 Detailed setup 150mm 200mm 250mm 300mm 400mm 2 Body type[u/d] <E20> Standatd [r&w sel] High pressure Low flow unit(1) Low flow unit(2) 3 Sensor type[u/d] <E30>...
- Page 45 4. BASIC OPERATING PROCEDURES 3 Configure outputs 1 Analog output 1 Flow span[r&w][u/d] <B10> 2 Outlimit(H)[r&w][u/d] <D30> 3 Burn out[r] <D35> 4 Detailed setup 2 Contact output [#][u/d] 1 Pulse rate[r&w][u/d] <B21> <B20> Scaled pulse Unsdcled pulse Frequency 1 Frequency at 100%[r&w][u/d] <B22> Alarm Flow SW(Low:On) 1 Setting level[r&w][u/d]...
- Page 46 4. BASIC OPERATING PROCEDURES 6 Adjust 4 Signal processing 1 User adjust[r&w] [u/d] <H20> 2 Reynolds adjust[#] [u/d] <H25> Not active[r&w sel] Active 1 Process density[r&w] [u/d] <H26> 2 Viscosity[r&w] [u/d] <H27> 3 End 4 Detailed setup 3 Gas expansion fact [u/d] <H30> Not active [r&w sel] Active...
- Page 47 4. BASIC OPERATING PROCEDURES Review 4 Review 1 Review 2 Review 3 Model Flow rate unit Special unit Function Manufacturer Flow span User’s unit Base density Distributor PV Damp Conversion faetor 1st temp coeff Contact output Nominal size 2nd temp coeff Cable length Descriptor Pulse rate...
-
Page 48: Parameter Setup
5. PARAMETER SETUP 5. PARAMETER SETUP 5.1 Parameter Setup 5.3 Parameters List The parameters are set before factory shipment. Set the This section describes the parameter of digitalYEWFLO. required parameter of changing fluid, contact out and • Contents of parameter lists. indication of display. - Page 49 5. PARAMETER SETUP (1) Item A : Indication These items are for the indication of flowrate and total. Decimal Initial Item Name R / W Data Range Unit Remark Disp. U / D point value DISPLAY Menu A (Display) FLOW RATE(%) 0.0 to 110.0 Flow rate FLOW RATE...
- Page 50 5. PARAMETER SETUP (3) Item C : BASIC SETUP These items are for the basic parameters with setting before shipment. The parameters, C20 to C50, are not indicated when option code “/MV” is selected and parameter item is selected in F10 except “Monitor only”...
- Page 51 5. PARAMETER SETUP (4) Item D : Additional Setup These items are for Auxiliary Setup. A value in “( )” is the data corresponding to the indicator. Decimal Initial Item Name R / W Data Range Unit Remark Disp. U / D point value AUX.
- Page 52 5. PARAMETER SETUP (5) Item E : Detector Setup These items are for detector that has been already set before. A value in “( )” is the data corresponding to the indicator. Decimal Initial Item Name R / W Data Range Unit Remark Disp.
- Page 53 5. PARAMETER SETUP (6) Item F: Thermometer (Only for Option Code /MV) These items is for thermometer setting when. A Value in “( )” is the data corresponding to the indicator. Data Range Unit Decimal Point Initial Value Disp Item Name R / W Remark...
- Page 54 5. PARAMETER SETUP (7) Item H : Adjust. These items are for setting of adjustment. A value in “( )” is the data corresponding to the indicator. Decimal Initial Item Name R / W Data Range Unit Remark Disp. U / D Point value ADJUST...
- Page 55 5. PARAMETER SETUP (9) Item K : Maintenance These items are for maintenance. Decimal Initial Item Name R / W Data Range Unit Remark Disp. U / D Point value MAINTENANCE Menu K (Maintenance) 0.1 to 20.0 Trigger Level Adjust SIGNAL LEVEL 0.1 to 20.0 Signal Level...
-
Page 56: Parameter Description
5. PARAMETER SETUP 5.4 Parameter Description (2) Item B : Easy Setting These items are for the Principal items to operate (1) Item A : Display digitalYEWFLO. These items are for the indication of flowrate and total. A value in “( )” is the data corresponding to indicator. [A10:FLOW RATE(%)] Flow rate [B10:FLOW SPAN] Flowrate span Flowrate is displayed by “%”... - Page 57 5. PARAMETER SETUP [B22:100% FREQ] Pulse numbers of 100% at [B47:TOTAL RESET] Reset the totalizer one second When totalizer reset function is executed, the total display Set pulse number at 100% for one second when “FRE- and communication parameter are reset. QUENCY”...
- Page 58 5. PARAMETER SETUP The following item should be done in case of (3) Item C : BASIC SETUP which “C20” is “GAS/STEAM : Volume”. These items are for the basic parameters with setting before shipment. [C30:TEMP UNIT] Fluid temperature unit at operating conditions The parameters which are set in B are not necessary to set in Select temperature unit at operating condition from...
- Page 59 5. PARAMETER SETUP [D40:SPECIAL UNIT] Change to special (4) Item D (AUX SETUP) flowrate unit These items are for Auxiliary setup. Select the availability of changing to special flowrate Unit A value in “( )” is the data corresponding to indicator. from “No(0)”...
- Page 60 5. PARAMETER SETUP (5) Item E (METER SETUP) (6) ltem F (Thermometer) These items are for detector set up that has already been set These items are for setting of thermometer and available before shipment. when build in thermometer type (Option code: /MV). A value in “( )”...
- Page 61 5. PARAMETER SETUP [F20 PRESS UNIT] Pressure unit [F50 TEMP DAMPING] Temperature damping Select pressure unit from MPa abs(0), kPa abs(1), bar abs(2), Set temperature damping, 0 to 99sec. kg/cm a(3), psia(4). [F52 CABLE LENGTH] Cable length of signal cable(DYC) [F21 PRESS f] Pressure value f Set cable length(m) of signal cable for DYA.
- Page 62 5. PARAMETER SETUP [H30:EXPANSION FA] Gas expansion correc- Item H (ADJUST) tion. This item for setting of adjustment. When measuring a compressibility gas by mass flow (Steam M, Gas M) and standard condition (Gas Qn), this expansion factor is useful to correct the deviation from the ideal gas NOTE law.
- Page 63 5. PARAMETER SETUP (8) Item J (TEST) When N.B. mode is “MANUAL”, the noise balance can be adjusted entering the setting values. These items are for test of output. Note: Refer to “6.2 Adjustment for Manual Mode”. A value in “( )” is the data corresponding to indicator. [K28:SET VORTEX F] Output test by setting [J10:OUT ANALOG] 4 to 20mA Current output.
-
Page 64: Error Code Lists
5. PARAMETER SETUP Error Code Lists When an ERROR is displayed by SELF CHECK in item A60, B60, C60, D60, E60, or H60, J60, K60, M60, press function key F2 [DIAG] and the error contents are displayed. The error contents are listed below: Table 5.1 ERROR Code List 5-17... -
Page 65: Operation
6. OPERATION 6. OPERATION After you have installed the flowmeter into the process 4. Check output value after set 50% in Parameter J10. piping, wired the input/output terminals, set up the required 5. Check output value after set 0% in Parameter J10. parameters, the vortex flowmeter should output an accurate flow signal from its terminals as soon as the measured liquid 24V DC... -
Page 66: Unit Of Pulse Output (Scaling)
6. OPERATION 6.1.5 Unit of Pulse Output (Scaling) Pulse output are constructed by two units, that are “Scaled pulse and Unscaled Pulse”. (1) Scaled Pulse When SCALED PULSE is selected in B20, set flowrate per one pulse output. Rate unit is linking to the flow unit. (2) Unscaled Pulse Pin position of Write Protect Switch... -
Page 67: Power Failure
6. OPERATION 6.2 Adjustment for Manual Mode 6.1.8 Power Failure When a power failure occurs, the totalized value will be digitalYEWFLO does not need the initial adjustment because protected by EEPROM (Electrically Erasable Programmable digitalYEWFLO is always adjusted by itself automatically. ROM). -
Page 68: Other Maintenance
6. OPERATION 6.3 Other Maintenance 1. Tuning method (1) Ensure the condition of flowrate 6.3.1 Cleaning Precautions The necessary condition for tuning function is zero flow. Care should be taken to prevent the build up of dirt, dust or other material on the display glass and data plate. In case of (2) Executing the tuning function. -
Page 69: Maintenance
• It is prohibited by law for the user to modify flameproof instruments. It is not permitted to add or remove indicators. If modification is required, contact YOKOGAWA. • Explosion protected type must be, as a rule, removed to a non-hazardous area for maintenance and be disassembled and reassembled to the original state. -
Page 70: Changing The Terminal Box Orientation
7. MAINTENANCE 7.1 Changing the Terminal Box Orientation The terminal box can be changed in four directions with respect to the flow direction. Integral Type Vortex Flowmeter Remote Converter Type Vortex Flowmeter <1> Remove the converter cover. <1> Remove the terminal box cover. <2>... -
Page 71: Indicator Removal And Rotation
7. MAINTENANCE 7.2 Indicator Removal and Rotation 7.4 Amplifier Unit Assembling (1) Turn the power OFF. (2) Remove the cover. IMPORTANT * In case of the Explosion protected type, remove the cover after unlock the clamp. The amplifier unit must be assembled keeping the (3) For the indicator, disconnect the cable connector from procedure as follows. -
Page 72: Vortex Shedder Removal
7. MAINTENANCE 7.5 Vortex Shedder Removal In case of High Temperature Version (Option code: HT), First time tighten Nuts with a torque wrench, applying the torque specified “A”. CAUTION Next time loosen Nuts completely, then again tighten Nuts with a torque wrench, applying the torque specified “B”. •... - Page 73 7. MAINTENANCE Vortex shedder Mounting Bolt Converter Case Color Wire Vortex shedder Mounting Block Clamp White Shielded Cover Leadwire Amplifier Unit Bracket Indicator Converter Cover Locking Screw Converter Vortex Shedder Mounting Bolt Assembly Bracket Mounting Gasket Bolt Integral Type Terminal Box Clamp Locking Terminal...
-
Page 74: Flow Calculation
7. MAINTENANCE 7.6 Flow Calculation Pulse rate (ex. E+ 3 is 10 Temperature at operating conditions (°C) (1) Flow Calculation (°F) Flowrate span The flowrate is calculated with the following equations based Total rate on the N number of generated vortices: Internal diameter (m) (inch) (a) Flowrate (in engineering units) µ... - Page 75 7. MAINTENANCE (3) Mass Flow calculation Where Steam Mass flow In case of saturated steam, mass flow rate is calculated Volumetric flow rate at Standard condition from density values to temperature measured by using Volumetric flow rate at oprtating condition saturated steam table.
-
Page 76: Troubleshooting
8. TROUBLESHOOTING CAUTION Please avoid replacing the amplifier unit from the case, and the vortex shedder bar. When these procedures are needed, please contact the nearest Yokogawa office. 8.1 Flow ● Large flowmeter errors and flowrate reading fluctuates. • If a built-in indicator is attached, check the display of the error code. - Page 77 8. TROUBLESHOOTING ● No output is indicated when the fluid is flowing. • If a built-in indicator is attached, check the display of the error code. • Connect a hand-held terminal and check self-diagnostic. Was a faulty area found with selfdiagnosis? Refer to the error code list and check for recovery measures.
- Page 78 8. TROUBLESHOOTING ● Output is indicated at zero flow. • If a built-in indicator is attached, check the display of the error code. • Connect a hand-held terminal and check self-diagnostic. Was a faulty area found with selfdiagnosis? Refer to the error code list and check for recovery measures.
-
Page 79: Flow (Only For /Mv)
8. TROUBLESHOOTING 8.2 Flow (Only for /MV) ● Start with this flow in case of /MV. • If a built-in indicator is attached, check the display of the error code. • Connect a hand-held terminal and check self-diagnostic. Was a faulty area found with self-diagnostic? Refer to the error code list and check for recovery measures. -
Page 80: General Description
9. GENERAL DESCRIPTION 9. GENERAL DESCRIPTION ■ Remote Type 9.1 Outline The Remote Converter Type Vortex Flowmeter (DY-N) is This vortex flowmeter measures liquid, gas and steam flow used with the Model DYA Vortex Flow Converter. A special rates and converts them to a 4 to 20mA DC output or pulse, cable (DYC) is used between these instruments. -
Page 81: Standard Specifications
9. GENERAL DESCRIPTION 9.2 Standard Specifications Non-Wetted Parts: Housing (Case, Cover): Refer to GS 01F06F01-01E for Fieldbus communica- Aluminum alloy JIS ADC12 Name Plate: Stainless steel JIS SUS304 tion type, marked with “ ”. DYA Mounting Bracket for 2B pipe: Cold-reduced carbon steel sheet JIS SPCC, Performance Specifications JIS SECC... - Page 82 ** Refered to Table 6 coverd by ANNEX II of EC Directive on Pressure Analog output is selected from flowrate Equipment Directive 97/23/EC temperature value when option code /MV is *** DY015 and DY025 are outside the scope of CE marking of PED. selected. T090201.EPS Data Security During Power Failure: Data (parameter, totalizer value, etc) storage by EEPROM.
- Page 83 9. GENERAL DESCRIPTION Process Temperature (˚C) With Indicator DYF090201.EPS Figure 9.2.1 Ambient Temperature limit (Integral Type) E - 10.5 0.0236 Communication applicable range BRAIN and HART 10.5 16.4 24.7 Power Supply Voltage E(V) F090202.EPS Figure 9.2.2 Relationship Between Power Supply and Load Resistance HIGH level 0 to 2 V...
-
Page 84: Model And Suffix Codes
Be very careful with highly corrosive process fluids such as hydrochloric acid, sulfuric acid, hydrogen sulfide, sodium hypochlorite, and high- temperature steam (150°C [302°F] or above). Contact Yokogawa for detailed information of the wetted parts material. T090302.EPS... - Page 85 (Note 1) Select body code [X] and shedder bar code [X] for /HY, /HT, /LT and /NC. (Note 2) Select shedder bar code [E] in case of TIIS Flame proof type (/JF3) and general specification for DY025 to DY100. Select [L] for other normal sizes.
- Page 86 Suffix Suffix Suffix Suffix Connection Model Code Model Code Model Code Model Code Code Code Code Code DY015 DY025-/R1 DY040-/R2 DY015 up to JIS 10 K up to — — — — up to up to DY100 DY300 DY200-/R1 DY200-/R2...
-
Page 87: Option Specifications
Refer to Table 9.3.1 , Figure 9.4.1. DY***-N (Note 7) Refer to Table 9.5.1 for minimum velocity. In case of another size, please contact to YOKOGAWA sales person. This specification temperature is from -196 to +100 C Cryogenic Version Refer to Table 9.3.1 , Figure 9.4.2. - Page 88 (Note 8) • Cryogenic version (/LT) is not available. • High process temperature version (/HT) and Multi-variable type (/MV) for DY025/R1 and DY040/R2 are not available. • Explosion protected type SAA (/SF1,/SS1) is not available. • Flange type only and available process connections are JIS10k, 20k (BJ1, BJ2) and ANSI150, 300 (BA1,BA2,BS1,BS2).
-
Page 89: Option Multi-Variable (Build In Temperature Sensor) Type (/Mv)(*1)
9. GENERAL DESCRIPTION 9.4.2 Option Multi-Variable (Build in Temperature Sensor) Type (/MV)(*1) This option is the same as standard specification except the following items. Standard Type Multi-variable Type Wafer Type 25mm to 100mm 15mm to 100mm Size Flange Type 15mm to 300mm 25mm to 200mm Function Only for indication... -
Page 90: Option Reduced Bore Type (/R1) (*1)
(Note 2) Flange type only: JIS10K,20K (BJ1,BJ2) and ANSI150,300 (BA1,BA2,BS1,BS2) MS Code [*] of “DY***-” means flange piping size. (Note 3) High process temperature version (/HT) and Multi-variable type (/MV) for DY025/R1 and DY040/R2 are not available. 9-11 IM 01F06A00-01E... -
Page 91: Option Specifications (For Explosion Protected Type)
9. GENERAL DESCRIPTION 9.4.4 Option Specifications (For Explosion Protected Type) Item Specification Code TIIS Certification TIIS Flame proof Approval (Note 1) Flame proof Ex d IIC T6 Certified by TIIS. (TIIS is the abbreviation of Technology Institution of Industrial Safety.) Amb. - Page 92 9. GENERAL DESCRIPTION Code Item Specification CENELEC ATEX (KEMA) Type n Approval CENELEC ATEX Applicable Standard: EN60079-15: 2005, IEC60079-0: 2004, IEC60079-11: 1999, EN60529: 1991 (KEMA) Type of Protection : EEx nL IIC T4...T1 (Integral Type Flowmeter and Remote Type Flowmeter) EEx nL IIC T4 (Remote Type Converter) Group : II Category : 3G...
- Page 93 9. GENERAL DESCRIPTION Specification Item Code Standards SAA Flame proof Approval Association Applicable Standard: AS 2380.1-1989, AS2380.2-1991, AS1939-1990 of Australia (SAA) Type of protection: Ex d IIC T6...T1, IP67, Class 1, Zone 1 (Note3) Amb.Temp.: –29 to +60°C (Integral Type Flowmeter and Remote Type Flowmeter) : –40 to +60°C (Remote Type Converter) Max.
-
Page 94: Sizing
Type Version version (unit: m/s) (unit: m/s) (unit: m/s) (unit: m/s) (Note) (Note) 250 /ρ –– 80/ρ or 3 DY015 DY025-/R1 DY040-/R2 –– DY025 DY040-/R1 DY050-/R2 122.5/ρ 490/ρ 45/ρ or 2 125/ρ or 2 31.3/ρ or 2 DY040 DY050-/R1 DY080-/R2 90/ρ... - Page 95 ± 1.0% (20000 Re < 2000*D) DY015 ± 0.75% 2000*D ± 1.0% ± 1.0% (20000 Re < 1500*D) (20000 Re < 1500*D) DY025 ± 0.75% ± 0.75% 1500*D 1500*D ± 1.0% ± 1.0% ± 1.0% DY040 Liquid DY050 (20000 Re < 1000*D) (20000 Re <...
- Page 96 (At standard condition of 15°C, ρ = 1000 kg/m Range of Fixed Measurable Flow Rate Model Code Accuracy Flow in m Rate in m DY015 DY025-/R1 DY040-/R2 0.30 up to 6 0.94 up to 6 DY025 DY040-/R1 DY050-/R2 0.65 up to 18 1.7 up to 18...
- Page 97 Minimum and Maximum Measurable Flow Rate in Nm Model Code Rate Limits 0 MPa 0.1 MPa 0.2 MPa 0.4 MPa 0.6 MPa 0.8 MPa 1 MPa 1.5 MPa 2 MPa 2.5 MPa DY025 min. 4.8(11.1) 6.7(11.1) 8.2(11.1) 10.5(11.1) 12.5 16.1 19.7 28.6 37.5 46.4 DY040 DY015...
- Page 98 Nominal Nominal Pulse Rate Model Code Diameter K-Factor = 5.4 m/s Hz/m/s Hz/m Pulse/L Therefore, substitute this value in equation (3): DY015 DY025-/R1 14.6 62.7 ∆P = 124 × 10 × 992 × 5.4 DY025 DY040-/R1 25.7 65.6 35.5 19.1 = 35.3 kPa...
-
Page 99: External Dimensions
EARTH TERMINAL 2-φG CLAMP Only for TIIS Explosion proof KEMA Explosion proof SAA Explosion proof INTEGRAL/REMOTE TYPE DY015 (15mm, DY025 (25mm,1in) CODE PROCESS CONNECTION - AD4 - AD4 70 (2.76) 70 (2.76) 35 (1.38) 35 (1.38) 14.6 (0.57) 25.7 (1.01) 35.1 (1.38) - Page 100 4.5(0.18) CONNECTION EARTH TERMINAL CLAMP Only For TIIS Explosion proof KEMA Explosion proof N-φG SAA Explosion proof TYPE INTEGRAL/REMOTE CODE DY015 (15mm, DY025 (25mm,1in) PROCESS CONNECTION - BD4 - BD4 (6.30) (5.12) (5.51) (6.30) (5.91) (7.48) (5.91) (5.12) (6.69) (7.48) 14.6 (0.58)
- Page 101 9. GENERAL DESCRIPTION ■ Flange type (DY150 up to DY300) Unit: mm (approx. inch) 74(2.91) WITH INDICATOR 59(2.32) 59(2.32) ELECTRICAL 125(4.92) CONNECTION (0.18) EARTH TERMINAL CLAMP N-φG Only for TIIS Explosion proof KEMA Explosion proof SAA Explosion proof TYPE INTEGRAL/REMOTE CODE DY150 (150mm, 6in) DY200 (200mm, 8in)
- Page 102 9. GENERAL DESCRIPTION ■ High Process Temperature Version (/HT): DY025-/HT up to DY100-/HT ■ Cryogenic Version (/LT): DY015-/LT up to DY100-/LT ■ Wafer type Unit: mm (approx. inch) 59(2.32) 59(2.32) ELECTRICAL CONNECTION 125(4.92) 4.5(0.18) EARTH TERMINAL CLAMP Only for TIIS Explosion proof 2-φG...
- Page 103 9. GENERAL DESCRIPTION ■ High Process Temperature Version (/HT): DY025-/HT up to DY100-/HT ■ Cryogenic Version (/LT): DY015-/LT up to DY100-/LT ■ Flange type Unit: mm (approx. inch) 59(2.32) 59(2.32) ELECTRICAL CONNECTION 125(4.92) 4.5(0.18) EARTH TERMINAL CLAMP Only For TIIS Explosion proof...
- Page 104 9. GENERAL DESCRIPTION ■ High Process Temperature Version (/HT): DY150-/HT up to DY200-/HT ■ Flange type Unit: mm (approx. inch) ELECTRICAL 59(2.32) 59(2.32) CONNECTION 125(4.92) 4.5(0.18) EARTH TERMINAL CLAMP Only For TIIS Explosion proof KEMA Explosion proof SAA Explosion proof N-φG TYPE Only for REMOTE...
- Page 105 9. GENERAL DESCRIPTION ■ Reduced Bore Type (/R1):DY025-/R1 up to DY150-/R1 ■ Flange type WITH INDICATOR ELECTRICAL CONNECTION EARTH TERMINAL CLAMP Only For TIIS Explosion proof KEMA Explosion proof N- φG Model Code DY025 /R1 Model Code DY040 /R1 Model Code...
- Page 106 9. GENERAL DESCRIPTION ■ Reduced Bore Type (/R1):DY200-/R1 ■ Flange type WITH INDICATOR ELECTRICAL CONNECTION EARTH TERMINAL CLAMP N- φG Only For TIIS Explosion proof KEMA Explosion proof Model Code DY200 /R1 Process Connection 185.6 138.8 342.9 477.5 487.5 28.4 41.1 298.5 330.2...
- Page 107 9. GENERAL DESCRIPTION ■ High Process Temperature Version Reduced Bore Type (/R1/HT): DY040-/HT/R1 up to DY150-/R1/HT ■ Flange type ELECTRICAL CONNECTION EARTH TERMINAL CLAMP Only For TIIS Explosion proof KEMA Explosion proof N- φG Model Code Model Code Model Code DY040 /R1/HT DY050 /R1/HT DY080 /R1/HT...
- Page 108 9. GENERAL DESCRIPTION ■ High Process Temperature Version Reduced Bore Type (/R1/HT): DY200-/R1/HT ■ Flange type ELECTRICAL CONNECTION JIS G1/2 Female ANSI 1/2NPT Female ISO M20 x 1.5 Female EARTH TERMINAL CLAMP Only For TIIS Explosion proof KEMA Explosion proof N- φG Model Code DY200 /R1/HT...
- Page 109 9. GENERAL DESCRIPTION ■ Reduced Bore Type (/R2): DY040-/R2 up to DY200-/R2 ■ Flange type WITH INDICATOR ELECTRICAL CONNECTION EARTH TERMINAL CLAMP Only For TIIS Explosion proof N- φG KEMA Explosion proof Model Code DY040 /R2 Model Code DY050 /R2 Model Code DY080 /R2 Process...
- Page 110 9. GENERAL DESCRIPTION ■ High Process Temperature Version Reduced Bore Type (/R2/HT): DY050-/R2/HT up to DY200-/R2/HT ELECTRICAL CONNECTION EARTH TERMINAL CLAMP Only For TIIS Explosion proof KEMA Explosion proof N- φG Model Code DY050 /R2/HT Model Code DY080 /R2/HT Model Code DY100 /R2/HT Process Process...
- Page 111 ANSI 1/2NPT Female ISO M20 1.5 Female EARTH TERMINAL 32.5 14.5 2 - φG CLAMP Only for KEMA Explosionproof Model Code DY015 (15A) /E1 DY025 (25A) /E1 DY040 (40A) /E1 Process Connection 14.6 25.7 39.7 35.1 50.8 235.5 245.4 263.5 49.5...
- Page 112 ANSI 1/2NPT Female ISO M20 1.5 Female EARTH TERMINAL 32.5 14.5 CLAMP Only for KEMA Explosionproof N - φG Model Code DY015 (15A) /E1 Model Code DY025 (25A) /E1 Process Process Connection Connection 14.6 25.7 88.9 95.3 95.3 120.7 95.3 120.7...
- Page 113 9. GENERAL DESCRIPTION Stainless Steel Housing: DY150-/E1 up to DY300-/E1 Flange type Unit: mm (approx. inch) ELECTRICAL CONNECTION JIS G1/2 Female ANSI 1/2NPT Female ISO M20 1.5 Female EARTH TERMINAL 32.5 14.5 CLAMP N - φG Only for KEMA Explosionproof Model Code DY150 (150A) /E1 Model Code...
- Page 114 9. GENERAL DESCRIPTION Stainless Steel Housing Reduced Bore Type (/E1/R1): DY025-/E1/R1 up to DY150-/E1/R1 Flange type Unit: mm (approx. inch) ELECTRICAL CONNECTION JIS G1/2 Female ANSI 1/2NPT Female ISO M20 1.5 Female EARTH TERMINAL 32.5 14.5 CLAMP Only for KEMA Explosionproof N - φG...
- Page 115 9. GENERAL DESCRIPTION Stainless Steel Housing Reduced Bore Type (/E1/R1): DY200-/E1/R1 Flange type Unit: mm (approx. inch) ELECTRICAL CONNECTION JIS G1/2 Female ANSI 1/2NPT Female ISO M20 1.5 Female EARTH TERMINAL 32.5 14.5 CLAMP Only for KEMA Explosionproof N - φG Model Code DY200 /E1 /R1 Process...
- Page 116 9. GENERAL DESCRIPTION Stainless Steel Housing Reduced Bore Type (/E1/R2): DY040-/E1/R1 up to DY200-/E1/R2 Flange type Unit: mm (approx. inch) ELECTRICAL CONNECTION JIS G1/2 Female ANSI 1/2NPT Female ISO M20 1.5 Female EARTH TERMINAL 32.5 14.5 CLAMP N - φG Only for KEMA Explosionproof Model Code...
- Page 117 9. GENERAL DESCRIPTION Remote Type Converter (DYA) Unit: mm (approx. inch) WITH INDICATOR 74(2.91) ELECTRICAL 59(2.32) 59(2.32) CONNECTION 125(4.92) 4.5(0.18) (both sides) EARTH TERMINAL CLAMP Only for TIIS Explosion proof KEMA Explosion proof SAA Explosion proof Weight: 1.9 kg (4.19lb), 4.1 kg (9.04lb) for /E1. Note: For flowmeters with indicator, add 0.2 kg.(0.44lb), 0.3 kg (0.66lb) for /E1.
- Page 118 9. GENERAL DESCRIPTION ■ Flameproof Packing Adapter (Option code /G11,/G12) Adapter body (M. Screw) Unit:mm O-Ring Packing case 16.5 Hexagon socket set screw Packing * Hexagon socket set screw O-Ring O-Ring Washer Union nut Packing gland *Packing Clamp ring (Choose from the table below depend on cable outside diameter) Clamp nut O-Ring...
-
Page 119: Explosion Protected Type Instrument
10. EXPLOSION PROTECTED TYPE INSTRUMENT 10. EXPLOSION PROTECTED TYPE INSTRUMENT In this section, further requirements and differences for Maximum Working Pressure: 16MPa(DY015 to DY200) explosion proof type instrument are described except JIS 5MPa(DY200 and DY300) Flame proof. For explosion proof type instrument, the Electrical Connection: ANSI 1/2 NPT female, description in this chapter is prior to other description in this ISO M20 X 1.5 female... -
Page 120: Installation
• The instrument modification or parts replace- 80°C 300°C ment by other than authorized representative of 80°C 450°C Yokogawa Electric Corporation is prohibited T100101-5.eps and will void the certification. *: Use /HT version above 250°C Electrical data Signal/Supply and Pulse circuit Ui= 32Vdc (30Vdc for the remote converter), Ci= 1.76nF, Li= 0mH... -
Page 121: Installation Diagram Of Type Of Protection "N
10. EXPLOSION PROTECTED TYPE INSTRUMENT 10.1.5 Installation Diagram of Intrinsically 10.1.6 Installation Diagram of Type of safe (and Note) Protection “n” IMPORTANT • In hazardous location, BT200 BRAIN Terminal can not be connected to the digitalYEWFLO which is approved by CENELEC (KEMA) Intrinsically Safe. -
Page 122: Name Plate
10. EXPLOSION PROTECTED TYPE INSTRUMENT 10.1.8 Name Plate MODEL: Specified model code SUFFIX : Specified suffix code [Integral type, Flameproof] STYLE: Style code SUPPLY : Supply voltage OUTPUT : Output signal MWP : Maximum working pressure K-FACTOR : Device-specific factor RANGE: Specified range [Remote type detector, Flameproof] NO.: Manufacturing serial number *1... -
Page 123: Technical Data
• The instrument modification or part replace- Ambient Temperature: –29 to +60°C ments by other than authorized representative (Integral Type Flowmeter) of Yokogawa Electric Corporation is prohibited –29 to +80°C and will void the approval of FM Approvals. (Remote Type Flowmeter) –40 to +60°C... -
Page 124: Installation Diagram
10. EXPLOSION PROTECTED TYPE INSTRUMENT Nonincendive (and WARNING) 10.2.5 Installation Diagram Intrinsically Safe (and WARNING) Hazardous Location Non Hazardous Location Hazardous Location Non Hazardous Class I, II, Division 2, Location Groups A, B, C, D, F and G, Class I, II, III, Division 1, Class III, Division 1, and Groups A, B, C, D, E, F and G, Class I, Zone 2, Group IIC... -
Page 125: Saa
• The instrument modification or parts replace- Applicable Standard: AS 2380.1-1989, AS2380.7-1987, ments by other than authorized representative AS2380.9-1991 of Yokogawa Electric Corporation are prohibited Certificate : AUS Ex 2611X and will void the certification. Type of Protection: Ex ia IIC T4 IP67 (Integral Type... -
Page 126: Installation Diagram
10. EXPLOSION PROTECTED TYPE INSTRUMENT Type “n” 10.3.5 Installation Diagram [Integral type] Intrinsically Safe Hazardous Location Non Hazardous (Zone 2) Location [Integral type] Hazardous Location Non Hazardous General Purpose (Zone 0) Equipment Location DY (flowmeter) Power Safety barriers Supply DY (flowmeter) SUPPLY SUPPLY PULSE... -
Page 127: Csa
10. EXPLOSION PROTECTED TYPE INSTRUMENT 10.4 CSA • Intrinsically Safe Applicable Standard: C22.2 No. 0.4-2004, C22.2 No. 157- M1987, C22.2 No. 213-M1987, C22.2 10.4.1 Technical Data No. 1010.1-92, CAN/CSA-E60079- • Explosion Proof 0:02, CAN/CSA-E60079-11:02, CAN/ Applicable Standard: C22.1-98, C22.2 No.0-M1991, C22.2 CSA-E60079-15:02, ANSI/ ISA- No.4-04, C22.2 No.0.5-1982, C22.2 12.27.01-2003... -
Page 128: Wiring
F100401_1.EPS • The instrument modification or part replace- ments by other than authorized representatives of Yokogawa Electric Corporation are prohibited and will void CSA Certification. WARNING • In any safety barrier used output current must be limited by a resistor ‘R’ such that Io=Uo/R or Isc=Voc/R. -
Page 129: Dual Seal (Option: /Cf11, /Cs11)
10. EXPLOSION PROTECTED TYPE INSTRUMENT Type “n” and Non-incendive 10.4.6 Dual Seal (Option: /CF11, /CS11) Dual Seal: Hazardous Location Non Hazardous Certified by CSA to the requirement of ANSI/ISA 12.27.01 Location Class IIC, Zone 2, No additional sealing required. Class I, II, Division 2,Groups A, B, C, D, Primary seal failure annunciation: at the O-ring seal portion E, F and G,... -
Page 130: Tiis
N (None Indicator) D (With Indicator) N (None Indicator) N (None Indicator) D (With Indicator) N (None Indicator) DY015 TC14901 TC14912 TC14923 – – – – DY025/R1 DY040/R2 TC18903 TC18914 TC18925 – – – – DY025 TC14902 TC14913 TC14924 TC19504... -
Page 131: Pressure Equipment Directive
DN: Nominal size Referred to Table 6 covered by ANNEX II of EC Directive on Pressure Equipment Directive 97/23/EC *** DY015 and DY025 are not attached CE mark of PED because they do not under CE mark of PED. **** Special-order product... -
Page 132: Installation And Operating Precautions For Tiis Flameproof Equipment
INSTALLATION AND OPERATING PRECAUTIONS FOR TIIS FLAMEPROOF EQUIPMENT INSTALLATION AND OPERATING PRECAUTIONS FOR TIIS FLAMEPROOF EQUIPMENT Apparatus Certified Under Technical Criteria (IEC-compatible Standards) 1. General tion is of completely enclosed type and its enclosure shall endure explosive pressures in cases where explosive gases or The following describes precautions on electrical apparatus vapours entering the enclosure cause explosion. - Page 133 INSTALLATION AND OPERATING PRECAUTIONS FOR TIIS FLAMEPROOF EQUIPMENT 4. Installation of Flameproof Ap- • In necessary, appropriate protective pipes (conduit or flexible pipes), ducts or trays shall be used for paratus preventing the cable run (outside the cable glands) from damage.
- Page 134 So, (2) Repair Yokogawa-specified cable entry devices for flameproof If the flameproof apparatus requires repair, turn off the type shall be used to meet this demand.
-
Page 135: Revision Record
REVISION RECORD REVISION RECORD Title : Model DY Vortex Flowmeter Model DYA Vortex Flow Converter Manual No. : IM 01F06A00-01E Edition Date Page Revised Item Jun. 2002 Change Figure1.1(b). Change the process temperature range and ambient temperature. Add Pressure Equipment Directive, Change Figure 2.2.1. Change Table 2.3.1 “Body”... - Page 136 REVISION RECORD Edition Date Page Revised Item Jan. 2005 Correction. Added a parameter. 5-16 Added a parameter explanation and corrections. Revision (MS code). Revision (Option Specification). 9-13 Revision. 9-18/25 Revision. 10-7 Revision. 10-8 Revision. 10-9 Revision. July 2005 Added a “CAUTION” about heat insulating material installation. Revised the formura 7.14.3.
- Page 137 REVISION RECORD Edition Date Page Revised Item 10th Nov. 2006 Add discviptions of /R2. 4-14 Delete 4.6.2. 5-13 Delete a note. Add to CAUTION. Add to CAUTION. Revisions. Add /R2. Add /R2. Revisions. Revision. 9-10 Add /R2. 9-11 Revisions. 9-14 Add /R2.
- Page 138 REVISION RECORD Edition Date Page Revised Item 12th Mar. 2010 Figure 1 Revision. 2.4 Revision. Table 2.3 Revision. Figure 3.2 Revision. Table 3.1 Revision. Figure 3.5 Revision. Figure 4.4 Revision. 4-13 to 21 4.6 Revision. D10 Revision. K45 Revision. 5-12 NOTE Revision.
Need help?
Do you have a question about the DY025 and is the answer not in the manual?
Questions and answers