Page 1
Owners Manual 3A9301C QuickShot™ Important Safety Instructions Read all warnings and instructions in this manual, on the unit, and in the battery and charger manual before using the equipment. Be familiar with the controls and the proper usage of the equipment. Save these instructions. Important Medical Information Read the medical alert card provided with the gun.
Korean Ultra QuickShot 20B479 230V Ultra QuickShot 20B475 230V Maximum Working Pressure: 2000 psi (138 bar, 14 MPa) Operational video Compatible with the following DeWALT batteries: DCB183 and DCB203 Related Manuals Manual in English Description DeWALT charger manual graco.com/quickshotsupport 3A9301C...
Important Grounding Information Important Grounding Information The following information is intended to help you understand when to use the grounding wire provided with your sprayer. Please read the information on the material container label to determine if it is oil-based or flammable.
All parts of the spray system, including the pump, hose assembly, spray gun, and objects in and around the spray area shall be properly grounded to protect against static discharge and sparks. Use Graco conductive or grounded high-pressure airless paint sprayer hoses. Follow Grounding Instructions, page 10.
Page 6
Check hoses and parts for signs of damage. Replace any damaged hoses and parts. • This system is capable of producing 2000 psi (138 bar, 13.8 MPa). Use Graco parts or accessories that are rated a minimum of 2000 psi (138 bar, 13.8 MPa). •...
Page 7
Warnings PRESSURIZED ALUMINUM PARTS HAZARD Use of fluids that are incompatible with aluminum in pressurized equipment can cause serious chemical reaction and equipment rupture. Failure to follow this warning can result in death, serious injury, or property damage. • Do not use 1,1,1-trichloroethane, methylene chloride, other halogenated hydrocarbon solvents or fluids containing such solvents.
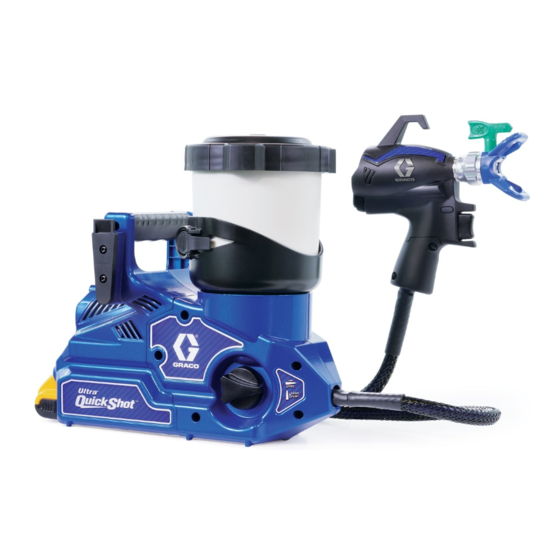
Know Your Sprayer Know Your Sprayer Cup Support Prime Knob Cup Release Lever Spray Gun Hose Spray Tip (2 included) Belt Spray Tip Guard Belt Latch Trigger Belt Holster Trigger Lock Holster Release Clip Flow Control Battery Pump Filter (2 included) Diagnostic Light Belt Clip (on sprayer) Grounding Wire and Plug...
Know Your Controls Know Your Controls Prime Knob The Prime Knob directs fluid to either the Cup or the Spray Tip. When priming, it is used to purge air from the pump. Your sprayer will not spray with air in the pump. Turn Prime Knob up to PRIME position when priming the sprayer or to relieve system pressure.
Grounding Instructions Grounding Instructions (Oil-Based or Flammable Materials) Pails Oil-based or flammable fluids: follow local codes and regulations. Use only conductive metal pails, placed on a grounded surface The equipment must be grounded to such as concrete. reduce the risk of static sparking. A static spark can cause fumes to ignite or Do not place pail on a non-conductive explode.
Setup Setup Pressure Relief Procedure Hold metal tip guard nut firmly to a grounded metal pail. Point Spray Gun into pail, disengage Trigger Lock, and trigger the Spray Gun to relieve system pressure. This sprayer builds up an internal pressure of 2000 psi (138 bar, 14 MPa) during use.
Setup Sprayer Setup Verify a clean Pump Filter is installed in the bottom of the Cup at the pump inlet. Use the black, 60 mesh filter with paints and the blue, 100 mesh filter with stains and thin materials. Flammable fumes (such as solvent and NOTE: A dirty or plugged Pump Filter will paint fumes) in work area can ignite or result in poor sprayer operation or loss of...
Setup Belt Setup Spray Gun will hook on the outside of the sprayer as shown for hands-free mobility. Install Belt Holster onto Belt located per the user’s preference (left side, right side, or back side). To remove sprayer from Belt, press the Holster Release Clip and pull up on the sprayer.
Startup Startup Always start with a fully charged Battery. Install fully charged Battery onto Do not splash or immerse Battery or sprayer. charger in water or solvents. See Battery and charger information shipped with the sprayer. Replace and charge Battery only in a well-ventilated area and away from flammable or combustible materials, Verify Storage Plug is OPEN.
Page 15
Startup Turn the Prime Knob forward to SPRAY position. To prime the Hose and Spray Gun, point the Spray Gun into a waste pail and pull the Trigger for 10 seconds or until there is a steady stream of paint. This will purge air (and storage fluid) from the Hose and Gun.
NOTE: For proper spraying operation use only Graco FFLP family of tips with your Spray Gun. The Flow Control allows for precise pressure adjustment. To reduce overspray, always...
Spraying Spray Techniques Triggering Timing Use a piece of scrap cardboard to practice Pull Trigger after starting stroke. Release these basic spraying techniques before you Trigger before end of stroke. Spray Gun must begin spraying the surface. be moving when Trigger is pulled and released.
Spraying Clear Tip Clogs Engage Trigger Lock. Return Spray Tip to SPRAY position. Disengage Trigger Lock and continue spraying. To avoid serious injury from skin injection, do not put your hand in front of the Spray Tip or Spray Tip Guard. Release Trigger.
Spray Tip when installing or removing the Spray Tip and Spray Tip Guard. NOTE: For proper spraying operation use only Graco FFLP family of tips with your Spray Gun. Perform Pressure Relief Procedure, page 11.
Spraying Cup Refills If desired, remove sprayer from the Belt by pressing the Holster Release Clip and pulling up on the sprayer. Flammable fumes (such as solvent and paint fumes) in work area can ignite or explode. See Grounding Instructions, page 10. Do not spray flammable or combustible liquids in a confined area.
Spraying Pause in Spraying NOTE: The Cup Lid hooks onto the sprayer while refilling the Cup. Paint will dry quickly and cause clogs in the sprayer. Follow these steps whenever you pause spraying for 5 minutes to 2 hours. Engage Trigger Lock and remove Battery from sprayer.
Do not store solvents other than mineral spirits in sprayer. Always flush with Graco Pump Armor prior to storage. Turn Prime Knob up to PRIME position to relieve system pressure.
Page 23
Cleanup Remove Cup Lid and pour extra paint Circulate cleaning fluid, fill Cup half-full back into paint can. of cleaning fluid, see Cleaning Fluid Compatibility, page 26, and reinstall Cup Lid. Verify Storage Plug is OPEN. Verify the Prime Knob is pointed up in the PRIME position and turn Spray Tip to the UNCLOG position.
Page 24
Cleanup Spray cleaning fluid: Clean Cup, Cup Lid and Pump Filter in warm water. Turn Prime Knob forward to SPRAY position and verify Spray 10. Wipe out Cup Support with wet rag. Tip is in the UNCLOG position. Reinstall Cup, Pump Filter and Cup Lid back into the Cup Support.
Storage Storage Storage NOTICE • Circulate and spray a small amount of Failure to store sprayer with Pump Armor Pump Armor Storage Fluid. can result in operational problems the next • Engage Trigger Lock time you spray. Always circulate Pump •...
Reference Reference Cleaning Fluid Compatibility Oil-Based or Flammable or Water-Based Materials • When spraying water-based materials, flush the system thoroughly with water. • When spraying oil-based or flammable materials, flush the system thoroughly with mineral spirits or compatible, flushing solvent. •...
Recycling and Disposal Recycling and Disposal End of Product Life • At the end of the product’s useful life, Remove motors, batteries, circuit dismantle and recycle it in a responsible boards, LCDs (liquid crystal displays), manner. and other electronic components. Recycle according to applicable •...
Troubleshooting Troubleshooting Check everything in this Troubleshooting Table before you bring the sprayer to an authorized service center. Sprayer Diagnostics Problem Cause Solution Sprayer makes no Diagnostic Light blinks two times when Replace Battery with a charged sound when Trigger is Trigger is pulled.
Page 29
Troubleshooting Problem Cause Solution Sprayer sprays with Flow Control is set too low. Increase speed until an poor results acceptable pattern is achieved. No air allowed into Cup. Make certain the Storage Plug on the Cup Lid is open when spraying.
Page 30
Troubleshooting Spray Pattern Diagnostics Problem Cause Solution Spray pattern is uneven: Operator is moving too Slow speed of movement. fast while spraying. Spray tip is clogged. Unclog spray tip or clean spray tip see Clear Tip Clogs, page Material difficult to Increase speed until desired atomize.
Page 31
Troubleshooting Problem Cause Solution Spray pattern is too wide: Sprayer is too far away Move sprayer closer to surface. from target surface. Incorrect spray tip for Install different size spray tip. application of material. See Spray Tip Installation, page 19. Spray pattern “spits”...
Replacement Parts Parts List Order Ref. Description Part No. 18H072 Kit, pump assembly includes 3, 4 18H073 Kit, filter, 60 mesh, 3 pack 18H074 Kit, filter, 100 mesh, 3 pack 18H075 Kit, outlet valve repair includes 3 of 3a, 2 of 3b, 2 of 25, 1 of 26, 3 of 27, 1 of 15 Outlet valve assembly Outlet valve plug...
Page 34
Replacement Parts Order Ref. Description Part No. 28▲ 18H084 Kit, warning labels Medical alert card (not shown) 17R476 English, Spanish, Portuguese (Brazil) 17A134 English, Chinese, Korean ▲ 179960 English, Spanish, French 17F690 Dutch, German, Italian 18H085 Kit, ground 18F891 Belt 18F810 Adapter, belt slide 18H056...
Technical Specifications Technical Specifications Quickshot Sprayer U.S. Metric Max Working Pressure 2000 psi 14 MPa, 138bar Weight 6.4 lb 2.9 kg Dimensions: Length 12 in. 30.5 cm Width 6 in. 15.2 cm Height 10.5 in. 26.7 cm Storage Temperature Range ◆❖ 32°...
With the exception of any special, extended, or limited warranty published by Graco, Graco will, for a period of twelve months from the date of sale, repair or replace any part of the equipment determined by Graco to be defective. This warranty applies only when the equipment is installed, operated and maintained in accordance with Graco’s written recommendations.
Need help?
Do you have a question about the QuickShot 20B473 and is the answer not in the manual?
Questions and answers