ST STM32 User Manual
Nucleo board software development tools
Hide thumbs
Also See for STM32:
- User manual (85 pages) ,
- Getting started (49 pages) ,
- Application note (49 pages)
Table of Contents
Advertisement
Quick Links
Introduction
The STM32 Nucleo board is a low-cost and easy-to-use development platform used to
quickly evaluate and start a development with an STM32 in 32-pin package, 64-pin package
and 144-pin package.
This document provides guidelines to beginners on how to build and run a sample
application and allows them to build and debug their application. It has the following
structure:
• The first chapter presents software and hardware requirements (some toolchains
supporting the STM32 families, ST-LINK/V2-1 installation and firmware package
presentation).
• The second chapter provides step by step guideline on how to build and debug an
application using some toolchains:
– IAR Embedded Workbench
– Microcontroller Development Kit for ARM
– TrueSTUDIO
– System Workbench for STM32 (SW4STM32) by AC6
This manual does not cover all the topics relevant to software development environments,
but it demonstrates the first basic steps necessary to get started with the
compilers/debuggers and offers links to the documents needed to fully understand every
single step.
All boards belonging to the STM32 MCU Nucleo line are supported.
January 2016
Getting started with STM32 Nucleo board software
®
®
®
by Atollic
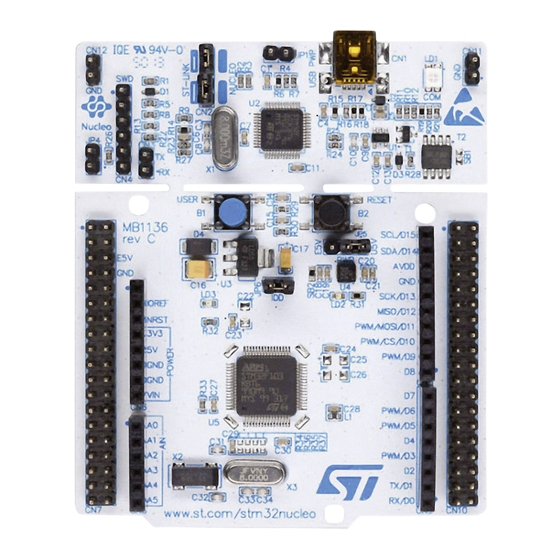
Figure 1. Nucleo development tools
DocID025840 Rev 5
®
for ARM
(EWARM) by IAR systems
®
(MDK-ARM) by Keil
UM1727
User manual
development tools
®
®
www.st.com
1/22
Advertisement
Table of Contents

Related Manuals for ST STM32


Summary of Contents for ST STM32
-
Page 1: Figure 1. Nucleo Development Tools
Introduction The STM32 Nucleo board is a low-cost and easy-to-use development platform used to quickly evaluate and start a development with an STM32 in 32-pin package, 64-pin package and 144-pin package. This document provides guidelines to beginners on how to build and run a sample application and allows them to build and debug their application. -
Page 2: Table Of Contents
ST-LINK/V2-1 installation ........7... - Page 3 UM1727 List of figures List of figures Figure 1. Nucleo development tools ..........1 Figure 2.
-
Page 4: System Requirements
Section Download the STM32 Nucleo firmware from the www.st.com/stm32nucleo webpage. Establish the connection with the STM32 Nucleo board, by connecting CN1 of the Nucleo board to the USB port of the PC (Figure 2,Figure 3 Figure 4 show the connector CN1 inside the red circle). -
Page 5: Figure 3. Connector Cn1 For Nucleo 64 Board
UM1727 System requirements Figure 3. Connector CN1 for Nucleo 64 board Figure 4. Connector CN1 for Nucleo 32 board DocID025840 Rev 5 5/22... -
Page 6: Ides Supporting Stm32 Families
SW4STM32 v1.5 and later – No limitation Information on the toolchain version supporting the STM32 device is available on toolchain release note at third-party web site. a. Registration before the download is required. b. The device support pack is separate from the MDK-ARM releases. -
Page 7: St-Link/V2-1 Installation
The ST-Link_V2_USB.exe file is automatically executed when installing the software toolchain. Complementary information on the firmware package content and the STM32 Nucleo requirements is available on the Getting started with the STM32 Nucleo board firmware package UM1726 User manual at the www.st.com website. -
Page 8: Firmware Package
Firmware package UM1727 Firmware package The STM32 Nucleo examples, applications and demonstration are provided in one single .zip file. The extraction of the .zip file generates one folder, STM32 Nucleo_FW_VX.Y.Z, which contains the following subfolders (see Figure Figure 5. Package contents •... -
Page 9: Ewarm Toolchain
UM1727 Firmware package 4.1.1 EWARM toolchain The following procedure explains how to compile, link and execute an existing EWARM project. Open IAR Embedded Workbench for ARM (EWARM). Figure 6 shows the basic names of the windows referred to in this document: Figure 6. -
Page 10: Figure 8. Download And Debug Button
Firmware package UM1727 In IAR Embedded Workbench IDE, from the Project menu, select Download and Debug or, alternatively, click the Download and Debug button in the toolbar, to program the Flash memory and start debugging (see Figure Figure 8. Download and debug button The debugger in IAR Embedded Workbench can be used to debug source code at C and assembly levels, set breakpoints, monitor individual variables and watch events during the code execution (see... -
Page 11: Mdk-Arm Toolchain
UM1727 Firmware package Figure 10. Go button 4.1.2 MDK-ARM toolchain Open Keil MDK-ARM Microcontroller Development Kit. Figure 11 shows the basic names of the "Keil µvision5" windows, to which this document refers. Figure 11. µvision5 IDE In the Project menu, select Open Project... Browse to select either an example or a demonstration or a template project file and click Open to launch it in the Project window. -
Page 12: Figure 12. Mdk-Arm Project Successfully Compiled
Firmware package UM1727 Figure 12. MDK-ARM project successfully compiled If user needs to change his project settings (Include and preprocessor defines), he must go through the project options: – For Include directories: Project>Options for Target > C/C++ > Include Paths –... -
Page 13: Figure 14. Mdk-Arm Debugger Screen
UM1727 Firmware package Figure 14. MDK-ARM debugger screen To run the application from the Debug menu, select Run. Alternatively, click the Run button in the toolbar to run the application (see Figure 15). Figure 15. Run button DocID025840 Rev 5 13/22... -
Page 14: Truestudio Toolchain
Firmware package UM1727 4.1.3 TrueSTUDIO toolchain Open Atollic TrueSTUDIO for ARM product. The program launches and prompts for the workspace location. Figure 16. TrueSTUDIO workspace launcher dialog box Browse to select a TrueSTUDIO workspace of either an example or a demonstration or a template workspace file and click OK to load it. -
Page 15: Figure 17. Atollic Truestudio Import Source Select Dialog Box
UM1727 Firmware package Figure 17. Atollic TrueSTUDIO import source select dialog box Click Select root directory and browse to the TrueSTUDIO workspace folder, as showed in Figure Figure 18. Atollic TrueSTUDIO import projects dialog box DocID025840 Rev 5 15/22... -
Page 16: Figure 19. Truestudio Project Successfully Compiled
Firmware package UM1727 In the Projects panel, select the project and click Finish. In the Project Explorer, select the project, open the Project menu, and click Build Project. If the project is successfully compiled, the following messages will be displayed on the console window (see Figure 19). -
Page 17: Figure 20. Truestudio Debug Window
UM1727 Firmware package Figure 20. TrueSTUDIO debug window The debugger in the Atollic TrueSTUDIO can be used to debug source code at C and assembly levels, set breakpoints, monitor individual variables and watch events during the code execution. To run the application, from the Run menu, select Resume, or alternatively click the Resume button in the toolbar. -
Page 18: Sw4Stm32 Toolchain
Firmware package UM1727 4.1.4 SW4STM32 toolchain Open the AC6 SW4STM32 for STM32. The program launches and prompts for the workspace location (See Figure 21). Figure 21. SW4STM32 workspace launcher dialog box Browse to select a SW4STM32 workspace of either an example or a demonstration or a template workspace file and click OK to load it. -
Page 19: Figure 23. Sw4Stm32 Import Projects Dialog Box
UM1727 Firmware package Click Select root directory, browse to the SW4STM32 workspace folder (See Figure 23). Figure 23. SW4STM32 import projects dialog box In the Projects panel, select the project and click Finish. In the Project Explorer, select the project, open the Project menu, and click Build Project. -
Page 20: Figure 25. Sw4Stm32 Debug Window
Firmware package UM1727 To change the project settings (Include directories and preprocessor defines), simply go through Project>Properties, select C/C++ Build>Settings from the left panel: • For Include directories follow the path: C Compiler>Directories>Include path • For pre-processor defines follow the path: C Compiler>Symbols>... -
Page 21: Revision History
Revision Changes 19-May-2014 Initial release Added new part numbers in the cover page. 20-Jun-2014 Removed Table1 Nucleo board General information. Replaced all rpns of NUCLEO with reference to the “STM32 MCU 09-Sep-2014 Nucleo” line. Added Section 4.1.4: SW4STM32 toolchain. 30-Nov-2015... - Page 22 ST products and/or to this document at any time without notice. Purchasers should obtain the latest relevant information on ST products before placing orders. ST products are sold pursuant to ST’s terms and conditions of sale in place at the time of order acknowledgement.
Need help?
Do you have a question about the STM32 and is the answer not in the manual?
Questions and answers