
Related Manuals for Yeastar Technology TE200


Summary of Contents for Yeastar Technology TE200
- Page 1 TE200 VoIP Gateway User Manual Version 61.0.0.7 Yeastar Information Technology Co. Ltd...
- Page 2 Technology Co., Ltd. Under the law, reproducing includes translating into another language or format. Declaration of Conformity Hereby, Yeastar Information Technology Co., Ltd. declares that Yeastar TE200 gateway is in conformity with the essential requirements and other relevant provisions of the CE, FCC. Warranty The information in this document is subject to change without notice.
-
Page 3: Table Of Contents
TE200 User Manual Table of Contents 1. INTRODUCTION ..........................5 1.1 Features .................... 5 1.2 Hardware Specification ................ 6 1.2.1 Exterior Appearance ....................6 2. SYSTEM SETUP ..........................8 2.1 Connection Drawing ................8 2.2 Connecting Ethernet Line ..............8 2.3 Supplying Power ................. 8 3 ADMINISTRATOR LOGIN ........................ - Page 4 TE200 User Manual 5.2.2 IP Blocklist ........................ 25 5.3 system Preferences ................26 5.3.1 Password Settings ....................26 5.3.2 Date and Time ......................27 5.3.3 Backup and Restore ....................28 5.3.4 Reset and Reboot .....................29 5.3.5 Firmware Update ..................... 29 Upgrade through HTTP ..................... 30 Upgrade through TFTP ......................30...
-
Page 5: Introduction
Yeastar TE200- Bridge the gap between E1/T1/J1 and VoIP networks Yeastar TE200 offers SMBs cost effective additions to legacy telephone systems to bring the true benefits of VoIP. TE200 is a dual-port VoIP E1/T1/J1 gateway (VoIP to E1/T1/J1, and E1/T1/J1 to VoIP). Each E1 trunk supports up to 30 concurrent calls. -
Page 6: Hardware Specification
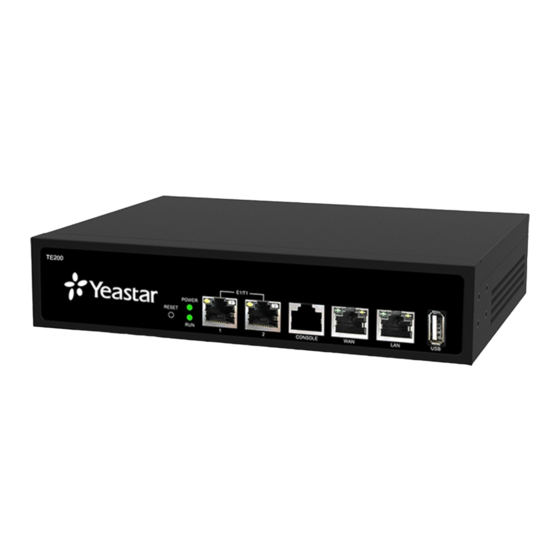
TE200 User Manual 1.2 Hardware Specification 1.2.1 Exterior Appearance Figure 1-1 Yeastar TE200 Front Panel Table 1-1 Front Panel Descriptions Identifying Reset Button Press and hold to reset to factory defaults. Power Indicator Indicates the power status. • On: The power is switched on. - Page 7 TE200 User Manual Figure 1-2 Yeastar TE200 Back Panel Table 1-2 Back Panel Descriptions Identifying ① Power Switch Press this button to switch on/off the device. ② Power Inlet Connect the power supply to the port. ③ Protective Earth Protect the personnel and the equipment.
-
Page 8: System Setup
2.3 Supplying Power Please follow the steps below to connect the TE200 unit to a power outlet: 1. Connect the small end of the power cable to the power input port on the TE200 back panel, and plug the other end of the cable into a 100V~240V AC power outlet. -
Page 9: Administrator Login
3 Administrator Login From your web browser, enter the IP address of the Yeastar TE200. If this is the first time you are configuring TE200, please use the default settings below (your PC should be in the same local network with TE200): IP Address: http://192.168.5.150... -
Page 10: Status
TE200 User Manual 4. Status Click to check the status of TE200, including the system’s status and the detailed reports. 4.1 System Status In this page, we can check the status of the system, including IP trunk status, E1/T1 status, network status and system information. -
Page 11: E1/T1 Status
TE200 User Manual Failed Trunk registration failed. 4.1.2 E1/T1 Status Figure 4-2 E1/T1 Status Table 4-3 Description of E1 Trunk Status Status Description Connected successfully; data stream on the trunk is normal; but the trunk may not work if there is something wrong with the E1 trunk communication protocol. -
Page 12: Network Status
TE200 User Manual Offered The channel is accepting an incoming call. The channel is requesting to hang up, but the line Disconnected hasn't be released by the other end. At least one end is being blocked on the channel. Blocked... -
Page 13: Reports
TE200 User Manual Figure 4-4 System Info 4.2 Reports On this page, you can check the call logs and system logs, which can be used to debug the problem you encountered. 4.2.1 Call logs The call log captures all call details, including time, caller number, callee number, call type, call duration, etc. -
Page 14: System Logs
TE200 User Manual 4.2.2 System logs You can download and delete the system logs of TE200. Figure 4-6 System Logs Options ·Enable Hardware Log Save the information of hardware; (up to 4 log files) ·Enable Normal Log Save the prompt information; (up to 16 log files) ·Enable Web Log... - Page 15 TE200 User Manual Packet Capture Tool This feature is used to capture packets. Users can specify the destination IP address and port to get the packets. ·IP Specify the destination IP address to get the packets. ·Port Specify the destination Port to get the packets.
-
Page 16: System
Figure 5-1 LAN Settings ·DHCP If this option is set as yes, TE200 will act as DHCP client to get an available IP address from your local network. Not recommended or you cannot access TE200 without the right IP address. - Page 17 ·Hostname Set the host name for TE200. ·IP Address Set the IP Address for TE200. It is recommended to configure a static IP address for TE200. ·Subnet Mask Set the subnet mask for TE200. ·Gateway Set the gateway for TE200.
-
Page 18: Wan Settings
TE200 User Manual 5.1.2 WAN Settings Figure 5-2 WAN Settings 3 connection types are supported: DHCP (obtain an IP automatically), PPPoE, and Static IP Address. Note: 1. WAN port is disabled by default. 2. WAN port cannot be used as a router to route the internet packages from WAN port to LAN port. -
Page 19: Ddns Settings
TE200 User Manual ·Static IP Address If your ISP says that you are connecting through a static or fixed IP address from your ISP, perform these steps: Step1: Select Static IP Address as the WAN Connection Type. Step2: Enter the IP Address. -
Page 20: Static Route
TE200 will have more than one internet connection in some situations but it has only one default gateway. You will need to set some Static Route for TE200 to force it to go out through different gateway when access to different internet. -
Page 21: Firewall Settings
TE200 User Manual ·Subnet Mask Specify the destination network portion. ·Gateway Define which gateway TE200 will go through when access to the destination network. ·Metric The cost of a route is calculated by using what are called routing metric. Routing metrics are assigned to routes by routing protocols to provide measurable statistic which can be used to judge how useful (how low cost) a route is. -
Page 22: Firewall Rules
TE200 User Manual 5.2.1 Firewall Rules Figure 5-5 Firewall Settings 1) General Settings ·Enable Firewall Enable the firewall to protect the device. You should reboot the device to make the firewall run successfully. ·Disable Ping Enable this item; net ping from remote hosts will be dropped. - Page 23 TE200 User Manual 2) Common Rules There are no default rules inside; you can create them as required. Figure 5-6 Add Firewall Rule ·Name A name for this rule, e.g. ‘HTTP’. ·Description Simple description for this rule. E.g.: Accept the specific host to access the web interface for configuration.
- Page 24 A~F are not case sensitive. Note: The MAC address of a remote device will be changed when data reach TE200. So filtering MAC address of remote devices will not work. ·Action Accept: Accept the access from remote hosts. Drop: Drop the access from remote hosts.
-
Page 25: Ip Blocklist
TE200 User Manual ·Rate The maximum packets or connections can be handled per unit time. E.g.: (Port: 8022 Protocol: TCP Rate: 10/minute) means maximum 10 TCP connections to port 8022 can be handled per minute, the eleventh connection will be refused directly. -
Page 26: System Preferences
TE200 User Manual Protocol · Auto defense protocol. TCP or UDP. IP Packets · Allowed IP packets number in the specific time interval. Time interval · The time interval to receive IP packets. For example, IP packets 90,time interval 60 means 90 IP packets are allowed in 60 seconds. -
Page 27: Date And Time
Figure 5-11 Date and Time Settings ·Time Zone Choose the time zone for TE200. ·Daylight Saving Time Set the mode to Automatic or disabled . ·Automatically Synchronize With an Internet Time Server Enter the NTP server so that TE200 will update the time automatically. 27/57... -
Page 28: Backup And Restore
Enable this feature to set the time to your local right time manually. 5.3.3 Backup and Restore You can backup up the configurations before reset TE200 to factory defaults, and then restore it using this package. Figure 5-12 Backup and Restore To restore the backup package, please click Upload a Backup, then upload it from your local PC. -
Page 29: Reset And Reboot
5.3.5 Firmware Update TE200 can be upgraded to a new firmware version via network or locally. Users could upgrade firmware via HTTP or TFTP. Please go to System→ System Preferences→ Firmware Update to do upgrade. -
Page 30: Upgrade Through Http
3. If you are trying to upgrade through HTTP, please make sure that your TE200 is able to visit external network, or it cannot access Yeastar website to get the firmware file, causing the upgrade fail. Upgrade through HTTP On the Firmware Upgrade page, choose HTTP URL. - Page 31 TE200 User Manual Figure 5-16 Configure Tftpd32 Log in to the TE200 Web page and go to System→System Step3. Preferences→Firmware Update, choose “TFTP Server”. 1) TFTP Server: fill in IP address of tftpd32 server (your PC’s IP address). 2) File Name: enter the name of firmware update. It should be a BIN file name.
-
Page 32: Gateway
TE200 User Manual 6. Gateway 6.1 Digital Trunk On this page you can configure the details of the E1/T1 trunk. Figure 6-1 E1/T1 Trunk Click Edit on a desired trunk and modify its properties in the pop-up window. 32/57... - Page 33 TE200 User Manual Figure 6-2 Edit E1/T1 Trunk 1) General Settings ·Mode Type E1 / T1 / J1 ·Signaling PRI,MFC/R2,SS7,E&M .Linecoding HDB3, AMI ·Codec Default: A-Law, U-Law. ·Echo Cancellation Disable or enable echo cancellation, it is recommended turn it on.
- Page 34 CPE over facility). ·Over Lap Dial Define whether TE200 can dial this switch using overlap digits. If you need Direct Dial-in (DDI; in German "Durchwahl") you should change this to yes, then TE200 will wait after the last digit it receives.
- Page 35 TE200 User Manual ·Remote Dialplan Called number type ·Remote Number Type Called number identification ·Location Dialplan Calling number type ·Location Number Type Calling number identification Screen Indicator(SI) The SI provides information on the source and the quality of the provided information.
- Page 36 TE200 User Manual Prefix you have set here will be added before the CID. So you can know this is an international call before you answer it. ·National Prefix When there are national calls coming in via this BRI trunk, the National Prefix you have set here will be added before the CID.
-
Page 37: Voip Settings
There are 3 types of VoIP trunks: Account, Trunk and Service Provider. Figure 6-3 VoIP Trunks 1) Account It’s a SIP account created in TE200 so that the other devices can register SIP trunk at their side using these information. Figure 6-4 SIP Account... - Page 38 Design the password for other device to register to. 2) Trunk It’s a SIP trunk configured in TE200 to register to the SIP provider. Before configuring the TE200, please confirm with the vendor in advance that the trunk is working properly.
- Page 39 TE200 User Manual ·Trunk type: Click the Trunk Type drop-down and select Trunk. ·Provider name: A unique label to help you identify this trunk when listed in outbound rules, incoming rules etc. Eg: 'yeastar'. ·Hostname/IP: Service provider’s hostname or IP address. 5060 is the standard port number used by SIP protocol.
- Page 40 TE200 User Manual Figure 6-6 Service Provider SIP Trunk ·Trunk type: Click the Trunk Type drop-down and select Service Provider. ·Provider Name A unique label would help to you identify this trunk. Ex: 'Provider2'. ·Hostname/IP Service provider’s hostname or IP address.
-
Page 41: Sip Settings
TE200 User Manual 6.2.2 SIP Settings Figure 6-7 General Settings 1) General ·UDP Port Used for sip registrations.Default value is 5060. ·TCP Port Used for sip registrations.Default value is 5060. ·TLS Port Used for sip registrations.Default value is 5061. ·RTP Port Start Beginning of RTP port range. - Page 42 . Default is 20 seconds. ·Calling Channel Codec Priority Once enabled, when dialing out via SIP/SPS trunks, the codec of calling channel will be selected in preference. If not, TE200 will follow the priority in your SIP/SPS trunks. ·DNS SRV Look Up If your SIP trunk contains more than one IP address, enable this option.
- Page 43 TE200 User Manual ·User Agent To change the user agent parameter of asterisk, you should change it if needed. 2) NAT Note: Configuration of this section is only required when using remote registry. Figure 6-8 NAT Settings ·Enable STUN STUN (Simple Traversal of UDP through NATs) is a protocol for assisting devices behind a NAT firewall or router with their packet routing.
- Page 44 TE200 User Manual queries periodically. This setting is only required when your public IP address is not static. It is recommended that a static public IP address be used with this system. Please contact your ISP for more information. ·External Refresh Interval If an external host has been supplied, you may specify how often the system will perform a DNS query on this host.
- Page 45 TE200 User Manual ·Allow RTP Reinvite By default, the system will route media steams from SIP endpoints through itself. Enabling this option causes the system to attempt to negotiate the endpoints to route packets to each other directly, bypassing the system. It is not always possible for the system to negotiate endpoint-to-endpoint media routing.
- Page 46 TE200 User Manual SPEEX: Speex is an Open Source/Free Software patent-free audio compression format designed for speech. The Speex Project aims to lower the barrier of entry for voice applications by providing a free alternative to expensive proprietary speech codecs. Moreover, Speex is well-adapted to Internet applications and provides useful features that are not present in most other codecs.
- Page 47 TE200 User Manual 5) T.38 Settings on this page is for the purpose of improving receiving and sending T.38 FAX. Figure 6-11 T.38 Settings Table 6-1 Description of T.38 Settings Description Items Re-invite SDP Not Add T.38 If set to Yes, SDP in re-invite packet will not add Attributes T.38 attributes.
- Page 48 TE200 User Manual ·To Field Where to get the DID in sip packet. ·180 Ringing It is set when the telecom provider needs. Usually it is not needed. ·Remote Party ID Whether send Remote-Party-ID on SIP header. Default no. ·Pedantic Enable checking of tags in headers, international character conversations in URIs and multiline formatted headers for strict, SIP compatibility.
-
Page 49: Trunk Group
TE200 User Manual 6.2.3 Trunk Group On this page, you can group multiple trunks into one group for setting up Routes list. Figure 6-13 Trunk Group Click Add New Trunk Group to add a new trunk group. Figure 6-14 Edit Trunk Group Group name Specify a name to help you identify this trunk group. -
Page 50: General Preferences
TE200 User Manual trunks to the right side as a group. 6.2.4 General Preferences Figure 6-15 General Preference .MAX call duration The absolute maximum amount of time permitted for a call. A setting of 0 disables the timeout. Default value is 6000s. -
Page 51: Routes Settings
TE200 User Manual 6.3 Routes Settings There are two default routes to route the calls from E1 to SIP and SIP to E1. In this page, we can route the call from one trunk to another trunk or a trunk group. - Page 52 TE200 User Manual Route name: Specify a name to help you identify this route. Match incoming calls: Choose the trunk or trunk group for the incoming calls. Handle matched incoming calls: Choose the trunk or trunk group to route the incoming calls to.
- Page 53 TE200 User Manual Match incoming calls: Choose the trunk or trunk group for the incoming calls. Inbound caller pattern: Match the prefix of caller ID for incoming calls. X: Any Digit from 0-9 Z: Any Digit from 1-9 N: Any Digit from 2-9 [12345-9]: Any digit in the brackets (in this example, 1,2,3,4,5,6,7,8,9) The ‘.’Character will match any remaining digits.
- Page 54 TE200 User Manual Send Call Through: Choose the trunk or trunk group to route the incoming calls to. T.38 Support: Enable T.38 fax in this outbound route. Note: Only for VoIP Trunk(only support protocol). Outbound Dial Pattern Outbound calls that match this dial pattern will use this outbound route. There...
-
Page 55: Blocklist
TE200 User Manual Prepend these digits before dialing These digits will be prepended to the phone number before the call is placed. For example, if a trunk requires 10 digit dialing, but users are more comfortable with 7 digit dialing, this field could be used to prepend a 3 digit area code to all 7 digit phone numbers before calls are placed. - Page 56 TE200 User Manual Figure 6-20 Custom prompts Click Upload a prompt to upload custom prompts. Figure 6-21 Upload prompt 56/57...
-
Page 57: Logout
TE200 User Manual 7. Logout Click to log out safely to the log in page. 57/57...
Need help?
Do you have a question about the TE200 and is the answer not in the manual?
Questions and answers