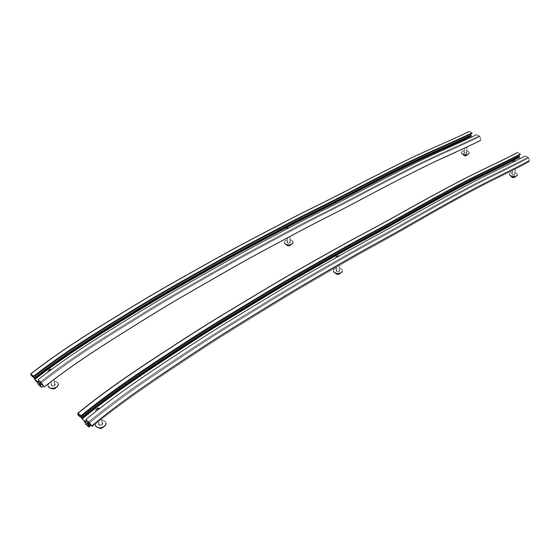
Front Runner Slimline II Quick Start Manual
For toyota revo extra cab (2016-current) tracks/1023mm
Hide thumbs
Also See for Slimline II:
- Fittings manual (23 pages) ,
- Manual (5 pages) ,
- Universal assembly instructions (27 pages)
Advertisement
Quick Links
front runner
Before you start, take a moment to familiarize yourself with the Fitting Instructions and the included components.
IT IS CRITICAL THAT ALL FRONT RUNNER PRODUCTS BE PROPERLY AND SECURELY ASSEMBLED AND ATTACHED TO YOUR VEHICLE. IMPROPER ATTACHMENT COULD
RESULT IN AN AUTOMOBILE ACCIDENT, AND COULD CAUSE SERIOUS BODILY INJURY OR DEATH. YOU ARE RESPONSIBLE FOR ASSEMBLING AND SECURING ALL FRONT
RUNNER PRODUCTS TO YOUR VEHICLE, CHECKING THE ATTACHMENTS PRIOR TO USE, AND PERIODICALLY INSPECTING THE PRODUCTS FOR ADJUSTMENT, WEAR AND
DAMAGE. THEREFORE, YOU MUST READ AND UNDERSTAND ALL OF THE INSTRUCTIONS AND PRECAUTIONS SUPPLIED WITH YOUR FRONT RUNNER PRODUCT PRIOR TO
INSTALLATION OR USE. IF YOU DO NOT UNDERSTAND ALL OF THE INSTRUCTIONS AND CAUTIONS, OR IF YOU HAVE NO MECHANICAL EXPERIENCE AND ARE NOT THOROUGHLY
FAMILIAR WITH THE INSTALLATION PROCEDURES, YOU SHOULD HAVE THE PRODUCT INSTALLED BY A PROFESSIONAL INSTALLER OR OTHER QUALIFIED PERSONNEL.
NOTE: Front Runner will not be responsible for any damage caused by the failure to install the product according to these instructions.
TRTH007_REV_A01
TOYOTA REVO Extra CAB (2016-CURRENT)
TRACKS / 1023MM
Thank you for purchasing a Front Runner Toyota Revo Extra Cab (2016-Current) Tracks / 1023mm.
Refer to Page 2 for a list of all the components, quantities and tools required.
IMPORTANT WARNING!
Please call us if you have any questions about the installation of this product.
READ ME!
1
TRTH007
© 2021 FRONT RUNNER VEHICLE OUTFITTERS
ENG
Advertisement

Summary of Contents for Front Runner Slimline II
- Page 1 FAMILIAR WITH THE INSTALLATION PROCEDURES, YOU SHOULD HAVE THE PRODUCT INSTALLED BY A PROFESSIONAL INSTALLER OR OTHER QUALIFIED PERSONNEL. NOTE: Front Runner will not be responsible for any damage caused by the failure to install the product according to these instructions.
- Page 2 Track - 1020mm Long (1 Left & 1 Right) Foam Strip M6 x 30 Button Head Bolt M6 Nyloc Nut Tin Snips Marker Sealant M6 x 19 x 1 Flat Washer Friend 10mm FIGURE 1.1 TRTH007_REV_A01 © 2021 FRONT RUNNER VEHICLE OUTFITTERS...
- Page 3 Cut the ditch molding across the mark made. Looking at the front of the ditch molding, measure 100mm backward from the front make a mark. Cut the ditch molding across the mark made and remove the middle section. TRTH007_REV_A01 © 2021 FRONT RUNNER VEHICLE OUTFITTERS...
- Page 4 Remove the Tracks and drill a 3mm pilot hole using the markings you have made. Widen the holes using a 6mm drill bit. TRTH007_REV_A01 © 2021 FRONT RUNNER VEHICLE OUTFITTERS...
- Page 5 IMPORTANT! FRONT RUNNER RACK KITS OFTEN HAVE A HIGHER LOAD RATING THAN THE VEHICLES THEY ARE MOUNTED TO. PLEASE REFER TO YOUR SPECIFIC VEHICLE MANUFACTURER FOR A RECOMMENDED ROOF RATING. FRONT RUNNER CANNOT BE RESPONSIBLE FOR IMPROPER LOADING BEYOND THE VEHICLE MANUFACTURER'S STATED LOAD CAPACITY.


Need help?
Do you have a question about the Slimline II and is the answer not in the manual?
Questions and answers