Advertisement
Available languages
Available languages
Quick Links
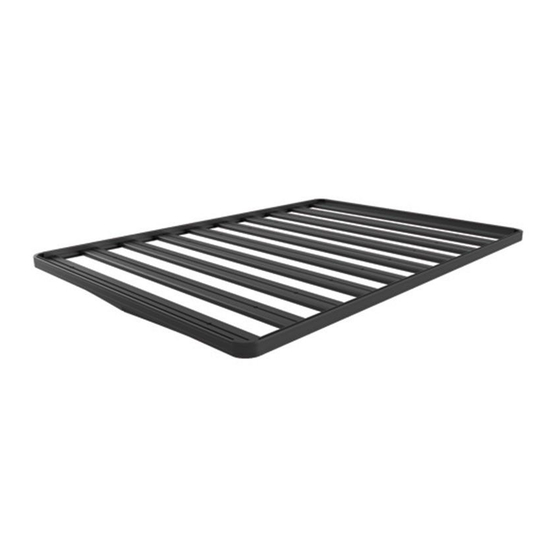
slimline ii tray
ENG
front runner
universal assembly
instructions
RRSTUNI
READ ME !
Thank you for purchasing a Front Runner Slimline II Tray.
Before you start, take a moment to familiarize yourself with the Fitting Instructions and the components received.
Refer to Page 2 for a list of all the components, quantities and tools required.
IMPORTANT WARNING!
IT IS CRITICAL THAT ALL FRONT RUNNER PRODUCTS BE PROPERLY AND SECURELY ASSEMBLED AND ATTACHED TO YOUR VEHICLE. IMPROPER ATTACHMENT COULD
RESULT IN AN AUTOMOBILE ACCIDENT, AND COULD CAUSE SERIOUS BODILY INJURY OR DEATH. YOU ARE RESPONSIBLE FOR ASSEMBLING AND SECURING ALL FRONT
RUNNER PRODUCTS TO YOUR VEHICLE, CHECKING THE ATTACHMENTS PRIOR TO USE, AND PERIODICALLY INSPECTING THE PRODUCTS FOR ADJUSTMENT, WEAR AND
DAMAGE. THEREFORE, YOU MUST READ AND UNDERSTAND ALL OF THE INSTRUCTIONS AND PRECAUTIONS SUPPLIED WITH YOUR FRONT RUNNER PRODUCT PRIOR TO
INSTALLATION OR USE. IF YOU DO NOT UNDERSTAND ALL OF THE INSTRUCTIONS AND CAUTIONS, OR IF YOU HAVE NO MECHANICAL EXPERIENCE AND ARE NOT THOROUGHLY
FAMILIAR WITH THE INSTALLATION PROCEDURES, YOU SHOULD HAVE THE PRODUCT INSTALLED BY A PROFESSIONAL INSTALLER OR OTHER QUALIFIED PERSONNEL.
NOTE: Front Runner will not be responsible for any damage caused by the failure to install the product according to these instructions.
Please call us if you have any questions about the installation of this product.
RRSTUNI_REV_A05
1
© 2019 FRONT RUNNER VEHICLE OUTFITTERS
Advertisement

Related Manuals for Front Runner SLIMLINE II TRAY


Summary of Contents for Front Runner SLIMLINE II TRAY
- Page 1 FAMILIAR WITH THE INSTALLATION PROCEDURES, YOU SHOULD HAVE THE PRODUCT INSTALLED BY A PROFESSIONAL INSTALLER OR OTHER QUALIFIED PERSONNEL. NOTE: Front Runner will not be responsible for any damage caused by the failure to install the product according to these instructions.
- Page 2 M8 x45 Button Head Bolt Thick Joiner Piece Thin Joiner Piece Side Profile Corner Combined Slat 28 X M8 x 25 Button Head Bolt 12 X Standard Slat M6 x 10 Button Head Bolt FIGURE 1.1 RRSTUNI_REV_A05 © 2019 FRONT RUNNER VEHICLE OUTFITTERS...
- Page 3 RACK ASSEMBLY - SIDE PROFILES NOTE: Skip this step if your Slimline II Tray is 1560mm or shorter. you will only have two Side Profiles and assembly is not required. If you have received four lengths of Side Profile (Item 5), you will need to join the pieces together using the Joiners (Items 3 &...
- Page 4 Combined Slat and Standard Slats, aligning the holes and loosely inserting the M8 x 25 Button Heads as you work your way to the Combined Slat at the other end. RRSTUNI_REV_A05 © 2019 FRONT RUNNER VEHICLE OUTFITTERS...
- Page 5 Push the Corner into position as shown, aligning the hole in the Corner with the Rivnut already inserted in the Combined Slat. Use a M6 x 12 Button Head Bolt (Item 10) and fasten the Corner in position. RRSTUNI_REV_A05 © 2019 FRONT RUNNER VEHICLE OUTFITTERS...
- Page 6 RACK ASSEMBLY - WIND DEFLECTOR IN THE BOX TOOLS NEEDED Slimline II Tray M8 Half Nut Wind Deflector (1LH + 1RH) Schnorr Washer M8 x 12 Button Head Bolt FIGURE 1.2 RRSTUNI_REV_A05 © 2019 FRONT RUNNER VEHICLE OUTFITTERS...
- Page 7 If you are going to put a Leg or Foot on the Combined Slat (Recommended), you will need to slide the M8 Bolt used for attaching these into the Machined Slots before assembling the Wind Deflector. Ensure that your Slimline II Tray is upside down. Check by looking at the product sticker.
- Page 8 Wind Deflectors slightly apart, leaving a gap of about 20 - 30mm. USEFULL TIP - PRE-LOAD TIE DOWN RINGS It is usefull to fit Tie-Down Rings (RRAC012) to your Front Runner Rack for future use before you fit any accessories. Insert the Tie Down Rings into the machined slots and position them in the center of the rack.
- Page 9 CHECK YOUR VEHICLE INSTALLATION GUIDE Now that your Slimline II Tray is assembled, get your Rack Kit Installation Guide out and follow the instructions to fit the Slimline II Tray to your specific vehicle. HOW TO CARE FOR YOUR FRONT RUNNER GEAR...
-
Page 10: Bitte Zuerst Lesen
BEFESTIGUNGEN VOR EINER VERWENDUNG REGELMÄßIG AUF EINSTELLUNG, ABNUTZUNG ODER SCHÄDEN ZU PRÜFEN. LIES DAHER UNBEDINGT VOR DER MONTAGE ODER DER VERWENDUNG ALLE MIT DEINEM FRONT RUNNER PRODUKT GELIEFERTEN ANWEISUNGEN UND HINWEISE. FALLS DU NICHT ALLE ANWEISUNGEN ODER HINWEISE VERSTEHST ODER DU KEINE TECHNISCHE ERFAHRUNG BESITZT UND MIT DEM ZUSAMENBAUEN NICHT VERTRAUT BIST, SOLLTEST DU DAS PRODUKT VON TECHNISCHEM FACHPERSONAL ODER EINER ANDERWEITIG QUALIFIZIERTEN PERSON VERBAUEN LASSEN. - Page 11 32 X M8 Selbstsichernde Mutter M8 x 45 Rundkopfschraube Dickes Verbindungsstück 4 MM 5 MM Dünnes Verbindungsstück Seitenprofil Eckstück Kombileiste 28 X M8 x 25 Rundkopfschraube 12 X Querleiste M6 x 10 Rundkopfschraube ABBILDUNG 1.1 RRSTUNI_REV_A04 © 2019 FRONT RUNNER OUTFITTERS...
- Page 12 Schiebe das zugehörige Seitenprofil über die zwei Verbindungsstücke und denk daran, eine selbstsichernde Mutter einzusetzen. Befestige auch diese Verbindung mit einer m8 x 45 Rundkopfschraube. Wiederhole die oben beschriebenen Schritte für die andere Seite. RRSTUNI_REV_A04 © 2019 FRONT RUNNER OUTFITTERS...
- Page 13 5 MM Kombileiste sein. Verwende eine M8 x 25 Rundkopfschraube (Teil 8) und ziehe sie mit einem 5 mm-Innensechskantschlüssel fest. Die Plattform bleibt mit der Unterseite nach oben gedreht, für die Montage der 7 Querleisten. RRSTUNI_REV_A04 © 2019 FRONT RUNNER OUTFITTERS...
- Page 14 Schau Dir nochmal Schritt 3.1 an - Schiebe danach die zweite Kombileiste in die zwei Seitenprofile und befestige sie, wie in Schritt 3.2 beschrieben. FESTZIEHEN ALLER SCHRAUBEN Ziehe mit Deinem 5 mm-Innensechskantschlüssel alle Rundkopfschrauben fest. Das empfohlene Drehmoment für die M8 Rundkopfschrauben ist 20 Nm oder 15 ftlb. RRSTUNI_REV_A04 © 2019 FRONT RUNNER OUTFITTERS...
- Page 15 Vergewissere Dich in der jeweiligen Montageanleitung, ob das der Fall ist. MONTAGE DES WINDABWEISERS INHALT DU BENÖTIGST Slimline II Dachträger M8 Halbmutter Windabweiser (1L + 1R) 5 MM Unterlegscheibe M8 x 12 Rundkopfschraube ABBILDUNG 1.2 RRSTUNI_REV_A04 © 2019 FRONT RUNNER OUTFITTERS...
- Page 16 (Teil 2, 4 & 5) wie dargestellt in die Kombileiste. Schiebe sie bis zur Mitte der Kombileiste, wobei Du sicherstellen musst, dass die Unterlegscheibe über der T-Nut sitzt. Montiere Teil 2, 4 & 5 wie abgebildet an beiden Windabweisern. RRSTUNI_REV_A04 © 2019 FRONT RUNNER OUTFITTERS...
- Page 17 (RRAC012) am Dachträger vor der Montage von zusätzlicher Ausrüstung bereits vorhanden sind. Einfach die Ringschrauben in die T-Nut auf den Leisten in der Mitte befestigen und somit vorbereitet sein, falls weitere Accessoires und Ausrüstung montiert werden soll. RRSTUNI_REV_A04 © 2019 FRONT RUNNER OUTFITTERS...
- Page 18 Im salzigen Küstenklima oder verschneiten Regionen, in denen Streusalz auf den Straßen genutzt wird, verwende auf Silikonbasis beschaffenes Öl oder Spray, um die Muttern und Schrauben dauerhaft vor Korrosion zu schützen. HOL DIR NOCH MEHR AUSRÜSTUNG VON FRONT RUNNER Besuche uns Online auf www.FrontRunnerOutfitters.com Markiere uns immer und überall! #FrontRunnerOutfitters #BornToRoam...
- Page 19 LOS PRODUCTOS PARA SU AJUSTE, DESGASTE Y DAÑOS. POR LO TANTO, DEBE LEER Y COMPRENDER TODAS LAS INSTRUCCIONES Y PRECAUCIONES SUMINISTRADAS CON SU PRODUCTO FRONT RUNNER ANTES DE LA INSTALACIÓN O EL USO. SI USTED NO ENTIENDE TODAS LAS INSTRUCCIONES Y PRECAUCIONES, O SI NO TIENE EXPERIENCIA MECÁNICA Y NO ESTÁ...
-
Page 20: Herramientas Necesarias
Pieza de ensamble gruesa Pieza de ensamble delgada Perfil lateral Esquina Barra combinada 28 X M8 x 25 Tornillo cabeza de botón 12 X Barra estándar M6 x 10 Tornillo cabeza de botón FIGURA 1.1 RRSTUNI_REV_A04 © 2019 FRONT RUNNER VEHICLE OUTFITTERS... - Page 21 Deslice el perfil lateral coincidente sobre las dos piezas de ensamble, recordando insertar una tuerca nyloc, y apriete una vez más usando un tornillo cabeza de botón M8 x 45. Repite los pasos anteriores para el otro lado. RRSTUNI_REV_A04 © 2019 FRONT RUNNER VEHICLE OUTFITTERS...
- Page 22 El orificio final del perfil lateral debe alinearse con el orificio en la barra combinada. Utilice un cabeza de botón M8 x 25 (artículo 8) y apriete ligeramente con una llave Allen de 5mm. RRSTUNI_REV_A04 © 2019 FRONT RUNNER VEHICLE OUTFITTERS...
- Page 23 Con su llave Allen de 5mm, apriete todos los tornillos cabeza de botón. El ajuste de par recomendado para los tornillos cabeza de botón M8 es de 20 Nm o 15 ft lb. © 2019 FRONT RUNNER VEHICLE OUTFITTERS RRSTUNI_REV_A04...
- Page 24 Schnorr está por encima del canal ranura en T. Ensamble los elementos 2, 4 y 5 a ambos deflectores de viento LH & RH (artículo 3) como se muestra. RRSTUNI_REV_A04 © 2019 FRONT RUNNER VEHICLE OUTFITTERS...
- Page 25 MONTAJE DE BACA - DEFLECTOR DE VIENTO EN LA CAJA HERRAMIENTAS NECESARIAS Baca portaequipaje Slimline II M8 Tornillo medio Deflector de viento (1LH + 1RH) Arandela de seguridad Schnorr M8 x 12 Tornillo cabeza de botón FIGURA 1.2 RRSTUNI_REV_A04 © 2019 FRONT RUNNER VEHICLE OUTFITTERS...
- Page 26 CONSEJO ÚTIL - ANILLOS DE AMARRE DE PRECARGA Es de mucha utilidad el colocar los anillos de amarre (RRAC012) en la baca portaequipajes de Front Runner para su uso futuro antes de colocar cualquier accesorio. Inserte los anillos de amarre por medio de las ranuras y colóquelos en el centro de...
- Page 27 ¡Es fácil! Cuida tu equipo Front Runner de la misma manera que haces con el exterior de tu vehículo: Enjuague con agua limpia y limpie con un paño suave y seco. Para manchas persistentes, usa un cepillo suave y un jabón suave.
Need help?
Do you have a question about the SLIMLINE II TRAY and is the answer not in the manual?
Questions and answers