Front Runner SLIMLINE II Fittings Manual
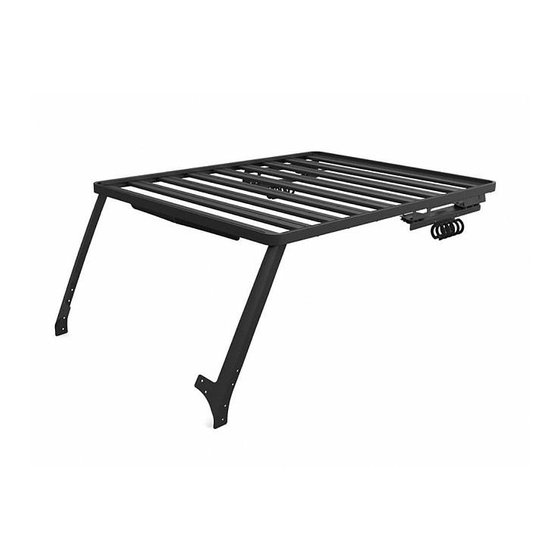
Jeep jk 3 door full tray extreme rack kit
Hide thumbs
Also See for SLIMLINE II:
- Quick start manual (5 pages) ,
- Manual (5 pages) ,
- Universal assembly instructions (27 pages)
Advertisement
Quick Links
NOTE: Your Jeep JK (3 Door) Extreme Roof Rack Kit consists of four boxes. (1) the Tray, (2) the Roll Bar
Brackets (FAJK005), (3) the Front Upright Supports (FAJK003) and (4) the Tray Support Brackets
(FAJK004).
IT IS CRITICAL THAT ALL FRONT RUNNER PRODUCTS BE PROPERLY AND SECURELY ASSEMBLED AND ATTACHED TO YOUR
VEHICLE. IMPROPER ATTACHMENT COULD RESULT IN AN AUTOMOBILE ACCIDENT, AND COULD CAUSE SERIOUS BODILY
INJURY OR DEATH TO YOU OR TO OTHERS. YOU ARE RESPONSIBLE FOR ASSEMBLING AND SECURING ALL FRONT RUNNER
PRODUCTS TO YOUR VEHICLE, CHECKING THE ATTACHMENTS PRIOR TO USE, AND PERIODICALLY INSPECTING THE
PRODUCTS FOR ADJUSTMENT, WEAR, AND DAMAGE. THEREFORE, YOU MUST READ AND UNDERSTAND ALL OF THE
INSTRUCTIONS AND CAUTIONS SUPPLIED WITH YOUR FRONT RUNNER PRODUCT PRIOR TO INSTALLATION OR USE. IF YOU DO
NOT UNDERSTAND ALL OF THE INSTRUCTIONS AND CAUTIONS, OR IF YOU HAVE NO MECHANICAL EXPERIENCE AND ARE NOT
THOROUGHLY FAMILIAR WITH THE INSTALLATION PROCEDURES, YOU SHOULD HAVE THE PRODUCT INSTALLED BY A
PROFESSIONAL INSTALLER OR OTHER QUALIFIED PERSONNEL.
REV_B03
JEEP JK 3 DOOR
SLIMLINE II FULL TRAY
EXTREME RACK KIT
IMPORTANT WARNING!
1
(
)
-
FAJK005 / KRJW016T
INSTALL TIME: 5 Hours
Advertisement

Related Manuals for Front Runner SLIMLINE II


Summary of Contents for Front Runner SLIMLINE II
- Page 1 VEHICLE. IMPROPER ATTACHMENT COULD RESULT IN AN AUTOMOBILE ACCIDENT, AND COULD CAUSE SERIOUS BODILY INJURY OR DEATH TO YOU OR TO OTHERS. YOU ARE RESPONSIBLE FOR ASSEMBLING AND SECURING ALL FRONT RUNNER PRODUCTS TO YOUR VEHICLE, CHECKING THE ATTACHMENTS PRIOR TO USE, AND PERIODICALLY INSPECTING THE PRODUCTS FOR ADJUSTMENT, WEAR, AND DAMAGE.
- Page 2 GET ORGANIZED You will need: a 3 door Jeep Wrangler Your ROLL BAR BRACKET box (FAJK005) contains: a Measuring Tape a 13mm Flat and 13mm Socket Wrench Item # Quantity Description REAR SUPPORT BRACKET PART A a T40 Torx Wrench REAR SUPPORT BRACKET PART B - (1 LEFT, 1 RIGHT) a Drill Machine M6 FLAT WASHER...
- Page 3 GET ORGANIZED...CONT. Your TRAY SUPPORT BRACKET box (FAJK004) contains: Item # Quantity Name M8 x 16 HEX BOLT M8 FLAT WASHER M8 NYLOC NUT TRAY SUPPORT BRACKET - (1 LEFT, 1 RIGHT) Your FRONT UPRIGHT SUPPORT box (FAJK003) contains: Item # Quantity Description M8 x 20 HEX BOLT...
- Page 4 REMOVE AND DRILL ROOF Remove the two Front T-top Roofs. Disconnect the power socket and water pipe in the back left corner of the vehicle. Using a T40 Torx Wrench, remove the six Torx Bolts holding the rear roof to the vehicle body.
- Page 5 REMOVE AND DRILL ROOF...CONT. ( FAJK004) Place the left and right Tray Support Brackets (Item 13) in position on the corresponding outer ribs as shown below. Mark the position of the four "feet" using a suitable marker. Remove the brackets. Using masking tape, tape the marked area on the roof where the four "feet"...
- Page 6 PREP AND INSTALL REAR SUPPORT ARMS ( FAJK005) Remove the speaker box so that you have access to the zips and padding that cover the vehicles roll bars. This is done by removing the the six bolts that hold it in place. Two bolts on the outside of each speaker and one bolt either side of the screws that hold the T-tops in place Loosen velcro, unzip and remove the padding covering both roll bars.
- Page 7 PREP AND INSTALL REAR SUPPORT ARMS...CONT. ( C ) Grab the two Rear Support Brackets (Items 1 & 2 from FAJK005 box). Line up the left and right brackets (Refer to block below) with the corresponding holes in the roof. With your black maker, mark the position of where the Rear Mounting Brackets need to bolt onto the roll bar.
- Page 8 INSTALL FRONT SUPPORT ARMS ( FAJK003) Grab your T40 Torx Wrench and remove the six bolts holding the Window Corner Plate in place. Be careful not to let the plate fall when removing the last bolt as this may result in damage to the paintwork of the part or your vehicle.
- Page 9 PREP FOR RACK INSTALL...CONT. If not already assembled, assemble your Tray as per the Universal Tray Assembly Instructions (Document RRSTUNI) NOTE: Before fitting the Wind Deflector, insert two M8 x 20 Hex Bolts (Item 14 from FAJK003 box) into the first slat (Combined Slat) using the machined slots. Slide a bolt to each of the outer corners.
- Page 10 MOUNT YOUR TRAY With the help of a friend, flip the Tray end over end so that it is in the upright position. (The Tray is flipped end over end so that bolts and brackets do not slide left and right). With one of you on either side of the Tray, lift the Tray and walk it into position above the vehicle, approaching from either the front or rear of the vehicle.
- Page 11 You'll find a small amount of settling has happened. Go on many more adventures, periodically checking all nuts, bolts, screws and fittings. Front Runner can not recommend a maximum weight carrying capacity. Please refer to your vehicle manufacturer's recommendations.
- Page 13 VEHICLE. IMPROPER ATTACHMENT COULD RESULT IN AN AUTOMOBILE ACCIDENT, AND COULD CAUSE SERIOUS BODILY INJURY OR DEATH TO YOU OR TO OTHERS. YOU ARE RESPONSIBLE FOR ASSEMBLING AND SECURING ALL FRONT RUNNER PRODUCTS TO YOUR VEHICLE, CHECKING THE ATTACHMENTS PRIOR TO USE, AND PERIODICALLY INSPECTING THE PRODUCTS FOR ADJUSTMENT, WEAR, AND DAMAGE.
- Page 14 GET ORGANIZED You will need: a 3 door Jeep Wrangler Your ROLL BAR BRACKET box (FAJK005) contains: a Measuring Tape a 13mm Flat and 13mm Socket Wrench Item # Quantity Description REAR SUPPORT BRACKET PART A a T40 Torx Wrench REAR SUPPORT BRACKET PART B - (1 LEFT, 1 RIGHT) a Drill Machine M6 FLAT WASHER...
- Page 15 GET ORGANIZED...CONT. Your TRAY SUPPORT BRACKET box (FAJK004) contains: Item # Quantity Name M8 x 16 HEX BOLT M8 FLAT WASHER M8 NYLOC NUT TRAY SUPPORT BRACKET - (1 LEFT, 1 RIGHT) Familiarize yourself with the parts and then step away from the work area and read through these instructions from beginning to end.
- Page 16 REMOVE AND DRILL ROOF...CONT. FAJK002 Using the T40 Torx Wrench, remove the two Torx Bolts, either side of the front seat headrests, holding the rear roof to the vehicle body. Grab a friend to help you lift the roof off and place it on a blanket or suitable work surface on the ground as not to damage it.
- Page 17 REMOVE AND DRILL ROOF...CONT. Using your drill machine and a 22mm Hole Saw, drill all the marked holes to 22mm. There is NO NEED for a lot of downward pressure. Let the drill do the work. Your job is to keep the drill steady. You don't want it slipping across your roof and scratching it! PREP AND INSTALL REAR SUPPORT ARMS ( FAJK005)
- Page 18 PREP AND INSTALL REAR SUPPORT ARMS...CONT. ( C ) Grab the two Rear Support Brackets (Items 1 & 2). Line up the left and right brackets (Refer to block below) with the corresponding holes in the roof. With your black maker, mark the position of where the Rear Mounting Brackets need to bolt onto the roll bar.
- Page 19 PREP FOR RACK INSTALL ( FAJK005) Clean the area around all the 22mm Clean the area around all the 22mm holes drilled in the roof with holes drilled in the roof with methylated spirits/denatured alcohol. methylated spirits/denatured alcohol. Insert the Aluminum Spacer (Item 6) Insert the Aluminum Spacer (Item 6) into the Foam Washer (Item 5) and into the Foam Washer (Item 5) and...
- Page 20 MOUNT YOUR TRAY With the help of a friend, flip the Tray end over end so that it is in the upright position. (The Tray is flipped end over end so that bolts and brackets do not slide left and right). With one of you on either side of the Tray, lift the Tray and walk it into position above the vehicle, approaching from the rear of the vehicle, making sure that the Wind Deflector faces forward.
- Page 21 You'll find a small amount of settling has happened. Go on many more adventures, periodically checking all nuts, bolts, screws and fittings. Front Runner can not recommend a maximum load carrying capacity. Please refer to your vehicle manufacturer's recommendations.
- Page 23 SEALING PLUG ASSEMBLY ASSEMBLE & FIT SEALING PLUGS Should you wish to remove the Rack from your vehicle, assemble the Sealing Plugs as shown in the exploded view below. Once assembled refer to the relevant section in your Rack Fitment Guide - Document KRJW****.
Need help?
Do you have a question about the SLIMLINE II and is the answer not in the manual?
Questions and answers