SMA SUNNY CENTRAL 500CP XT Installation Manual
Hide thumbs
Also See for SUNNY CENTRAL 500CP XT:
- User manual (156 pages) ,
- Installation manual (30 pages) ,
- Maintenance manual (70 pages)

Related Manuals for SMA SUNNY CENTRAL 500CP XT


Summary of Contents for SMA SUNNY CENTRAL 500CP XT
- Page 1 Installation Manual SUNNY CENTRAL 500CP XT / 630CP XT / 720CP XT / 760CP XT 800CP XT / 850CP XT / 900CP XT SCCPXT-IA-D7-en-42 | 98-105500.01 | Version 4.2 ENGLISH...
- Page 2 Legal Provisions The information contained in this document is the property of SMA Solar Technology AG. Publishing its content, either partially or in full, requires the written permission of SMA Solar Technology AG. Any internal company copying of the document for the purposes of evaluating the product or its correct implementation is allowed and does not require permission.
-
Page 3: Table Of Contents
SMA Solar Technology AG Table of Contents Table of Contents Information on this Document........... . . 6 Safety . - Page 4 Table of Contents SMA Solar Technology AG 7.7.2 Transporting the Sunny Central Using a Crane ..........32 7.7.3 Mounting the Roof of the Sunny Central .
- Page 5 17.1 Sunny Central 500CP XT ........
-
Page 6: Information On This Document
Installation Requirements - Important Information on Transportation and Installation for Technical Information Sunny Central 500CP XT ⁄ 630CP XT ⁄ 720CP XT ⁄ 760CP XT ⁄ 800CP XT ⁄ 850CP XT ⁄ 900CP XT Important Requirements for Medium-Voltage Transformers and Transformers for Auxiliary... - Page 7 SMA Solar Technology AG 1 Information on this Document Symbols Symbol Explanation Indicates a hazardous situation which, if not avoided, will result in death or serious injury Indicates a hazardous situation which, if not avoided, can result in death or serious injury...
-
Page 8: Safety
SMA Solar Technology AG. Making unauthorized changes will void the warranty and warranty claims and will normally result in invalidation of the operating permit. SMA Solar Technology AG shall not be held liable for any damage caused by such changes. -
Page 9: Safety Precautions
SMA Solar Technology AG 2 Safety 2.2 Safety Precautions This section contains safety precautions that must be observed at all times when working on or with the product. To prevent personal injury and property damage and to ensure long-term operation of the product, read this section carefully and follow all safety precautions at all times. - Page 10 2 Safety SMA Solar Technology AG Danger to life from electric shock if the Sunny Central is damaged Operating a damaged Sunny Central can lead to hazardous situations that result in death or serious injuries due to electric shock. • Only use the Sunny Central when it is in a technically faultless condition and safe to operate.
- Page 11 SMA Solar Technology AG 2 Safety Risk of fire due to failure to observe torque specifications on live bolted connections Failure to follow the specified torques reduces the ampacity of live bolted connections so that the contact resistances increase. This can cause components to overheat and catch fire.
-
Page 12: Skills Of Qualified Persons
When working on the Sunny Central, always wear the appropriate personal protective equipment for the specific job. The following personal protective equipment is regarded by SMA Solar Technology AG to be the minimum requirement: ☐ In a dry environment, safety shoes of category S3 with perforation-proof soles and steel toe caps ☐... -
Page 13: Product Description
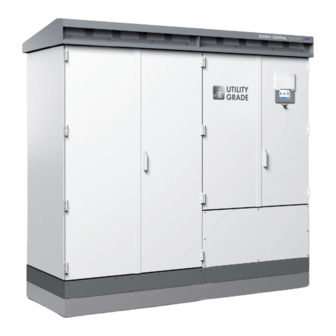
SMA Solar Technology AG 3 Product Description 3 Product Description 3.1 PV System Overview The Sunny Central is a PV inverter which converts the direct current generated in the PV modules into grid-compliant alternating current. An external MV transformer fitted downstream feeds the generated alternating current into the utility grid. -
Page 14: Type Label
You will require the information on the type label to use the product safely and when seeking customer support from the SMA Service Line. The type labels must be permanently attached to the product. Reading off the serial number You can identify the serial number without opening the Sunny Central. -
Page 15: Touch Display
SMA Solar Technology AG 3 Product Description 3.2.3 Touch Display Different kinds of Sunny Central data can be viewed on the touch display. On the touch display, you cannot set any Sunny Central parameters, but only configure display settings such as language, time and brightness. -
Page 16: Remote Shutdown
3 Product Description SMA Solar Technology AG If only a low data transfer rate is required for monitoring the PV system, grid operator specifications can also be transmitted via the monitoring network. Only one network is required in this case. -
Page 17: Grounding Concept
PV system. SMA Solar Technology AG therefore recommends that when using e.g. cameras and monitoring technology, optical fiber technology is used for the transmission of signals (see Section 13.2.2 "Setting up a System Network with Optical Fibers", page 63). -
Page 18: Scope Of Delivery
4 Scope of Delivery SMA Solar Technology AG 4 Scope of Delivery Check the scope of delivery for completeness and any externally visible damage. Contact your distributor if the scope of delivery is incomplete or damaged. Figure 4: Components included in the scope of delivery... -
Page 19: Storage
SMA Solar Technology AG 5 Storage 5 Storage If the Sunny Central is to be stored prior to installation, note the following: Penetrating moisture can damage the Sunny Central • Store the Sunny Central in a closed state. • Store the Sunny Central in a dry and covered location. -
Page 20: Preparation For Installation
☐ The mounting location must fulfill the requirements for the ambient conditions (see Technical Information "Installation Requirements - Important information on transportation and installation for Sunny Central 500CP XT ⁄ 630CP XT ⁄ 720CP XT ⁄ 760CP XT ⁄ 800CP XT ⁄ 850CP XT ⁄ 900CP XT"). -
Page 21: Minimum Clearances For Outdoor Installation
SMA Solar Technology AG 6 Preparation for Installation Dimensions of the Sunny Central for Indoor Installation Figure 6: Dimensions without roof 6.1.3 Minimum Clearances for Outdoor Installation Risk of fire due to overheating of cables if different cable lengths are used Cables of differing lengths may cause the cables to overheat and catch fire. - Page 22 Minimum clearance between two inverters The minimum clearance between two inverters is 500 mm. SMA Solar Technology AG recommends a clearance of 800 mm between the inverters to facilitate maintenance and cleaning work. Figure 8: Option 1: Minimum clearances for two Sunny Central inverters with MV transformer...
-
Page 23: Minimum Clearances For Installation In Electrical Equipment Rooms
SMA Solar Technology AG 6 Preparation for Installation Position Designation Cable route between Sunny Central and MV transformer Option 2 Figure 9: Option 2: Minimum clearances for two Sunny Central inverters with MV transformer Position Designation Sunny Central 1 Sunny Central 2... - Page 24 6 Preparation for Installation SMA Solar Technology AG Figure 10: Minimum clearances for one Sunny Central in an electrical equipment room Position Designation Minimum passage width Sunny Central Minimum Clearances for Two Sunny Central Inverters Installed in Electrical Equipment Rooms Danger due to blocked escape route Opening the doors of two Sunny Central inverters located opposite each other blocks the escape route.
-
Page 25: Requirements For Foundation And Cable Arrangement
Figure 12: Arrangement of AC cables with three cables per line conductor (example) * For further information, see Technical Information "Cable Set ‒ Requirements for and Laying of Cables between Sunny Central CP and Transformer Compact Station" at www.SMA-Solar.com. Installation Manual... -
Page 26: Preparation For Mounting Without Base
☐ Foundation pit and subgrade must be prepared for the installation of the base (see Technical Information "Installation Requirements ‒ Important Information on Transportation and Installation for Sunny Central 500CP XT ⁄ 630CP XT ⁄ 720CP XT ⁄ 760CP XT ⁄ 800CP XT ⁄ 850CP XT ⁄ 900CP XT"). -
Page 27: Transporting The Sunny Central
SMA Solar Technology AG 7 Transporting the Sunny Central 7 Transporting the Sunny Central 7.1 Safety during Transport Danger of crushing through tipping, falling or swaying of raised or suspended Sunny Central The Sunny Central can tip or fall as a result of being lifted and transported carelessly or too fast. This can result in death or serious injury. -
Page 28: Transporting The Sunny Central Using A Crane Fork
7 Transporting the Sunny Central SMA Solar Technology AG 7.4 Transporting the Sunny Central Using a Crane Fork Danger of crushing if the Sunny Central tips over With the kick plates mounted at the rear of the Sunny Central, the supporting surface of the Sunny Central on the tines of the crane fork is inadequate. -
Page 29: Transporting The Sunny Central Using A Forklift
SMA Solar Technology AG 7 Transporting the Sunny Central 7.5 Transporting the Sunny Central Using a Forklift Danger of crushing if the Sunny Central tips over With the kick plates mounted at the rear of the Sunny Central, the supporting surface of the Sunny Central on the forks of the forklift is inadequate. -
Page 30: Transporting The Sunny Central Using A Crane
7 Transporting the Sunny Central SMA Solar Technology AG Procedure: 1. If the Sunny Central is to be transported on a wooden pallet, move the pallet truck under the Sunny Central from the front or the rear. 2. If the Sunny Central is to be transported without a wooden pallet, the pallet truck must always be moved under the Sunny Central from the side. - Page 31 SMA Solar Technology AG 7 Transporting the Sunny Central Procedure: 1. Release the screws of the right-hand ventilation grid. 2. Pull the lower side of the right-hand ventilation grid forwards to remove it. 3. Release the screws of the left-hand ventilation grid.
-
Page 32: Transporting The Sunny Central Using A Crane
7 Transporting the Sunny Central SMA Solar Technology AG 7. Release the grounding cables from the Sunny Central. 8. Remove the Sunny Central roof and set down on a suitable surface. 7.7.2 Transporting the Sunny Central Using a Crane Requirements: ☐... - Page 33 SMA Solar Technology AG 7 Transporting the Sunny Central Procedure: 1. Position the roof on the Sunny Central. 2. Screw the grounding cable onto the Sunny Central (torque: 14.2 Nm). 3. Slide the roof into the rail on the Sunny Central and pull forwards.
- Page 34 7 Transporting the Sunny Central SMA Solar Technology AG 8. Screw the right-hand ventilation grid on (torque: 20 Nm). SCCPXT-IA-D7-en-42 Installation Manual...
-
Page 35: Installing The Sunny Central
SMA Solar Technology AG 8 Installing the Sunny Central 8 Installing the Sunny Central Depending on the order option, the Sunny Central can be installed directly on the foundation without base, or attached to a base. You must select the relevant section. -
Page 36: Removing The Transport Lock From The Inverter Cabinet
8 Installing the Sunny Central SMA Solar Technology AG 4. Remove the panels. 8.4 Removing the Transport Lock from the Inverter Cabinet Damage to electronic components due to electrostatic discharge Electrostatic discharge can damage or destroy electronic components. • When working on the Sunny Central or handling assemblies, observe the ESD safety regulations and wear protective gloves. -
Page 37: Mounting The Ventilation Plate
SMA Solar Technology AG 8 Installing the Sunny Central 8.6 Mounting the Ventilation Plate The guide rails for the ventilation plate are located in the floor area of the inverter cabinet. Procedure: • Slide the ventilation plate into the guide rails in the inverter cabinet. The ventilation grid in the ventilation plate should be facing the rear panel. -
Page 38: Grounding Connection
9 Grounding Connection SMA Solar Technology AG 9 Grounding Connection 9.1 Cable and Terminal Lug Requirements Cables: ☐ Use copper or aluminum cables only. ☐ Maximum cable cross-section: 400 mm Terminal lugs: ☐ Use tin-plated terminal lugs only. ☐ Only use the nuts, screws and washers included in the scope of delivery for the connection. - Page 39 SMA Solar Technology AG 9 Grounding Connection Position Designation Tin-plated one-hole terminal lug Tin-plated two-hole terminal lug Screw M12 Additionally required mounting material (not included in the scope of delivery): ☐ Clean cloth ☐ Ethanol cleaning agent Requirement: ☐ Do not attach more than one grounding cable to the PE connection lug.
-
Page 40: Dc Connection
10 DC Connection SMA Solar Technology AG 10 DC Connection Depending on the order option, the DC connection procedure may differ. You must select the relevant section. 10.1 Safety during DC Connection Danger to life from electric shock due to live voltage High voltages are present in the live components of the Sunny Central. -
Page 41: Dc Connection With Dc Fuse Option
SMA Solar Technology AG 10 DC Connection Risk of fire due to failure to observe torque specifications on live bolted connections Failure to follow the specified torques reduces the ampacity of live bolted connections so that the contact resistances increase. This can cause components to overheat and catch fire. -
Page 42: Connection Area With Dc Fuse Option
10 DC Connection SMA Solar Technology AG 10.2.2 Connection Area with DC Fuse Option Figure 16: Connection area for DC fuses (example) Position Designation Busbar for grounding cable Connection lug for DC‒ cable Connection lug for DC+ cable Connection lugs for AC cables... -
Page 43: Connection With One Terminal Lug
SMA Solar Technology AG 10 DC Connection 10.2.3 Connection with One Terminal Lug Figure 17: Assembly of the connection with terminal lug for terminals with single assignment Position Designation Spring washer Fender washer Copper or aluminum bar Tin-plated one-hole terminal lug... -
Page 44: Connection With Two Terminal Lugs
10 DC Connection SMA Solar Technology AG 10.2.4 Connection with Two Terminal Lugs Figure 18: Assembly of the connection with terminal lugs for terminals with double assignment Position Designation Spring washer Fender washer Tin-plated one-hole terminal lug Tin-plated two-hole terminal lug... -
Page 45: Connecting Dc Cables
SMA Solar Technology AG 10 DC Connection Procedure: 1. Position and screw the busbar firmly over three DC terminals (torque: 60 Nm). 2. Pull the fuses out of the three DC connection lugs. Use the LV/HRC fuse handle. 10.2.6 Connecting DC Cables Additionally required mounting material (not included in the scope of delivery): ☐... -
Page 46: Dc Connection With Dc Busbar Option
10 DC Connection SMA Solar Technology AG 10.3 DC Connection with DC Busbar Option 10.3.1 Cable and Terminal Lug Requirements Cables: ☐ Use copper or aluminum cables only. ☐ Maximum cable cross-section: 400 mm Terminal lugs: ☐ Use tin-plated terminal lugs only. -
Page 47: Connection With One Terminal Lug
SMA Solar Technology AG 10 DC Connection Position Designation Connection lug for DC+ cable Connection lugs for AC cables DC connection lug with dimensions 10.3.3 Connection with One Terminal Lug Figure 20: Assembly of the connection with terminal lug for terminals with single assignment... -
Page 48: Connection With Two Terminal Lugs
10 DC Connection SMA Solar Technology AG 10.3.4 Connection with Two Terminal Lugs Figure 21: Assembly of the connection with terminal lugs for terminals with double assignment Position Designation Spring washer Fender washer Tin-plated one-hole terminal lug Tin-plated two-hole terminal lug... -
Page 49: Connecting The Dc Cables
SMA Solar Technology AG 10 DC Connection 10.3.5 Connecting the DC Cables Additionally required mounting material (not included in the scope of delivery): ☐ Clean cloth ☐ Ethanol cleaning agent Procedure: 1. Insert the DC cables into the interface cabinet. -
Page 50: Ac Connection
11 AC Connection SMA Solar Technology AG 11 AC Connection 11.1 Safety during AC Connection Danger to life from electric shock due to live voltage High voltages are present in the live components of the low-voltage and medium-voltage grids. Touching live components results in death or serious injury due to electric shock. -
Page 51: Connection With One Terminal Lug
SMA Solar Technology AG 11 AC Connection Terminal lugs: ☐ Use tin-plated terminal lugs only. ☐ Only use the nuts, screws and washers included in the scope of delivery for the connection. ☐ Always connect two-hole terminal lugs with two screws. -
Page 52: Connection With Two Terminal Lugs
11 AC Connection SMA Solar Technology AG 11.2.3 Connection with Two Terminal Lugs Figure 23: Assembly of the connection with terminal lugs for terminals with double assignment Position Designation Spring washer Fender washer Tin-plated one-hole terminal lug Copper bar Screw M12 11.2.4 Connecting the AC Cables... - Page 53 SMA Solar Technology AG 11 AC Connection Procedure: 1. Insert the AC cables into the interface cabinet. 2. Strip the AC cable insulation. 3. Fit the AC cables with terminal lugs. 4. Clean the contact surfaces using a clean cloth and ethanol cleaning agent.
-
Page 54: Cable Connection Of External Devices And Connections In The Interface Cabinet
12 Cable Connection of External Devices and Connections in the Interface Cabinet SMA Solar Technology AG 12 Cable Connection of External Devices and Connections in the Interface Cabinet The connection of external devices depends on the project configuration. You must select the relevant section. Note that for unused functions such as remote shutdown or transformer protection, the parameter settings must be checked and changed, if necessary. -
Page 55: Leading The Cables Into The Interface Cabinet
SMA Solar Technology AG 12 Cable Connection of External Devices and Connections in the Interface Cabinet 12.2 Leading the Cables into the Interface Cabinet 1. Remove the four screws at the top of the sealing plate. 2. Remove the sealing plate. -
Page 56: Connecting The Data Cable From The Sunny String-Monitor
Sunny String-Monitor to the Sunny Central. For an optimum voltage supply, SMA Solar Technology AG recommends connecting two insulated conductors each with a cross-section of 0.5 mm to one voltage supply terminal. You can connect two insulated conductors to one terminal for the GND_EXT signal in just the same way. -
Page 57: Connecting The Remote Shutdown
SMA Solar Technology AG 12 Cable Connection of External Devices and Connections in the Interface Cabinet Requirement: ☐ The Sunny Central must be disconnected (see Section 14, page 65). Procedure: 1. Insert the Sunny String-Monitor cable into the interface cabinet (see Section 12.2 "Leading the Cables into the Interface Cabinet", page 55). -
Page 58: Connecting The External Setpoint Specification
12 Cable Connection of External Devices and Connections in the Interface Cabinet SMA Solar Technology AG 4. Press the shield clamping saddle down onto the shield of the stripped cable until it clicks into place and fasten hand-tight. 5. Attach the cable to the cable support rail using a cable tie. This will ensure that the cable cannot be pulled out inadvertently. -
Page 59: Connecting The Cable For The Status Report Of The Insulation Monitoring
SMA Solar Technology AG 12 Cable Connection of External Devices and Connections in the Interface Cabinet 4. Press the shield clamping saddle down onto the shield of the stripped cable until it clicks into place and fasten hand-tight. 5. Attach the cable to the cable support rail using a cable tie. This will ensure that the cable cannot be pulled out inadvertently. -
Page 60: Connecting The External Supply Voltage
12 Cable Connection of External Devices and Connections in the Interface Cabinet SMA Solar Technology AG Requirement: ☐ The Sunny Central must be disconnected (see Section 14, page 65). Procedure: 1. Insert the transformer protection cable into the interface cabinet (see Section 12.2, page 55). -
Page 61: Connecting The External Fast Stop Cabling
SMA Solar Technology AG 12 Cable Connection of External Devices and Connections in the Interface Cabinet Procedure: 1. Lead the external voltage supply cable into the interface cabinet (see Section 12.2, page 55). 2. Connect the cable in accordance with the circuit diagram (see Section 12.3.1, page 55). -
Page 62: Setting Up A System Network
13 Setting up a System Network SMA Solar Technology AG 13 Setting up a System Network 13.1 Structure of a System Network In order to connect the Sunny Central to a computer via the service interface or via the Internet, the communication must be set up in a PV system network. -
Page 63: Position Of The Communication Terminals
SMA Solar Technology AG 13 Setting up a System Network 13.2 Position of the Communication Terminals 13.2.1 Connection Area Figure 27: Position of the communication terminals Position Quantity Designation Splice box* Network terminal for network port * optional 13.2.2 Setting up a System Network with Optical Fibers Damage to optical fibers due to too tight bend radii Overly bending or kinking will damage the optical fiber. -
Page 64: Setting Up A Pv System Network With Copper Cables
13 Setting up a System Network SMA Solar Technology AG Connection of Optical Fibers via Subscriber Connector Additionally required mounting material (not included in the scope of delivery): ☐ Subscriber connector Requirement: ☐ The Sunny Central must be disconnected (see Section 14, page 65). -
Page 65: Disconnecting The Sunny Central
SMA Solar Technology AG 14 Disconnecting the Sunny Central 14 Disconnecting the Sunny Central Before working on the Sunny Central, always disconnect the Sunny Central from all voltage sources as described in this section. Danger to life from electric shock due to live voltage High voltages are present in the live components of the Sunny Central. - Page 66 14 Disconnecting the Sunny Central SMA Solar Technology AG Procedure: 1. Switch the key switch of the Sunny Central to Stop. 2. Wait 15 minutes before opening the inverter. This will ensure that the capacitors are discharged. 3. Disconnect the external AC voltage of the MV transformer.
- Page 67 SMA Solar Technology AG 14 Disconnecting the Sunny Central 16. Remove all fuses and disconnection blades from all fuse holders. Use the LV/HRC fuse handle. Installation Manual SCCPXT-IA-D7-en-42...
-
Page 68: Commissioning
Warranty or guarantee claims can only be made valid if the initial start-up was carried out by SMA Solar Technology AG or if the fully completed and signed "Commissioning Report for Sunny Central Plants" is available at SMA Solar Technology AG. -
Page 69: Checking The Sunny Central Cabling
SMA Solar Technology AG 15 Commissioning Procedure See Section Check the AC line voltage 15.3.2, page 70 Check the internal power supply 15.3.3, page 70 Check the grid monitoring 15.4, page 70 Check the settings for unused options 15.5, page 71 Switch on the voltage supply and AC circuit breaker 15.7, page 72... -
Page 70: Checking The Ac Line Voltage
15 Commissioning SMA Solar Technology AG 4. Measure the DC voltage for each non-grounded pole to ground and record in the commissioning report. Use the connection lugs of the ungrounded terminal and the grounding busbar as measuring points. ☑ Voltage drop can be measured. -
Page 71: Important Measures In Case Of Non-Utilized Options
SMA Solar Technology AG 15 Commissioning 2. Open the test and disconnect terminals. 3. Connect the function generator to the test and disconnect terminals (see function generator manual). 4. Check the limiting values set for the grid monitoring parameters: • Use the function generator to create a simulated line voltage for the Sunny Central. Always comply with the nominal AC voltage of the Sunny Central. -
Page 72: Switching The Voltage Supply And The Ac Circuit Breaker On
☑ The fans switch on and start drawing air in through the air intake vents. ✖ The fans do not switch on? • Contact the SMA Service Line. 3. Switch the AC circuit breaker on. 4. Switch the supply voltage circuit breaker on. -
Page 73: Mounting The Panels And Protective Covers
SMA Solar Technology AG 15 Commissioning 15.8 Mounting the Panels and Protective Covers Figure 28: Position of the protective covers in the Sunny Central Position Designation Protective cover Procedure: 1. Attach all cables to the cable support rail using cable ties. -
Page 74: Switching The Sunny Central On
15 Commissioning SMA Solar Technology AG 15.9 Switching the Sunny Central On Danger to life through electric shock in the event of improper use or unauthorized opening of the Sunny Central High voltages are present in the live components of the Sunny Central. Touching live components results in death or serious injury due to electric shock. -
Page 75: Decommissioning
SMA Solar Technology AG 16 Decommissioning 16 Decommissioning 1. Disconnect the Sunny Central from all voltage sources (see Section 14, page 65). 2. Disassemble the panels (see Section 8.3, page 35). 3. Screw the protective cover over the fuses. 4. Decommission the DC main distribution (see DC main distribution documentation). -
Page 76: Technical Data
17 Technical Data SMA Solar Technology AG 17 Technical Data 17.1 Sunny Central 500CP XT Input Data MPP voltage range 430 V to 850 V Maximum DC voltage 1,000 V Maximum DC current 1,250 A Maximum short-circuit current 1,680 A... -
Page 77: Sunny Central 630Cp Xt
SMA Solar Technology AG 17 Technical Data Dimensions and Weight Width x height x depth 2,562 mm x 2,272 mm x 956 mm Weight 1,900 kg Efficiency Maximum efficiency, η 98.6% European weighted efficiency, η 98.4% CEC weighted efficiency 98.5%... - Page 78 17 Technical Data SMA Solar Technology AG Output Data Nominal AC power at +50°C 630 kVA Continuous AC power at +25°C 700 kVA Maximum AC current 1,283 A Nominal AC current 1,155 A Nominal AC voltage − 10% / +15% 315 V Power frequency 50 Hz / 60 Hz...
-
Page 79: Sunny Central 720Cp Xt
SMA Solar Technology AG 17 Technical Data 17.3 Sunny Central 720CP XT Input Data MPP voltage range 525 V to 850 V Maximum DC voltage 1,000 V Maximum DC current 1,400 A Maximum short-circuit current 1,680 A Overvoltage category - DC inputs... -
Page 80: Sunny Central 760Cp Xt
17 Technical Data SMA Solar Technology AG Dimensions and Weight Width x height x depth 2,562 mm x 2,272 mm x 956 mm Weight 1,900 kg Efficiency Maximum efficiency, η 98.6% European weighted efficiency, η 98.4% CEC weighted efficiency 98.5%... - Page 81 SMA Solar Technology AG 17 Technical Data Output Data Nominal AC power at +50°C 760 kVA Continuous AC power at +25°C 836 kVA Maximum AC current 1,411 A Nominal AC current 1,283 A Nominal AC voltage − 10% / +15% 342 V Power frequency 50 Hz / 60 Hz...
-
Page 82: Sunny Central 800Cp Xt
17 Technical Data SMA Solar Technology AG 17.5 Sunny Central 800CP XT Input Data MPP voltage range 583 V to 850 V Maximum DC voltage 1,000 V Maximum DC current 1,400 A Maximum short-circuit current 1,680 A Overvoltage category - DC inputs... -
Page 83: Sunny Central 850Cp Xt
SMA Solar Technology AG 17 Technical Data Dimensions and Weight Width x height x depth 2,562 mm x 2,272 mm x 956 mm Weight 1,900 kg Efficiency Maximum efficiency, η 98.6% European weighted efficiency, η 98.4% CEC weighted efficiency 98.5%... - Page 84 17 Technical Data SMA Solar Technology AG Output Data Nominal AC power at +50°C 850 kVA Continuous AC power at +25°C 935 kVA Maximum AC current 1,411 A Nominal AC current 1,283 A Nominal AC voltage − 10% / +15%* 386 V Power frequency 50 Hz / 60 Hz...
-
Page 85: Sunny Central 900Cp Xt
SMA Solar Technology AG 17 Technical Data 17.7 Sunny Central 900CP XT Input Data MPP voltage range 656 V to 850 V Maximum DC voltage 1,000 V Maximum DC current 1,400 A Maximum short-circuit current 1,680 A Overvoltage category - DC inputs... - Page 86 17 Technical Data SMA Solar Technology AG Dimensions and Weight Width x height x depth 2,562 mm x 2,272 mm x 956 mm Weight 1,900 kg Efficiency Maximum efficiency, η 98.6% European weighted efficiency, η 98.4% CEC weighted efficiency 98.5%...
-
Page 87: Contact
SMA Solar Technology AG 18 Contact 18 Contact If you have technical problems concerning our products, contact the SMA Service Line. We need the following data in order to provide you with the necessary assistance: • Inverter type • Serial number of the Sunny Central •... - Page 88 South Africa SMA Solar Technology 08600 SUNNY South Africa Pty Ltd. (08600 78669) Centurion (Pretoria) International: +27 (12) 643 1785 United Kingdom SMA Solar UK Ltd. +44 1908 304899 Milton Keynes Ελλάδα SMA Hellas AE 801 222 9 222 Αθήνα International: +30 212 222 9 222 България...
- Page 92 SMA Solar Technology www.SMA-Solar.com...
Need help?
Do you have a question about the SUNNY CENTRAL 500CP XT and is the answer not in the manual?
Questions and answers