Table of Contents
Advertisement
Quick Links
Advertisement
Table of Contents

Related Manuals for Endress+Hauser analytikjena Biometra TRobot II


Summary of Contents for Endress+Hauser analytikjena Biometra TRobot II
- Page 1 Setup Instructions Biometra TRobot II Automated thermal cycler...
- Page 2 Biometra GmbH (Analytik Jena GmbH) Manufacturer Rudolf-Wissell-Str. 30 37079 Göttingen Germany Phone + 49 551 50 68 6-0 + 49 551 50 68 6-66 E-Mail info@analytik-jena.com Biometra GmbH Service Rudolf-Wissell-Str. 30 37079 Göttingen Germany Phone + 49 551 50 68 6 -10, -14 or -16 + 49 551 50 68 6-66 E-Mail service@analytik-jena.com http://www.analytik-jena.com...
-
Page 3: Table Of Contents
Biometra TRobot II Contents Contents Basic information ....................... 5 Notes on this Setup Instruction ..................5 Intended use ........................5 Safety instructions ...................... 7 General notes ........................7 Safety markings on Biometra TRobot II ................7 Technical condition ......................8 Requirements for the operating personnel .............. - Page 4 Contents Biometra TRobot II...
-
Page 5: Basic Information
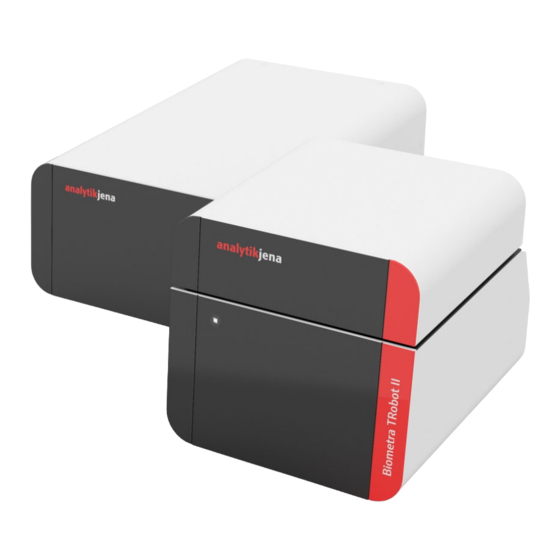
Biometra TRobot II Basic information Basic information Notes on this Setup Instruction As an excerpt from the detailed device instructions, these setup instructions contain the first steps of installation and the safety instructions to be observed. For all further steps, please apply the detailed operating instructions, which are supplied in electronic form on a USB stick. - Page 6 Basic information Biometra TRobot II systems. For space-saving integration on robotic decks, the thermal cycler is divided into a block module and a separate controller. The block module is placed on or next to the robotic platform, the controller, which is connected by cable, usually under the platform. Biometra TRobot II can be operated from an automation platform software.
-
Page 7: Safety Instructions
Biometra TRobot II Safety instructions Safety instructions General notes For your own safety and to ensure error-free and safe operation of Biometra TRobot II, please read this chapter carefully before commissioning. Besides the safety instructions in the operating manual and the local safety regulations that apply to the operation of the device, the general applicable regulations regarding accident prevention, occupational health and safety, and environmental protection have to be observed and complied with. -
Page 8: Technical Condition
Safety instructions Biometra TRobot II Technical condition Biometra TRobot II has been built and certified according to safety standard EN 61010- 1. Do not modify the device in any way. Any modification made to the device will lead to a loss of warranty and the EN 61010-1 certificate and poses a potential risk. The following has to be observed: ... -
Page 9: Safety Instructions - During Operation
Biometra TRobot II Safety instructions Safety instructions – during operation 2.6.1 Summary of safety instructions Before each commissioning, the operator of Biometra TRobot II must make sure that the condition of the device including the safety equipment is sound. The following has to be observed: ... -
Page 10: Handling Of Samples, Auxiliary And Operating Materials
Safety instructions Biometra TRobot II The electrical components must be checked regularly by a qualified electrician. Any defects, such as loose connections, faulty, or damaged cables, must be repaired with- out delay. Before opening the device it must be switched off at the main power switch and the power plug must be disconnected from the power outlet! ... -
Page 11: Behavior During Emergencies
Biometra TRobot II Safety instructions it in and the corresponding form must be attached to the outside of the packaging, see note in the detailed operating instructions. Behavior during emergencies During hazardous situations, Biometra TRobot II must be switched off immediately by operating the main power switch at the rear left of the controller. -
Page 12: Device Installation And Commissioning
Device installation and commissioning Biometra TRobot II Device installation and commissioning Scope of delivery Thermal cycler: Biometra TRobot II Setup Instructions PCR module + controller (print) Power cable Biometra TRobot II operating manual, Biometra TSuite software operating ... - Page 13 Biometra TRobot II Device installation and commissioning Make sure that the power switch on the controller and the power cable are easily ac- cessible. This is important if the device needs to be disconnected from the power supply. Make sure that the ventilation slots at the sides and the bottom of the device are un- obstructed.
-
Page 14: Connecting The Cables
Device installation and commissioning Biometra TRobot II 3.3.2 Connecting the cables Connect the Biometra TRobot II thermal cycler controller to a grounded power outlet using the power cable supplied. The cable must not be replaced by an inadequately dimensioned power cable. ... -
Page 15: Setting The Operating Voltage
Biometra TRobot II Device installation and commissioning The network card must also be changed to a fixed IP(V4) (e.g. IP 192.168.0.10, subnetmask 255.255.255.0) via the network adapter set- tings under Windows. The PC network card should comply with the auto-crossover standard IEEE 803.2ab_1999, otherwise a crossover network line is required. - Page 16 Device installation and commissioning Biometra TRobot II 5. If the Biometra TRobot II is controlled by the Biometra TSuite software (see Bi- ometra TSuite Software User Manual for details), then: Install the Biometra TSuite software with the “Biometra TSuite.exe” (from USB flash drive). b.
-
Page 17: Functional Elements
Biometra TRobot II Functional elements Functional elements Biometra TRobot II PCR module front view Fig. 4 Biometra TRobot II PCR module front view Seal for the block Status LED Heated lid Safety frame Plate lifter Sample block (96-well/silver) -
Page 18: Biometra Trobot Ii Pcr Module Rear View
Functional elements Biometra TRobot II Biometra TRobot II PCR module rear view At the rear of the Biometra TRobot II there are the connectors for the DSub 24W7 signal cable and for the DSub 12 supply cable. Fig. 5 Biometra TRobot II PCR module rear view Signal cable Ventilation slots Supply cable... -
Page 19: Biometra Trobot Ii Pcr Controller Front View
Biometra TRobot II Functional elements Biometra TRobot II PCR controller front view The controller does not have any operating functions other than the power switch lo- cated at the rear of the device on the left. Fig. 6 Biometra TRobot II controller rear view Biometra TRobot II Controller rear view Fig. -
Page 20: Operation
Operation Biometra TRobot II Operation For further information please check out the operating manuals of the device and of the software. These manuals are included in electronic form on USB flash drive. Alterna- tively, you can also find them on the Analytik Jena homepage in the download area of the corresponding device.
Need help?
Do you have a question about the analytikjena Biometra TRobot II and is the answer not in the manual?
Questions and answers