Table of Contents
Advertisement
Quick Links
Advertisement
Table of Contents

Related Manuals for Endress+Hauser Analytik Jena multi N/C


Summary of Contents for Endress+Hauser Analytik Jena multi N/C
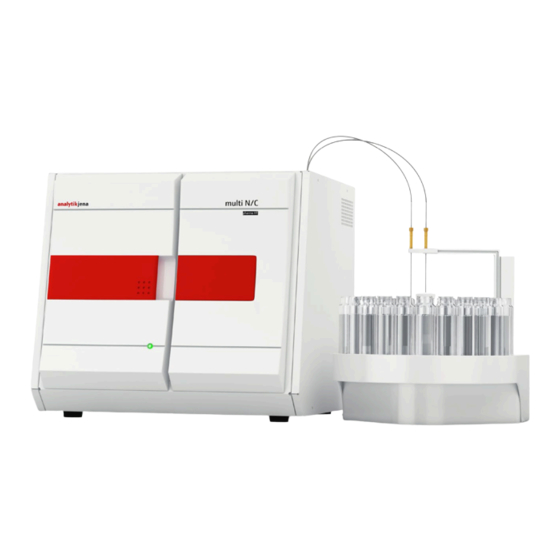
- Page 1 Operating Manual multi N/C pharma UV TOC Analyzer...
- Page 2 Analytik Jena GmbH Manufacturer Konrad-Zuse-Str.1 07745 Jena Germany Phone + 49 3641 77 70 + 49 3641 77 9279 Email info@analytik-jena.com Analytik Jena GmbH Service Konrad-Zuse-Str. 1 07745 Jena Germany Phone + 49 3641 77 74 07 Email service@analytik-jena.com http://www.analytik-jena.com General information...
-
Page 3: Table Of Contents
multi N/C pharma UV Contents Contents Basic Information ....................... 7 User manual notes ......................7 Intended Use ........................8 Warranty and liability ....................... 8 Safety instructions ...................... 9 Safety markings on the analyzer ..................9 Technical condition ......................9 Requirements for the operating personnel ..............10 Safety instructions, transport and installation ............. - Page 4 Contents multi N/C pharma UV AS vario autosampler ..................... 38 Sampler AS 21......................... 41 Sampler AS 10......................... 45 EPA sampler ........................47 Operation ......................... 52 General information for the analysis work ..............52 6.1.1 Reagents and materials required ................... 52 Switching on the analyzer (standard commissioning) ..........
- Page 5 multi N/C pharma UV Contents 10.4 UV module ........................101 10.4.1 Removing the UV module .................... 101 Specifications ......................104 11.1 Technical data ....................... 104 11.2 Standards and directives ....................105 Figures Fig. 1 Front view (doors open) ..................15 Fig.
- Page 6 Contents multi N/C pharma UV...
-
Page 7: Basic Information
multi N/C pharma UV Basic Information Basic Information User manual notes The analyzer multi N/C pharma UV is intended for operation by qualified specialist personnel observing this user manual. The user manual informs about the design and operation of the analyzer and provides personnel familiar with TC/TN analysis the necessary know-how for the safe handling of the equipment and its components. -
Page 8: Intended Use
Basic Information multi N/C pharma UV Intended Use The analyzer multi N/C pharma UV is a device for determining the parameters TC, TOC, NPOC and TIC in aqueous samples through the wet chemical digestion using UV radiation and peroxodisulfate in accordance with the national and international standards. -
Page 9: Safety Instructions
multi N/C pharma UV Safety instructions Safety instructions For your own safety and to ensure error-free and safe operation of the analyzer multi N/C pharma UV, please read this chapter carefully before using the appliance. Observe all safety notes listed in this user manual and all messages and displayed by the control and analysis software on the monitor. -
Page 10: Requirements For The Operating Personnel
Safety instructions multi N/C pharma UV The operator must only operate the analyzer in a sound and operationally safe condition. The technical condition must always comply with the legal requirements and regulations. Prior to every use the analyzer must be checked for damage and sound condition. ... -
Page 11: Safety Instructions, Transport And Installation
multi N/C pharma UV Safety instructions Safety instructions, transport and installation The analyzer is always installed by the customer service department of Analytik Jena GmbH or its authorized and trained specialist personnel. Independent assembly and installation are not permitted. Incorrect installation can create serious hazards. The following has to be observed: ... -
Page 12: Safety Instructions - Protection Against Explosion And Fire
Safety instructions multi N/C pharma UV 2.5.2 Safety instructions - Protection against explosion and fire The analyzer must not be operated in an explosive environment. Smoking or handling open flames in the operating room of the analyzer is prohibited! The operating personnel have to be familiar with the location of the fire-fighting equipment in the operating room of the analyzer. -
Page 13: Safety Notes On Uv Radiation
multi N/C pharma UV Safety instructions After successful repair and service of the components of the compressed air containers or system the analyzer must be checked for sound operation prior to recommissioning! Independent assembly and installation are not permitted! 2.5.5 Safety notes on UV radiation ... -
Page 14: Safety Instructions - Service And Repair
Safety instructions multi N/C pharma UV Auxiliary and operating materials as well as their containers may not be disposed in domestic waste or enter the sewage system or the soil. The applicable regulations for disposal of these materials must be meticulously observed. ... -
Page 15: Function And Setup
multi N/C pharma UV Function and setup Function and setup System design The analyzer multi N/C pharma UV is a compact laboratory device with permanently installed main components. The complete measuring design further includes accessory parts and reagents which must be connected to the analyzer or made ready prior to a measurement. -
Page 16: Uv Reactor With Control Gear
Function and setup multi N/C pharma UV 3.1.1 UV reactor with control gear The analyzer multi N/C pharma UV features a specially developed UV reactor with integrated UV radiation source from quartz glass. The reactor directly surrounds the UV radiation source. Wavelengths of 185 nm and 254 nm are used. This results in a very efficient and high radiation density and thus a high digestion capability| The reactor has two inlets and one outlet. -
Page 17: Hose System
multi N/C pharma UV Function and setup Fingertight connection 9-port valve Metering syringe Fig. 3 Syringe pump with 9 port valve The hoses at the 9-port valve are labelled and connected to the following components: Hose no. Connection to the component/accessory TIC condensate container Reagent bottle for phosphoric acid H Reagent bottle for sodium peroxodisulfate Na... -
Page 18: Fig. 4 Hose Diagram
Function and setup multi N/C pharma UV Fig. 4 Hose diagram Within the device most gas connections have been implemented via a FAST connector Connection method (FAST – Fast, Save, Tight). These connectors provide a tight transition between the hoses and connections with different diameters. The soft sleeves prevent the risk of glass fractures compared to rigid screw connections. -
Page 19: Fig. 5 Different Fast Connector Designs
multi N/C pharma UV Function and setup Fig. 5 Different FAST connector designs In addition, so-called Fingertight screw connections are used in the analyzer multi N/C pharma UV. These flangeless fittings consist of a conical nipple and a banjo bolt. These hose connections seal purely by tightening the plastic banjo bolt finger- tight. -
Page 20: Components For Gas Drying And Cleaning
Function and setup multi N/C pharma UV Via the condensate pump the condensate or the waste solution from TIC detection are Condensate pump automatically pumped off after each measurement. The condensate pump is to the left of the halogen trap. Fig. -
Page 21: Fig. 9 Tic Condensation Module
multi N/C pharma UV Function and setup Cooling block TIC condensate container Fig. 9 TIC condensation module The analyzer multi N/C pharma UV contains water traps to remove interfering Water traps components from the measuring gas and to protect the detector and the gasbox. The water traps are installed in the gas path after the cooling block and between the gasbox and the UV module. -
Page 22: Ndir Detector
Function and setup multi N/C pharma UV Fig. 11 Halogen trap 3.1.5 NDIR detector The NDIR detector (non-dispersive infrared absorption detector) is on the rear right side wall of the analyzer. Gases with molecules from different atoms have specific absorption bands in the infrared wavelength range. -
Page 23: Indicator And Control Elements, Connectors
multi N/C pharma UV Function and setup 3.1.6 Indicator and control elements, connectors The green LED at the left door of the analyzer illuminates after the analyzer has been LED displays switched on. Fig. 12 Diode to indicate readiness for operation Main switch, mains connection, equipment fuse, media connections (gases and waste) Main switch, interfaces, and the interfaces for connecting the PC and the accessories are at the back of the... -
Page 24: Reagent Accessories
Function and setup multi N/C pharma UV 3.1.7 Reagent accessories The following accessories are required for measurements with the analyzer: connection cables, connection hoses suitable waste container or drainage reagent bottle with drip pan for phosphoric acid H , 250 ml ... -
Page 25: Fig. 14 Principle Of Operation
multi N/C pharma UV Function and setup Fig. 14 Principle of operation The digestion is wet chemical via UV persulfate oxidation or via UV oxidation only. Acidic persulfate solution is added to the sample aliquot and it is radiated with UV radiation of 185 nm /254 nm (UVC) wavelengths. -
Page 26: Measuring Method
Function and setup multi N/C pharma UV the carbon content in the sample is performed via a previously determined calibration function. Measuring method The analyzer multi N/C pharma UV is used to determine the following parameters as sum parameters. TC - Total Carbon ... -
Page 27: Tic Analysis
multi N/C pharma UV Function and setup 3.3.3 TIC analysis During the TIC analysis the total inorganic carbon from carbonates and hydrocarbonates as well as free CO is detected. Cyanides, cyanate, isocyanate and carbon particles are not detected. An aliquot of the sample is directly dosed into the TIC reactor to determine the inorganic carbon materials (TIC). -
Page 28: Calibration
Function and setup multi N/C pharma UV Calibration 3.4.1 Calibration strategies For most applications a single point calibration is permitted for the multi N/C pharma Single point calibration UV – the blank value of the device is low and the NDIR detector linear. To minimize sources of error during a single point calibration due to an incorrect standard preparation, the following procedure is recommended: ... -
Page 29: Calibration Method In Multiwin
multi N/C pharma UV Function and setup 3.4.3 Calibration method in multiWin Every parameter (procedure) of a method can be calibrated. The parameters of a method to be calibrated can be individually defined. Not all parameters need necessarily be calibrated. For every parameter up to three calibration functions can be stored in a method. -
Page 30: Method Characteristics
Function and setup multi N/C pharma UV The calculated parameters appear in the method in the TIC analysis channel. The calculation of the analysis results is based on the calculated calibration function. Generally separate calibration functions are calculated for the channels TC and TIC in TOC (Diff) accordance with the equations (4) or (5). -
Page 31: Other Calculations
multi N/C pharma UV Function and setup The correlation coefficient compares the dispersion of the calibration measuring points Correlation coefficient of the regression function with the total dispersion of the calibration. If all calibration measuring points are on the calculated regression function, then the correlation coefficient is +1 or -1. -
Page 32: Blank Values
Function and setup multi N/C pharma UV The combination of measurements with the smallest variation coefficient or the smallest standard deviation is used to calculate the analysis results. The unused measurements are considered as outliers and deleted. The average value of the final result is calculated from the concentrations determined Mean value for the individual detections after eliminating the outliers. -
Page 33: Reagent Blank Value
multi N/C pharma UV Function and setup dilution blank value sample volume sample effective integer raw integer dilution water integer Parts of the primary sample in the total parts (e. g. 10 parts in 100 parts), i.e. e.g. Definition of the dilution 10 ml primary sample are diluted with dilution water to a total volume of 100 ml. -
Page 34: Eluate Blank Value
Function and setup multi N/C pharma UV 3.5.3 Eluate blank value The eluate blank value is a special blank value for samples from the purity validation or eluate preparation. It corresponds to the TOC content of the ultrapure water used which has e.g. - Page 35 multi N/C pharma UV Function and setup ���� = × 100 ���� −���� �������� ���� ���� −���� ���� ���� (15) E... System effectiveness in % TOC of the reference solution (saccharose) TOC of the system suitability solution (p-benzoquinone) TOC the TOC water used (preparation water) The system is suitable if the value derived from the formula above is >...
-
Page 36: First Commissioning
First commissioning multi N/C pharma UV First commissioning Site requirements 4.1.1 Installation conditions The following requirements are placed on the climatic conditions in the operating room of the analyzer: Temperature range: +10 °C to +35 °C max. humidity: 90 % at 30 °C ... -
Page 37: Energy Supply
multi N/C pharma UV First commissioning 4.1.3 Energy supply WARNING The analyzer multi N/C pharma UV must only be connected to a properly grounded mains outlet in accordance with the voltage specifications on the type plate! The multi N/C pharma UV is operated from the single phase alternating current mains. The installation of the electrical equipment of the laboratory must comply with the standard DIN VDE 0100. -
Page 38: Connecting Add-On Devices
Connecting add-on devices multi N/C pharma UV Connecting add-on devices CAUTION Before connecting add-on devices switch off the analyzer. Always connect the add-on devices to the multi N/C pharma UV when it is switched off! AS vario autosampler WARNING Make sure that no liquid reaches the cable connections or the inside of the equipment or the power supply. -
Page 39: Fig. 15 Layout Of The As Vario Autosampler
multi N/C pharma UV Connecting add-on devices Connection hose to the analyzer Sample tubes (purging hose for NPOC measurements) Sample tray Connection hose to the analyzer (sample Sleeve aspiration hose) Cannula Cannula holder Autosampler arm Fig. 15 Layout of the AS vario autosampler The autosampler AS vario has been fitted with a transport safety lock on the bottom of Removing the transport the autosampler. -
Page 40: Fig. 16 Transport Lock On Autosampler As Vario
Connecting add-on devices multi N/C pharma UV Transport lock Screw M3x12 Fig. 16 Transport lock on autosampler AS vario 4. Switch off the analyzer! Commissioning the autosampler 5. Plug cable on the low voltage side of the table power supply included in the delivery into the connection on the rear of the autosampler. -
Page 41: Sampler As 21
multi N/C pharma UV Connecting add-on devices 12. Adjust the cannulas so that approx. one third of the cannulas is visible above the sleeve. Secure the cannulas by slightly tightening the screw. 13. Connect the two connection hoses to the analyzer to the cannulas: Hose no. -
Page 42: Fig. 19 Layout Of The Sampler As 21
Connecting add-on devices multi N/C pharma UV CAUTION Caution near the movement area of the sampler arm and the cannula during operation. There is a risk of injury (crushing etc.)! ATTENTION Do not obstruct the sampler during running operation. The drives might be damaged. Technical data Number of samples max. -
Page 43: Fig. 20 Connections At The Bottom Of The Sampler As 21
multi N/C pharma UV Connecting add-on devices grounding conductor switching power supply connection RS 232 interface - analyzer connection Fig. 20 Connections at the bottom of the sampler AS 21 1. Screw the holder to the right-hand side of the analyzer. Installation at the analyzer 2. -
Page 44: Fig. 21 Cannula Holder For Parallel Purging
Connecting add-on devices multi N/C pharma UV In the P , select P LEASE SELECT POSITION NEEDING ADJUSTMENT GROUP OSITION Click [P OSITION ADJUST The autosampler arm now lowers the cannulas into the tube in position 1. If necessary, increase or decrease the z values. Click [P ] again OSITION ADJUST... -
Page 45: Sampler As 10
multi N/C pharma UV Connecting add-on devices Click [P OSITION ADJUST The autosampler arm now lowers the cannulas into the tube in position 1. If necessary, increase or decrease the z values. Click [P ] again OSITION ADJUST after each change to verify the change. -
Page 46: Fig. 22 Layout Of The As 10 Autosampler
Connecting add-on devices multi N/C pharma UV Cannulas Layout Autosampler arm Sample tubes Sample tray Grid connection and connection to the analyzer (hidden) On/Off switch Fastening screws Fig. 22 Layout of the AS 10 autosampler 1. Plug cable on the low voltage side of the table power supply included in the Installation at the delivery into the connection at the bottom of the autosampler and connect the analyzer... -
Page 47: Epa Sampler
multi N/C pharma UV Connecting add-on devices group, select the correct tray and tube size. Exit the O window AMPLER PTIONS with [OK]. 8. Adjust the immersion depth of the cannulas in the tube (z direction) in multiWin. Select the I ... -
Page 48: Fig. 23 Epa Sampler
Connecting add-on devices multi N/C pharma UV Layout Fig. 23 EPA sampler Connection hoses to the analyzer Holding-down clamp Sample tray Special cannula Wash cup Autosampler arm with cannula holder Stirring arm Autosampler arm Type plate Electrical connections Fig. 24 Rear of the EPA sampler... -
Page 49: Fig. 25 Electrical Connections On The Rear Of The Epa Sampler
multi N/C pharma UV Connecting add-on devices Connection to power supply unit Equipment switch Connection to the analyzer Not used Stirrer connection Fig. 25 Electrical connections on the rear of the EPA sampler 1. Remove the transport lock! Setting up the EPA sampler Remove the two countersunk screws with the A/F3 hexagon head wrench ... - Page 50 Connecting add-on devices multi N/C pharma UV 4. Connect the table power supply cable on the low voltage side to the rear of the autosampler. Do not connect the power supply to the grid yet. 5. Connect the data cable supplied to the "Sampler" port on the rear of the analyzer. 6.
-
Page 51: Fig. 28 Hose In Fingertight Connection
multi N/C pharma UV Connecting add-on devices Retighten the Fingertight connection. Conical nipple Banjo bolt Hose Fig. 28 Hose in Fingertight connection 13. Connect the power supply to the grid. 14. Check the configuration in the multiWin program via the I ... -
Page 52: Operation
Operation multi N/C pharma UV Operation General information for the analysis work Observe the following during analysis: When analyzing samples with high acidic or saline content, aerosol can be formed in the TIC condensation vessel. The capacity of the halogen trap is depleted within a relatively short time. -
Page 53: Switching On The Analyzer (Standard Commissioning)
multi N/C pharma UV Operation TOC water (ultrapure water) as system water (device-internal rinsing water) and for the preparation of standards with the following requirements (conductivity < 1.0 µS/cm (at 25 °C), TOC < 0.1 mg/l orthophosphoric acid (H ) 10 % prepared from orthophosphoric acid (concentrated) p. -
Page 54: Switching Off The Analyzer
Operation multi N/C pharma UV Position a sample within reach and switch the analyzer on as follows: 1. Open the valve at the pressure reducer of the gas supply. 2. Switch on the PC (PC version only). 3. If applicable, switch on any sampler (see user manual of the respective component where applicable). -
Page 55: Switching Off Before Longer Periods Of Rest
multi N/C pharma UV Operation For measurements without autosampler: Enable the checkbox R . Place the sample aspiration EVERSE RINSE NALYZER cannula into the waste container before starting the backwash. For measurements with the autosampler AS vario, EPA sampler: ... -
Page 56: Carrying Out The Calibration
Operation multi N/C pharma UV Carrying out the calibration 6.4.1 Preparing and starting the calibration The control and analysis software multiWin provides the option to adjust the analysis individually to the measuring task by selecting the methods. An ideal measurement with its corresponding method requires its own calibration for each analysis parameter and each measuring channel. - Page 57 multi N/C pharma UV Operation For calibration using C the appropriate ALIBRATION WITH FIXED CONCENTRATION concentration of the standard provided must be entered into the input field. 5. In the input field N enter the number of calibration points. UMBER OF STANDARDS 6.
-
Page 58: Displaying Calibration Results
Operation multi N/C pharma UV Fig. 30 Window C (with sampler operation) URRENT SAMPLE DATA 12. Release the calibration standards in the window C with URRENT SAMPLE DATA exit the window with the button 13. After opening the window M click on the button [S F2]. -
Page 59: Fig. 31 Calibration Window - Data Of The Completed Calibration
multi N/C pharma UV Operation Fig. 31 window - Data of the completed calibration ALIBRATION Tab Calibration results Result table The following are displayed: number of detections target concentration used for constant sample volume or sample volume used for constant concentration average value of the area integers average values of the calculated concentrations percentage deviation of the calculated concentration from the target... -
Page 60: Editing An Existing Calibration
Operation multi N/C pharma UV average values. It is also necessary to use at least two individual detections for the analysis for the selected calibration measuring points with the smallest and largest target concentration. The test is carried out at a significance level of P = 99 %. ... -
Page 61: Transferring Calibration Parameters To A Method
multi N/C pharma UV Operation Fig. 32 Disabling individual measured values of a calibration Enabling/disabling measured values for preparation water The individual values determined for the preparation water can be viewed by clicking on the button [E ] and enabled/disabled for the calibration. ... -
Page 62: Fig. 33 Window Link To Method
Operation multi N/C pharma UV 4. Answer the subsequent query "Link to calibrated method?" ] the link is made with the calibrated method (default) ] the calibration parameters are linked to a method individually selected The method parameters of the calibration and the selected method are not checked! The user must always decide whether such a procedure can be applied to the concrete analytic objective in hand. -
Page 63: Fig. 34 Window Link With Method With Three Areas
multi N/C pharma UV Operation Three calibration A maximum of three calibration ranges can be stored for each ranges exist parameter in a method. In this case the ranges can only be replaced. Delete the range to be replaced in the right-hand columns using the button [D ELETE Transfer the currently determined calibration data with the button... -
Page 64: Managing Calibration Data
Operation multi N/C pharma UV 6.4.5 Managing calibration data Print the calibration report as follows: Printing calibration data 1. In the window C – C enable the option ALIBRATION ALIBRATION SETTINGS USE CALIBRATION 2. Define the scope of printing under the menu P RINT OPTIONS Print calibration graph and/or ... -
Page 65: Performing Measurements
multi N/C pharma UV Operation 3. Highlight the corresponding calibration report and click on the button [OK]. The calibration report is displayed. Performing measurements 6.5.1 Measurement with manual sample supply Carry out a measurement with manual sample supply as follows: 1. -
Page 66: Measurement With Sampler
Operation multi N/C pharma UV 6.5.2 Measurement with sampler ATTENTION After transport or prolonged storage of the analyzer the sampler must be readjusted during recommissioning. 1. In the window S select sample supply with sampler by clicking the YSTEM STATE button [S AMPLER ... - Page 67 multi N/C pharma UV Operation Confirm the entries with The rack table will be closed. A query follows whether the rack table should be saved. If you want to reuse the entries later, open the default window for saving files with [Y Next the window M opens.
-
Page 68: Maintenance And Care
Maintenance and care multi N/C pharma UV Maintenance and care Maintenance intervals Analyzer Maintenance task Maintenance interval Clean and maintain the device weekly Clean drip trays and reagent bottles weekly and after filling Inspect all hose connections for tight fit weekly Inspect the fastening screws for tight fit monthly... -
Page 69: Adjustment And Setup Tasks
multi N/C pharma UV Maintenance and care ATTENTION To carry out regular inspections and maintenance tasks always ensure that the doors and the left side wall of the analyzer are freely accessible. ATTENTION Ensure that all connections are gas-tight again after servicing: ... -
Page 70: Fig. 36 Adjustment Points On The Sample Tray
Maintenance and care multi N/C pharma UV 4. Increase or decrease the z values until the cannulas are positioned approx. 2 cm above the adjustment points and click the [ ] button. NEEDLE ADJUST 5. Align the cannulas with the two adjustment points by carefully bending them. Fig. -
Page 71: Adjust The Npoc Purge Flow
multi N/C pharma UV Maintenance and care 7. To adjust position 1, place a sample tube with magnetic stirrer onto the sample tray. 8. Increase or reduce the z values to align the rinse position or position 1. Adjust the height of the cannulas in the rinse position so that the cannulas immerse at least 1 cm into the rinse vessel. -
Page 72: Adjusting The Epa Sampler
Maintenance and care multi N/C pharma UV 2. From the list field select the option P URGING 3. For sample supplied with sampler: Select the purging time in the field T between 1 and 900 seconds. In the R field, select any position on the sample tray in which you ACK POSITION ... - Page 73 multi N/C pharma UV Maintenance and care For NPOC measurements, adjust the immersion depth for automatic acidification (z position). Adjust the cannula in the rinse position and test the adjustment values by automatically moving to the acid position. Make sure the cannula perforates the cover but does not enter the sample liquid.
-
Page 74: Replacing The Water Traps
Maintenance and care multi N/C pharma UV 5. Adjust position 1. To adjust the x and y positions, remove the sample tube and move to the position. Place the stirrer onto the sample tray in this position. If it is at the center of the position, the position is correctly adjusted. - Page 75 multi N/C pharma UV Maintenance and care These two water traps can be replaced in the switched-on state but not during a measurement. 1. Open the doors of the analyzer. 2. Pull the water traps out of the clamps (3). 3.
-
Page 76: Fig. 37 Water Traps On The Inside Of The Device, Left Side Panel Opened
Maintenance and care multi N/C pharma UV FAST connector Terminal on the gas box Prefilter (aerosol trap) Disposable retention filter FAST connector Fig. 37 Water traps on the inside of the device, left side panel opened 1. Exit the control and analysis software multiWin with a backwash of the analyzer (see section "Switching off before longer periods of rest"... -
Page 77: Replacing The Halogen Trap
multi N/C pharma UV Maintenance and care Replacing the halogen trap ATTENTION Damage to optical and electronic components (detectors, flow sensors) from aggressive combustion products if the copper wool in the halogen trap is used up! Replace the complete filling of the halogen trap as soon as half of the copper wool or the brass wool is discolored. -
Page 78: Maintaining The Uv Reactor
Maintenance and care multi N/C pharma UV Maintaining the UV reactor It is recommended to test the illumination of the UV lamp every 12 months to guarantee that the sample is fully digested. If the illumination of the lamp is insufficient, the UV reactor must be cleaned. ... -
Page 79: Cleaning The Uv Reactor
multi N/C pharma UV Maintenance and care 7.5.2 Cleaning the UV reactor The UV reactor can be cleaned with the oxidizing reagent: Na (with c = 80 g/l). It is not necessary to remove the UV reactor. For cleaning, dip the sample aspiration cannula into the reagent bottle filled with solution and start one measurement by hand (manual mode). - Page 80 Maintenance and care multi N/C pharma UV 5. Release the 4 knurled head screws (arrows) at the cover of the cooling block. 6. Remove the cover and the metal plate below. 7. Remove the TIC container from the tray and pull the hoses out of the FAST connectors.
-
Page 81: Cleaning And Replacing The Syringe Pump
multi N/C pharma UV Maintenance and care Cleaning and replacing the syringe pump Replace or clean the syringe pump as follows: 1. Open the doors of the analyzer. 2. Drain the syringe pump via the software. Using the menu command I ... -
Page 82: Removing And Replacing The Pump Hose
Maintenance and care multi N/C pharma UV Removing and replacing the pump hose CAUTION The pump hose contains phosphoric acid! Phosphoric acid is irritating for eyes, skin and the mucous membrane! Always wear goggles and protective gloves when handling concentrated phosphoric acid! Rinse the affected skin with water immediately. -
Page 83: Replacing The Hose Connections
multi N/C pharma UV Maintenance and care 9. Push hose no. 15 and hose no. 16 back onto their adapters. 10. Position the conveyor belt around the pump body. 11. Press the conveyor belt down with one hand and turn the bracket to the right with the other hand until it locks into place. -
Page 84: 7.10 Checking The System For Tightness
Maintenance and care multi N/C pharma UV 3. Slide the FAST connector from the cannula onto the hose. 4. Pull the hose off the cannula. 5. Pull the hose far out of the FAST connector until it no longer reaches into the wider hole. - Page 85 multi N/C pharma UV Maintenance and care In (inlet flow): 140 ml/min Out (outlet flow): 140 ml/min (± 10 ml/min) ATTENTION If the outlet flow is significantly below the inlet flow of 140 ml/min, all connection points must be reinspected.
-
Page 86: Fault Removal
Fault removal multi N/C pharma UV Fault removal General information The following chapter describes a number of possible problems that the user can partially remedy independently. If such problems occur frequently, the Service department of Analytik Jena GmbH must always be informed. As soon as the multi N/C pharma UV is switched on, system monitoring takes place. -
Page 87: Error Messages In Multiwin
multi N/C pharma UV Fault removal Error messages in multiWin Error code Error message VERS Communication error - incorrect command set between PC and device! Cause Remedy the internal and external program versions do update the internal and external program not match VERS1 Communication error - analyzer... - Page 88 Fault removal multi N/C pharma UV COM 2 not found COM 3 not found COM 4 not found Cause Remedy problems with internal hardware switch analyzer off/on Gas pressure error Cause Remedy counterpressure in the analyzer system too great: ...
- Page 89 multi N/C pharma UV Fault removal Optics error, analog values outside of range Cause Remedy the analog values of the detector are outside the check the quality of the carrier gas working range NDIR detector faulty inform Service no connection to the syringe pump Cause Remedy...
- Page 90 Fault removal multi N/C pharma UV Unknown sampler command Cause Remedy Communication error Contact Service Restart the internal program Cause Remedy overvoltage initialize analyzer short-term power failure Syringe pump initialization Syringe pump: invalid command Syringe pump: invalid operand Syringe pump faulty command sequence Cause Remedy...
-
Page 91: Status Errors - Indications In The Window S
multi N/C pharma UV Fault removal Status errors – indications in the window S YSTEM STATE Status errors are shown in the window S in red or yellow. YSTEM STATE Error indication Flow indication IN: 140 ml/min Flow indication OUT: < 130 ml/min or > 150 ml/min Cause Remedy ... -
Page 92: Equipment Faults And Analytical Problems
Fault removal multi N/C pharma UV Values of the NDIR detector below opt. bank indicated in yellow Cause Remedy The analog values of the detector are outside the check halogen trap and replace if necessary working range. consult regarding the application with Analytik Jena The ADU values can be viewed in the control and analysis GmbH about specific application rules for difficult software multiWin with the menu command Instrument /... - Page 93 multi N/C pharma UV Fault removal Water traps clogged Cause Remedy Lifetime exceeded (renewal after 6 month Replacement of the water traps (see section "Replacing recommended, matrix dependent) the water traps" p. 74) Measuring of samples with strong aerosol generation ...
- Page 94 Fault removal multi N/C pharma UV Sample is not drawn up without air bubbles Cause Remedy leaks in the sample intake path check connections between cannula and hose and tighten any loose connections sample intake cannula clogged ...
-
Page 95: Transport And Storage
multi N/C pharma UV Transport and storage Transport and storage Transport 9.1.1 Preparing the analyzer for transport CAUTION Risk of injury from glass breakage! When removing the glass components there is a risk of injury from glass breakage! Remove all glass components carefully from the analyzer! ATTENTION Unsuitable packaging material and residue of measuring solution and chemicals can... -
Page 96: Transport Notes
Transport and storage multi N/C pharma UV 9.1.2 Transport notes Observe the safety instructions in section "Safety instructions, transport and installation" p. 11. Transport the analyzer very carefully to prevent damage from impact or vibration. The analyzer should be transported in such a way that major temperature fluctuations are avoided and the formation of condensate is thus prevented. -
Page 97: Moving The Analyzer In The Laboratory
multi N/C pharma UV Transport and storage 9.1.4 Moving the analyzer in the laboratory CAUTION Unintentional dropping of the analyzer poses a risk of injury and the analyzer will be damaged! Move the analyzer with great care! 2 persons are required to lift and carry the analyzer! Observe the following when moving the analyzer within the laboratory: ... -
Page 98: Recommissioning After Transport Or Storage
Transport and storage multi N/C pharma UV Recommissioning after transport or storage 9.3.1 Assembling the analyzer after transport or storage When positioning the analyzer observe the notes in section "Site requirements" p. 36. 1. Carefully remove the basic device, accessories and any add-on devices from the transport packaging. -
Page 99: Fig. 41 Mains Connection And Gas Connections At The Multi N/C Pharma Uv
multi N/C pharma UV Transport and storage Fig. 41 Mains connection and gas connections at the multi N/C pharma UV Holder for mains fuse "FUSE" Connection for inert gas "N nitrogen" Main switch to switch the analyzer on and off Connection of the neutral conductor at the "power switch"... - Page 100 Transport and storage multi N/C pharma UV The carrier gas connection at the equipment is a quick-release connection: The hose is inserted into the connection and thereby attached. To undo the hose the red ring must be pressed back and the hose pulled off the ...
-
Page 101: Disposal
multi N/C pharma UV Disposal Disposal 10.1 Waste water Waste water arises during the ongoing analysis operation of the multi N/C pharma UV. This water contains sulfuric acid, diluted phosphoric acid and sample, depending on the measurement mode. The neutralized (if necessary) waste must be brought to the appropriate waste disposal center for correct disposal according to the appropriate legal guidelines. - Page 102 Disposal multi N/C pharma UV 1. Exit the control and analysis software multiWin. Press the main switch to turn off Preparation the analyzer and remove the mains plug from the power outlet. 2. Turn off the autosampler, unplug the mains cable and the serial data cable from the autosampler and remove the autosampler.
- Page 103 multi N/C pharma UV Disposal 8. Remove the complete UV module towards the back and the right. 9. Disconnect the plug-in connector from the connection in the analyzer. 10. Detach hose no. 23 from the PTFE screw joint on the UV module.
-
Page 104: Specifications
Specifications multi N/C pharma UV Specifications 11.1 Technical data General characteristics Designation/type Analyzer multi N/C pharma UV Dimensions Basic device (W x H x D) (513 x 464 x 550) mm Mass approx. 28 kg Procedural data Digestion principle wet chemical through UV radiation or UVC radiation and Measuring method TC, TIC, TOC (differential method), NPOC Industry standards... -
Page 105: 11.2 Standards And Directives
multi N/C pharma UV Specifications Environmental conditions Temperature during storage 5 – 55 °C Temperature during operation 10 – 35 °C Humidity during operation max. 90% at +30 °C Humidity during storage (10 – 30) % (use desiccant) Air pressure 0.7 1.06 bar Minimum equipment for the control and analysis... - Page 106 Specifications multi N/C pharma UV The analyzer is built and tested according to standards that meet the requirements of EU directives EU directives 2014/35/EU and 2014/30/EU. The analyzer leaves the factory in a sound condition as far as technical safety is concerned. To maintain this condition and to ensure safe operation, the operator must strictly observe the safety and operating instructions contained in this manual.
Need help?
Do you have a question about the Analytik Jena multi N/C and is the answer not in the manual?
Questions and answers