
Related Manuals for Endress+Hauser Analytik Jena Biometra TOne 96


Summary of Contents for Endress+Hauser Analytik Jena Biometra TOne 96
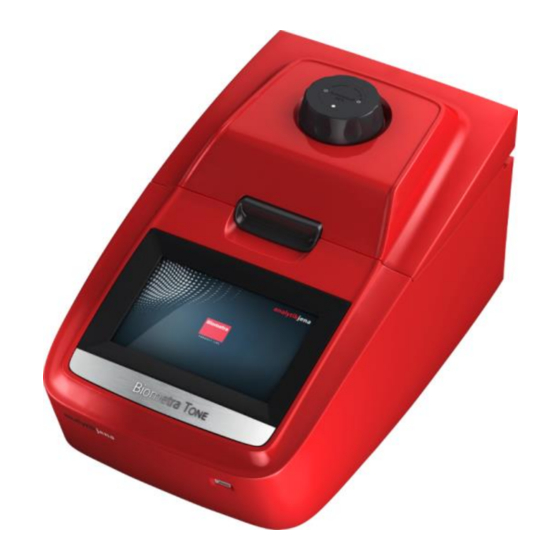
- Page 1 Operating Manual Biometra TOne High-performance thermal cycler for DNA amplification by PCR...
- Page 2 Biometra GmbH (Analytik Jena AG) Manufacturer Rudolf-Wissell-Str. 30 37079 Göttingen Germany Phone + 49 551 50 68 6-0 + 49 551 50 68 6-66 Email Info@analytik-jena.com Biometra GmbH Service Rudolf-Wissell-Str. 30 37079 Göttingen Germany Phone + 49 551 50 68 6 -12, -14 or -16 + 49 551 50 68 6-11 Email Service@analytik-jena.com...
-
Page 3: Table Of Contents
Contents Contents Basic information ....................... 5 Notes on the operating manual ................. 5 Purpose ........................6 Warranty and liability ....................6 Safety and warning instructions ..................7 General notes ......................7 Safety markings on the Biometra TOne ..............7 Technical condition ....................7 Requirements for the operating personnel ............... - Page 4 Contents 6.3.2 Opening the lid ....................21 The Biometra TOne software ..................22 6.4.1 Keyboard ......................22 6.4.2 Keypad ......................23 6.4.3 Cursor keys .....................23 6.4.4 Confirm or Cancel ...................23 6.4.5 List of commands and icons used ..............24 Operation .........................29 Power on self-test ....................29 Login screen ......................29 Login ........................30 Home screen ......................31...
- Page 5 Contents 10.2 Pausing a program ....................59 10.3 Continuing the program ..................60 10.4 Skipping a step ......................60 10.5 Stopping the program....................60 Tools ..........................61 11.1 Configuration ......................62 11.1.1 Setting the date and time ................63 11.1.2 Automatic user logout ..................
- Page 6 Contents 15.2 Disinfecting the device ....................92 15.3 Firmware update .....................92 Service ..........................93 16.1 Device return information ..................93 16.2 Packing the Biometra TOne ..................94 Disposal ...........................95 Declaration of conformity ....................96 Index ..........................97 Version 03_19 Biometra TOne Manual...
-
Page 7: Basic Information
Basic information Basic information Notes on the operating manual The Biometra TOne is intended for operation by qualified specialist personnel observing this operating manual. The operating manual contains information about the design and operation of the Biometra TOne and provides personnel familiar with PCR technology with the necessary know-how for the safe handling of the equipment and its components. -
Page 8: Purpose
Basic information Purpose The Biometra TOne is an end-point thermal cycler. It is designed to amplify nucleic acids by repeated cycles of heating and cooling using DNA polymerases in a PCR reaction. The thermal cycler is developed for Research Use Only (RUO). The Tone combines modern design with user-friendly software. -
Page 9: Safety And Warning Instructions
Safety and warning instructions Safety and warning instructions General notes For your own safety and to ensure error-free and safe operation of the Biometra TOne, please read this chapter carefully before commissioning. Besides the safety instructions in this user manual and the local safety regulations that apply to the operation of the device, the general applicable regulations regarding accident prevention, occupational health and safety and environmental protection have to be observed and complied with. -
Page 10: Requirements For The Operating Personnel
Safety and warning instructions ❑ Prior to every use the device must be checked for damage and sound condition. ❑ Any changes in the device affecting its safety must be reported by the operating personnel to the operator without delay. Requirements for the operating personnel The Biometra TOne must only be operated by qualified specialist personnel instructed in the use of the device. -
Page 11: Safety Instructions: Protection Against Explosion And Fire
Safety and warning instructions ❑ The thermal block, the samples and the heated lid reach high temperatures. There is a risk of burns during contact. ❑ Ensure that the lid is securely closed before starting the program! Do not touch the heated lid! ❑... -
Page 12: Safety Instructions: Service And Repair
Safety and warning instructions The following has to be observed: ❑ Protective goggles and rubber gloves have to be worn when handing reagents. ❑ If only a few samples are treated, an (empty) tube of the same height must additionally be placed at each corner position of the block. -
Page 13: Technical Specifications
Technical specifications Technical specifications Order number 846-x-070-311 846-x-070-301 Name Biometra TOne 96 Biometra TOne 96G Capacity 96 x 0.2 ml tubes, 96 well micro plates or 8 well strips Block material Aluminum Block coating Special alloy Max. heating rate* 4.0 °C/sec Max. - Page 14 Technical specifications Power consumption 550 watt Operating voltage 100, 115, 230 Volt, 50 - 60 Hz Noise emissions Very low, max. 45 dB Interfaces USB A, Ethernet Environmental conditions 15 °C to 35 °C, 70% air humidity, max. 2,000 m above sea level Dimensions (WxDxH) 260 mm x 430 mm x 210 mm...
-
Page 15: Function And Setup
Function and setup Function and setup The Biometra TOne thermal cycler is available in the following models: • Biometra TOne 96 with aluminum block • Biometra TOne 96G with aluminum block and gradient function The device is controlled by a 7'' touchscreen display and an easy-to-use user interface. PCR protocols and run log files can be saved to a connected USB stick. -
Page 16: High Performance Smart Lid
Function and setup High Performance Smart Lid The Biometra TOne heated lid has been optimized to heat twice as fast as with older models and thus helps to shorten protocol run times. Moreover the heated lid fulfills two other important functions: It prevents the formation of condensation at the reaction tube portion located above the block surface level and it ensures reliable contact between the reaction tubes and the thermoblock by applying constant pressure. -
Page 17: Linear Gradient Tool
Function and setup Linear Gradient Tool For optimizing new primer pairs in a single run the Biometra TOne can optionally be equipped with a gradient function. Finding the best primer annealing temperature is crucial for the specificity and efficiency of PCR reactions. Often the optimization of experiments is conducted to a limited extent only leading to unspecific byproducts or reduced PCR sensitivity. -
Page 18: Order Numbers
Function and setup Order numbers Instruments incl. block and base unit Model Block type Gradient range Order number TOne 96 Aluminum 846-x-070-311 TOne 96G Aluminum 20°C 846-x-070-301 Abbreviations: G = gradient x = 2 for 230 V, 4 for 115 V, 5 for 100 V Version 03_19 Biometra TOne Manual... -
Page 19: Installation
Installation Installation Scope of delivery Thermal cycler Mains cable Operating instructions Quick reference guide Please keep the original packaging in case the device needs to be returned. The shipping box for the Biometra TOne thermal cycler contains a specially developed foam system for the transport of high quality electronic devices. -
Page 20: Commissioning
Installation Commissioning WARNING Danger of electric shock! Prior to commissioning, please make sure that the operating voltage set on the device is the same as the mains voltage (see section "Setting the operating voltage" p. 17). Attention Do not cover the ventilation slits! Ensure that the ventilation slits are clear. -
Page 21: Control Elements
Control elements Control elements Biometra TOne front view Dial for adjusting the contact pressure Lid sealing button Display USB port Fig. 2 Front view of the Biometra TOne Biometra TOne Manual Version 03_19... -
Page 22: Biometra Tone Rear View
Control elements Biometra TOne rear view The Ethernet port, mains plug and mains switch are located at the rear of the Biometra TOne. Ethernet port Mains switch Fuse holder Mains plug Fig. 3 Rear view of the Biometra TOne High Performance Smart Lid (HPSL) The Biometra TOne has a height-adjustable lid for optimal contact pressure on the samples. -
Page 23: Opening The Lid
Control elements Attention The strength of the lid contact pressure has been designed for a fully populated block. If only a few samples are to be used in the block, place an additional two (empty) tubes of the same height in the four corner positions of the block. Otherwise the sample tube may be damaged from excess contact pressure (see also Fig. -
Page 24: The Biometra Tone Software
Control elements The Biometra TOne software The Biometra TOne thermal cycler features a 7" color touchscreen and a completely new software for operation. 6.4.1 Keyboard For some applications, names, addresses or passwords have to be defined. For this purpose, the Biometra TOne software offers a keyboard to enter characters, digits and special characters. -
Page 25: Keypad
Control elements 6.4.2 Keypad In some screens of the Biometra TOne software digits have to be entered. For this purpose, the software features a keypad integrated in some screens: Fig. 6 Biometra TOne keypad The keypad can be used to enter digits, dots, minus signs and infinite. In addition the following special keys are available: Delete single character Delete all characters... -
Page 26: List Of Commands And Icons Used
Control elements Cancel 6.4.5 List of commands and icons used The Biometra TOne software uses the following icons: Command Icon Home Back Right Left Down Confirm Cancel Login User management New user Delete user Edit user Incubation Start incubation Version 03_19 Biometra TOne Manual... - Page 27 Control elements Programs New program Open template Copy program/copy all programs Delete program Edit program Start program Quick select program or user Stop program Done Save program Pause program Continue program Skip step Graphical view Spreadsheet view Gradient display Biometra TOne Manual Version 03_19...
- Page 28 Control elements Edit step Insert step Delete step Temperature increment Time increment Heating rate Gradient Linear Gradient Tool Standard gradient programming Preheating OFF Preheating ON Tools Settings Date and time Automatic user logout Beeper Network Version 03_19 Biometra TOne Manual...
- Page 29 Control elements Display brightness Display darker Display brighter Touchscreen calibration Factory settings Documentation Run log file Run log file overview Save run log file to USB Save all run log files to View run log file View program Log file self-test Error log file Extended self-test Start extended self-test...
- Page 30 Control elements Load backup file Cycler information Version 03_19 Biometra TOne Manual...
-
Page 31: Operation
Operation Operation Power on self-test After the Biometra TOne is switched on, the device performs an automatic self-test (power on self-test). During the test the device shows the following screen: Fig. 7 Biometra TOne start screen For the power on self-test a log file is created and stored in the thermal cycler memory (see chapter 11.3.2). -
Page 32: Login
Operation Fig. 8 Biometra TOne login screen Login After starting the Biometra TOne, the login screen is displayed. To log in as an existing user, press Login In the next screen select a user by pressing the corresponding button. Fig. 9 Biometra TOne select user screen Version 03_19 Biometra TOne Manual... -
Page 33: Home Screen
Operation Note: The position of the buttons can change. The button for the most recently logged in user is always shown in the first position at the top left of the screen. All the other buttons become arranged from top left to bottom right according to the date and time of the latest user login. -
Page 34: Block Status
Operation Command Function Chapter Programs Viewing, running and editing programs See chapter 8 Block Shows the current block status. If a block is free, See chapter 0 and chapter 0 a touch on the button leads to a list of previously used or changed programs for quick start Incubate For running a sample block at a constant... -
Page 35: Quick Start Function
Operation Button Block status Color Function Free Green Quick start function Running Yellow Program view Pause Blue Program view Quick start function The Biometra TOne software offers a quick start function for previously used programs. To use the quick start function, press the block status display button in the login screen (see chapter 7.2) or in the home screen (see chapter 7.4). -
Page 36: Incubation Mode
Operation Fig. 13 Biometra TOne program quick start screen Select the program for quick start in the table and press the Start button to start the selected program. If necessary, the program can be edited before the start or a new program can be created based on a template (see chapter 8.1). - Page 37 Operation To start incubation, press Start Fig. 14 Biometra TOne incubation mode screen During incubation the following commands can be used: Stop Pause Continue Skip Note: To stop the incubation, use the corresponding command. Do not switch off the device while the incubation is running.
-
Page 38: Creating, Editing And Saving Programs
Creating, editing and saving programs Creating, editing and saving programs Programming modes The Biometra TOne software offers spreadsheet or graphical programming. Use the buttons to toggle between the two modes. The following screenshots show the spreadsheet and graphical programming mode. Graphical view Spreadsheet view Fig. -
Page 39: Creating A New Program/Using A Program Template
Creating, editing and saving programs Both programming modes show the same information but in different ways. In the spreadsheet mode all parameters are summarized in a table. In the graphical mode symbols are displayed for some parameters (see the table below). Toggle to the spreadsheet mode to view the settings for these parameters. - Page 40 Creating, editing and saving programs Fig. 17 Biometra TOne program overview screen In the program overview screen, press the New from template button: New from template The program template screen opens (see Fig. 19). Search for a program template using the cursor keys and press the corresponding button to select it.
-
Page 41: Assigning Program Names
Creating, editing and saving programs The program structure can be controlled in the program preview (see Fig. 19). If a template is selected, the program steps and some additional information are displayed in spreadsheet form. By using the program preview function, templates can be checked before they are opened. -
Page 42: Preheating The Heated Lid
Creating, editing and saving programs Fig. 20 Biometra TOne heated lid temperature setting screen NOTICE The heated lid automatically switches off at a temperature difference of >75 °C between the block and the heated lid. At these low block temperatures, sample condensation on the tube lid is no longer to be expected. -
Page 43: Editing All Parameters Of A Step
Creating, editing and saving programs Parameter Description and limits Chapter Temperature Temperature for a step in °C. The target temperature See chapter 8.6 can be set between 3.0°C and 99.0°C in tenths of a degree. Hold time Hold time for a step in h:mm:ss. Values between 0 and See chapter 8.6 9 hours, 0 and 59 minutes and 0 to 59 seconds can be programmed. -
Page 44: Programming Loops
Creating, editing and saving programs In the graphical view you can also access the screen for editing a program step by touching the currently activated step again. Fig. 21 Biometra TOne program step editing screen Note: To program a step at least the temperature and the hold time must be defined. To set the temperature, touch the corresponding input field and enter a value between 3.0°C and 99.0°C. -
Page 45: Programming A Temperature Increment
Creating, editing and saving programs To program a loop, select the last step of the loop and enter the step number to which the program should return in the Go To input field (see Fig. 21). To define the number of repetitions, enter a number in the Cycles field (see Fig. -
Page 46: Adjusting The Ramp Rate
Creating, editing and saving programs Note: Time increments only become active if they are in loops. If a time increment has been programmed, the small symbol will be shown at the corresponding step in the graphical programming mode. 8.6.1.4 Adjusting the ramp rate The average ramp rate can be adjusted for each step. - Page 47 Creating, editing and saving programs Fig. 22 Temperature gradient on a 96 well sample block In a specific column all wells have the same temperature but the temperature differs from column to column. The temperature gradient can be applied in both directions; the highest temperature can be either in column 1 or column 12. Sample replicates are distributed across the columns of the sample block and tested for the temperature giving the optimal result.
-
Page 48: Direct Programming Of Program Parameters For A Step
Creating, editing and saving programs To create a gradient using the standard gradient programming screen, enter a temperature for the first column and the last column in the sample block (see Fig. 24). The effective temperatures for all the other columns are automatically calculated and displayed as a bar chart. - Page 49 Creating, editing and saving programs Parameter Spreadsheet view ① Temperature (gradient) [°C] ② Hold time [h:mm:ss] ③ Loops ④ Number of cycles Temperature increment [∆T (°C)] ⑤ Time increment [∆t (s)] ⑥ Ramp rate [∆R (°C/s)] ⑦ To edit program parameters in the graphical view, press the corresponding input field for the parameter that you want to edit for the step (see Fig.
- Page 50 Creating, editing and saving programs ⑥ Ramp rate option button ⑦ Input field for program option (loop counter here) When you press a cell in the spreadsheet view or an input field in the graphical view, a small window opens in the middle of the screen with a keyboard (see Fig. 27). This window allows you to enter the desired value for the parameter using the keyboard.
-
Page 51: Inserting A Step
Creating, editing and saving programs Fig. 28 Biometra TOne gradient view Inserting a step To insert a step, select a program step on the Biometra TOne spreadsheet or graphical programming screen and press the Insert button. Insert When you press the Insert button, the screen for editing program steps opens (see chapter 8.6). -
Page 52: Saving The Program
Creating, editing and saving programs Note: If a step is deleted in an existing loop, the number of steps within the loop decreases, whereas the number of cycles remains the same. Saving the program To save a program, press the Done button. Done on the Biometra TOne spreadsheet or graphical programming screen. - Page 53 Creating, editing and saving programs An overview screen opens in which a maximum of 30 users or 50 user programs are displayed. If a user has saved more than 50 programs, scroll through the user list using the cursor keys (see Fig. 30). Right Left To select a user or program, press the corresponding button with the user or program name.
-
Page 54: Starting, Coping And Deleting Programs
Starting, coping and deleting programs Starting, coping and deleting programs Starting a program The Biometra TOne software offers a quick start function for previously started programs (see chapter 7.6). This chapter describes the process of selecting and starting stored programs from a user account. -
Page 55: Copying A Program
Starting, coping and deleting programs Fig. 32 Biometra TOne program overview screen with preview Copying a program To copy a program, touch the corresponding buttons to select a user directory and a program on the Biometra TOne program overview screen (see Fig. 31). If the number of user directories or programs is higher than the maximum number that can be displayed in the list, the buttons above and below the lists can be used to scroll up and down. -
Page 56: Copying All Programs
Starting, coping and deleting programs Fig. 33 Biometra TOne program overview screen Copying all programs To copy all programs, touch the corresponding button to select a user directory on the Biometra TOne program overview screen (see Fig. 31). If the number of user directories or programs is higher than the maximum number that can be displayed in the list, the buttons above and below the lists can be used to scroll up and down. -
Page 57: Deleting A Program
Starting, coping and deleting programs Fig. 34 Biometra TOne program overview screen Deleting a program To delete a program, touch the corresponding buttons to select a user directory and a program on the Biometra TOne program overview screen (see Fig. 31). If the number of user directories or programs is higher than the maximum number that can be displayed in the list, the buttons above and below the lists can be used to scroll up and down. -
Page 58: Deleting All Programs
Starting, coping and deleting programs Deleting all programs To delete all programs, touch the corresponding buttons to select a user directory on the Biometra TOne program overview screen (see Fig. 31). If the number of user directories is higher than the maximum number that can be displayed in the list, the buttons above and below the lists can be used to scroll up and down. -
Page 59: Running, Pausing, Continuing And Stopping Programs
Running, pausing, continuing and stopping programs Running, pausing, continuing and stopping programs 10.1 Display during a run After a program has been started (see chapter 9.1) the Biometra TOne software can display the currently running program in a spreadsheet or graphical view. In addition, the curve of the gradient can be displayed in gradient steps. - Page 60 Running, pausing, continuing and stopping programs Gradient view Fig. 37 Biometra TOne display during the run in a graphical, spreadsheet and gradient view The following parameters are summarized in the headline in the table: • Program name • Sample block temperature •...
-
Page 61: Pausing A Program
Running, pausing, continuing and stopping programs 10.2 Pausing a program To pause a program, press the Pause button on the Biometra TOne run display screen (see Fig. 37). Pause The word "Pause" is shown and the pause time is counted in the Remain.Time field. Spreadsheet view Graphical view Fig. -
Page 62: Continuing The Program
Running, pausing, continuing and stopping programs Note: If the device is switched off during a pause step, this will be recognized as a power failure (a corresponding error message is written to the run log file). If, for example, the last step in a program is a pause, the program has to be stopped by pressing the Stop button (see chapter 10.5), before switching off the Biometra TOne. -
Page 63: Tools
Tools Tools The Biometra TOne software provides the following tools: Settings Defines basic device settings See chapter 11.1 User Tool for user management See chapter 11.2 Management Documentation Access to stored log files See chapter 11.3 Self Test Executes the extended self-test See chapter 11.4 Service info file Creates service info files (SINF) -
Page 64: Configuration
Tools 11.1 Configuration The Biometra TOne software offers the following setting options: Date and time Sets the date and time See chapter 11.1.1 Automatic user logout Switches automatic user logout on or off and See chapter 11.1.2 time settings Beeper Switches the beeper on or off See chapter 11.1.3 Network... -
Page 65: Setting The Date And Time
Tools 11.1.1 Setting the date and time The Biometra TOne software allows the user to set the date and time. The date has the format day:month:year and the time the format hours:minutes:seconds. Fig. 42 Biometra TOne date and time entry screen Activate the corresponding input field and use the keypad on the right side of the date and time entry screen to enter digits. -
Page 66: Automatic User Logout
Tools 11.1.2 Automatic user logout The Biometra TOne features an automatic user logout function. The automatic user logout can be switched On or Off by using the corresponding button: Automatic logout On Automatic logout Off If automatic user logout is switched on, the time after which the user is logged out from the system can be set. -
Page 67: Configuring The Beeper
Tools 11.1.3 Configuring the beeper The Biometra TOne has a beeper which, if switched on, will issue an acoustic signal when a PCR program is finished. The beeper can be switched ON or OFF by activating the corresponding checkbox. Fig. 44 Biometra TOne beeper configuration screen 11.1.4 Network The Network menu item can be used to configure basic settings or show a list of network... -
Page 68: Network Users
Tools Delete all characters Go to the next input field Fig. 45 Biometra TOne network settings screen Note: The network cable must be at least performance class Cat 5e and the cable configuration has to be STP. 11.1.4.2 Network users The software stores the users who access the Biometra TOne via the network and lists them in chronological order in a table. -
Page 69: Screen Calibration
Tools Fig. 46 Biometra TOne display brightness adjustment screen 11.1.6 Screen calibration To calibrate the screen, follow the instructions and touch the screen at the center of the displayed circle. This procedure is repeated three times at different positions on the display. If, at the end of the procedure, a small cross is shown within the large circle, the calibration was successful. -
Page 70: Factory Settings
Tools 11.1.7 Factory settings Press the Factory settings button and confirm the following confirmation prompt: Fig. 48 Biometra TOne confirmation prompt Using the factory settings tool will delete all users and programs! Use a backup file to restore the system (see chapter 11.6). 11.2 User management The Biometra TOne can manage up to 90 user directories. -
Page 71: Creating A User
Tools There is no password protection for all users except the administrator "Admin". If more than 8 users have been created, you can use the cursor keys to navigate through the table with the list of users (see Fig. 49). Down To select a user, press on the corresponding row in the table. -
Page 72: Editing User Settings
Tools 11.2.2 Editing user settings To edit the user settings, select a user on the Biometra TOne user management screen (see chapter 11.2) and press the Edit button. Edit On the next screen the user name and the language setting can be changed. Fig. -
Page 73: Documentation
Tools Fig. 52 TOne confirmation prompt After confirmation of the confirmation prompt the user and all of his programs will be deleted. 11.3 Documentation The Biometra TOne software provides the following documentation tools: Run Log File Documentation of PCR runs See chapter 11.3.1 Power On Log File Result of the latest initial self-test... -
Page 74: Run Log File
Tools 11.3.1 Run log file The Biometra TOne lists up to 24 run log files for the programs that were last started. Fig. 54 Biometra TOne run log file overview screen The run log files are sorted by date and time. The run log file for the program that was last started is shown at the first position in the table. - Page 75 Tools • Serial number of the Biometra TOne thermal cycler • Sample block type • Block serial number • Block number • Messages Fig. 55 Biometra TOne run log file screen To view the corresponding program, press the View Program button. View program The Biometra TOne offers the option to show the program in graphical from or as a spreadsheet (see chapter 8.1).
-
Page 76: Power On Logfile
Tools Fig. 56 Biometra TOne program view screen Use the buttons to toggle between the overview screen, the run log file screen and the view program screen. Overview Run Log Files View Run Log File Show Program To export all the saved run log files on USB, press the Save all Run Log Files on USB button. -
Page 77: Extended Self-Test Log File
Tools Fig. 57 Biometra TOne power on log file screen 11.3.3 Extended self-test log file During the extended self-test the Biometra TOne checks several functions and components like cooler, thermal tracking, heating and cooling rate, refrigeration, gradient, heated lid and regulation (see chapter 11.4). -
Page 78: Error Log File
Tools 11.3.4 Error log file The Biometra TOne records all errors by date and time. The latest error is shown at the first position in the error table. The error code and the message are also listed. Fig. 59 Biometra TOne error log file screen Version 03_19 Biometra TOne Manual... -
Page 79: Extended Self-Test
Tools 11.4 Extended self-test NOTICE The Extended Self-Test must be performed under the following conditions to achieve reproducible and meaningful results: Ambient temperature in the range 20 °C to 25 °C Mains voltage depending on the voltage type of the device: 100 V/115 V/230, ±10 % each ... - Page 80 Tools Fig. 60 How to load the sample block with plasticware for the extended self-test When the plasticware has been properly inserted and the heated lid is closed, the extended self-test can be started. To start the extended self-test press: Start Self Test Fig.
-
Page 81: Service Info File (Sinf)
Tools Fig. 62 Biometra TOne extended self-test overview screen The results of the extended self-test are summarized in a log file, stored by the device and can be viewed by the user (see chapter 11.3.3). 11.5 Service info file (SINF) The service info file is a helpful tool for remote fault diagnosis by the Biometra service department. -
Page 82: Backup
Tools The service info file can be sent by e-mail to the Biometra service department. For contact details, refer to the inside front cover. 11.6 Backup The backup function is used to synchronize the memory contents between Biometra TOne thermal cyclers. With the backup all folders, programs, users and user settings can be stored to USB and transferred to another Biometra thermal cycler (TOne, Trio or TAdvanced). -
Page 83: Cycler Info
Tools 11.7 Cycler Info The Cycler Info screen provides general information about the device like: • Cycler type • Company • Serial number cycler • Block type • Block serial number • Software version • Protocol version • Revision number power board •... -
Page 84: Contact
Tools 11.8 Contact Shows contact details for the Biometra service department. Fig. 66 Biometra TOne service department contact details screen Version 03_19 Biometra TOne Manual... -
Page 85: Adaptation Of Programs
Adaptation of programs Adaptation of programs If programs are exchanged between different thermal cycler models or the sample block is exchanged, programs might need to be adapted to the installed sample block type prior to the start or during editing. The following table provides an overview of possible program adaptations: Cause Example... - Page 86 Adaptation of programs The heating and A program for a 96 well The heating and cooling rate will be cooling rate is not aluminum block is to be increased to the maximum possible reached. started on a 96 silver block. value for the installed sample block type.
-
Page 87: Quick Reference Guide
Quick reference guide Quick reference guide WARNING Before initial operation, check the correct operating voltage is set on the voltage selection switch on the underside of the device. Do not open the housing! Danger of electric shock! CAUTION The sample block and the heated lid can reach high temperatures during operation. - Page 88 Quick reference guide Press [Tools] to access the system settings, user management, documentation, backup tool or self-test functions. Press [Logout] to log out. Press [Programs] on the TOne home screen The program overview screen opens: Editing, saving and copying programs ...
- Page 89 Quick reference guide Use the cursor keys above the keyboard to switch between program steps. The number of the currently activated step is displayed on a blue background in the table at the top of the screen. Touch the "Temperature" input field and enter a temperature [°C]. ...
- Page 90 Quick reference guide To save the program, select a user directory and a storage location. Then press [Save]. The program is now saved. To copy programs, press [Programs] on the TOne home screen. To copy all programs located in a directory, select a directory and press [Copy all]. Select a directory to which the programs should be copied and press [Save].
-
Page 91: Troubleshooting
Troubleshooting Troubleshooting 14.1 Administrator password forgotten If the administrator has forgotten his password, use the "Factory settings" function (see chapter 11.1.7) to reset the system and download a backup file for recovery (see chapter 11.6). 14.2 Slow heating and cooling The Biometra TOne is equipped with strong fans that remove the heat from the heat sink. -
Page 92: Loosening The Lid Wheel In Case Of Blockage
Troubleshooting 14.6 Loosening the lid wheel in case of blockage When the heated lid is in the highest or lowest position, it may happen that the lid wheel is uncoupled. In this situation the clutch mechanism is active in both directions (there is a clicking noise in both directions). -
Page 93: Maintenance And Care
Maintenance and care Maintenance and care The Biometra TOne is mainly maintenance-free. The care and maintenance tasks which can be performed by the customer are limited to the cleaning and disinfection of the housing and sample block. All maintenance work and repairs beyond this scope must only be performed by Biometra GmbH customer service personnel or authorized and trained persons. -
Page 94: Disinfecting The Device
Maintenance and care 15.2 Disinfecting the device WARNING Biological hazard! Clean the Biometra TOne with particular care after analyzing potentially infectious material. Wear suitable protective equipment, e.g., protective gloves. ATTENTION The only suitable cleaning method for the housing is wipe disinfection. When using spray disinfectants there is a risk that the liquid enters the sensitive electronic system through the ventilation slits. -
Page 95: Service
Service Service If you have any problems with the device, please contact our customer service department or your local Biometra dealer. For the address of the Biometra customer service department refer to the inside front cover of this operating manual. Please observe the return information (see section "Device return information"... -
Page 96: Packing The Biometra Tone
Service 16.2 Packing the Biometra TOne Biometra uses an extra designed packaging system with inserts of foamed material. Important: The thermal cycler is only protected from transport damage if the original packaging is used and the packing instructions are followed. Biometra is not liable for transport damage due to incorrect packaging. -
Page 97: Disposal
Disposal Disposal The operator of the Biometra TOne must dispose of any waste materials that occur during measurements (sample materials) in accordance with statutory and local regulations. At the end of its service life, the Biometra TOne and all its electronic components must be disposed of as electronic waste in accordance with valid regulations. -
Page 98: Declaration Of Conformity
Declaration of conformity Declaration of conformity Version 03_19 Biometra TOne Manual... -
Page 99: Index
Index Index Auto restart 91 Heated lid temperature 39 Backup 80 Loop 42 Block status 32 Name 39 Care 93 New 37 Cleaning the housing 93 Pause 59 Configuration 62 Preheating 40 Decontamination 94 Ramp rate 44 Decontamination certificate 100 Save 49 Disinfection instructions 94 Spreadsheet programming 36...
Need help?
Do you have a question about the Analytik Jena Biometra TOne 96 and is the answer not in the manual?
Questions and answers