Table of Contents
Advertisement
Advertisement
Table of Contents

Related Manuals for Alvarado MST


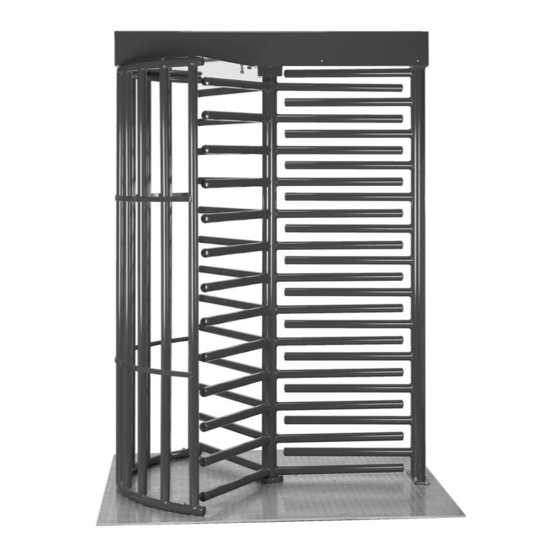
Summary of Contents for Alvarado MST
- Page 1 MST / MSTX MAXIMUM SECURITY TURNSTILE INSTRUCTIONS AND MAINTENANCE GUIDE Revision 1.3 - April 30, 2002 Serial Number: ______________________ Alvarado Manufacturing Company, Inc. 12660 Colony Street, Chino, CA 91710 (800) 423-4143 (909) 591-8431 www.alvaradomfg.com...
-
Page 2: Table Of Contents
Alvarado – MST / MSTX Turnstile TABLE OF CONTENTS IMPORTANT SAFETY WARNINGS PAGE 3 COMPONENTS INCLUDED WITH ORDER PAGE 4 INSTALLING THE MST TURNSTILE PAGE 5-11 ELECTRICAL ACTIVATION AND WIRING DIAGRAMS PAGE 12 TURNSTILE CONFIGURATIONS PAGE 13 WIRING DIAGRAMS: 4X – FAIL LOCK COUNTER-CLOCKWISE PAGE 14 4X –... -
Page 3: Important Safety Warnings
• Read this manual in its entirety before installing or operating the turnstile. If there are questions, you may contact Alvarado at (909) 561-8431 (US) during normal business hours. • Use only skilled individuals to install and service the turnstile. -
Page 4: Components Included With Order
Alvarado – MST / MSTX Turnstile COMPONENTS INCLUDED WITH ORDER If your turnstile is an MST-1 or MST-2 If your turnstile is an MST-3, an MSTX-4X, an MSTX-5X or MSTX-6X 1. Roto 2. Top Channel 1. Roto 3. Yoke Guard Plate 2. -
Page 5: Installing The Mst Turnstile
Alvarado – MST / MSTX Turnstile INSTALLING THE MST TURNSTILE TOOLS REQUIRED OVERVIEW OF INSTALLATION Heavy Duty Drill Tape Measure 1. Determine turnstile location, taking Or Roto Hammer 1/8 Allen Wrench into account the turnstile dimensions, Twist Drill Plumb Bob... - Page 6 Alvarado – MST / MSTX Turnstile INSTALLATION continued INSTALLATION OF ROTO BOTTOM BEARING HOUSING 3. Locate and chalk mark the four anchor holes for the roto bearing housing, using the bearing housing as a template. (See Fig. 3) Drill the four 5/8”...
- Page 7 Alvarado – MST / MSTX Turnstile INSTALLATION continued INSTALLATION OF YOKE 6. Drill a 5/8” hole 3” deep marked at the yoke center chalk line. Clean hole and install anchor. Install the yoke center bolt using a 3/8-16 x 4½” HHCS and...
- Page 8 Alvarado – MST / MSTX Turnstile INSTALLATION continued INSTALLATION OF OV 9. Slide the OV section into position. (See Fig. 8) (the position should have been marked when the first chalk lines were made.) Mark the location of the four anchoring holes for the OV.
- Page 9 Alvarado – MST / MSTX Turnstile INSTALLATION continued 11. Apply a light coating of grease to the shaft mounted on the channel and the interior spline of the roto to assist in the sliding together of these pieces. (See Figs. 10 & 11) 12.
- Page 10 Alvarado – MST / MSTX Turnstile INSTALLATION continued INSTALLATION OF TOP CHANNEL 14. With a person holding the roto section upright, lower the top channel on top of the yoke and the roto. (See Fig. 13 & note below) NOTE: The shaft is missing a valley in the splines. Align this area with the additional ridges in the roto portions.
- Page 11 Alvarado – MST / MSTX Turnstile INSTALLATION continued 15. Attach the top channel to the yoke using two (2) ½ -13 x 1½” bolts, washers and nuts. (See white arrows in Fig. 14) Do not tighten at this point. Note: If turnstile has a card...
-
Page 12: Electrical Activation And Wiring Diagrams
Alvarado – MST / MSTX Turnstile ELECTRICAL AND ACTIVATION WIRING INSTRUCTIONS TOOLS REQUIRED: Wire Stripper PARTS REQUIRED: Wire Nuts INSTRUCTIONS (NOTE: USE ONLY SKILLED ELECTRICIANS TO CONNECT POWER) 1. Make sure that primary power to the unit is off. 2. Locate the drawing showing the appropriate turnstile version. -
Page 13: Turnstile Configurations
Alvarado – MST / MSTX Turnstile TURNSTILE CONFIGURATIONS Non-Electric Electric MST-1 MST-4X Turnstile is free rotating in one direction. Electrically controlled in one direction. Locked in opposite direction. Locked in opposite direction. MST-2 MST-5X Free rotating in both directions. Electrically controlled in one direction. Free rotating in the opposite direction. -
Page 14: Fail Lock Counter-Clockwise
Alvarado – MST / MSTX Turnstile MST 4X CHANNEL CONFIGURATION FAIL LOCK COUNTER-CLOCKWISE FAIL LOCK WIRING DIAGRAM FAIL LOCK TIME DELAY RELAY WIRING DIAGRAM... -
Page 15: Fail Lock Clockwise
Alvarado – MST / MSTX Turnstile MST 4X CHANNEL CONFIGURATION FAIL LOCK CLOCKWISE FAIL LOCK WIRING DIAGRAM FAIL LOCK TIME DELAY RELAY WIRING DIAGRAM... -
Page 16: Fail Safe Counter-Clockwise
Alvarado – MST / MSTX Turnstile MST 4X CHANNEL CONFIGURATION FAIL SAFE COUNTER_CLOCKWISE FAIL SAFE WIRING DIAGRAM FAIL SAFE TIME DELAY RELAY WIRING DIAGRAM... -
Page 17: Fail Safe Clockwise
Alvarado – MST / MSTX Turnstile MST 4X CHANNEL CONFIGURATION FAIL SAFE CLOCKWISE FAIL SAFE WIRING DIAGRAM FAIL SAFE TIME DELAY RELAY WIRING DIAGRAM... -
Page 18: Fail Lock Counter-Clockwise
Alvarado – MST / MSTX Turnstile MST 5X CHANNEL CONFIGURATION FAIL LOCK COUNTER-CLOCKWISE FAIL LOCK WIRING DIAGRAM FAIL LOCK TIME DELAY RELAY WIRING DIAGRAM (SELF-CENTERING ONLY) -
Page 19: Fail Lock Clockwise
Alvarado – MST / MSTX Turnstile MST 5X CHANNEL CONFIGURATION FAIL LOCK CLOCKWISE FAIL LOCK WIRING DIAGRAM FAIL LOCK TIME DELAY RELAY WIRING DIAGRAM (SELF-CENTERING ONLY) -
Page 20: Fail Safe Counter-Clockwise
Alvarado – MST / MSTX Turnstile MST 5X CHANNEL CONFIGURATION FAIL SAFE COUNTER-CLOCKWISE FAIL SAFE WIRING DIAGRAM FAIL SAFE TIME DELAY RELAY WIRING DIAGRAM (SELF-CENTERING ONLY) -
Page 21: Fail Safe Clockwise
Alvarado – MST / MSTX Turnstile MST 5X CHANNEL CONFIGURATION FAIL SAFE CLOCKWISE FAIL SAFE WIRING DIAGRAM FAIL SAFE TIME DELAY RELAY WIRING DIAGRAM (SELF-CENTERING ONLY) -
Page 22: Fail Lock Both Directions
Alvarado – MST / MSTX Turnstile MST 6X CHANNEL CONFIGURATION FAIL LOCK BOTH DIRECTIONS FAIL LOCK WIRING DIAGRAM FAIL LOCK TIME DELAY RELAY WIRING DIAGRAM... -
Page 23: Fail Safe Both Directions
Alvarado – MST / MSTX Turnstile MST 6X CHANNEL CONFIGURATION FAIL SAFE BOTH DIRECTIONS FAIL SAFE WIRING DIAGRAM FAIL SAFE TIME DELAY RELAY WIRING DIAGRAM... -
Page 24: Fail Safe Counter-Clockwise / Fail Lock Clockwise
Alvarado – MST / MSTX Turnstile MST 6X CHANNEL CONFIGURATION FAIL SAFE COUNTER-CLOCWISE FAIL LOCK CLOCWISE WIRING DIAGRAM FAIL SAFE / FAIL LOCK TIME DELAY RELAY WIRING DIAGRAM FAIL SAFE / FAIL LOCK... -
Page 25: Fail Safe Clockwise / Fail Lock Counter-Clockwise
Alvarado – MST / MSTX Turnstile MST 6X CHANNEL CONFIGURATION FAIL SAFE CLOCKWISE FAIL LOCK COUNTER CLOCWISE WIRING DIAGRAM FAIL SAFE / FAIL LOCK STATE SHOWN WITH POWER OFF TIME DELAY RELAY WIRING DIAGRAM FAIL SAFE / FAIL LOCK... -
Page 26: Turnstile Drawing (Mounting View)
Alvarado – MST / MSTX Turnstile TURNSTILE (MOUNTING VIEW) -
Page 27: Turnstile Drawing (Anchoring View)
Alvarado – MST / MSTX Turnstile TURNSTILE (ANCHOR VIEW) -
Page 28: Turnstile Drawing (Elevation View)
Alvarado – MST / MSTX Turnstile TURNSTILE (ELEVATION VIEW) -
Page 29: Turnstile Drawing (Top View)
Alvarado – MST / MSTX Turnstile TURNSTILE (TOP VIEW) -
Page 30: Turnstile Maintenance
Alvarado – MST / MSTX Turnstile MAINTENANCE Perform basic maintenance 60 days after installation. Thereafter, the frequency of maintenance will depend on usage and the environment. We suggest exterior inspection and cleaning once per month. Interior inspection and lubrication should be performed at least twice a year and more frequently in heavy use applications or in dusty or humid environments. - Page 31 3-6 lbs. during the rotation. If adjustment is desired, unhook the two W Cam Follower Springs (#15) that are attached to the MST Brake Spring Screw (#19). Rotate the screw to tighten or loosen the spring (thereby increasing or decreasing brake tension).
-
Page 32: Turnstile Operation/User Instructions
Alvarado – MST / MSTX Turnstile TURNSTILE OPERATION/USER INSTRUCTIONS SAFETY CONSIDERATIONS • Always walk slowly through the turnstile • Always use caution when using the turnstile • Instruct users in proper operation The following steps provide a guide to proper turnstile use 1. - Page 33 After the user walks through the turnstile, there will be a trailing arm section (A – Fig. 2). Taking long steps could cause the trailing arms to strike the heels of the user. Heel and arm guards may be purchased from Alvarado. 5. Step out of the turnstile upon passage.
-
Page 34: Troubleshooting
Alvarado – MST / MSTX Turnstile TROUBLESHOOTING – MST Symptom Possible Cause Solution Activation signal Provide proper activation Turnstile does missing/incorrect type. signal. not unlock No power (fail lock unit) Provide proper power Weak power (fail lock unit) Test at solenoid to ensure at... -
Page 35: Channel Assembly (Exploded Parts View)
Alvarado – MST / MSTX Turnstile CHANNEL ASSEMBLY / EXPLODED PARTS VIEW... -
Page 36: Channel Assembly (Exploded Parts View Numerical Listing)
Alvarado – MST / MSTX Turnstile CHANNEL ASSEMBLY / EXPLODED PARTS NUMERICAL LISTING... -
Page 37: Self Centering Channel Adjustment
Alvarado – MST / MSTX Turnstile SELF CENTERING ADJUSTMENTS...
Need help?
Do you have a question about the MST and is the answer not in the manual?
Questions and answers