Table of Contents
Advertisement
Quick Links
Advertisement
Table of Contents

Related Manuals for NEFF B4AVH1AH0B


Summary of Contents for NEFF B4AVH1AH0B
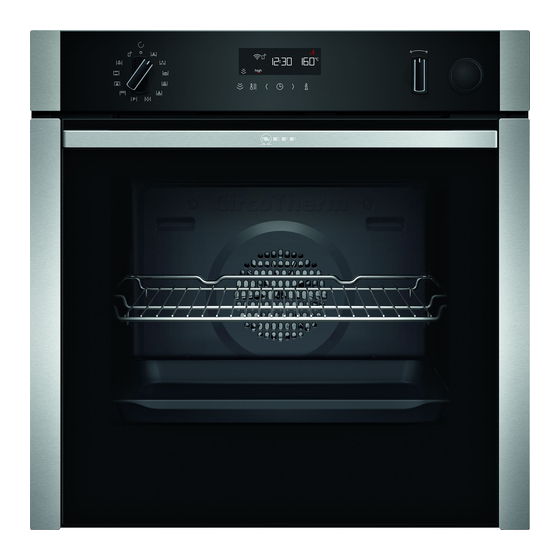
- Page 1 Oven [en] User manual and installation in- structions B4AVH1AH0B...
-
Page 2: Table Of Contents
en Safety ¡ Do not connect the appliance if it has been Table of contents damaged in transit. 1.2 Intended use INFORMATION FOR USE This appliance is designed only to be built into kitchen units. Read the special installation Safety .............. 2 instructions. -
Page 3: Safety
Safety en Loose food remnants, fat and meat juices WARNING ‒ Risk of injury! may catch fire. Scratched glass in the appliance door may ▶ Before using the appliance, remove the develop into a crack. worst of the food residues and remnants ▶ Do not use any harsh or abrasive cleaners from the cooking compartment, heating ele- or sharp metal scrapers to clean the glass ments and accessories. - Page 4 en Safety If the appliance or the power cord is dam- WARNING ‒ Risk of electric shock! aged, this is dangerous. When changing the bulb, the bulb socket con- ▶ Never operate a damaged appliance. tacts are live. ▶ Never pull on the power cord to unplug the ▶...
-
Page 5: Environmental Protection And Saving En- Ergy
Preventing material damage en 2 Preventing material damage Fruit juice dripping from the baking tray leaves stains 2.1 General that cannot be removed. ATTENTION! When baking very juicy fruit flans, do not pack too ▶ Alcoholic vapours may catch fire in the hot cooking much on the baking tray. -
Page 6: Familiarising Yourself With Your Appliance
en Familiarising yourself with your appliance 3.2 Saving energy If the cooking time is relatively long, you can switch the appliance off 10 minutes before the cooking time If you follow these instructions, your appliance will use ends. less power. ¡ There will be enough residual heat to finish cooking Only preheat the appliance if the recipe or the recom- the dish. - Page 7 Familiarising yourself with your appliance en Temperature selector Water tank Use the temperature selector to set the temper- Fill and empty the water tank. ature for the type of heating or select the set- → "Filling the water tank", Page 12 ting for other functions. You can turn the tem- perature selector clockwise and anti-clockwise.
- Page 8 en Familiarising yourself with your appliance Symbol Type of heating and What it's used for/how it works temperature range CircoTherm hot air Bake and roast on one or more levels. 30 - 200 °C The fan distributes the heat from the ring-shaped heating element in the back wall evenly around the cooking compartment.
- Page 9 Accessories en Temperature display Your appliance has four shelf positions. The shelf posi- tions are numbered from bottom to top. The temperature display shows you the temperature in You can remove the rails, e. g. for cleaning. the cooking compartment. → "Shelf supports", Page 24 Notes ¡...
-
Page 10: Accessories
You will find a comprehensive range of products for your appliance in our brochures and online: www.neff-international.com Accessories vary from one appliance to another. When Baking tray Slide the tray, e.g. the universal pan, purchasing accessories, always quote the exact E.g. - Page 11 Before using for the first time en 6 Before using for the first time Configure the settings for initial start-up. Clean the ap- Fill the water tank. pliance and accessories. → "Filling the water tank", Page 12 Keep the room ventilated while the appliance is heating.
- Page 12 en Steam Use the temperature selector to set the required ▶ temperature. 8 Steam You can switch on steam assistance with some heating 8.2 Reheating types. With the "Reheating" type of heating, you can gently WARNING ‒ Risk of scalding! reheat food that has already been cooked or crisp up Hot steam may escape when you open the appliance day-old baked goods.
- Page 13 Steam en Press on the water tank and pull the water tank 8.4 After every steam operation . The remaining water is pumped back into the water tank after every operation with steam. Then empty and dry the water tank and the cooking compartment. Emptying the water tank WARNING ‒ Risk of burns! The water tank may heat up while the appliance is in...
- Page 14 en Time-setting options 9 Time-setting options Your appliance has different time-setting options, with Use the button to reset the timer duration to zero. ▶ which you can control its operation. a After a few seconds, the appliance applies the change and ...
-
Page 15: Steam
Programme en Press the button repeatedly until is highlighted is highlighted on the display. Requirement: in the display. Reset the end time to the current time plus the set ▶ Press the or button. cooking time using the ... - Page 16 en Programme Food Cookware Weight range Shelf Note posi- Weight setting tions Baking tray with 0.5–2.0 kg The cooking compart- Wheat bread, multi-grain greaseproof paper Weight of dough ment must be cold to be- wheat bread on a baking gin with.
-
Page 17: Childproof Lock
Childproof lock en 11 Childproof lock You can secure your appliance to prevent children Pausing the automatic childproof lock from accidentally switching it on or changing the set- Requirement: The automatic childproof lock is activ- tings. ated in the basic settings. Note: You can go to the basic settings → Page 17 to → "Basic settings", Page 17 specify whether you want the option to set the child- Press and hold the... - Page 18 en Basic settings Display Basic setting Selection Waiting time until a setting is adopted = 3 seconds = 6 seconds = 10 seconds Button tone when pressing a button ...
-
Page 19: Home Connect
Home Connect en Tip: If your tap water is very hard, we recommend Water hardness Water German French that you use softened water. If you use only basic setting hardness hardness hardness softened water, you can set your appliance to the in mmol/l in °dH °fH "softened"... - Page 20 en Home Connect 14.2 Home Connect Settings You can adjust the settings and network settings for Home Connect in the basic settings for your appliance. Setting Selection or display Explanation Connection to the network and are displays that you cannot set. ...
-
Page 21: Cleaning And Servicing
Cleaning and servicing en ¡ Security certificate of the Wi-Fi communication mod- 14.5 Remote diagnostics ule (to ensure a secure data connection). Customer Service can use Remote Diagnostics to ac- ¡ The current software and hardware version of your cess your appliance if you contact them, have your ap- appliance. -
Page 22: Shelf Supports
en Cleaning and servicing Appliance door Area Suitable cleaning agents Information Door panels ¡ Hot soapy water Do not use a glass scraper or a stainless steel wool. Tip: Remove the door panels in order to clean them thoroughly. → "Appliance door", Page 25 Door cover ¡... - Page 23 Cleaning function en faces no longer clean themselves adequately during 15.3 Checking the cooking compartment operation, heat up the cooking compartment specific- seal after cleaning ally to the right temperature. If the cooking compartment seal is on the left or ▶ ATTENTION! right of the spacer ...
- Page 24 en Shelf supports Pour the descaling solution into the water tank and Remove the water tank and clean thoroughly with insert the water tank. water. Use the function selector to set descaling . Dry the water tank and re-insert it. ...
- Page 25 Appliance door en 18 Appliance door To ensure that your appliance retains its appearance Open the appliance door approx. 45° wide. and remains fully functioning for a long time, you can detach the appliance door and clean it. WARNING ‒ Risk of injury! If the hinges are not secured due to an incomplete lock, they can snap shut with great force.
- Page 26 en Appliance door ATTENTION! 18.2 Attaching the appliance door Opening and closing the appliance door when it is Tip: Ensure that the appliance door is not wedged in the lock position damages the door hinges. at an angle and that it is properly fitted in place. Never force the appliance door open or closed.
- Page 27 Appliance door en Push down on the intermediate pane in the area of WARNING ‒ Risk of injury! , and carefully lift the retainer until you are able If the door locks are unsecured, the appliance door to pull it out. may become detached.
-
Page 28: Troubleshooting
en Troubleshooting Tip: When fitting the door panes, make sure that Centre the inner pane on the appliance door. they are in the original order. Insert the inner pane into the door cover at an angle towards the back . Insert the intermediate pane in the direction of the Insert the retaining bracket for the inner pane ... -
Page 29: Customer Service
Troubleshooting en 19.1 Malfunctions Fault Cause and troubleshooting The appliance is not The circuit breaker in the fuse box has tripped. working. Check the circuit breaker in the fuse box. ▶ There has been a power cut. Check whether the lighting in your kitchen or other appliances are working. ▶... - Page 30 en Troubleshooting Fault Cause and troubleshooting Electronics fault A message with appears in the dis- Press the button. play, e.g. - . If required, reset the time. ‒...
- Page 31 Disposal en Pull out the halogen bulb without turning it . Insert the new halogen lamp and press it firmly into the socket. Make sure the pins are positioned correctly. Depending on the appliance model, the glass cover may have a sealing ring. Put the sealing ring in posi- tion.
- Page 32 2014/53/EU. A detailed Declaration of Conformity can be found on- A detailed RED Declaration of Conformity can be found line at www.neff-home.com/uk among the additional online at www.neff-international.com among the addi- documents on the product page for your appliance.
-
Page 33: How It Works
How it works en ¡ For best results, we recommend using dark-col- ¡ Depending on the size and type of the food to be oured metal bakeware. roasted, add up to 1/2 litre water to the universal ¡ Steam-assisted baking is only possible on one level. pan. - Page 34 en How it works 23.4 Food selection Food Accessories/cook- Shelf pos- Heating Temperature in Steam intens- Cooking ware itions function °C/grill setting time in mins Victoria sponge cake 2 pcs 150-160 20-35 Ø 20 cm cake tin Rich fruit cake Deep 23 cm dia- ...
- Page 35 How it works en Food Accessories/cook- Shelf pos- Heating Temperature in Steam intens- Cooking ware itions function °C/grill setting time in mins Complete meal with Wire rack 180, then 200 Chicken: chicken (Yorkshire pud- (25+25) + Wire rack ding) 20 for Yorkshire Universal pan...
- Page 36 en Installation instructions Position baking tins/dishes either next to one another Shelf positions Shelf positions for baking on two levels: or offset on different shelves so that they are not dir- ectly one above the other in the cooking compartment. Note: Items that are placed in the oven on baking trays or in baking tins/dishes at the same time will not ne- cessarily be ready at the same time.
-
Page 37: Installation Instructions
Installation instructions en 24.1 General installation instructions Follow these instructions before you start with the installation of the appliance. ¡ The safe operation of this appliance can only be guaranteed if it has been installed ¡ Wear protective gloves so that you do not to a professional standard in accordance cut yourself. - Page 38 en Installation instructions ¡ To ventilate the appliance, the intermediate floor 24.3 Installation below a worktop must have a ventilation cut-out. Observe the installation dimensions and the installation ¡ In combination with induction hobs, the gap instructions when installing below a worktop. between the worktop and appliance must not be sealed using additional strips.
- Page 39 Installation instructions en ¡ To ensure that the appliance door can be opened, 24.6 Installing two appliances on top of you must take the minimum dimensions into consid- each other eration when installing in a corner. The dimension Your appliance can also be installed above or below is dependent on the thickness of the unit front and another appliance.
- Page 40 en Installation instructions If required, you can adjust the height of the appli- 24.9 Installing the appliance ance door using the adjustment screws on the left Note: Do not use a cordless screwdriver to secure the and right. panels. This may damage the panels. If required, you can adjust the gap between the ap- pliance door and the panels using the adjustment screws on the left and right.
- Page 41 Installation instructions en Open the appliance door slightly, then refit the pan- els and screw them in place, first at the top and then at the bottom. Note: The gap between the worktop and the appliance must not be closed by additional battens. Thermal insulation strips must not be fitted to the side panels of the surround unit.
- Page 44 Valid within Great Britain: Imported to Great Britain by BSH Home Appliances Ltd. Grand Union House Old Wolverton Road Wolverton, Milton Keynes MK12 5PT United Kingdom *9001629170* 9001629170 BSH Hausgeräte GmbH Carl-Wery-Straße 34 020705 81739 München, GERMANY...
Need help?
Do you have a question about the B4AVH1AH0B and is the answer not in the manual?
Questions and answers