
Related Manuals for DeLonghi DINAMICA PLUS ECAM37 85 Series


Summary of Contents for DeLonghi DINAMICA PLUS ECAM37 85 Series
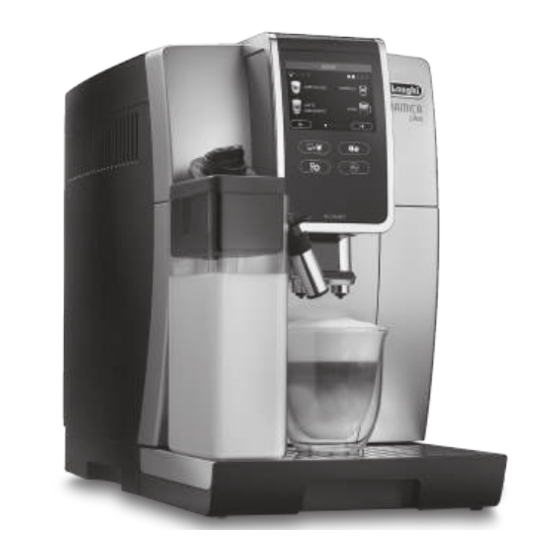
- Page 1 ECAM37X.85 BEAN TO CUP ESPRESSO AND CAPPUCCINO MACHINE Instructions for Use Instructions videos available at: http://dinamicaplus.delonghi.com...
- Page 3 READY...
-
Page 4: Table Of Contents
CONTENTS MAKING CAPPUCCINOS AND MILK-BASED 1. INTRODUCTION ...........5 COFFEES ........... 11 Letters in brackets ............ 5 Filling and attaching the milk container ....11 Troubleshooting and repairs........5 Adjusting the amount of froth ....... 11 Download the App! ..........5 Making cappuccinos and milk-based coffees 2. -
Page 5: Introduction
: beverage aroma selection appliance. : My beverages selection menu. Unless previously Please note: programmed from the settings menu as described in chap- Check compatible devices on "compatibledevices.delonghi. ter "11. com". C3. Customising the beverages ", the beverage is pro-... -
Page 6: Description Of The Accessories (Page 3 - D)
Follow the instructions indicated on the appliance display: 2.4 Description of the accessories (page 3 - D) D1. "Total Hardness Test" indicator paper (attached to page 2 of the English instructions) D2. Pre-ground coffee measure D3. Descaler D4. Water softener filter (certain models only) D5. -
Page 7: Turning The Appliance On
Please note! Please note! • The first time you use the appliance, you need to make 4 If you will not be using the appliance for some time, unplug - 5 cappuccinos before it starts to give satisfactory results. from the mains socket: •... -
Page 8: Auto-Off (Standby)
1. Once in the settings menu, press "DRINK SETTINGS". The 6.10 Water hardness values for the first beverage appear on the display; For instructions on setting water hardness, see section "14. 2. The values are displayed on vertical bars. The default value Setting water hardness". -
Page 9: Making Coffee
• Preparation of each coffee can be customised (see section "11. Customising the beverages"). MAKING COFFEE 7.2 Selecting the coffee aroma 7.1 Making coffee using coffee beans Press the button (C1): Important! Custom (if programmed) / Do not use green, caramelised or candied coffee beans as they Standard could stick to the coffee mill and make it unusable. -
Page 10: Adjusting The Coffee Mill
Please note! 3. Make sure the funnel (A4) is not blocked, then add one The grinding adjustment dial must only be turned when the level measure of pre-ground coffee (fig. 12). coffee mill is in operation during the initial phase of coffee preparation. -
Page 11: Making Cappuccinos And Milk-Based
SAFETY WARNING: After making the pot of coffee, leave the ap- pliance to cool for 5 minutes before making another beverage. Risk of overheating! MAKING CAPPUCCINOS AND MILK- BASED COFFEES Please note! To avoid milk with poor froth or large bubbles, always clean the milk container lid (E2) and hot water connection nozzle (A8) 6. -
Page 12: Making Cappuccinos And Milk-Based Coffees Automatically
9.3 Making cappuccinos and milk-based coffees automatically 1. Fill the milk container (E) and attach it as described above. 2. Select the required beverage: • CAPPUCCINO • LATTE MACCHIATO • HOT MILK • CAPPUCCINO+ • CAPPUCCINO MIX • CAFFELATTE • FLAT WHITE •... -
Page 13: Customising The Beverages
• You can also customise the beverages by connecting with Please note! the DeLonghi Coffee Link App. After cleaning, it is normal for the grounds container (A11) to • Press to exit programming. The values will contain water. -
Page 14: Cleaning The Drip Tray And Condensate Tray
To remove the drip tray, proceed as follows: Important! Danger of scalding If you make a number of cappuccinos one after the other, the 1. Remove the drip tray and coffee grounds container (A11) metal cup tray (A12) becomes hot. Wait for it to cool down be- (fig. -
Page 15: Cleaning The Pre-Ground Coffee Funnel
2. Check the holes in the coffee spouts are not blocked. If nec- Clean the infuser without using washing up liquid as it could essary, remove coffee deposits with a toothpick (fig. 25B). be damaged. 6. Use the brush (D5) to remove any coffee residues left in the infuser housing, visible through the infuser door;... -
Page 16: Cleaning The Hot Water Nozzle
• It is important to use De’Longhi descaler only. Using un- suitable descaler and/or performing descaling incorrectly may result in faults not covered by the manufacturer's guarantee. Descale the appliance when "DESCALING NEEDED" "PRESS OK TO START (~45min)" appears on the display: To descale immedi- ately, press and follow the operations from point 3. -
Page 17: Setting Water Hardness
spouts. A series of rinses is performed automatically to re- fill with fresh water up to the MAX level, then put back in move all the scale residues inside the coffee machine; the appliance. After about 25 minutes, descaling stops; The descaling cycle is now complete. -
Page 18: Water Softener Filter
3. "WATER HARDNESS" "CURRENT VALUE UNDERLINED": Press the required level (Level 1 = soft water; Level 4 = very hard water); 4. Press " " to go back to the homepage. The machine is now reprogrammed with the new water hard- ness setting. -
Page 19: Technical Data
2. Access the menu as described in section "6.1 Access the 16.1 Tips for Energy Saving settings menu"; • Do not attach the accessories to the steam connection noz- 3. PRESS "WATER FILTER"; zle (A8) until needed for the beverage to be made. After 4. - Page 20 DISPLAYED MESSAGE POSSIBLE CAUSE REMEDY EMPTY GROUNDS CONTAINER The grounds container (A11) is full. Empty the grounds container and drip tray (A15), clean and put back in the appliance. Important: when removing the drip tray, the grounds container must always be emptied, even if it has not filled up appreciably.
- Page 21 DISPLAYED MESSAGE POSSIBLE CAUSE REMEDY FILL BEANS CONTAINER The coffee beans have run out. Fill the beans container (A4) (fig. 10). The pre-ground coffee funnel (A4) is clogged. Empty the funnel with the help of a brush (D5) as described in section "12.8 Cleaning the pre- ground coffee funnel".
- Page 22 DISPLAYED MESSAGE POSSIBLE CAUSE REMEDY INSERT MILK CONTAINER The milk container (E) is not inserted correctly. Insert the milk container, pushing it as far as it will go. INSERT INFUSER ASSEMBLY The infuser (A20) has not been replaced after Insert the infuser as described in section "12.9 cleaning.
- Page 23 DISPLAYED MESSAGE POSSIBLE CAUSE REMEDY TURN MILK FROTH Milk has been delivered recently and the tubes Turn the froth adjustment dial (E1) to CLEAN ADJUSTMENT DIAL TO CLEAN inside the milk container (E) must be cleaned. (fig. 19). POSITION CLEAN TURN FROTH ADJUSTMENT The milk container has been inserted with Turn the dial to the required froth position.
-
Page 24: Troubleshooting
DISPLAYED MESSAGE POSSIBLE CAUSE REMEDY Reminds you the filter (D7) must be replaced. Replace the filter or remove it as described in section "15. Water softener filter". The machine must be descaled. The descaling procedure described in section "13. Descaling" needs to be performed. The appliance may request descaling cycles at very short intervals. - Page 25 PROBLEM POSSIBLE CAUSE REMEDY The coffee is delivered too slowly or a The coffee is ground too finely. Turn the grinding adjustment dial (A5) one drop at a time. click clockwise towards "7" while the coffee mill is in operation (fig. 13). Continue one click at a time until the coffee is made satisfactori- ly.
- Page 28 De’Longhi Appliances via Seitz, 47 31100 Treviso, Italy www.delonghi.com...
Need help?
Do you have a question about the DINAMICA PLUS ECAM37 85 Series and is the answer not in the manual?
Questions and answers